Welcome to today’s post.
In today’s post I will discuss how to publish a Docker image from a .NET Core Application to a DockerHub container registry.
To prepare your .NET Core application for Docker support review my previous post where I show you how to enable Docker Support within Visual Studio. It is quite straightforward.
The Docker environment is an isolated environment where we can run our .NET Core application with the same resources as we have in a local development environment.
Benefits of Running Applications in a Docker Environment
There are some benefits in using a Docker environment. I mentioned that we can run applications and services within the isolated environment as part of a development or test stage of our project and gain the same benefits as we would have had we run the same application and dependencies in a local development environment. The isolated nature of a Docker environment means that we do not risk re-configuring, re-installing, and running the application within a physical environment and accidentally misconfiguring or incorrectly installing a part of the environment that causes the resources within the environment to be irreparably damaged after an attempted rollback or uninstallation procedure.
Another benefit with running the application in Docker is that we expend less on hardware resources which use electricity and manual maintenance. A Docker environment can be built based on configuration parameters, used for development, or testing purposes, then torn down when no longer needed.
In the next section, I will show how to publish a .NET Core application to a Docker Container Hub.
Publishing a .NET Core Application to a Docker Container Hub
I will now show how to publish a .NET Core Application from Visual Studio into a Docker Container Hub.
In Visual Studio, after your application has loaded and is successfully built, select the Publish option from the web project context menu.

Select New Profile …
The following Publish Target screen opens:

Select Container Registry and Docker Hub.
Click on Publish. Select Create profile in the drop-down options.

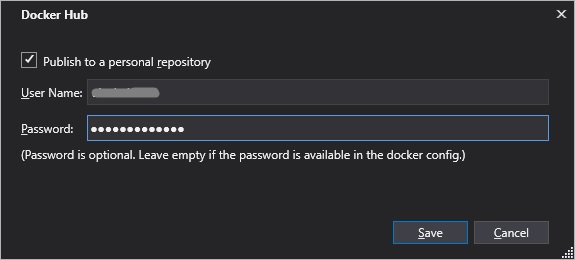
In the authentication screen that opens, enter your docker user account name and password.
Click on Save.
The Publish screen will display:

The URL to your repository in docker will be of the format:
registry.hub.docker.com/[account-name]/[repository-name]Click on Publish.
The output window will show the image build and deployment progress.
The following step in the build:
Step 4/16 : FROM microsoft/aspnetcore-build:2.0 AS build
2.0: Pulling from microsoft/aspnetcore-build
Will could take a while (time depending on your internet download speed).
Be patient!
Once all the publication steps have completed, you will see output like that shown below:

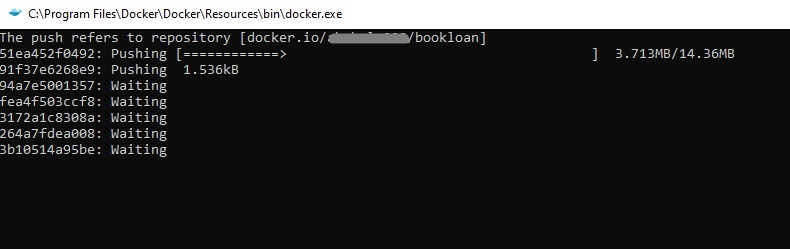
Once the build phase completes, the docker image will also be re-built within the docker images on your machine:

the docker image deployment to docker hub commences in a separate command line process. This is the push process:
In the next section, I will show how to verify the application has been successfully deployed into the Docker Hub Container.
Post Docker Publication Checks
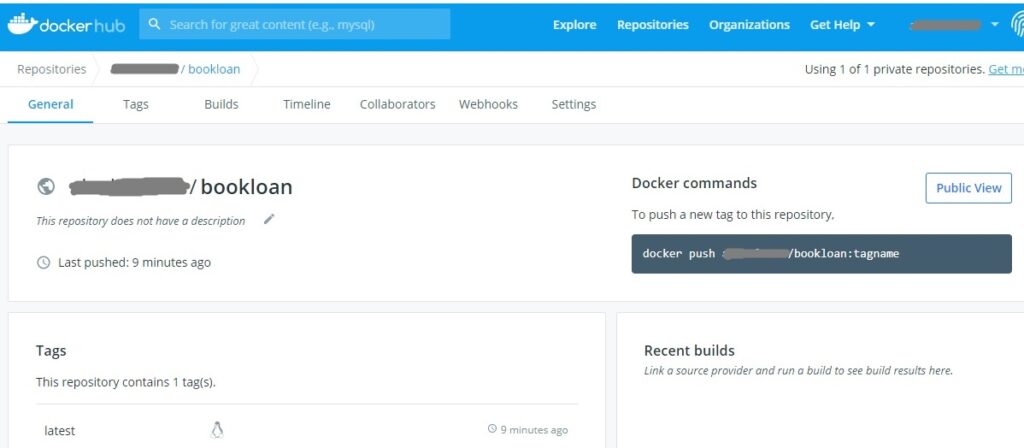
Once building and publishing is completed, open the docker hub
https://hub.docker.com(and login if required). Go to repositories. The new docker image will show in the list of repositories as shown:

Click on the repository view icon as shown:

The repository details will show:
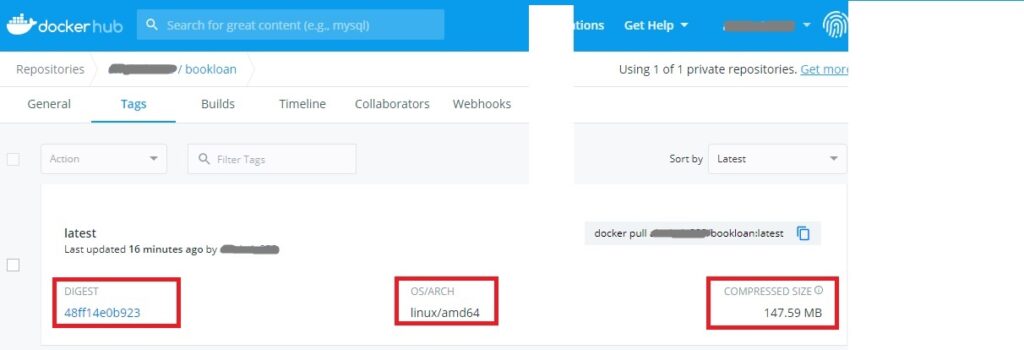
The repository does not have a tag. You can add a new tag by pushing a new one with the following command:
docker push [dockeraccount]/[repositoryname]:tagname
Select the Tags tabbed menu. You will see the Digest, OS and Size details:
Select the Builds tabbed menu. You will see the screen:

Here you will see two options, link your repository image to a GitHub or Bitbucket build.
This will allow you to automate the build of your Docker source container image from a GitHub repository.
In a separate post I will show how to trigger builds of your Docker image from your Git repository.
That’s all for now.
I hope this post has been useful and informative.
Andrew Halil is a blogger, author and software developer with expertise of many areas in the information technology industry including full-stack web and native cloud based development, test driven development and Devops.