
Welcome to today’s post.
In today’s post I will show you how to use the file compression utilities that are in the .NET library. Many of the useful compression utilities are available by including the System.IO.Compression namespace.
I will show how to use the compression utilities by implementing a basic library that performs basic multiple file uploads and downloads.
In the next two future posts, I will show how to use the ZipFile class to automate some useful file archiving and file extraction tasks.
I will first discuss the most common uses of file compression and archiving utilities in applications.
Typical Uses of Archiving and Compression in Applications
Server storage maintenance
Archiving of files and folders is most useful when we need to reduce the disk space that is used by files that have been uploaded to a web server or file server. Uncompressed files can then be removed from the server and the compressed ZIP files moved to an archive folder or separate shared drive.
This is especially common in applications that are extensively used daily by many users. The risk to the backend server is that disk storage will deplete and cause the server to function sub-optimally.
Package uploads for end user uploads
Applications that allow uploads in a controlled environment where end users login and upload content, can have their content packaged and compressed into ZIP files that are available to the end user by upload from links within the application.
Packaged uploads to subscribers
Applications that generate content that is available to subscribers can provide the content as compressed ZIP files. Examples of this might be share price data, media, machine learning data, reporting data, server diagnostics log data. The ways in which ZIP archive content is delivered by a link within a portal or as an attachment within an email notification.
In the first section, I will show how to upload files using the IO utilities.
Uploading Files into the Upload Folder
Before we can make use of any file archiving and compression utilities, we will need to have ready a folder that contain some files that can be archived.
We will use an existing folder that has no files or sub-folders and upload two files into the folder. The two files will then be the source files we will use for the compression and archiving operations that we will apply to generate the archive folder and compression files.
I will implement a basic utility service that performs multiple file uploads.
The class declaration for the file utility service has injected services for logging and options configuration, which is shown below:
using System.IO;
using System.Linq;
using System.Threading;
using Microsoft.AspNetCore.Http;
using File.Uploader.API.Models;
using File.Uploader.API.Reference;
using System.Collections.Concurrent;
using System.IO.Compression;
using Microsoft.Extensions.Logging;
using Microsoft.Extensions.Options;

public class FileUtilityService : IFileUtilityService
{
    private readonly ILogger _logger;
    private readonly IOptions<AppConfiguration> _appConfiguration;

    int _numberFilesUploaded;
    int _numberFilesDownloaded;
    string _errorMessage;

    public FileUtilityService(ILogger<FileUtilityService> logger,
        IOptions<AppConfiguration> options)
    {
        _logger = logger;
        _appConfiguration = options;
    }
    ....
Below is the implementation of a multiple file upload method that is part of the file utility service.
public async Task<FileUploadResponse> UploadFiles(List<IFormFile> files)
{
    try
    {
        if (files.Count > 0)
        {
            foreach (var f in files)
            {
                if (f.Length > 0)
                {
                    var fileName = Path.GetFileName(f.FileName);
                    var fileFullTempName = Path.GetTempFileName();
                    var fileTempName = Path.GetFileName(fileFullTempName);
                    var currentDirectory = UploadFolder;
                    var subFolder = UploadSubFolder;
                    var uploadFolder = System.IO.Directory.CreateDirectory(currentDirectory + "\\" + subFolder);

                    using (var stream = System.IO.File.Create(uploadFolder + "\\" + fileTempName))
                    {
                        await f.CopyToAsync(stream);
                        _logger.LogInformation($"Uploaded file: {fileName}. Stored as {fileTempName}.");
                    }
                }
            }
            logger.LogInformation(string.Format(StringConstants.NUMBER_FILES_UPLOADED, files.Count));
            return new FileUploadResponse()
            {
                ErrorMessage = ""
            };
        }
    }
    catch (Exception ex)
    {
        _logger.LogInformation(StringConstants.ERROR_UPLOADING_MULTIPLE_FILES);
        return new FileUploadResponse() { ErrorMessage = ex.Message.ToString() };
    }
}
The above file uploader functionality is a variation of a file uploader web API that stores multiple uploaded files within a SQL server database which I showed in one of my previous posts.
In the above file uploader functionality, I create a new subfolder in the upload folder that corresponds to the current year date and day that is computed within the following property:
/// <summary>
/// UploadSubFolder
/// Determine the upload sub folder based on current year date time.
/// </summary>
/// <returns></returns>
private string UploadSubFolder
{
    get
    {
        return $"{DateTime.Now.Year.ToString("D4")} {DateTime.Now.Month.ToString("D2")}
{DateTime.Now.Day.ToString("D2")}";
    }
}
The base upload folder is retrieved from the application settings:
/// <summary>
/// UploadFolder
/// Retrieve the root upload folder
/// </summary>
public string UploadFolder
{
    get
    {
        return _appConfiguration.Value.UploadFolder;
    }
}
As we saw in the class declaration for the file utility, I used the Options pattern (see a previous post, when I give an overview of the Options pattern) to retrieve the application settings into properties within an instance of a DTO/model configuration class AppConfiguration. We bound the settings into the configuration class in the startup by using the following:
builder.Services.Configure<AppConfiguration>(
    builder.Configuration.GetSection("AppSettings")
);
The API controller is shown below with the file utility service injected through the constructor:
using Microsoft.AspNetCore.Mvc;
using File.Uploader.API.Services;
using File.Uploader.API.Models;

namespace File.Uploader.API.Controllers
{
    public class FileUtilityController : Controller
    {
        readonly IFileUtilityService _fileUtilityService;

        public FileUtilityController(IFileUtilityService fileUtilityService)
        {
            _fileUtilityService = fileUtilityService;
        }

        [HttpPost("api/[controller]/UploadFiles")]
        public async Task<IActionResult> UploadFiles([FromForm] List<IFormFile> files)
        {
            var uploadResponse = await _fileUtilityService.UploadFiles(files);
            if (uploadResponse.ErrorMessage != "")
                return BadRequest(new { error = uploadResponse.ErrorMessage });
            return Ok(uploadResponse);
        }
        …
    }
}
The Swagger UI definition for the above upload method with the ability to add multiple files once at a time with the List<IFormFile> parameter is shown below:
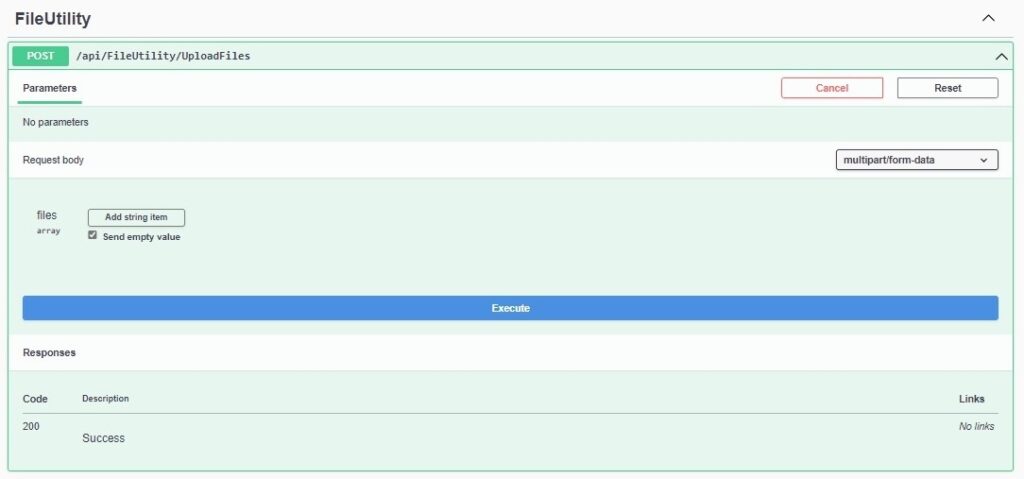
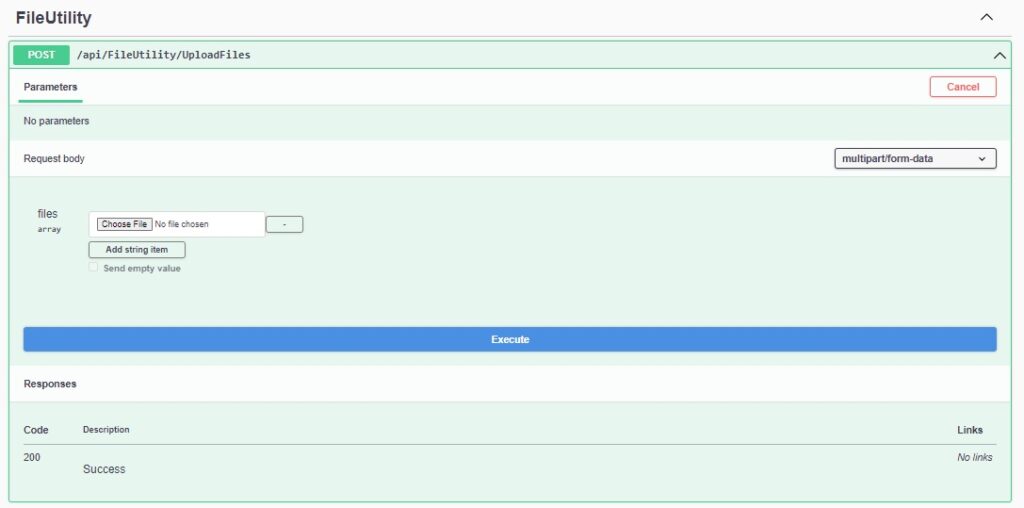
Adding each file is done by clicking on the Add string item action, which exposes a Choose file dialog action as shown:
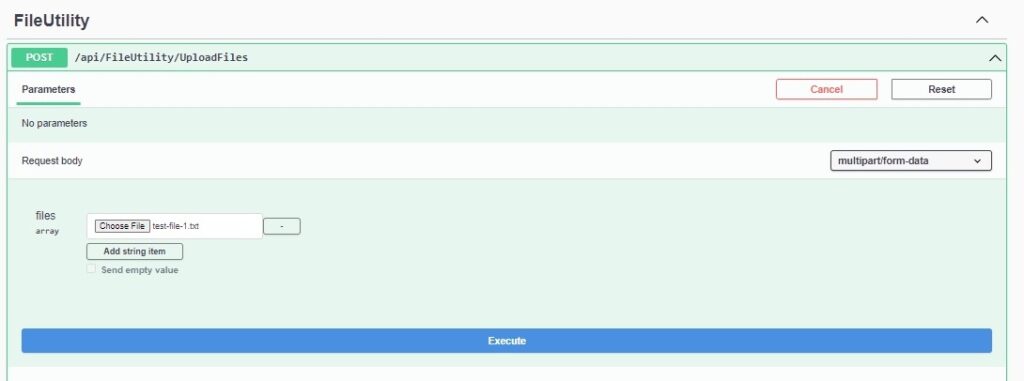
When a file has been selected from a local folder, its name will be displayed after the file selection action as shown:
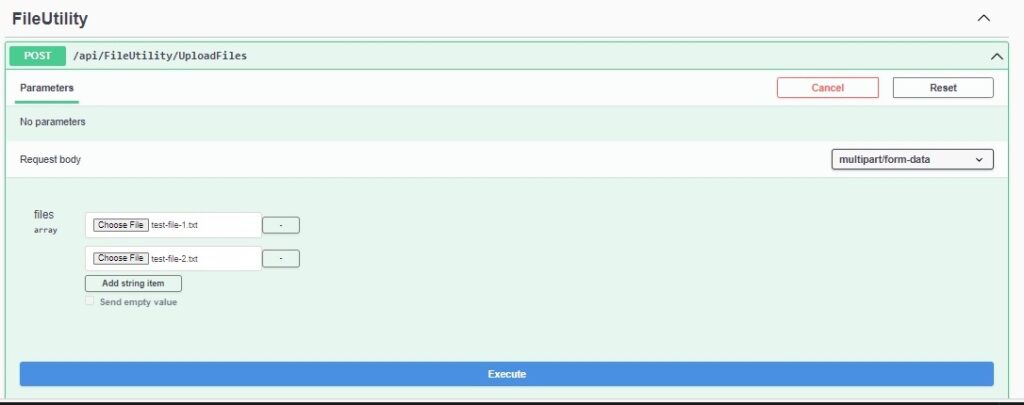
After repeating the above file selection procedure, we have a second file displayed as shown:
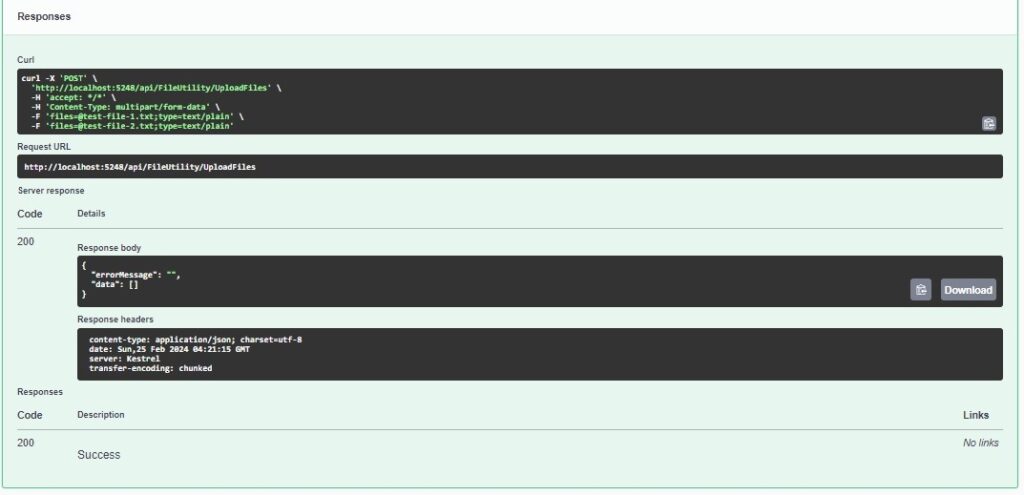
After the Execute action is clicked, the following response will be displayed:
During the multiple file upload, the following changes to the upload folder can be observed:
- A sub-folder with the format YYYYMMDD is created in the upload folder.
- uploaded files with temporary file names are stored in the created upload sub-folders.
Below are the temporary files created in place of the uploaded files within each upload sub-folder:

Now that we have the files uploaded to our file server, the next task is to download some files from the same file server, which is what I will show in the next section.
Downloading Files from the Upload Folder
I will implement a basic downloader that downloads all files within the upload subfolder for the current day. In a high usage application, we could end up downloading thousands of such files, so this is a contrived example.
In a more complicated scenario, which depends on the application, we might be downloading the files that are specific for a particular user account that are stored in a folder specific to that user, and limited to subfolders partitioned by dates, months, or years.
Below is the method that performs a basic download of files from a subfolder within the upload folder:
public async Task<MemoryStream> DownloadFiles()
{
    var currentDirectory = UploadFolder;
    var subFolder = UploadSubFolder;
    MemoryStream memoryStream = new MemoryStream();
    ZipFile.CreateFromDirectory(currentDirectory + "\\" + subFolder, memoryStream);
    return memoryStream;
}
In the above implementation, to limit the number of files returned in the download, I have added the files in the upload subfolder into a compressed folder archive which is an in-memory stream with the following utility method:
ZipFile.CreateFromDirectory()
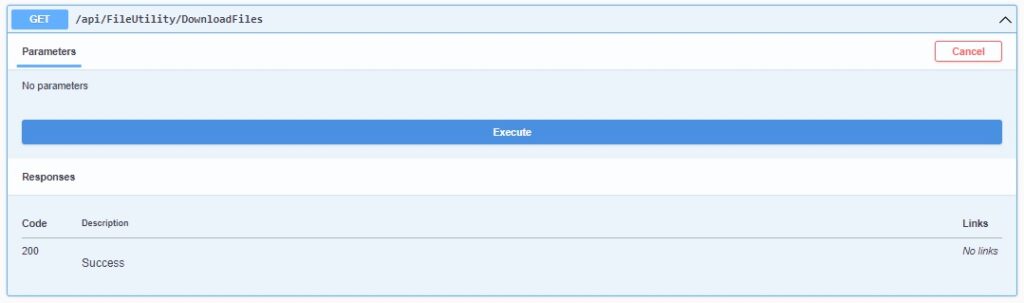
The download files API method is executed from the Swagger interface:
I then return the in-memory stream to the controller as a content response of type “application/octet-stream”.
[HttpGet("api/[controller]/DownloadFiles")]
public async Task<IActionResult> DownloadFiles()
{
    var stream = await _fileUtilityService.DownloadFiles();
    if (stream == null)
    {
        return NotFound();
    }
    return new FileContentResult(
        stream.ToArray(), "application/octet-stream"
    );
}
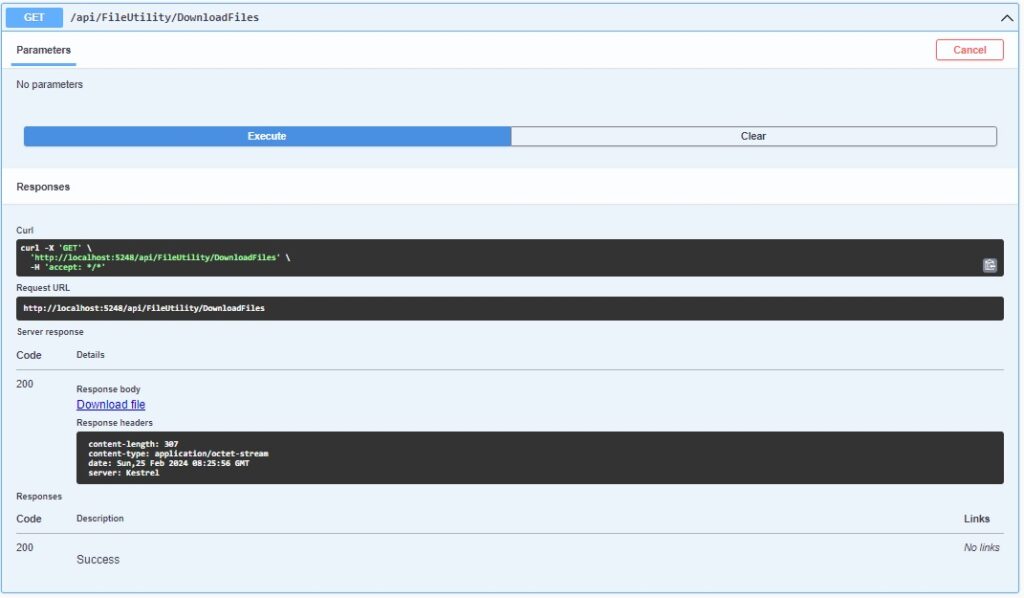
The response to the download execution is shown below with a download hyperlink Download file showing in the response body:
After the download file hyperlink is clicked, you will see it download a file from your browser to your Downloads directory:
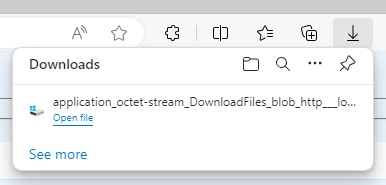
If you open the downloads folder, you will see the downloaded file as shown:

We have completed the downloading of multiple files to an upload folder.
In the next section, I will cover some best practices on file uploading.
File Upload Recommendations and Best Practices
Remove directory paths from upload file name
Ensure that the file name extracted from the IFormFile object has its directory paths removed before the file name is stored on the server folder. The reason for this is that the file could be saved into a folder location absolute or relative to the intended upload folder that could be used for a potential attack, where dangerous content may be uploaded and used to cause harm on the server.
To remove directory paths from the file name, use the command:
Path.GetFileName(name)
Take Control of the Upload Folder Location
For the reason I mentioned above, you should ensure that the uploaded files are in a pre-determined folder location so that you can control the permissions and storage within that folder. The best way to control the upload folder location is to set the upload folder through the application settings as shown below:
"AppSettings": {
    "UploadFolder": "C:\\ uploads"
},
Then concatenate upload folder from the settings to a file name that has no paths in its string.
Store Safe Filenames on the Server
When a malicious filename is stored on the server, the file could be concealed as an executable, a compressed file, or a script, that when accessed remotely and renamed through a script, can cause damage on the server.
To keep file names safe, use one of two methods to scramble or randomize the file names, so that attackers cannot identify files easily and use them in for malicious reasons. The two methods to use are:
Path.GetRandomFileName(name)

Path.GetTempFileName(name)
Allow Minimum Permissions on Upload Folders
When files are uploaded to a folder, any files that could cause damage, such as files that are concealed as executables or scripts, cannot be renamed, and executed to cause damage.
For this reason, we should limit file permissions on the folder to create and modify, but not allow execution.
Conclusions
In the above sections, we have seen how to perform file uploading and downloading, including a file extraction task which involved applying the new static ZipFile class method:
ZipFile.CreateFromDirectory()
within .NET 8.0 to create stream from an existing ZIP archive then download it through an API method.
In the next post, I will show how to use the file compression and extraction tools including ZipFile to create ZIP file compression archives.
That is all for today’s post.
I hope that you have found this post useful and informative.
Andrew Halil is a blogger, author and software developer with expertise of many areas in the information technology industry including full-stack web and native cloud based development, test driven development and Devops.

