
Welcome to today’s post.
In today’s post I will be what speech translation is and how to translate from speech to text.
With speech translation we take as input the speech, then provide as output the text or transcription of the speech. The process of taking speech and translating it to text is known as speech recognition.
With Microsoft Azure AI Services, we can create a subscription to an AI Speech Service that provides us with the capability of translating from speech to text using speech recognition AI and from text to speech synthesis. In the previous post I showed how to create an Azure AI Speech Service subscription.
In the previous post I also showed how to convert text to speech as an audio output file.
Before I show how to translate speech to text, I will go through the ways in which we can use audio files as speech input and ensure they are compliant.
Creating or Sourcing Audio Files for Speech Recognition
For an input audio file that we can satisfy the following requirements:
- It is of WAV file format.
- Volume within the audio file is high enough for humans, at least 25dB.
- The sample rate of the file be at least 256kbps. For raw sampled audio, this can be to 1500kbps or more.
When sampling human voice audio, ensure the speaker or sound source is close enough to the microphone. If using an in-built microphone on a laptop, being close enough to the webcam when speaking can yield better voice samples.
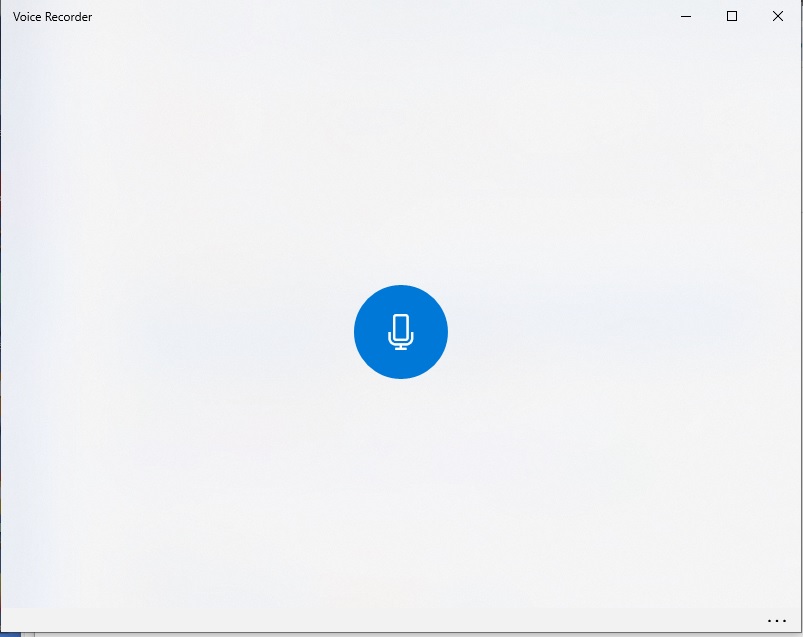
On Windows you can create raw audio samples using the Voice Recorder application.

Once opened, speak into the microphone.
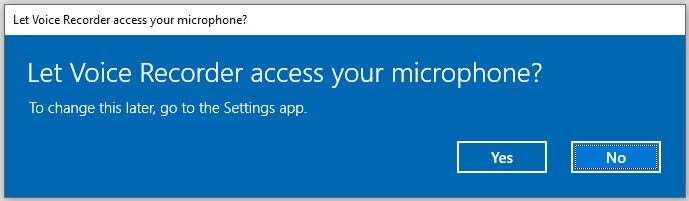
If the microphone icon does not animate and you do not see the microphone on the task bar, then you will need to also let the voice recorder application have access to your microphone.
Once your recording sample has been created, you can re-play it back and determine the quality of the sampled audio.
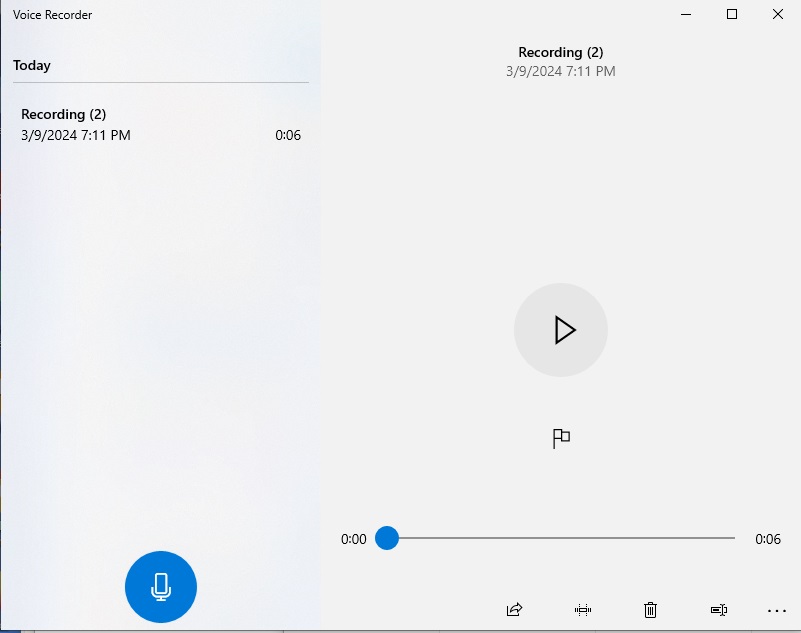
If the generated sound is of sufficient quality, then you can use it for the speech to text recognition purposes.
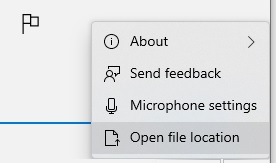
Generated recorded audio files are stored in your \Documents\Sound recordings folder.

The generated audio output files are in M4A format. The Azure AI Speech SDK only supports audio file inputs that are in the WAV format. What we can do next is either use an audio file conversion utility or an online file convertor to convert our M4A file to a WAV file.
Note: If you try to rename the M4A file to a file with a WAV extension, it will not work as a compliant input file for Speech Service SDK functions. When our M4A file is converted to a WAV file, you will notice that the file size will increase significantly:

In the next section I will explain the functions within the Azure AI Speech Service SDK that are used for speech to text conversion.
Overview of the Cognitive Services Azure Speech SDK
To be able to use the speech services, we will need to use the Azure Speech SDK, which is a library of methods and functions that allows us to perform many of the speech features in our own development environment.
When the SDK functions and methods are run directly from JavaScript within a browser client, the methods for returning audio files, text and microphone output are better supported.
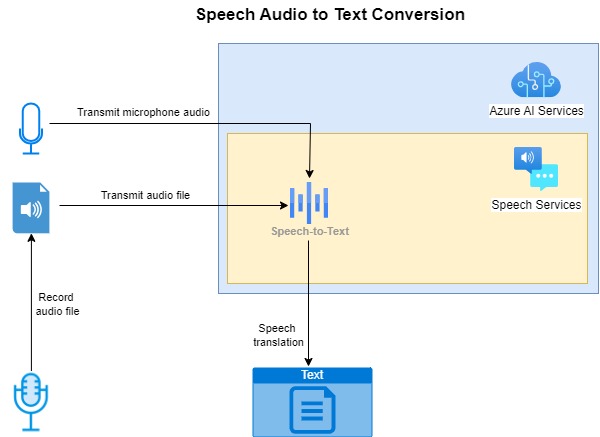
Below is an overview of the process of converting speech from the different audio sources (generated audio file or microphone input) into translated speech text:
The example I will be providing for the text to speech translation is written in C# in a console application.
To use the speech services, you will need to first install the NuGet package:
Microsoft.CognitiveServices.Speech
The next step is within our code, where we need to specify the parameters to connect and use the speech service functions. To do this we will need to provide one of the subscription keys and the region of the service. These are obtained from the Overview of the resource in the Azure Portal. The subscription key must be treated as an access credential, which can be misused if compromised by an untrusted party.
When using the subscription key and region in your application, they should not be hard coded or stored in publicly accessible settings files. Storing them in a secure key vault that is accessible through a configuration provider or in environment variables hides the key details from unauthorized access.
To store the access keys in environment variables you can do the following from a Windows command prompt:
setx SPEECH_KEY subscription-key
setx SPEECH_REGION subscription-region
To declare the SDK within the application startup, use the following declarations:
using Microsoft.CognitiveServices.Speech;
using Microsoft.CognitiveServices.Speech.Audio;
The above namespace library declarations allow us to use the cognitive speech library and the audio processing methods within the library.
To setup the speech configuration, use the FromSubscription() method of the SpeechConfig SDK class:
string speechKey = Environment.GetEnvironmentVariable("SPEECH_KEY");
string speechRegion = Environment.GetEnvironmentVariable("SPEECH_REGION");

var speechConfig = SpeechConfig.FromSubscription(
    speechKey,
    speechRegion
);
The first property we set to determine the language that is to be recognized within the input audio file. This is done using the speechRecognitionLanguage property of the SpeechConfig class. An example of how this is done is shown below:
speechConfig.speechRecognitionLanguage = "en-AU";
You should aim to use a language that is applicable to the country/culture that your application will be hosted for.
A full list of languages for different countries is on the language support section of the Microsoft AI Services site for speech to text.
The audio input is configured using the AudioConfig SDK class FromWavFileInput() method:
var audioConfig = AudioConfig.FromWavFileInput(fileName);
Where audioFile is the string name of the audio file that contains the input speech that will be used for speech recognition.
We next create an instance of the SpeechRecognizer SDK class that will allow you to specify input text and the output audio file. This is done as shown:
var speechRecognizer = new SpeechRecognizer(speechConfig, audioConfig);
Applying the audio input file to the SpeechSynthesizer SDK class to produce text output is done using the RecognizeOnceAsync() function, which will stop after the first speech utterance is detected with a silence. It returns a result asynchronously of type <Microsoft.CognitiveServices.Speech.SpeechRecognitionResult>.
Below is how we use process recognition results using a helper method:
static void OutputSpeechRecognitionResult(SpeechRecognitionResult speechRecognitionResult)
{
    speechRecognitionResult = await speechRecognizer.RecognizeOnceAsync();

    switch (speechRecognitionResult.Reason)
    {
        case ResultReason.RecognizedSpeech:
            Console.WriteLine($"RECOGNIZED: Text={speechRecognitionResult.Text}");
            break;
        case ResultReason.NoMatch:
            Console.WriteLine($"NOMATCH: Speech could not be recognized.");
            break;
        case ResultReason.Canceled:
            var cancellation = CancellationDetails.FromResult(speechRecognitionResult);
            Console.WriteLine($"CANCELED: Reason={cancellation.Reason}");

            if (cancellation.Reason == CancellationReason.Error)
            {
                Console.WriteLine($"CANCELED: ErrorCode={cancellation.ErrorCode}");
                Console.WriteLine($"CANCELED: ErrorDetails={cancellation.ErrorDetails}");
                Console.WriteLine($"CANCELED: Did you set the speech resource key and region values?");
            }
            break;
    }
}
Where we extract any recognized text using the Text property of the speechRecognitionResult output parameter.
In the next section, I will show how to run an application with the above SDK functions to produce text that is recognized from an audio input file.
Running an Application to Recognize Text from an Audio Speech File
Below is a function that takes as input the speech configuration, prompts the user for the location and filename of an audio file, and attempts to produces recognized text as output:
static async void RunRecognizeSingleCommandsFromFile(SpeechConfig speechConfig)
{
    SpeechRecognitionResult speechRecognitionResult;
    ConsoleKeyInfo consoleKeyInfo;
    bool isFinished = false;

    string? fileName = String.Empty;

    while (!isFinished)
    {
        Console.WriteLine("Enter location of audio file:");
        fileName = Console.ReadLine();

        if (fileName == String.Empty || fileName?.Length == 0)
        {
            Console.WriteLine("Please specify a valid filename.");
            return;
        }

        using (var audioConfig = AudioConfig.FromWavFileInput(fileName))
        {
            using (var speechRecognizer = new SpeechRecognizer(speechConfig, audioConfig))
            {
                Console.WriteLine($"Selected file to process: {fileName}.");

                speechRecognitionResult = await speechRecognizer.RecognizeOnceAsync();

                OutputSpeechRecognitionResult(speechRecognitionResult);

                Console.WriteLine("Press Y to give another sample. Escape to finish.");
                consoleKeyInfo = Console.ReadKey(true);
                if (consoleKeyInfo.Key == ConsoleKey.Escape)
                {
                    Console.WriteLine("Escape Key Pressed.");
                    isFinished = true;
                }
            }
        }
    }
}
There are four results types that the reason property of the recognizeOnceAsync() function returns:
ResultReason.RecognizedSpeech
ResultReason.NoMatch
ResultReason.Canceled
CancellationReason.Error
The RecognizedSpeech result also provides a value of the recognized speech as text in the text property.
When the speech in the audio file cannot be recognized, either because the quality is insufficient, or the audio language does not match the specified language defined by the speechRecognitionLanguage property, the NoMatch result is returned.
The Canceled and Error are returned when the recognition process cannot be completed.
To call the above RunRecognizeSingleCommandsFromFile() method, we create a console menu from main() which creates the speech configuration, requests an option from the user, then executes the speech example:
async static Task Main(string[] args)
{
    HostApplicationBuilder builder = Host.CreateApplicationBuilder(args);

    string speechKey = Environment.GetEnvironmentVariable("SPEECH_KEY");
    string speechRegion = Environment.GetEnvironmentVariable("SPEECH_REGION");
    string speechCustomEndpoint = Environment.GetEnvironmentVariable("SPEECH_CUSTOM_MODEL_ENDPOINT");

    builder.Services.AddLogging(
        l => l.AddConsole().SetMinimumLevel(LogLevel.None));

    using IHost host = builder.Build();

    var speechConfig = SpeechConfig.FromSubscription(speechKey, speechRegion);
    speechConfig.SpeechRecognitionLanguage = "en-US";

    Console.WriteLine("For Speech Recognition from a File Press F.");
    Console.WriteLine("Press Escape to finish.");

    ConsoleKeyInfo consoleKeyInfo = Console.ReadKey(true);

    if (consoleKeyInfo.Key == ConsoleKey.F)
        RunRecognizeSingleCommandsFromFile(speechConfig);

    await host.RunAsync();
    Console.WriteLine("Application terminated.");
}
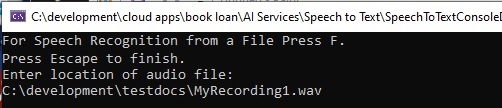
After building and running the application, we will see the following prompt:

Press the option and enter (or paste in) the file name with the full path of the audio file that you want to process:
After hitting enter, then wait for a response:
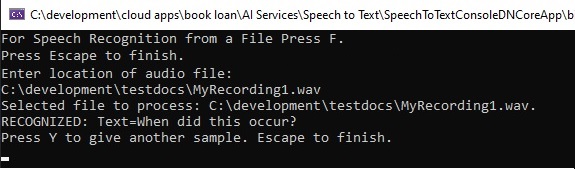
If the speech recognition succeeds, you will see the output shown below:
Try the application on two different input files: a file that you have found that is generated with synthesized voice and another that you have created with the Voice Recorder and see how accurate the recognition is.
When we try an audio file that we have created, the recognized text output varies for the following language variations:
With the following English language dialects:
speechConfig.speechRecognitionLanguage = "en-US";
or
speechConfig.speechRecognitionLanguage = "en-AU";
The output accurately reflects the spoken audio:

With the German language:
speechConfig.speechRecognitionLanguage = "de-DE";
The output miss-translates the final spoken word:

With the Spanish language:
speechConfig.speechRecognitionLanguage = "es-ES";
The output miss-translates the final spoken word:

You can see that speech recognition requires the correct spoken language to be set to render an accurate translation of the spoken audio.
We have used the Azure AI Speech Services SDK to recognize speech from an audio file and produce text output.
There are some useful applications of speech to text recognition. These include:
- Translating audio to readable text instructions for hearing impaired persons.
- Output of public announcements from spoken human audio or generated audio.
I will cover some more uses for the Speech Services SDK in another post.
That is all for today’s post.
I hope that you have found this post useful and informative.
Andrew Halil is a blogger, author and software developer with expertise of many areas in the information technology industry including full-stack web and native cloud based development, test driven development and Devops.