
Welcome to today’s post.
In today’s post I will be showing how to create an Azure Web Job using Visual Studio 2019,
With the process I will explain below, I will show how to create a Web Job locally within a .NET Core application. I will also show how to integrate the web job within a .NET Core application. I will then run the Web Job and test the job trigger function locally.
I will first explain what an Azure Web Job is.
What is a Web Job?
A web job is quite a useful part of an application that allows us to divert processes that would normally run within the application context into a separate job. The job can then be maintained and managed separately from the web application within the Azure App Service.
A web job is run by using a trigger function. In turn our trigger function fires when a particular event on a resource such as a storage account has a change to its data.
In Visual Studio, I will be making use of the Web Jobs SDK v3 library from the Microsoft.Azure.Webjobs NuGet package.
Steps Needed to Setup an Azure Web Job
The following are the steps we will take to create and setup our Azure web job within our development environment:
- Create .NET Core Console App.
- Install NuGet Packages Microsoft.Azure.Webjobs.Extensions (v4.0.1) and Microsoft.Extensions.Logging.Console (v3.1.11) and Microsoft.Azure.WebJobs.Extensions.Storage (v3.0.11)
- Configure WebJobs, Azure Storage Service and Logging by making the following calls:
- Calling the HostBuilder extension method ConfigureWebJobs().
- Calling the WebJobsBuilder extension methods AddAzureStorageCoreServices() and AddAzureStorage().
- Calling the LoggingBuilder extension method AddConsole().
Modifying Main() to Configure Web Jobs
In our static Main() method we apply Step 3 so that the web jobs are configured with the extension method ConfigureWebJobs(). We then call the AddAzureStorageCoreServices() extension method to enable Azure Storage for our web jobs.
To kick off the Web Job in the web host we run RunAsync() asynchronously.
This is shown in the code excerpt below:
using System.Threading.Tasks;
using Microsoft.Extensions.Hosting;
using Microsoft.Extensions.Logging;

class program
{
    static async Task Main()
    {
        var builder = new HostBuilder();
        builder.ConfigureWebJobs(b =>
        {
    	b.AddAzureStorageCoreServices();
        });
        var host = builder.Build();
        using (host)
        {
    	await host.RunAsync();
        }
    }
}
Creation of the Trigger Function
An additional file is required that contains a trigger function that fires when the storage queue receives a new message.
using Microsoft.Azure.WebJobs;
using Microsoft.Extensions.Logging;

namespace BookLoan.WebJob
{
    public class Functions
    {
        public static void ProcessQueueMessage([QueueTrigger("[queue name]")] string message, ILogger logger)
        {
            logger.LogInformation(message);
        }
    }
}
When the storage queue contains a new message, the above function will be triggered, and the log file will be written with the message text added to the queue.
Configure Access to an Azure Storage Account
To be able to run the Web Job, we will need to make use of an existing Azure Storage account.
From the Cloud Explorer, expand [Your Subscription] | Storage Accounts. Select a storage account.
From the properties, obtain the primary connection string.
Create a new configuration file, appsettings.json, with the following key/value:
{
  "AzureWebJobsStorage": "{azure storage connection string}",
}
In appsettings.json properties, set property Copy to Output Directory to Copy if newer.
We can test the web jobs locally by running the console app within Visual Studio.
The console will output as shown waiting for the trigger:
info: Host.Startup[0]
      Job host started
Application started. Press Ctrl+C to shut down.
Hosting environment: Production
Content root path: C:\xxxx\xxx\xxx xxx\xxxx\xxxx\BookLoan.WebJob\bin\Debug\netcoreapp3.1\
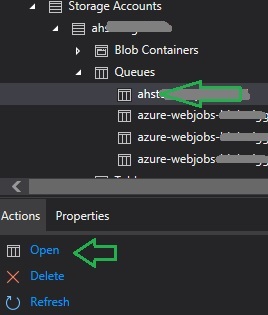
Select and open the queue from the Cloud Explorer:
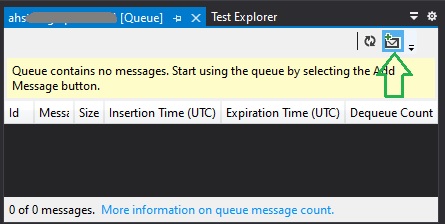
In the queue select add message.
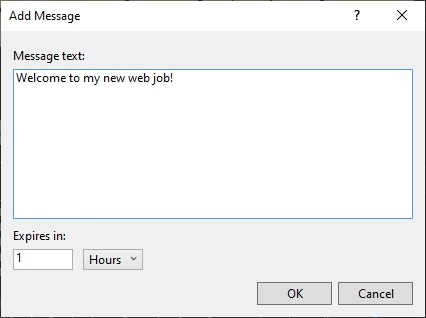
Enter a new message and submit the dialog.
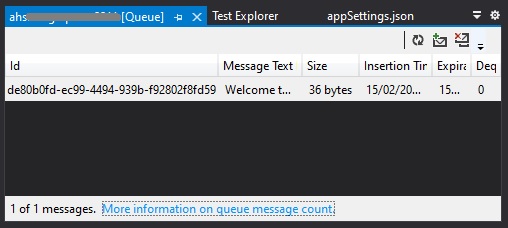
Check the console and the new message should appear:
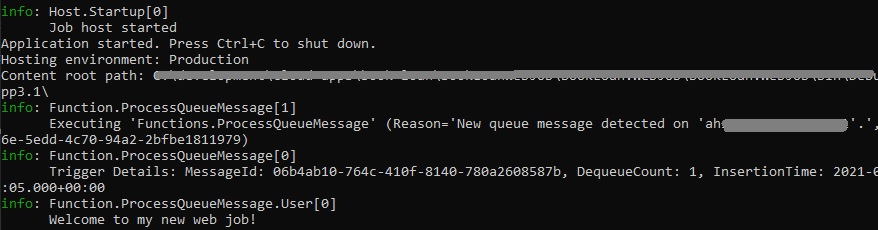
If the message does not trigger, then check the message queue name attribute in the trigger function matches the queue you have in Azure storage.
Once we have completed implementation and testing of the Azure Web Job, we can then deploy the web job to an Azure App Service, where we can test the Queue Trigger Function by uploading a file to the Storage Account of the Trigger Function. In a future post I will show how to execute a deployment of the Web Job to an Azure App Service.
That is all for today’s blog.
I hope you found this blog useful and informative.
Andrew Halil is a blogger, author and software developer with expertise of many areas in the information technology industry including full-stack web and native cloud based development, test driven development and Devops.

