
Welcome to today’s post.
In today’s post, I will be showing you how to implement basic authorization within a ASP.NET Core Blazor web application.
In the previous post, I showed how to create an ASP.NET Core Blazor server application with identity UI services. Part of the implementation of the Identity UI included using the item creation template to generate the scaffolding for Identity UI forms and code.
The Identity UI allows us to use the Identity Service API methods and user interfaces that allow us to register new user accounts, login with those accounts, manage those accounts, and to check user authorization within the application.
In the next section I will explain the purpose of authentication and authorization work in applications.
Authentication and Authorization
The security process of authentication involves the validation of user credentials when logging into an application or identity service. Once the user token is provided and is persisted within the application, we can then apply authorization to verify if the user is able to access more sensitive parts of the application.
What parts of the application do we want to protect and secure with authorization?
We can use authorization to protect areas of the application that involve data manipulation, access to more sensitive data, higher level management of user security, important business functions.
In previous posts I showed how to use ASP.NET Core to apply different types of authorization within an ASP.NET Core Web API application. The first type of authorization I used was to use imperative authorization policy to secure API resources. I then showed how to use declarative authorization policy to secure API resources. In another post showed how to use a more advanced form of authorization, claims-based authorization to protect functionality imperatively in a .NET Core application.
There are a few different approaches we can make to execute authorization security within our .NET Core applications. Similarly, the methods are available in ASP.NET Core Blazor Server applications. In this post I will show how to use declarative means to protect resources within an ASP.NET Core Blazor application.
Creation of a User Account and User Authentication
Recall that after we had scaffolded the Identity UI Services into our application, we were ready to call user registration account and login (authentication) endpoints. In this section I will go through the user registration, then login using our registered account.
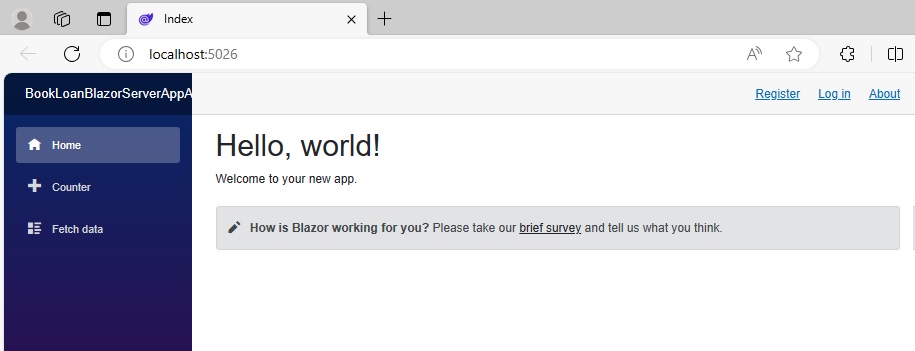
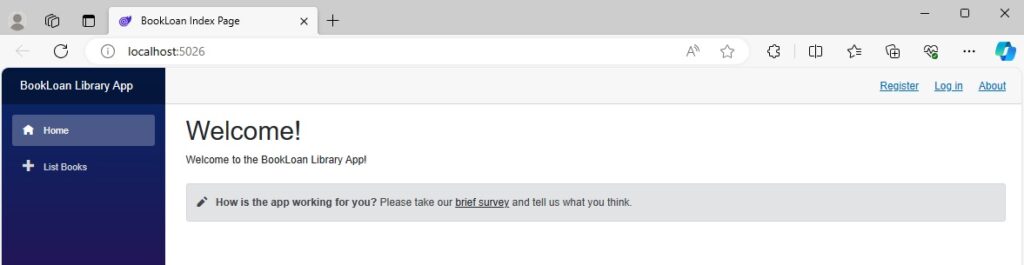
When the authentication-enabled application is built and run, the landing page displays a Register and Log in hyperlinks in the menu section:
The endpoints for the user registration and authentication are:
http://localhost:5026/Identity/Account/Register

http://localhost:5026/Identity/Account/Login
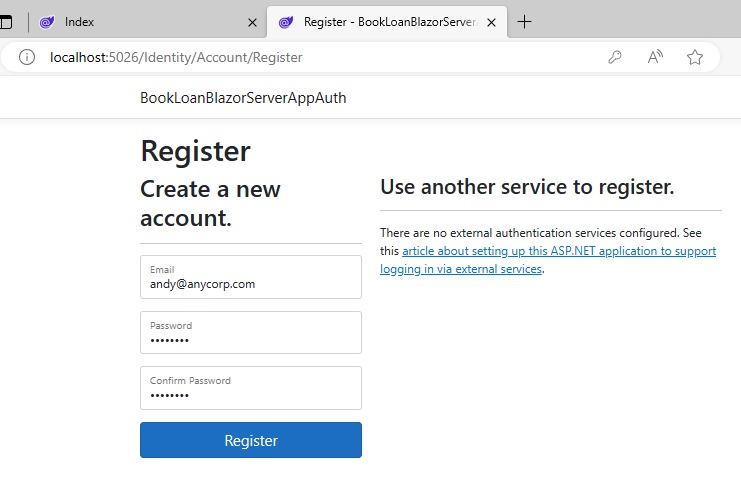
The first step, which is registration, requires us to provide an email and password to a registration form:
Once we have hit the Register button, a registration confirmation screen will display. The scaffolded application does not have a sender email address configured, so we are unable to receive an email that confirms the creation of the account.
At this point, you will wonder if you can click on the login link and login to authenticate successfully.
The answer is No. The authentication will fail, not due to the credentials being incorrect, but because the email is not confirmed. To verify this, open the SQL Server Object Explorer, expand the identity database, then expand the AspNetUsers table as shown:

Run a select on the table. You will see just one record in the table, that corresponds to the account that we have just attempted to register. The record is shown below:
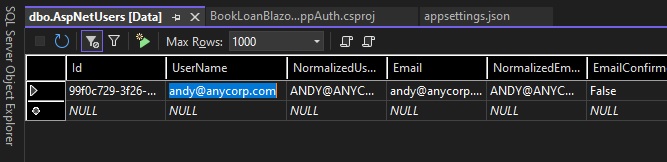
What do you notice about the account data?
The EmailConfirmation field has a value of False.
For the account to be valid, we need the email confirmation status to be True.
In all modern security compliant registration systems, we would receive a notification email that would require us to click on an activation link to confirm the email is valid. As we do not have an email sender configured, the initial notification is provided by default within a web confirmation page.
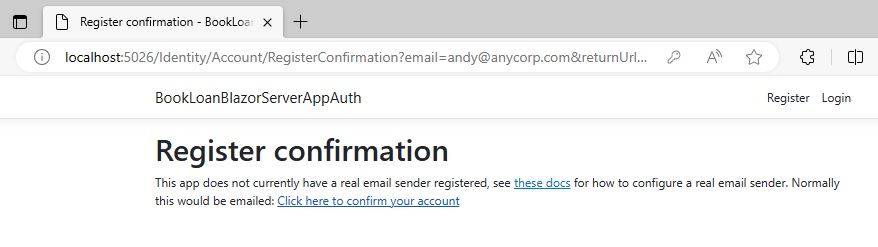
Inside the registration confirmation page, there is a link to confirm validation of the account. This is like the account activation feature I mentioned.
Once the link is clicked, you will receive the confirmation email page.
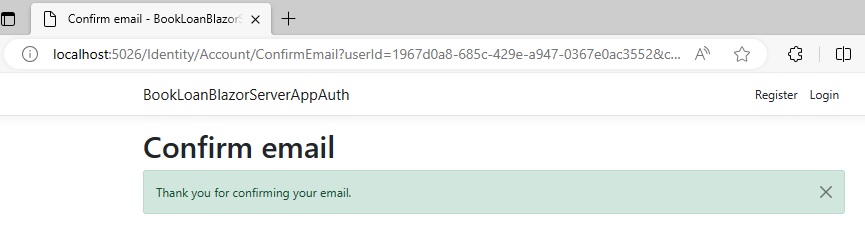
The email verification is complete. To verify this, return to the AspNetUsers table and re-run a select on the data. You will see the record in the following state:

What do you notice about the account data this time?
The EmailConfirmation field has a value of True.
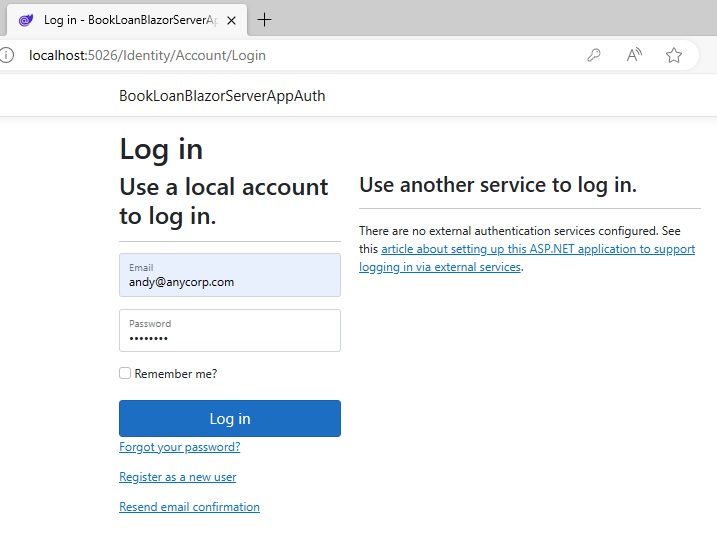
We can now try the login feature.
Click on the Log in hyperlink. In the Log in screen, enter an email address and new password. For development purposes, the email address can be arbitrary as the Identity UI Services are not configured yet to support real-world notifications to end-users.
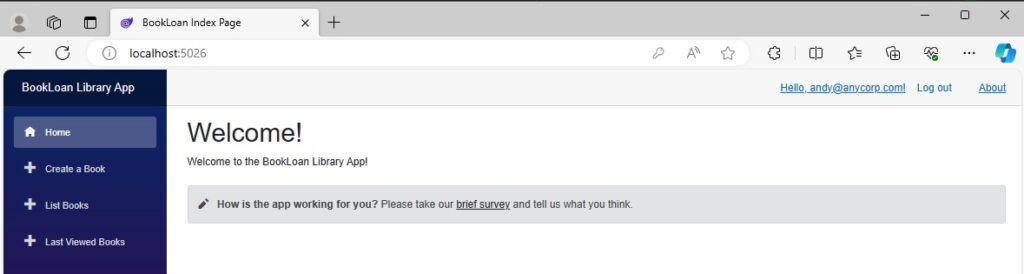
After clicking on the Log in button, you will be taken to the landing page:
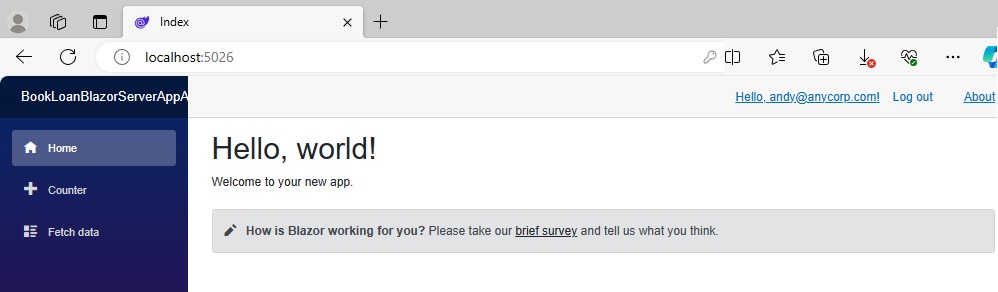
The hyperlinks in the menu section have changed to display a hyperlink to your account, with the email address displayed, and a Log out hyperlink. The endpoints for the account management and log out are:
http://localhost:5026/Identity/Account/Manage
http://localhost:5026/Identity/Account/LogOut
In the next section, I will show now to apply authorization within the application.
Applying Authorization within the Application
Before I implement the authorization for the application, I will reconstitute the application and include the pages, components, services, and navigation menu of a ASP.NET Core Blazor Server Application that I wrote in an earlier post, where I implemented a Blazor Application with Entity Framework Core and CRUD functionality.
The application, as it was before I included the additional feature screens as below with the default components from the templated application:

Authorization of Menu Items
After the additional feature screens are included, the landing page of the application shows the menu items to the additional features in the side bar:
As a logged in user, let me set some application requirements:
- Permit non-logged in users to view only the landing page Home andthe List Books screen.
- Permit non-logged in users to view only the landing page Home andthe List Books screen.
- Permit logged in users to view the landing page Home andallthe feature pages: Create a Book, Last Viewed Books, and the List Books screen.
- The navigation menu shows all links to the application features. The markup of the navigation menu Razor component is shown below:
- NavMenu.razor (unauthenticated)
<div class="top-row ps-3 navbar navbar-dark">
    <div class="container-fluid">
        <a class="navbar-brand" href="">BookLoan Library App</a>
        <button title="Navigation menu" class="navbar-toggler" @onclick="ToggleNavMenu">
            <span class="navbar-toggler-icon"></span>
        </button>
    </div>
</div>

<div class="@NavMenuCssClass nav-scrollable" @onclick="ToggleNavMenu">
    <nav class="flex-column">
        <div class="nav-item px-3">
            <NavLink class="nav-link" href="" Match="NavLinkMatch.All">
                <span class="oi oi-home" aria-hidden="true"></span> Home
            </NavLink>
        </div>
        <div class="nav-item px-3">
            <NavLink class="nav-link" href="createbook">
                <span class="oi oi-plus" aria-hidden="true"></span> Create a Book
            </NavLink>
        </div>
        <div class="nav-item px-3">
            <NavLink class="nav-link" href="listbooks">
                <span class="oi oi-plus" aria-hidden="true"></span> List Books
            </NavLink>
        </div>
        <div class="nav-item px-3">
            <NavLink class="nav-link" href="lastviewedbooks">
                <span class="oi oi-plus" aria-hidden="true"></span> Last Viewed Books
            </NavLink>
        </div>
    </nav>
</div>
To protect the two features, Create a Book and Last Viewed Books from unauthenticated accounts, I will use the following declarative HTML markup elements from ASP.NET Core Identity UI:
<AuthorizeView>
<Authorized>
and
<NotAuthorized>
to not render them for unauthenticated accounts and render them for authenticated accounts. The List Books feature will render in both cases. The way we use the above HTML markup is in the following template pattern:
<AuthorizeView>
    <Authorized>
	[include HTML that you wish to render for authenticated users]
    </Authorized>

    <NotAuthorized>
	[include HTML that you wish to render for non-authenticated users]
    </NotAuthorized>
</AuthorizeView>
Given the above HTML template pattern, we update the NavMenu.razor markup to include the authorization markup. The resulting HTML markup for the navigation menu Razor component is as shown:
NavMenu.razor (authenticated)
<div class="top-row ps-3 navbar navbar-dark">
    <div class="container-fluid">
        <a class="navbar-brand" href="">BookLoan Library App</a>
        <button title="Navigation menu" class="navbar-toggler" @onclick="ToggleNavMenu">
            <span class="navbar-toggler-icon"></span>
        </button>
    </div>
</div>

<AuthorizeView>
    <Authorized>
        <div class="@NavMenuCssClass nav-scrollable" @onclick="ToggleNavMenu">
            <nav class="flex-column">
                <div class="nav-item px-3">
                    <NavLink class="nav-link" href="" Match="NavLinkMatch.All">
                        <span class="oi oi-home" aria-hidden="true"></span> Home
                    </NavLink>
                </div>
                <div class="nav-item px-3">
                    <NavLink class="nav-link" href="createbook">
                        <span class="oi oi-plus" aria-hidden="true"></span> Create a Book
                    </NavLink>
                </div>
                <div class="nav-item px-3">
                    <NavLink class="nav-link" href="listbooks">
                        <span class="oi oi-plus" aria-hidden="true"></span> List Books
                    </NavLink>
                </div>
                <div class="nav-item px-3">
                    <NavLink class="nav-link" href="lastviewedbooks">
                        <span class="oi oi-plus" aria-hidden="true"></span> Last Viewed Books
                    </NavLink>
                </div>
            </nav>
        </div>
    </Authorized>
    <NotAuthorized>
        <div class="@NavMenuCssClass nav-scrollable" @onclick="ToggleNavMenu">
            <nav class="flex-column">
                <div class="nav-item px-3">
                    <NavLink class="nav-link" href="" Match="NavLinkMatch.All">
                        <span class="oi oi-home" aria-hidden="true"></span> Home
                    </NavLink>
                </div>
            </nav>
        </div>
    </NotAuthorized>
</AuthorizeView>
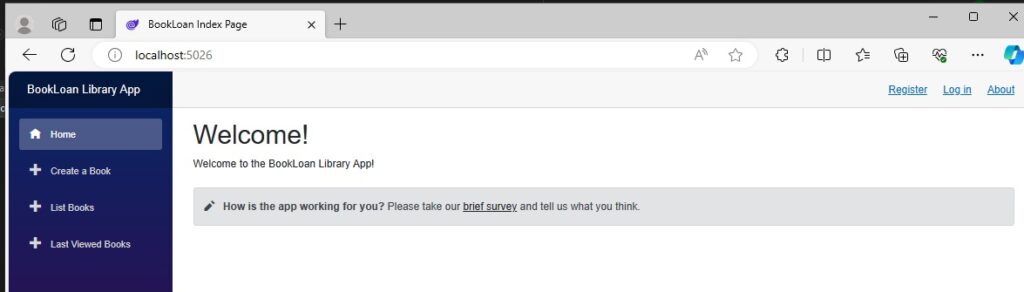
When we build and run the application, the landing page with the side bar menu looks like this:
The unauthenticated user does not see the two features that I mentioned earlier, only displaying the List Books feature. The authorization elements are working as expected to enable rendering of HTML that is in the respective <Authorized> and <NotAuthorized> markup tags.
When the user logins into the application, the landing page with the links to the features in the side bar menu renders as shown:
The authenticated user sees all the application features. The authorization elements are working as expected to enable rendering of HTML content that is in the <Authorized> markup tag. Content that is in the <NotAuthorized> markup tag is not rendered.
Authorization within Razor Components
Not only can you control rendering HTML within the navigation menu, but you can control it within the HTML markup of each component.
Let us add an additional security requirement for our application:
- Permit logged in users edit books in the List Books screen.
To be able to add the above security requirement, I had to allow both un-authenticated and authenticated users to access the List Books feature. From there I will add an additional level of security for the list of books.
Presently, the List Books feature looks as shown:
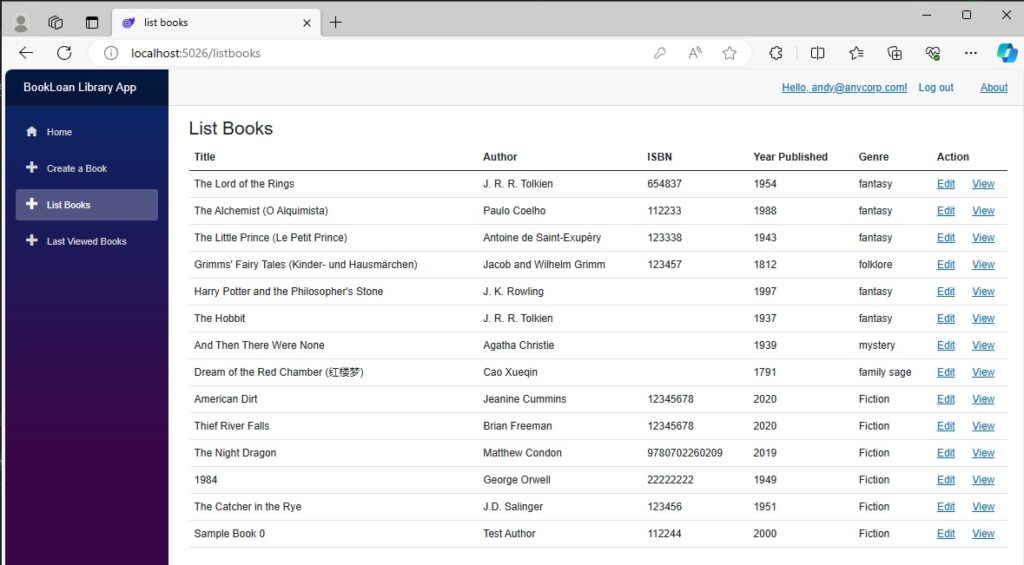
Notice that the Action column has two actions, Edit and View.
The HTML for the Razor component is as shown:
ListBooks.razor (unauthenticated):
@page "/listbooks"
@using BookLoanBlazorServerAppAuth.Services
@using BookLoanBlazorServerAppAuth.Models
@inject IBookService LibraryBookService

<PageTitle>list books</PageTitle>

<h3>List Books</h3>

@if (books == null)
{
    <p><em>Loading...</em></p>
}
else
{
    <table class="table">
        <thead>
            <tr>
                <th>Title</th>
                <th>Author</th>
                <th>ISBN</th>
                <th>Year Published</th>
                <th>Genre</th>
                <th colspan="2">Action</th>
            </tr>
        </thead>
        <tbody>
            @foreach (var book in books)
            {
                <tr>
                    <td>@book.Title</td>
                    <td>@book.Author</td>
                    <td>@book.ISBN</td>
                    <td>@book.YearPublished</td>
                    <td>@book.Genre</td>
                    <td>
                        <a href="editbook/?id=@book.ID">Edit</a>
                    </td>
                    <td>
                        <a href="viewbook/?id=@book.ID">View</a>
                    </td>
                </tr>
            }
        </tbody>
    </table>
}
After adding the authorization markup to the HTML of the above component, we have the resulting HTML markup:
ListBooks.razor (authenticated):
@page "/listbooks"
@using BookLoanBlazorServerAppAuth.Services
@using BookLoanBlazorServerAppAuth.Models
@inject IBookService LibraryBookService

<PageTitle>list books</PageTitle>

<h3>List Books</h3>

@if (books == null)
{
    <p><em>Loading...</em></p>
}
else
{
    <table class="table">
        <thead>
            <tr>
                <th>Title</th>
                <th>Author</th>
                <th>ISBN</th>
                <th>Year Published</th>
                <th>Genre</th>
                <th colspan="2">Action</th>
            </tr>
        </thead>
        <tbody>
            @foreach (var book in books)
            {
                <tr>
                    <td>@book.Title</td>
                    <td>@book.Author</td>
                    <td>@book.ISBN</td>
                    <td>@book.YearPublished</td>
                    <td>@book.Genre</td>
<AuthorizeView>
    <Authorized>
                    <td>
                        <a href="editbook/?id=@book.ID">Edit</a>
                    </td>
    </Authorized>
</AuthorizeView>
                    <td>
                        <a href="viewbook/?id=@book.ID">View</a>
                    </td>
                </tr>
            }
        </tbody>
    </table>
}
Notice that I did not include the <NotAuthorized> tags. If I were to include them, then I would need to include HTML content as the compiler does not permit empty content in the <Authorized> and <NotAuthorized> tags.
The HTML markup below is equivalent to the above markup, but there is duplication of the View hyperlink action within both HTML tags.
<AuthorizeView>
    <Authorized>
        <td>
            <a href="editbook/?id=@book.ID">Edit</a>
        </td>
        <td>
            <a href="viewbook/?id=@book.ID">View</a>
        </td>
    </Authorized>
    <NotAuthorized>
        <td>
            <a href="viewbook/?id=@book.ID">View</a>
        </td>
    </NotAuthorized>
</AuthorizeView>
When the above change is rebuilt and run, the component rendering looks like this:
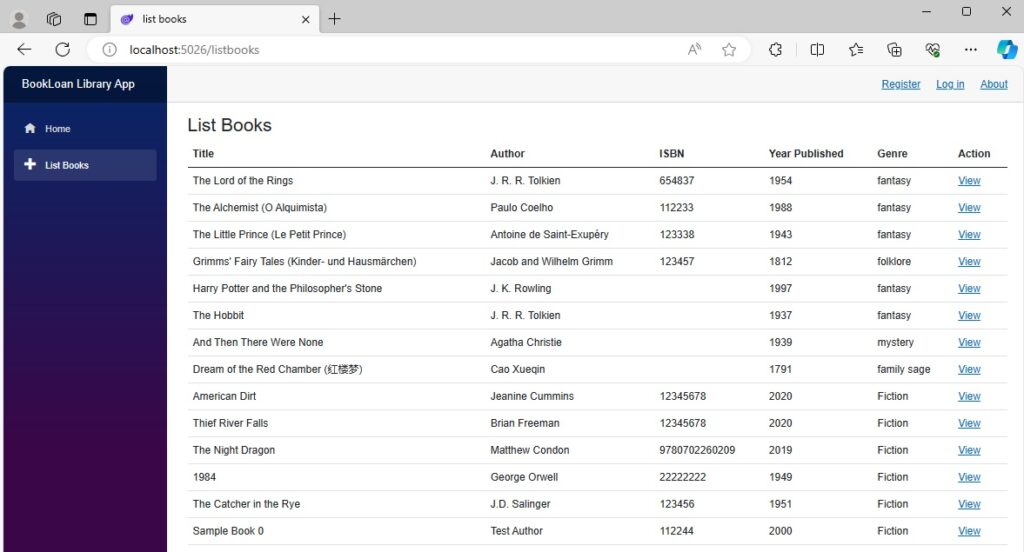
The View action displays, but the Edit action is hidden as expected with an unauthenticated user.
The above overview has shown us how to apply a useful declarative syntax to achieve authorization within a Blazor Server application. In addition, we have seen how to register and authenticate accounts using the scaffolded ASP.NET Core Identity UI.
In a future post I will explore other ways in which to apply authorization within a Blazor Server application.
That’s all for today’s post.
I hope that you have found this post useful and informative.
Andrew Halil is a blogger, author and software developer with expertise of many areas in the information technology industry including full-stack web and native cloud based development, test driven development and Devops.

