
Welcome to today’s post.
In today’s post I will be showing you how a chatbot is implemented with voice-enabled capability.
In previous posts, I showed how to create chatbots using both the Bot Framework Composer and with the Bot Framework SDK. Both tools allow the creation of text-based chatbots.
I will start with a brief overview of text-based chatbots.
Overview of the Text-based Chatbots
As we already know, a text-based chatbot is an application that receives text, parses the input, then formulates a response to the user as text. The rules for parsing then determining the intent of the input text can be as simple as a static model that syntactically parses the tokens of the text sentence, then formulates the entities and intents, then outputs a recognition response.
The other way in which the intent and entities of an input sentence are determined is by using a language model. In one of my previous posts, I explained how to create a custom Conversational Language Understanding (CLU) model using the Azure Language Studio. I then showed how to test, train, and deploy the CLU model in another post.
In this post, I will be showing how to incorporate the CLU model into a chatbot application, which will then have its text recognition output synthesized into streamed voice output to a custom voice assistant application.
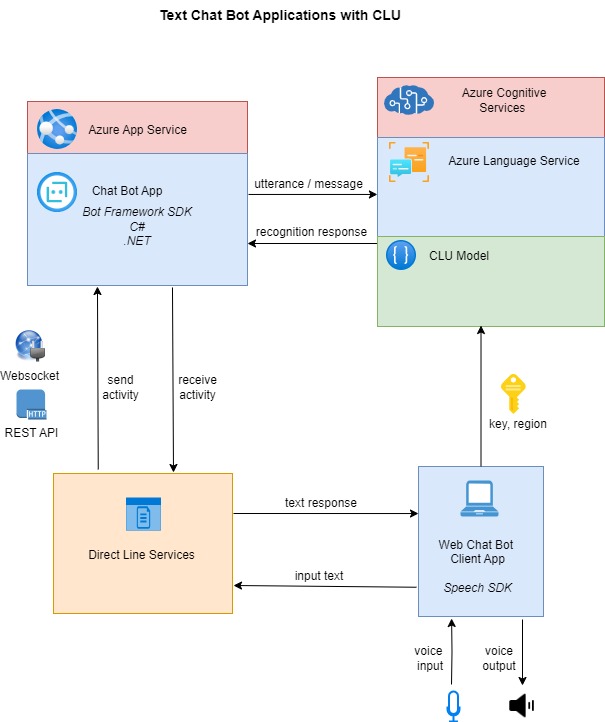
In a previous post I also showed how to create a chatbot application with Visual Studio and the Bot Framework SDK that integrates with the CLU model. I then showed how to deploy the chatbot application to an Azure App Service. Below is the architecture of a text-based chatbot application that receives input and sends responses back to a text-based Web chatbot client:
In the next section, I will provide an overview of what is involved with adding voice capability to a chatbot application.
Adding Voice Capability to a Chatbot Application
The chatbot application service on its own can only support text-based inputs and responses. To allow voice-enabled capability for a chatbot to be able to receive both text or speech-based inputs and then respond with text or speech-based outputs requires additional configurations and setups in the deployed chatbot within the Azure App Service, and the deployed Bot Service.
An additional service, which is the Direct Line Speech (DLS) service is a service that is required to allow separate channels for input speech from the Voice Assistant client to be translated to text using the Speech to Text service, and recognition text responses from the Azure Bot Service are synthesized into speech that is streamed back to the Voice Assistant client. In the next section, I will show how the channels in the DLS are enabled during the configuration of the Azure App Service hosting the chatbot application and the Bot Service that is hosting the chatbot registration.
The input text messages are then transmitted from the DLS service to the chatbot application in the cloud using web sockets.
The chatbot application receives the parsed input text message and posts the text to the language service, which then determines the recognition response based on the CLU model. The recognition text response is then received by the chatbot, which sends the text response back to the DLS service using web sockets.
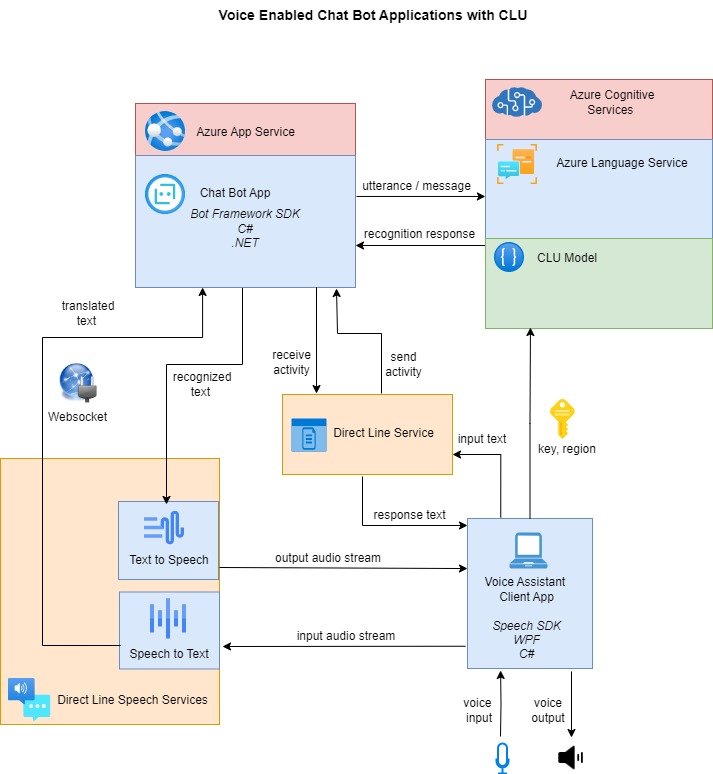
When the text response is received by the DLS service, it uses the Text to Speech service to synthesize the text into speech, which is then streamed back to the Voice Assistant client application and played back through a load speaker. An overview of the interactions and data flows between the various components of the voice-enabled chatbot architecture are shown in the diagram below:
In the next section, I will show you how to configure the chatbot to support Direct Line Speech Services.
Configuration of the Chatbot to Support Direct Line Speech Services
To allow the chatbot application that is hosted in Azure to run channels that convert streamed audio from a client application to text and convert text to streamed audio from a chatbot application.
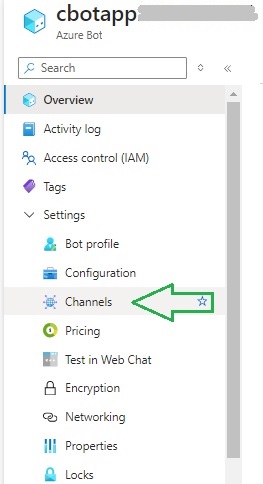
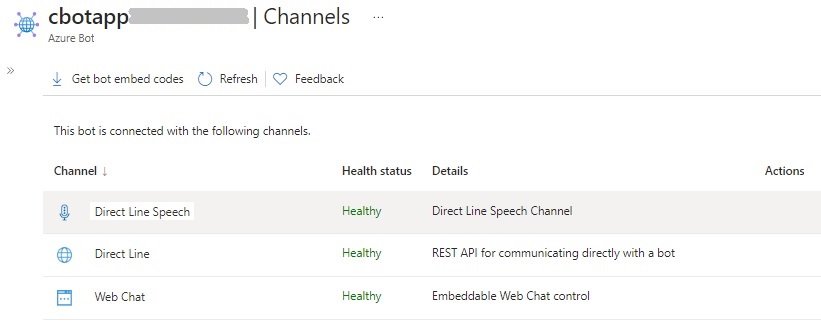
Setup of Direct Speech Line channels. The first task we will need to complete is to set up the Direct Line Speech channel. This channel allows the chatbot to communicate with the client application using audio input. In the Azure Bot resource overview, the Channels menu under Settings is used to access the configuration of the third-party vendor channels that the chatbot application can connect to.
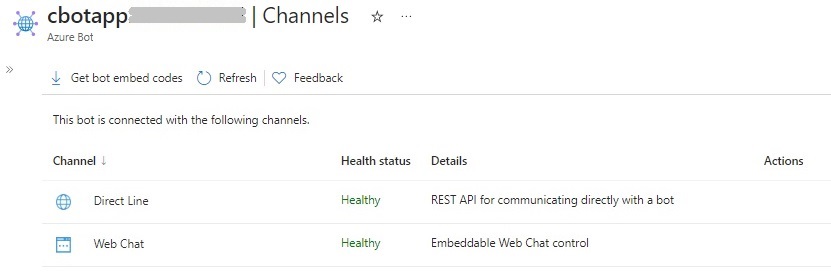
In the Channels dialog, you will see the list of connected channels and their state of health. You will see one of the connected channels is the Direct Line channel, which is used to allow client applications to communicate with the chatbot application with a REST API.
Further down the screen, you can see the available channels, which are not connected with the Bot resource.
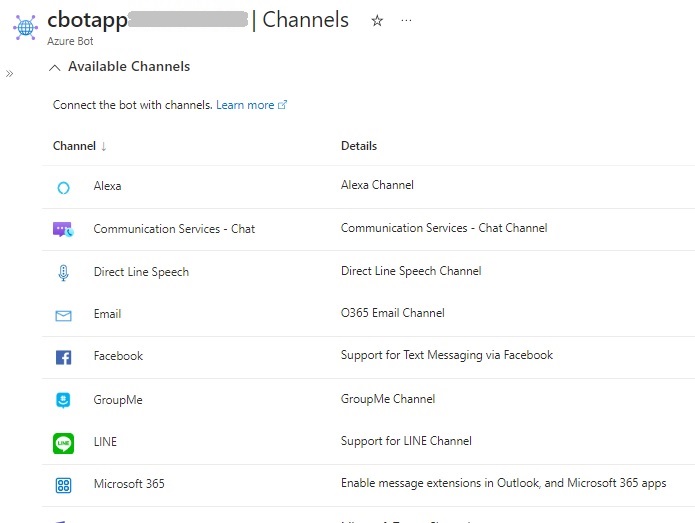
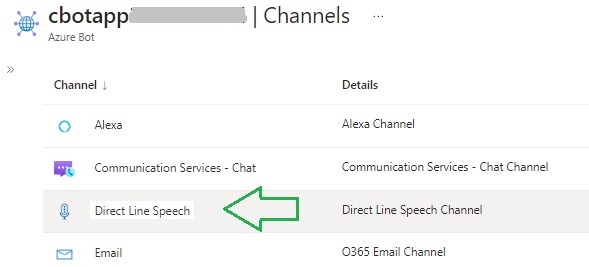
In the list of available channels, locate the Direct Line Speech channel and select it.
The configuration screen for the DLS channel opens:
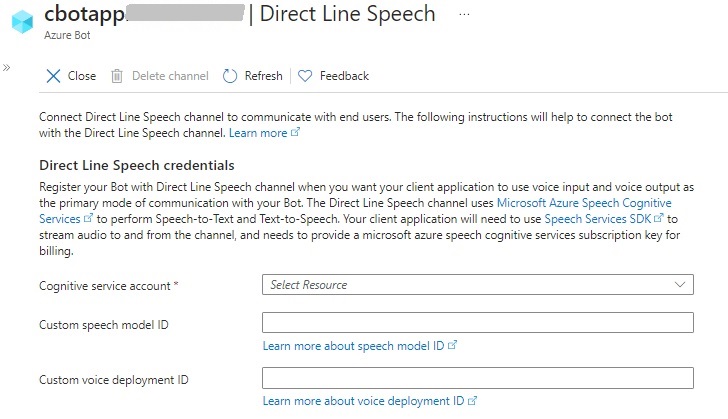
In the configuration screen that displays, you will see three parameters:
Cognitive service account
Custom speech model ID
Custom voice deployment ID
The voice deployment ID can be ignored as it is for custom voice models that can be used instead of the available neutral synthesized voices.
The speech model ID which can also be ignored is the custom speech recognition model that can be used to determine intents and entities from input text passed into the chatbot.
The mandatory parameter is the Cognitive service account, which is a Speech Service that is used to provide language recognition to the custom application.
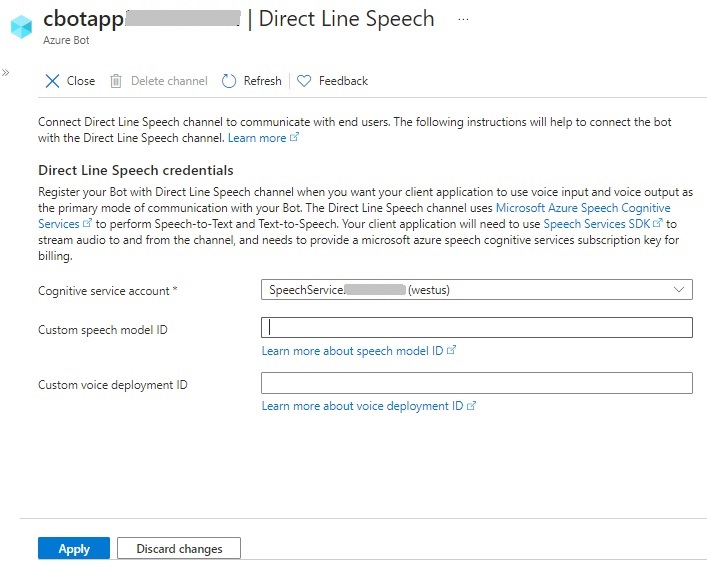
After applying the changes, you will see the DLS channel listed among the channels connected to the Bot.
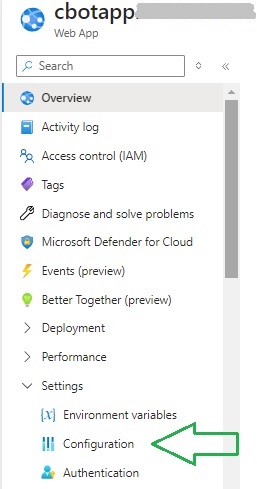
The next part of the configuration is to enable web sockets for the chatbot application hosted within the Azure App Service. Enabling WebSocket streams allows Bot Framework Streaming Extensions support for the chatbot application. To access this setting, you will need to select the Configuration option under Settings.
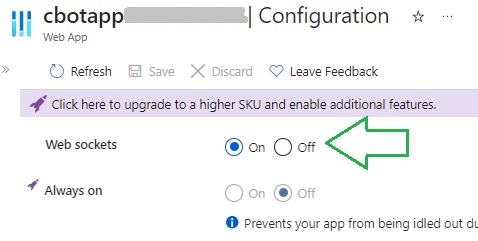
In the Configuration settings screen, check the Web sockets option to On as shown:
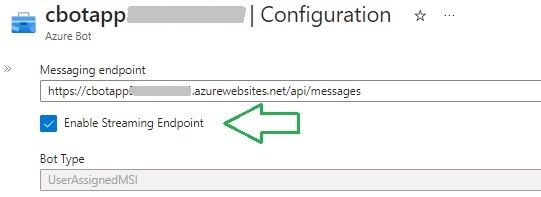
Another required configuration in the Azure Bot resource is to define the Messaging Endpoint, which is the REST API endpoint that is used to send messages to the chatbot application. An ARM template, which is used to deploy the chatbot resources to Azure is explained in one of my previous posts, included this setting. It is of the form:
https://[web-application-name].azurewebsites.net/api/messages
The configuration of the messaging endpoint is shown below:
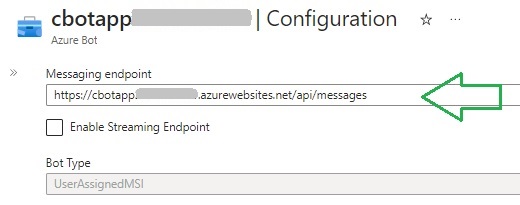
In addition, you will need to enable endpoint streaming below the messaging endpoint, which is shown below:
Once we have applied the above configuration settings across the Web application and the Azure Bot resource, your Bot will be ready to stream voice-based inputs and outputs.
In the next section, I will show you how to test the chatbot within a custom Windows Voice Assistant Client.
Testing the Voice Enabled Bot in a Custom Voice Assistant Client
A Voice Assistant Client is an application that is deployed on a client device such as a laptop or mobile device. The client application can be a Windows application, or a JavaScript based application that uses the Azure Speech SDK.
One ideal way to test out the voice capability is to use one of the supplied boilerplate applications from the Microsoft GitHub repository. The Windows Voice Assistant Client source is a C# WPF application that when configured and run, will allow you to send text or voice inputs to the chatbot application and any connected CLU model you have implemented and deployed to Azure. You will then receive text and voice responses that are based on the inputs.
When the application is built and run, you will see the following Settings screen display:
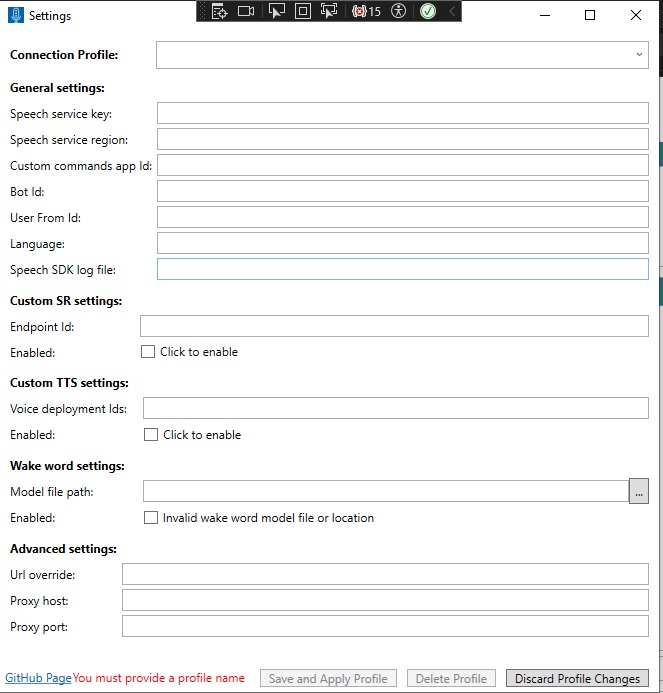
Enter values for the Speech service key and region.
Save and apply the settings.
When the chat dialog opens, you will see the left pane display the Chat Conversation View, and the right pane display the Activity Log and Activity Load.
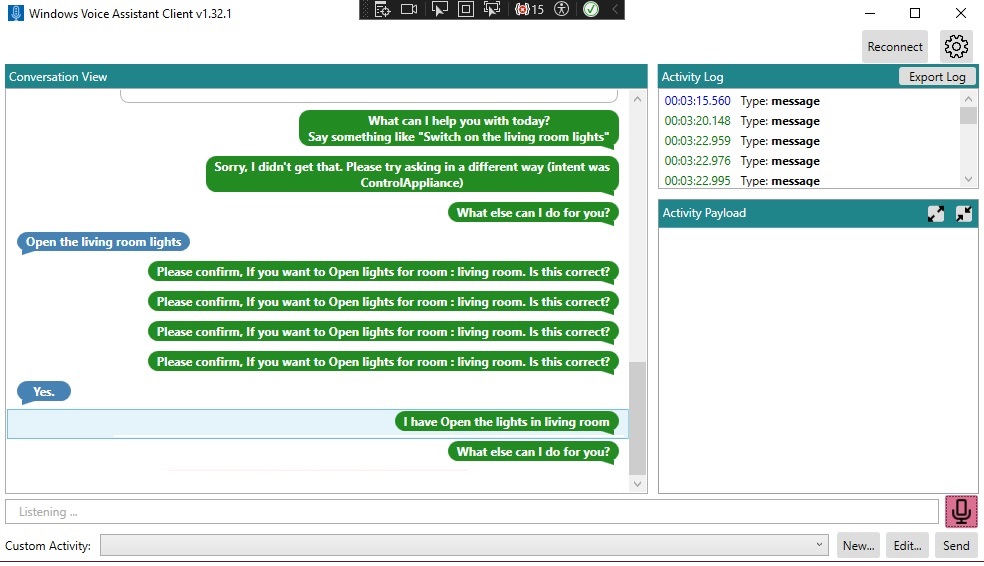
To the right, you will see the microphone icon, which when clicked can enable or disable voice input. In addition, you will notice that the Bot responds through the speaker of the device.
In addition, you will notice that the conversation responses from the Bot are consistent with the outputs that we received when we tested our CLU Chat Bot within the Bot Framework Tester.
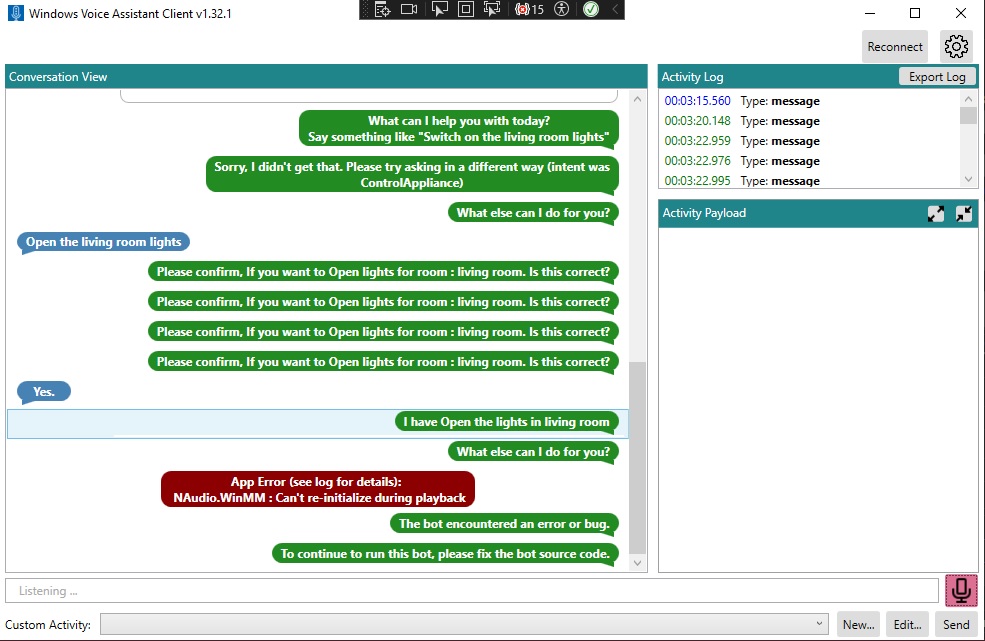
If an error occurs during processing of input or response audio streaming, you will see the errors in red font.
The above overview has shown us how to voice enable an existing chatbot application with a voice-enabled custom Windows client.
That is all for today’s post.
I hope that you have found this post useful and informative.
Andrew Halil is a blogger, author and software developer with expertise of many areas in the information technology industry including full-stack web and native cloud based development, test driven development and Devops.

