
Welcome to today’s post.
In today’s post I will show you how you can use NUnit to test your .Net Core Applications.
NUnit is a test framework library that allows you to run a suite of unit tests that cover important business rules within your application. One of the most useful aspects with unit testing frameworks is that you don’t need to construct tests with many application dependencies.
You can construct a unit test that covers the necessary logic to ensure that the business rule works irrespective of the non-functional aspects of your application. You can even create mock API services, mock database records and even mock users to satisfy unit testing requirements. It is only when we decide to integration test our application, that we require the use of real databases, real users, and real API services for our tests.
I will start off in the next section by showing how to create an NUnit test within a basic .NET Core application.
Creation of an NUnit Test Project
First, I will show you how to add an NUnit test project to your application.
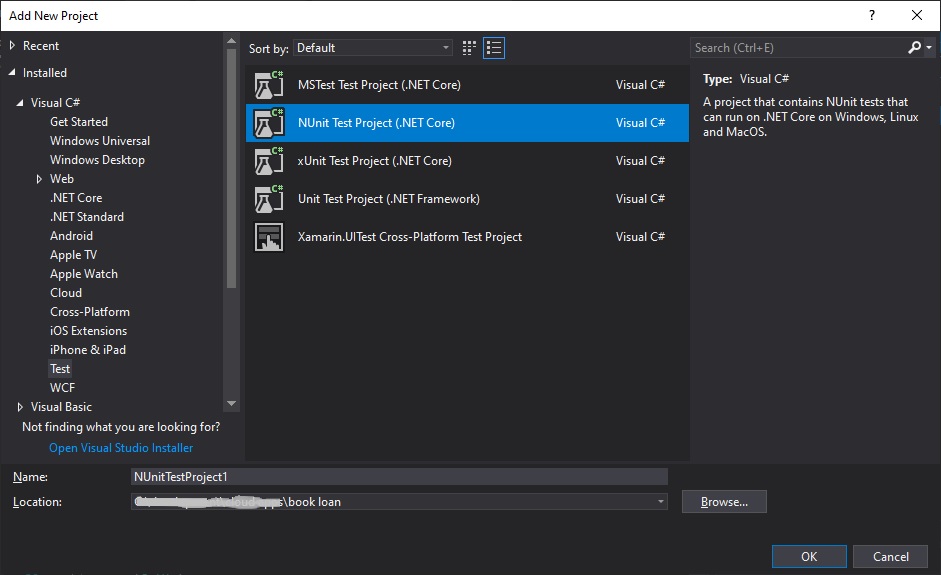
In your solution select New Project.. and in the dialog that opens.
Select the Test project template category.
Select the NUnit Test Project as shown. Select the folder and enter the name of the test project and click ok.
After the project is created, you will see the test project in the Solution Explorer in Visual Studio with a blank unit test class created for you.
In the blank unit test class, you will see the following structure:
using NUnit.Framework;

namespace Tests
{
    [TestFixture]
    public class Tests
    {
        [SetUp]
        public void Setup()
        {
		// blank setup - to be implemented
        }

        [Test]
        public void Test1()
        {
		// blank test - to be implemented
        }
    }
}
The attributes [Setup] and [Test] are NUnit attributes.
[Setup] is used for methods that are used for setting up the test variables.
[Test] is used for methods that contain the unit test implementation.
With [Setup] we declare variables that will be used by our test methods within the context of each test run. These include:
- Database contexts like in-memory data.
- Service collections to contain application services.
- Mock classes to hold sample test data.
A Typical Example of an NUnit Test
An example of a test is shown below:
[Test]
public void ListBooksTest()
{
   var book = new BookViewModel() { ID = 1, Author = "W.Smith", Title = "Rivers Run Dry", YearPublished = 1954 };
   context.Add(book);
   context.SaveChanges();

   book = new BookViewModel() { ID = 2, Author = "D.Lee", Title = "Red Mine", YearPublished = 1968 };
   context.Add(book);
   context.SaveChanges();

   book = new BookViewModel() { ID = 3, Author = "V.Prescott", Title = "Boundary Rider", YearPublished = 1974 };
   context.Add(book);
   context.SaveChanges();

   var bookService = new BookService(context);
   var books = bookService.GetBooks().GetAwaiter();

   var result = books.GetResult();
   Assert.AreEqual(3, result.Count);

   Assert.Pass();
}
Each test should have an assertion to compare values and report if there is a pass or failure. This is done using either the Assert.AreEqual() or Assert.AreNotEqual() equality / inequality tests.
Running Tests within the Visual Studio Test Explorer
The main interface tool we use to run unit tests is the Test Explorer. It is usually located to the left of the Visual Studio developer IDE.
After you have written at least one test, and compiled it, the tests will be visible as shown.
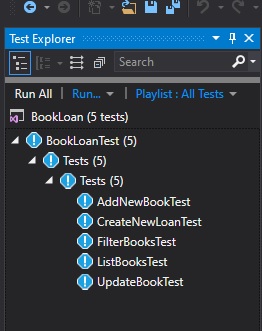
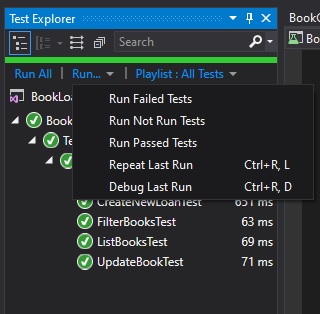
Tests can either be run individually or in their entirety, and can be debugged.
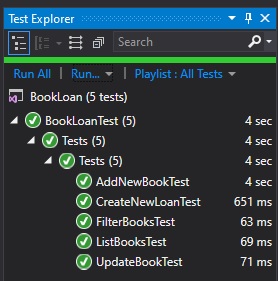
Below is an example of tests that are run successfully.
If you are testing service classes that contain asynchronous methods and functions, then the following development pattern must be implemented in the unit test method.
Notice in the above method, when using the service book class, I have used the GetAwaiter() method. In order to use this you will need to include the System.Threading.Tasks namespace.
The service class method we were calling from the unit test method is shown below:
public async Task<List<BookViewModel>> GetBooks()
{
   return await _db.Books.ToListAsync();
}
Notice that this method uses the common async … await asynchronous threading pattern and returns a Task.
To call this method from another method, we will need to use the await command or GetAwaiter() to return a Task back to a synchronous method. As our unit test method is synchronous, to obtain the result from the service we use the GetAwaiter() method (which returns a TaskAwaiter<List>), and then use GetResult() to convert our result to a List<> type.
var bookService = new BookService(context);
var books = bookService.GetBooks().GetAwaiter();

var result = books.GetResult();
Assert.AreEqual(3, result.Count);
The result is then compared using the assertion.
That’s all for this post.
I hope this has been useful.
In a future post I will discuss how to use data contexts to unit test your .NET Core applications that are data dependent.
Andrew Halil is a blogger, author and software developer with expertise of many areas in the information technology industry including full-stack web and native cloud based development, test driven development and Devops.

