Welcome to today’s post.
In today’s post, I will show how to implement a continuous integration pipeline within Azure DevOps that will trigger on a commit from a local Git repository for an Angular application.
In a previous post, I showed how to implement a continuous integration pipeline within Azure DevOps that triggered on a commit from a local Git repository for an ASP.NET Core web application. The resulting artifacts were then deployed to an Azure App Service as a web application.
In a much earlier post, I showed how to deploy Angular application changes from a local Git repository direct to an Azure App Service web application through the built-in Azure Kudu deployment process.
Each of the above deployments of a .NET Core web application and of an Angular application used some common structures that allow us to standardize the deployment within an Azure DevOps release pipeline. These include:
- Triggering a continuous build pipeline when the repository is committed to the main branch.
- Building the application source within the continuous integration pipeline.
- Packaging the application build into an artifact.
- Archive the artifact.
- Publishing (dropping) the artifact into an accessible shared folder.
- Triggering the release pipeline.
- Deploying the application into an Azure App Service web application.
In today’s post I will be explaining steps 1-6 in the continuous build pipeline. Below is a diagram that explains the steps that will be taken in the workflow of the build pipeline:
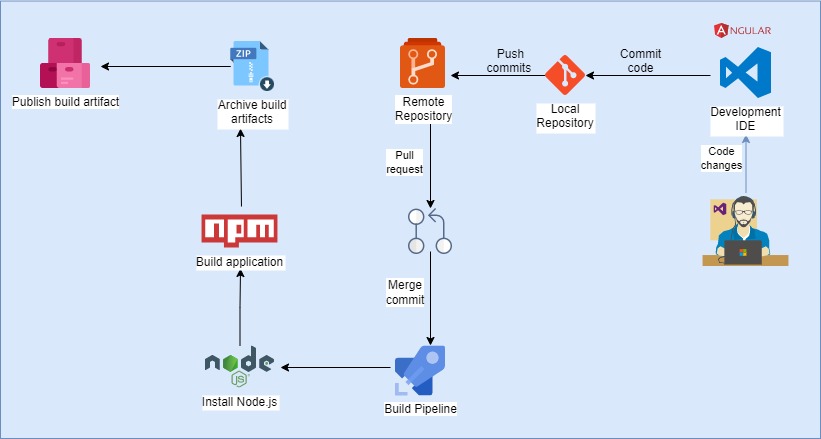
In the next section, I will show how to setup an Angular application in a Git repository in a local development environment.
Setting up an Angular application in a local Git environment
We first of create a basic Angular application within our Visual Code IDE.
Install NPM into the local development environment:
npm install -g @angular/cli
Check the version of Node you have in your local development environment:
npm --version
Create a new Angular application:
ng new angular-devops-app
Change over to the new application folder:
cd angular-devops-app
Run the Angular application locally:
ng serve –open
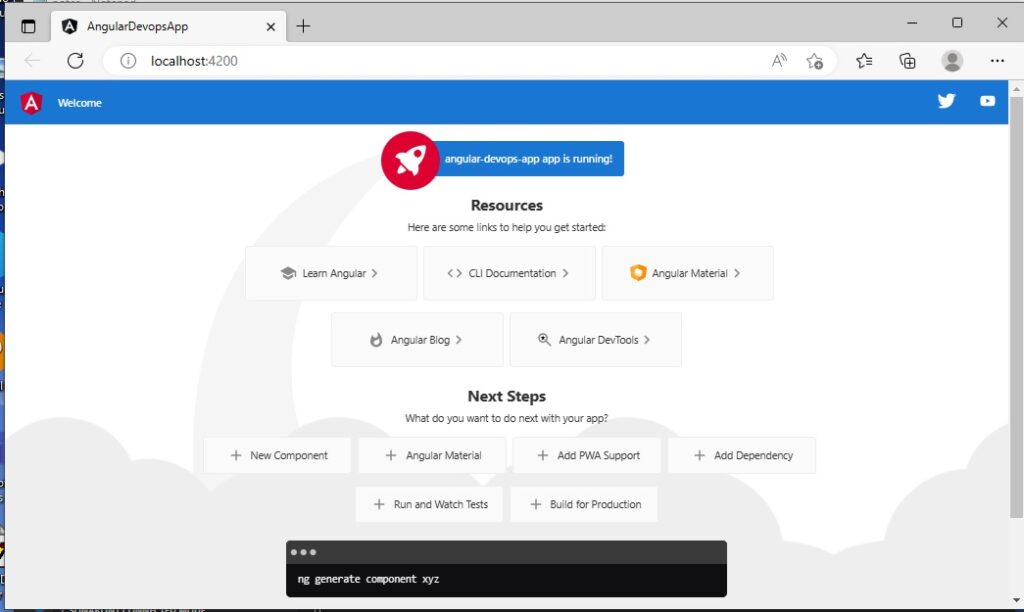
Below is the landing page for the basic Angular 15 application running locally:
In the next section, I will show how to push the local Angular application into an Azure DevOps remote repository.
Pushing Angular source into an Azure DevOps remote repository
We build the app to generate the distribution folder dist:
npm run build
Next, initialise the local Git repo for our application:
git init
Stage the application code to the local Git repository:
git add .
Commit the application code to the local Git repository:
git commit -m "Init version"
Open Azure DevOps. If not already within an existing project, create a new project under an existing organization. Next, we will create a new Git repository within the Azure DevOps project under Repositories -> Files.
Copy the repository URL from the Azure DevOps project.
Next, we will push the local Git repository into the Azure DevOps Project repository.
With the Azure DevOps remote repository URL, we will run the following commands from our development IDE to push the code into our Azure DevOps repository:
git remote add origin https://[organization]@dev.azure.com/[organization]/[project name]/_git/[project name]
git push -u origin --all
where:
[organization] is the name of your DevOps organization.
[project name] is the name of the project containing your source code repository.
Once the above commands are run, the source within our src subfolder and the contents of the dist subfolder will appear in the Azure DevOps repository root folder (containing our package.json file) and readily accessible from our pipelines:
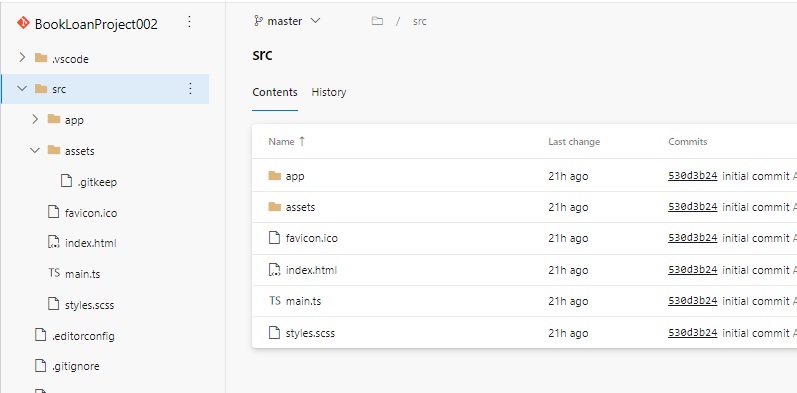
Provided you have allowed the dist folder to be committed to source control repository through updating git.ignore file, then followed up with running the npm build command in your Visual Studio IDE, you will see the dist folder in your Azure DevOps project Git repository:

To allow Git to allow changes to include the dist sub-folder in Git VCS, open the git.ignore file. Below you will see the section containing the compiled output folders:
# See http://help.github.com/ignore-files/ for more about ignoring files.
# Compiled output
/dist
/tmp
/out-tsc
/bazel-out

# Node
/node_modules
npm-debug.log
yarn-error.log
..
After removing the dist line, the compiled output exclusions will include:
# See http://help.github.com/ignore-files/ for more about ignoring files.
# Compiled output
/tmp
/out-tsc
/bazel-out

# Node
/node_modules
npm-debug.log
yarn-error.log
...
In the next section, I will show how to implement a build pipeline that is triggered on a commit from the local git source repository.
Implementation of a build pipeline triggered on a repository source commit
I will now show how to implement a build pipeline that triggers from commits on our main repository branch within Azure DevOps.
Open the repository pane under the project.
Create a new build pipeline.
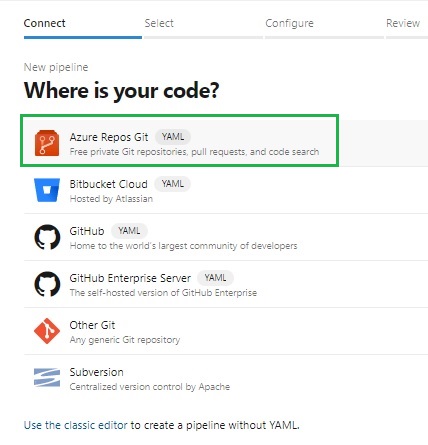
Under Connect, choose the Azure Repos Git YAML pipeline.
Under Select, choose the repository.

Under Configure, select Node.js with Angular.
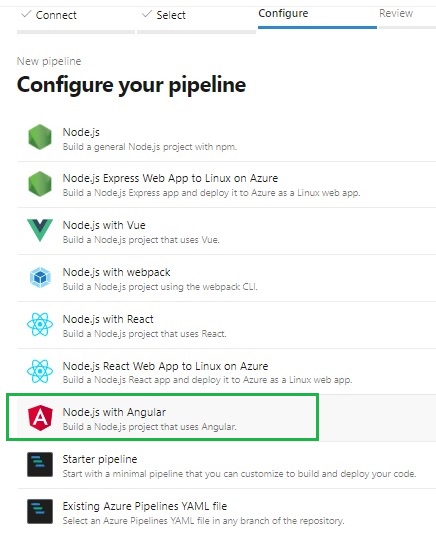
The next screen will include the following pipeline tasks to install Node and build our angular application:
Install Node.js
Npm install and build
The YAML script for our pipeline azure-pipelines.yml will be like this:
# Node.js with Angular
# Build a Node.js project that uses Angular.
# Add steps that analyze code, save build artifacts, deploy, and more:
# https://docs.microsoft.com/azure/devops/pipelines/languages/javascript

trigger:
- main

pool:
  vmImage: ubuntu-latest

steps:
- task: NodeTool@0
  inputs:
    versionSpec: '10.x'
  displayName: 'Install Node.js'

- script: |
    npm install -g @angular/cli
    npm install
    ng build --prod
  displayName: 'npm install and build'
In the next section, I will show how we can determine the Node.js version required for the pipeline build.
Determining the minimum Node.js version for the pipeline build
By default, the node version used in the Node installation task is 10.x. This value should be amended if the minimum node version needed to run your local version of Angular is higher. In this case, the version of Angular I have is 15, which needs a minimum Node version is 14.20. This is modified as shown:
steps:
- task: NodeTool@0
  inputs:
    versionSpec: '14.20.x'
  displayName: 'Install Node.js'
To determine the minimum Node version that is supported by our current Angular version, review the upgrade page for your version of Angular. In the upgrade guide for Angular 15, I paid particular attention to the following mention of the compatibility between Angular 15 and Node.js:
Angular v15 supports node.js versions: 14.20.x, 16.13.x and 18.10.x
In v15, Angular no longer supports node.js versions 14.[15-19].x or 16.[10-12].x.
The above tells us that version 14.19.x is not supported, so we can use Node.js version 14.20.x.
Notice the pipeline build will be triggered when the main branch has code change through a merge or pull request. The trigger branch is defined from the trigger section in the YAML script:
trigger:
- main
In the next section, I will show how to define a build Agent in the pipeline.
Defining a Microsoft-hosted build Agent or a Self-hosted build Agent
Currently, the default YAML script in the pipeline will use a Microsoft-hosted Agent for the builds. If you wish to use a self-hosted Agent for your builds, you can replace the pool: section with a declaration for your self-hosted Agent. In my case, I have set the pool name and used the agent server (left redacted, which you can fill in). In a previous post I show how to setup a self-hosted Agent for a continuous build pipeline.
pool:
  name: BookLoan-0101-pool
  demands:
   - agent.name -equals [SERVER AGENT NAME]
In the next section, I will show how to define a task to copy distributable artifacts from the agent build into the build artifacts staging folder.
Defining the Copy files pipeline task
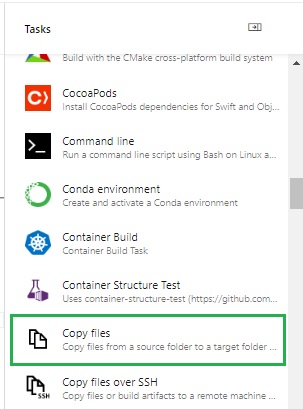
The next task will add to our YAML pipeline is a copy file task that will make a copy of the dist sub-folder, then copy the contents into the build artifacts staging directory. To do this, we can select the Copy files task from the task palette:
In the Copy Files parameters dialog, set the source and target folders as shown:
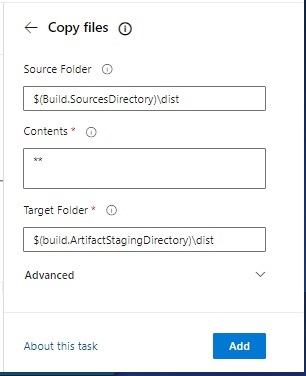
After adding the task to the pipeline, the YAML script will add the following Copy files script:
- task: CopyFiles@2
  inputs:
    SourceFolder: '$(Build.SourcesDirectory)\dist'
    Contents: '**'
    TargetFolder: '$(build.ArtifactStagingDirectory)\dist'
In the next section, I will show how to define a task to archive the distributable artifacts into a ZIP archive.
Defining the Archive files pipeline task
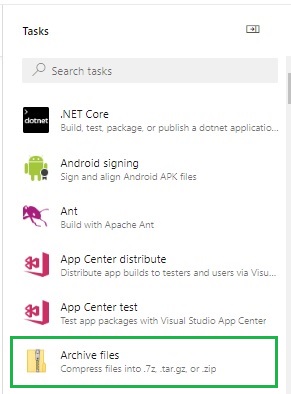
The next task we will require is to archive the dist folder contents. Select the Archive files task in the task palette as shown:
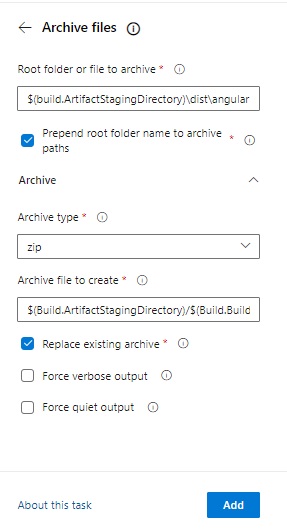
The create archive files task parameters can be entered as shown:
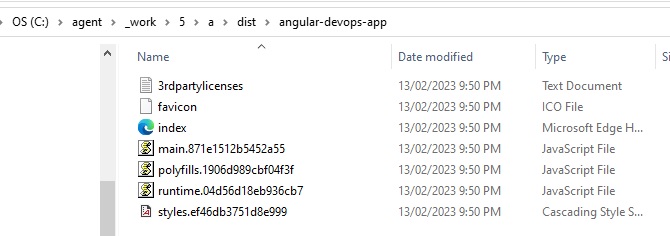
Note, the source folder parameter should contain the application sub-folder within the dist sub-folder as shown in the agent build source folder within our hosted agent (C:\agent\_work\5\s\dist\angular-devops-app):
The source folder for archiving is:
$(build.ArtifactStagingDirectory)\dist\angular-devops-app
Where: angular-devops-app is our application name.
The archive type is zip.
Leave the destination folder for the zipped archive with the provided default:
$(Build.ArtifactStagingDirectory)/$(Build.BuildId).zip
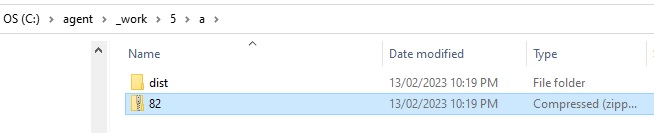
This just creates a ZIP archive with the build number. Below is an excerpt of the archive file in the agent build source folder:
The resulting YAML script for file archival added to our pipeline script is shown below:
- task: ArchiveFiles@2
  inputs:
    rootFolderOrFile: '$(build.ArtifactStagingDirectory)\dist\angular-devops-app'
    includeRootFolder: true
    archiveType: 'zip'
    archiveFile: '$(Build.ArtifactStagingDirectory)/$(Build.BuildId).zip'
    replaceExistingArchive: true
In the next section, I will show how to define a publish build artifacts pipeline task.
Defining the Publish build artifacts pipeline task
The next task we require is to publish and drop our archive into the build artifacts folder.
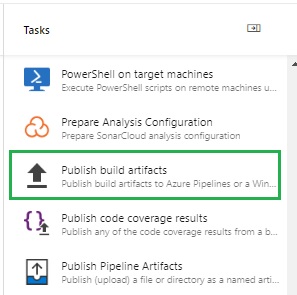
We do this by selecting the Publish build artifacts task from the task palette as shown:
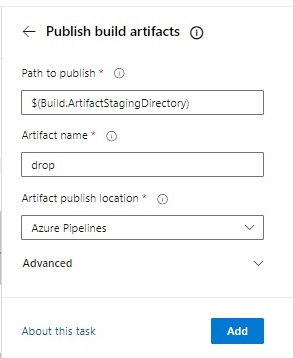
Accept the default parameters as shown:
After adding the task to the YAML pipeline, the following scripted task will be added to the pipeline script:
- task: PublishBuildArtifacts@1
  inputs:
    PathtoPublish: '$(Build.ArtifactStagingDirectory)'
    ArtifactName: 'drop'
    publishLocation: 'Container'
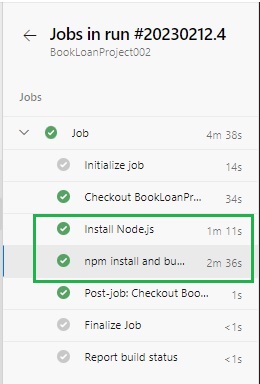
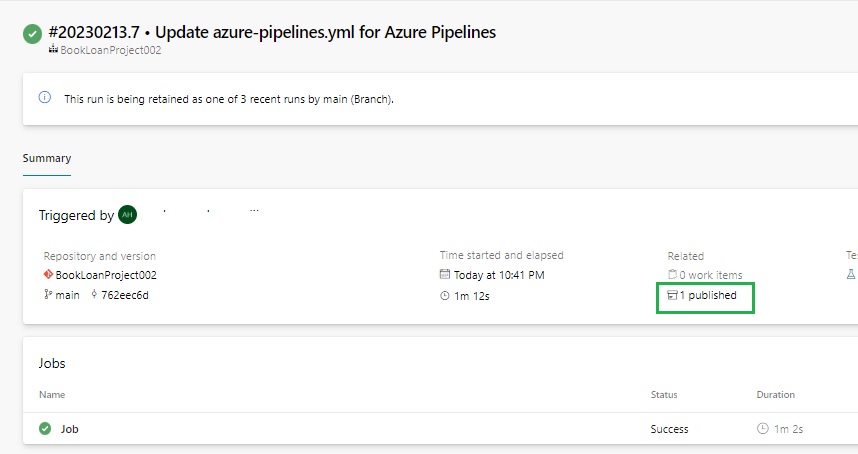
Save the pipeline. On completion, open the pipeline job and click on the published link within the job Summary:
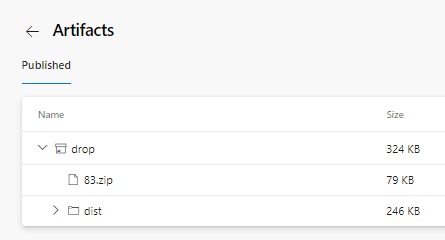
You will see the contents of the artifacts drop folder contain the ZIP file that contains the dist folder build output.
The resulting YAML pipeline should look like that shown below:
trigger:
- main

pool:
  name: BookLoan-0101-pool
  demands:
   - agent.name -equals [AGENT SERVER NAME]

steps:
- task: NodeTool@0

  inputs:
    versionSpec: '14.20.x'
  displayName: 'Install Node.js'

- script: |
    npm install -g @angular/cli
    npm install
    ng build --prod
  displayName: 'npm install and build'

- task: CopyFiles@2
  inputs:
    SourceFolder: '$(Build.SourcesDirectory)\dist'
    Contents: '**'
    TargetFolder: '$(build.ArtifactStagingDirectory)\dist'

- task: ArchiveFiles@2
  inputs:
    rootFolderOrFile: '$(build.ArtifactStagingDirectory)\dist\angular-devops-app'
    includeRootFolder: true
    archiveType: 'zip'
    archiveFile: '$(Build.ArtifactStagingDirectory)/$(Build.BuildId).zip'
    replaceExistingArchive: true

- task: PublishBuildArtifacts@1
  inputs:
    PathtoPublish: '$(Build.ArtifactStagingDirectory)'
    ArtifactName: 'drop'
    publishLocation: 'Container'
The first part of our CI-CD pipeline has been implemented. We can automatically build our Angular source after a Git source code commit to our remote Azure DevOps repository. We have also packaged our build output into an Azure artifact folder, ready for the next stage of our pipeline, which is the release pipeline, which will deploy our application build artifacts into a destination server.
In the next post I will show how to take the outputs from the continuous integration pipeline and build a continuous release (deployment) pipeline.
That is all for today’s post.
I hope you have found this post useful and informative.
Andrew Halil is a blogger, author and software developer with expertise of many areas in the information technology industry including full-stack web and native cloud based development, test driven development and Devops.