
Welcome to today’s post.
In today’s post I will show how to install and setup a self-hosted Agent within an Azure DevOps Service.
I will explain how a self-hosted Agent fits into the components within an Azure DevOps subscription.
A self-hosted Agent is not attached to projects within an Azure DevOps subscription, but to the organization under the subscription. The reason for this is that for any given project under the organization, we can select the Agent we wish to use for the building of the repository for the project. An Agent can be run either as an Azure hosted Agent or as a self-hosted Agent. So, any project repository within the organization can be built with any configured Agent, which is self-hosted or cloud-hosted (Microsoft Azure-hosted).
There are many business reasons why we may choose to build project repositories with self-hosted or Microsoft-hosted agents, and these are related to a combination of cost and speed.
A self-hosted Agent is created within an Azure DevOps pool. In Azure DevOps, an Agent runs under a pool within an Azure DevOps pipeline.
An Azure-hosted Agent runs within a pool with the compute resources (CPU, memory etc) of a managed VM hosted in an Azure subscription.
A self-hosted Agent runs on an on-premises server that has its compute resources managed outside of Azure.
The requirements for a self-hosted Agent are the following:
- PAT (Personal access token) in your Azure DevOps Organization.
- Azure DevOps Organization.
- Azure DevOps Pool.
- Machine to host the Agent.
Assuming you have an organization setup in an Azure DevOps account, I will first show how to create the PAT (Personal Access Token).
Creation of a PAT token
To create a PAT from Azure DevOps, you select the Security menu in your account pull-down menu.
In User Settings, create a new token in the Personal Access Tokens pane by clicking the New Token plus sign.

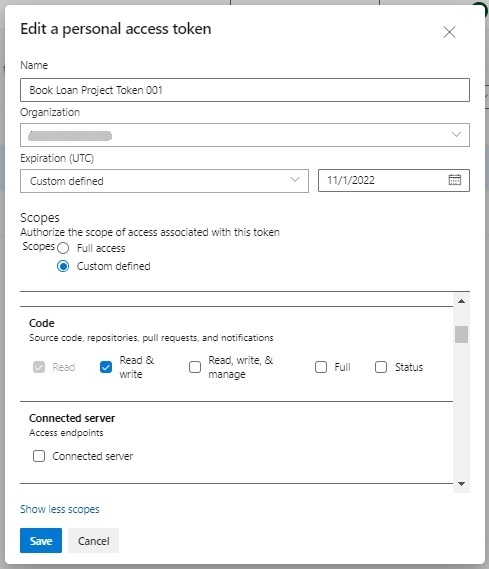
In the token creation dialog, enter the token name, organization (from the drop-down list), expiration date.
In the scopes, select Custom defined. In the scopes, for Code, select the Read & write option.
For Agent Pools, select Read & manage.
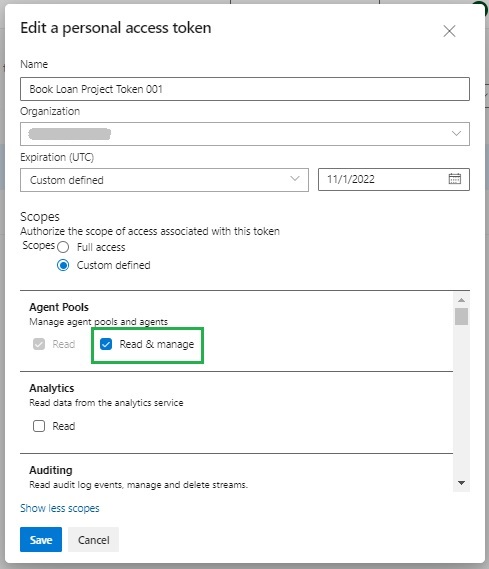
Save the token.
The next dialog will provide the token for you to copy and store to re-use when connecting services to your DevOps Organization.
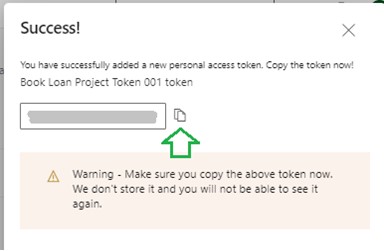
The token should be treated like a password as it provides access to your Azure DevOps projects and data. After the expiry date, a new token will need to be re-generated, and the Agent will need re-connection.
Creation of an Agent Pool
The next requirement is an Agent Pool.
This is created as follows:
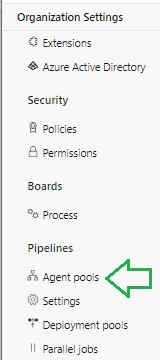
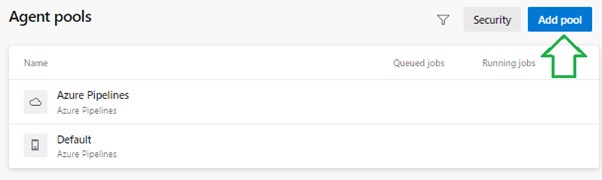
Under Organization Settings, under Pipelines select Agent Pools.
In the Agent pools pane, click on Add pool.
In the Add agent pool dialog, select the pool type.
This is either Self-hosted or an Azure virtual machine scale set. Select the Self-hosted option.

Give the new pool a name:
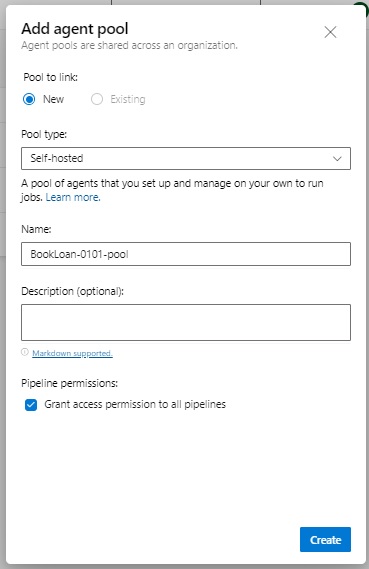
Create the Agent Pool.
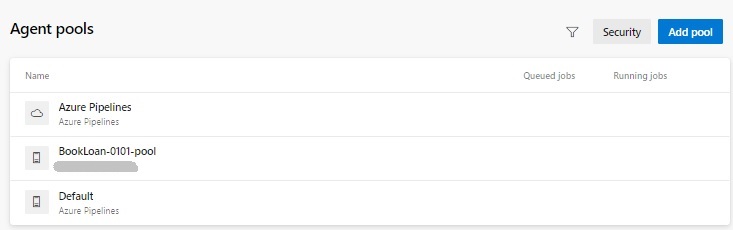
The new pool will show in the Agent pool pane.
Select the Agent Pool.
Click New Agent.

Copy the link from the Download the agent section in the instructions:
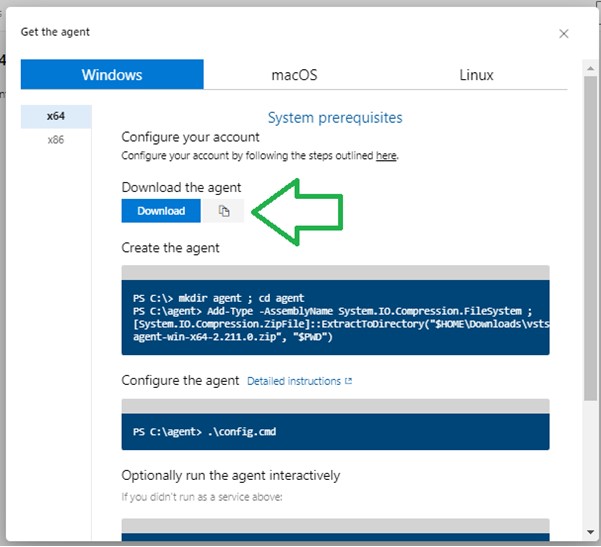
Browse to the agent link. It will download the self-hosted agent extraction ZIP file.
Follow the instructions (they are quite straightforward) to create the agent folder in the local machine (or VM), then extract the contents of the extract into the agent folder.
The agent can be run interactively or as a service. To run as a service, follow the instructions. As an interactive agent, just run the command:
config.cmd
If you have already configured the agent for a different project or pool, or the PAT has expired or been regenerated, you will need to re-configure the agent. To do this, you will need to run the configuration with the remove option as follows:
config.cmd remove
if the agent is run before configuration, then the diagnostic files in C:\agent\_diag\ shows there is no configuration:
[2022-10-08 06:51:37Z ERR  Terminal] WRITE ERROR: An error occurred: Not configured
[2022-10-08 06:51:37Z ERR  AgentProcess] System.InvalidOperationException: Not configured
   at Microsoft.VisualStudio.Services.Agent.Listener.Configuration.ConfigurationManager.LoadSettings()
   at Microsoft.VisualStudio.Services.Agent.Listener.Agent.ExecuteCommand(CommandSettings command)
   at Microsoft.VisualStudio.Services.Agent.Listener.Program.MainAsync(IHostContext context, String[] args)
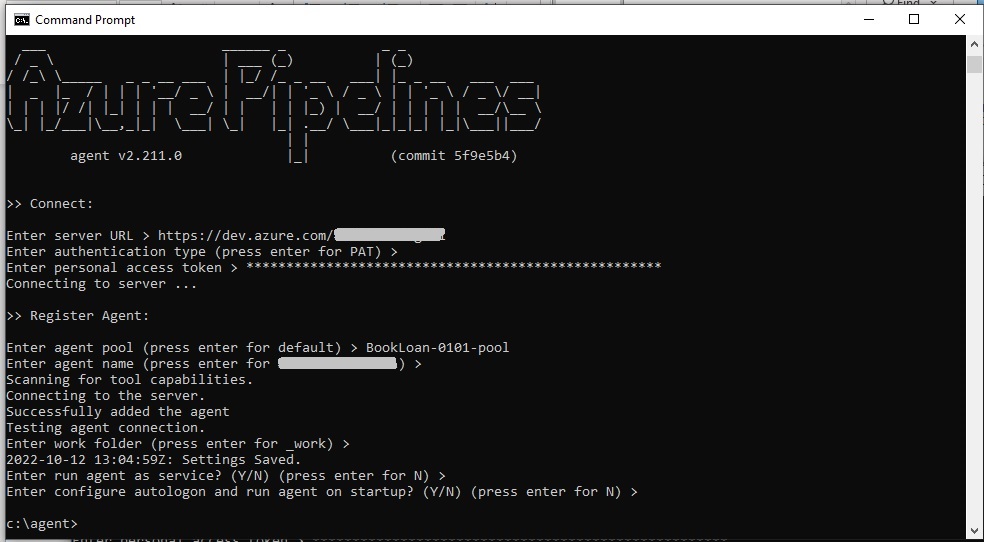
The command prompt for the Azure Pipelines Agent will then show and prompt for some settings:

Enter the parameters into each prompt. These include:
Server URL = https://dev.azure.com/[my-organization-name]
Authentication type = PAT [your PAT generated in the Azure DevOps security]
Agent Pool = BookLoan-0101-pool (or whatever your pool name is)
If you get the following error:
Connecting to server ...
Error reported in diagnostic logs. Please examine the log for more details.
    - c:\agent\_diag\Agent_20221012-121732-utc.log
Failed: Removing agent from the server
VS30063: You are not authorized to access https://dev.azure.com.
Then go back to the Azure DevOps and check the security scope for the PAT. I have experienced the authorization error and amended the PAT token to allow Read or Read & manage permissions on the Agent Pool as it was unchecked. You can host as many Agents within your server if you have enough resources. If you don’t have enough resources and wish to remove one Agent configuration, you can do so from Azure DevOps as shown:
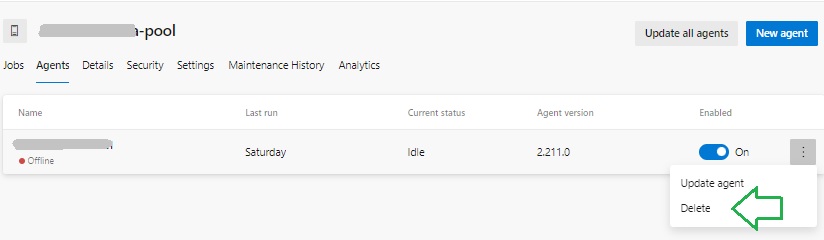
With the agent configuration you will see the prompts as shown:
Return to Azure DevOps Organization Settings | Pipelines | Agent Pools.
Select the Agent tab.
The new Agent will appear enabled and in an Offline state.

Now, try running the agent with the command:
Run.cmd
The Agent will then run idling in the CMD console.
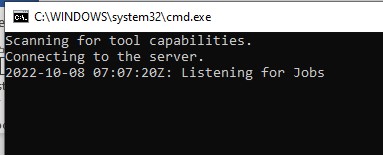
In the Agents pool pane, select the Agents tab. The agent will show as running and awaiting a job:

We now have a self-hosted Agent for our Azure DevOps Pool within our Organization.
With the Agent, we will be able to use our pool to run jobs within a triggered Pipeline that action many tasks including build the source within our repository or deploying artifacts from a pipeline.
In future posts I will refer to this post when constructing pipelines in Azure DevOps.
That is all for today’s post.
I hope you have found this post useful and informative.
Andrew Halil is a blogger, author and software developer with expertise of many areas in the information technology industry including full-stack web and native cloud based development, test driven development and Devops.

