
Welcome to today’s post.
In today’s post I will show how to install and integrate an Azure DevOps Pipeline into a GitHub repository and trigger a Continuous Integration build on a source code commit.
Recall that in a previous post I showed how you could build an Azure Pipeline with a Continuous Integration trigger on a branch within an Azure DevOps Git repository.
As you will be aware, there are some limitations on how many Azure DevOps Git repositories you can use in an organization within the free tier of an Azure DevOps Services account. With GitHub repositories, there are no limits, as you can integrate and run an unlimited number of GitHub repositories with Azure DevOps pipelines.
With each Azure DevOps pipeline, you can run it under a self-hosted Agent pool or a Microsoft-hosted Agent pool. With the Microsoft-hosted option, parallel jobs are part of a paid subscription. With the self-hosted option, you have at most one free parallel job with private projects and unlimited parallel jobs with public projects.
In this post, I will show how to integrate the GitHub pipeline with a self-hosted Agent. In a previous post I showed how to setup a self-hosted build Agent, which can be used if you do not have the parallel Azure Pipeline in your DevOps organization projects.
Prerequisites before Azure Pipelines Setup
Before we can make use of the Azure Pipelines with GitHub, we will need to have an existing GitHub repository, and ideally, setup and cloned within a development environment, such as Visual Studio.
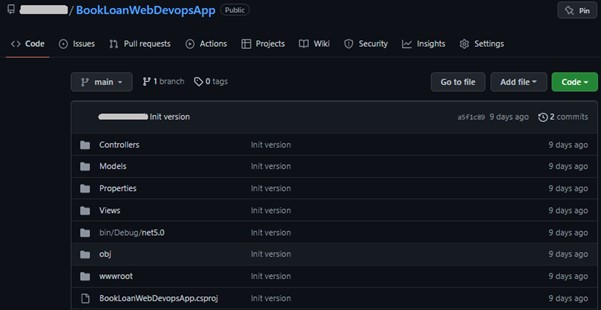
Below is a typical GitHub repository I have created with code imported from the local development environment:
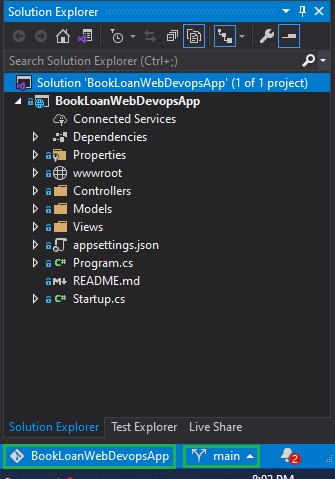
In the local Visual Studio development environment, the cloned GitHub source code repository and current branch pull-up menus will show in the status bar at the bottom of the IDE window. From the repository menu we can stage, commit, push code, branch, and create pull-requests to our repository.
Now that we have a code repository, I will show how to setup Azure DevOps within the GitHub repository in the next section.
Setup and Configuration of Azure Pipelines in a GitHub Account
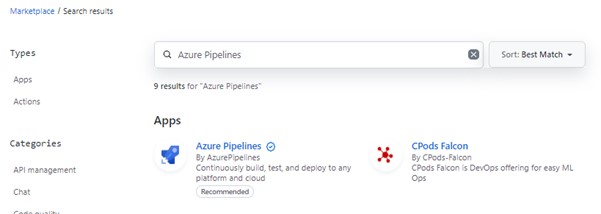
To setup Azure Pipelines in GitHub, you locate the Azure Pipelines application in GitHub Marketplace.
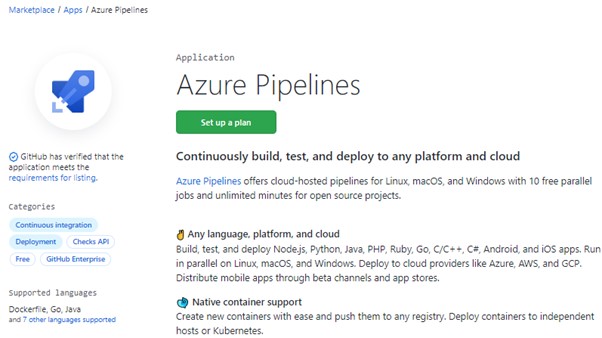
After selecting the Azure Pipelines application, you will see the intro page which gives an overview:
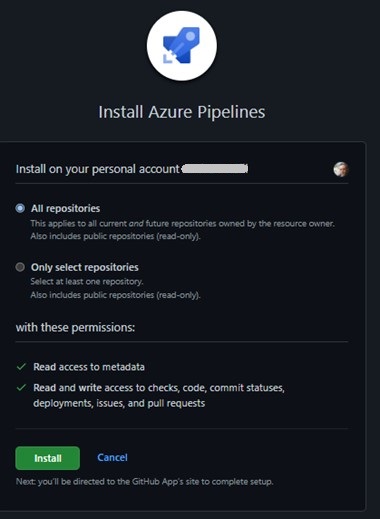
Once selected, you then install Azure Pipelines. For GitHub accounts, it is free for public and private repositories. This gives you an opportunity to evaluate it publicly before introducing it as a private build and deployment pipeline later for commercial uses.

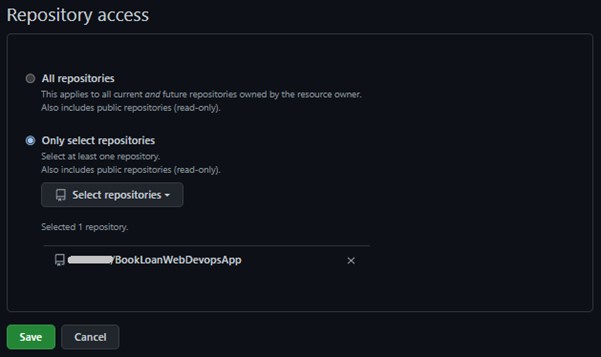
The installation dialog will give you the option of including all repositories or be selective on which repositories to include.
Next, select any existing repositories for access to Azure Pipelines.
Any repositories included in the pipeline access can be added or removed in future by returning to the GitHub profile settings, then clicking on Applications under Integrations.
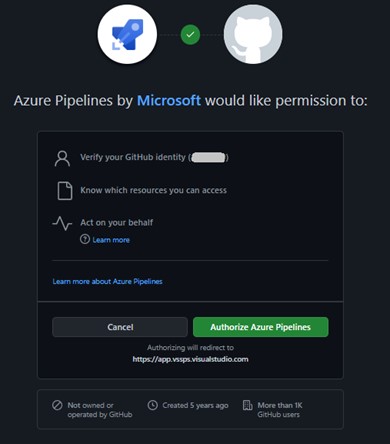
You will need to authorize Azure DevOps Pipelines to access your GitHub repositories.
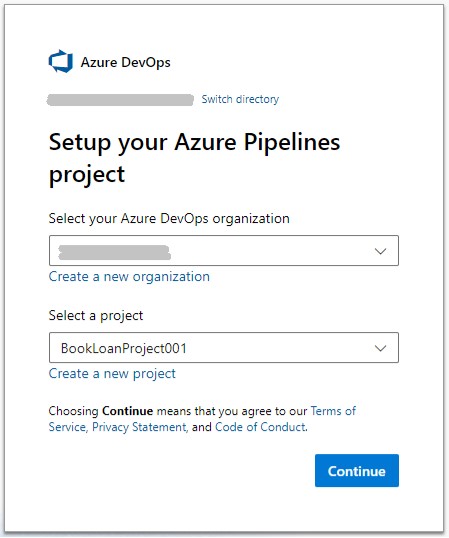
Once saved, you will be taken to authenticate into Azure DevOps.
In the sign-in, enter the organization and project and continue.
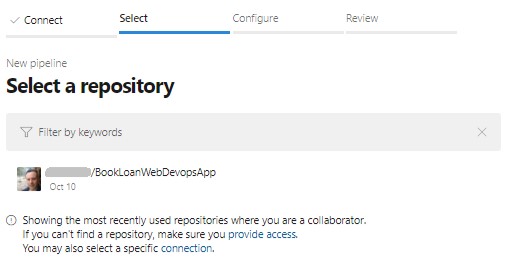
You will be taken to the new pipelines wizard and shown the GitHub repositories selected for pipeline access. Select one of the repositories.
In the configure pipeline, select the pipeline template to use.
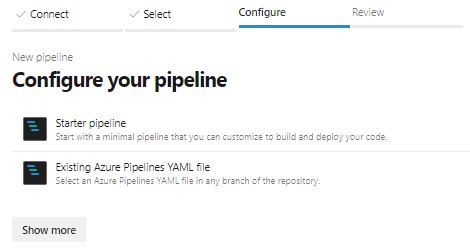
Expand Show more and select the pipeline template compatible with our GitHub source, which is the .NET Core pipeline.

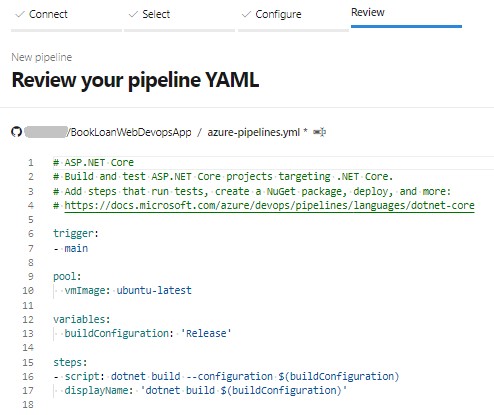
After selecting the pipeline template, you will be taken to the default pipeline YAML. The pipeline jobs will trigger on a commit to the main branch. The Agent pool defined in the script has a default image, which is one of the virtual machine images under a Microsoft-hosted agent.
At this juncture, we could decide to use a Microsoft-hosted Agent in our pipeline or a self-hosted one.
When you run the pipeline with the default Microsoft-hosted ubuntu agent, the following error will appear if you have not purchased parallel pipeline jobs in your Azure DevOps account:

The error message is shown is full below:
##[error]No hosted parallelism has been purchased or granted. To request a free parallelism grant, please fill out the following form https://aka.ms/azpipelines-parallelism-request
Pool: Azure Pipelines
Image: ubuntu-latest
Started: Tue at 10:17 PM
Duration: 1d 21h 33m
In the evaluation stage of our project, we may experience the above error. One way around this is to use a self-hosted Agent with a custom Agent pool. In a previous post I showed how to create a custom Agent pool with a self-hosted Agent. The custom Agent pool is then included in the pipeline’s YAML script.
To override the pool with one of an alternative custom pool, which a self-hosted Agent runs under, I can replace the pool section with the following:
pool:
  name: BookLoan-0101-pool
  demands:
  - msbuild
  - visualstudio
  - vstest
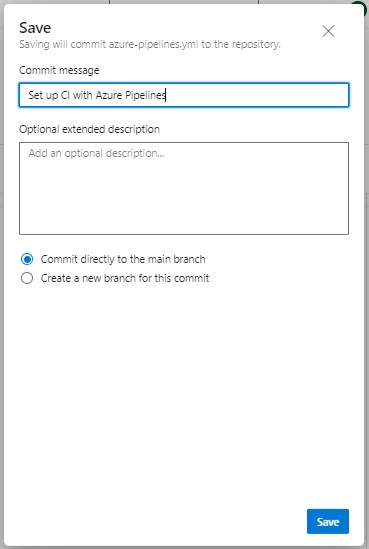
Where BookLoan-0101-pool is an Agent pool within a self-hosted Agent. Save the pipeline.
On saving, the pipeline will Commit to the main branch.
We can confirm our committed YAML script is in the main branch of our GitHub repository, which we can check out in future to make changes to our pipeline and re-use the script to create other pipelines in the repository.

In the next section I will show how to trigger the source code rebuild within the pipeline.
Triggering the Source Code Build within the Azure Pipeline
Commit any changes to the repository from Visual Studio.
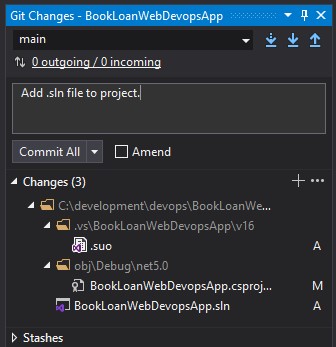
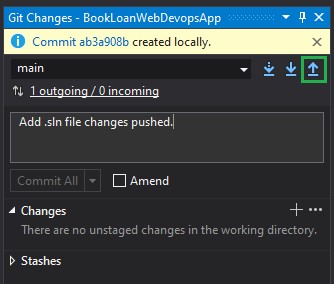
Push changes to the repository.
Create the pull request.

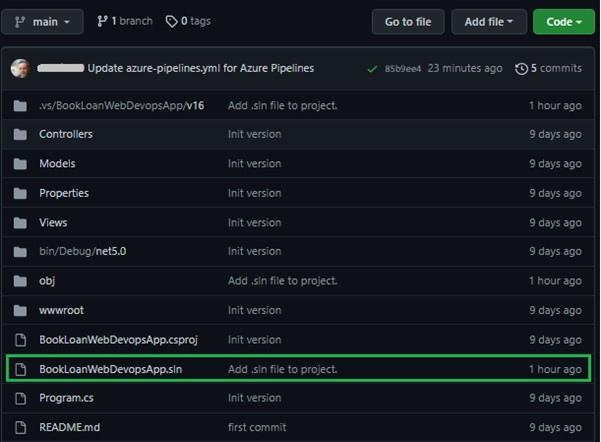
The change we have pushed is updated in the GitHub repository. Note that since our repository is external to Azure DevOps, the changes do not show there.
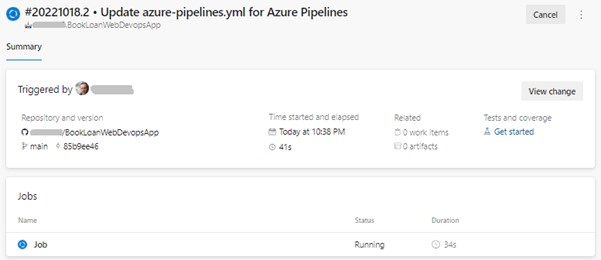
As soon as the changes have been pushed into GitHub, the pipeline will trigger the build of the source. Return to the Azure DevOps pipeline.
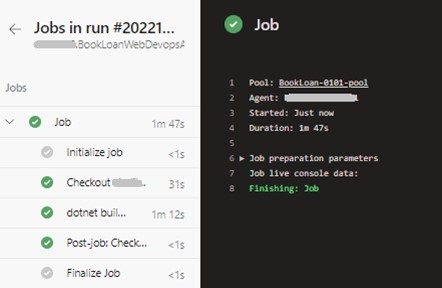
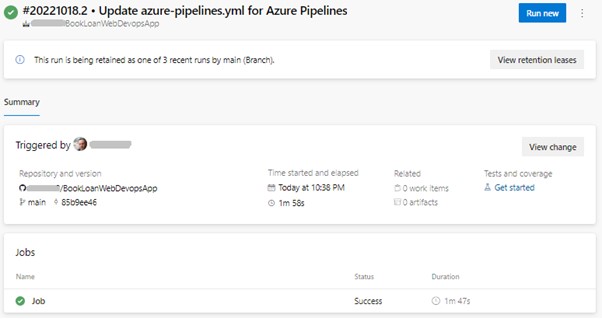
If our self-hosted agent is offline, the job will continue to run until the agent comes online or the pipeline times out.
Once we bring the agent online, the pipeline job tasks will run to completion. Below is a successful job run.
We have now achieved the same outcome with a GitHub repository that we did for an Azure DevOps Git repository.
The flexibility is there for us to choose between Azure Git Repositories or GitHub repositories, and of course each option comes with its own advantages. For the open-source developer the GitHub repository is ideal with a limited number of pipelines, and for enterprises with closed source, Azure repositories are ideal with the options for Azure Pipeline parallel jobs yielding additional computing power for multiple projects and larger teams.
In future I will return to Azure Pipelines with GitHub and explore other ways to configure the pipeline during Continuous Integration.
That is all for today’s post. I hope you have found this post useful and informative.
Andrew Halil is a blogger, author and software developer with expertise of many areas in the information technology industry including full-stack web and native cloud based development, test driven development and Devops.

