
Welcome to today’s post.
In today’s post I will show how to integrate unit tests from a .NET Core web application into an Azure DevOps Continuous Integration build pipeline.
The purpose behind creating a unit test project and integrating it into our build pipeline is to ensure that our application build is successful only when all unit tests are passed successfully. In addition, having our unit test output the number of successful and failed tests into build pipeline summary helps developers, DevOps engineers, and test engineers understand what caused our pipeline to fail and report this back to the development team through notifications or reports. The unit test task is just one of potentially many build tasks including source code quality scanning and source code vulnerability scans that require passing before a release pipeline can be triggered.
In a previous post I showed how to construct continuous integration jobs using Azure DevOps pipeline designer tasks that triggers a build when source code from a .NET Core web application from a local Git repository is changed, committed, and pushed into our remote Azure DevOps Git repository.
In that post I showed how to create a useful pipeline task, which was to restore NuGet packages before running the build task. In today’s post, I will create another useful pipeline task, which is to run unit tests from the .NET Core Test project within our .NET Core solution.
Correctly Structuring our Project Source Folders
Before we can integrate a test pipeline task into our build that will run the tests successfully from our test project, we will need to structure our .NET Core solution within Visual Studio so that the unit tests within the Test project that is within our solution are visible to the Azure DevOps test task.
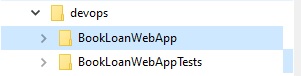
After we add a unit test project to our .NET Core solution, the default folder is created at the same folder level as the project in our main solution. This just means that both application and unit test would not be visible to each other within the Git repository, so both would need to be in separate Git repositories unless they were both initialized within a Git repository in a parent directory. Below is the default folder structure:
To remediate this situation, we do the following:
- Create a new Test folder within the project folder of the main solution.
- Move the unit test project into the Test folder.
- Change the folder reference to the unit test project in the main solution file to reference the new unit test project location under the Test subfolder.
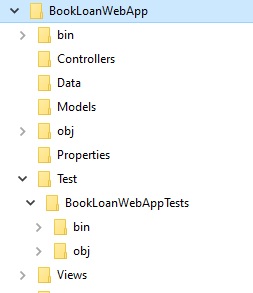
Below is the folder structure after moving the unit test project under a new Test subfolder:
Remediation of the Unit Test Project Configuration File
In the solution file following alteration will show the unit test now referencing the Test subfolder:
Project("{FAE04EC0-301F-11D3-BF4B-00C04F79EFBC}") = "BookLoanWebAppTests", "..\BookLoanWebAppTests\BookLoanWebAppTests.csproj", "{9D98F364-4A0E-44DC-9F2F-68B7625422E9}"
Project("{FAE04EC0-301F-11D3-BF4B-00C04F79EFBC}") = "BookLoanWebAppTests", "Test\BookLoanWebAppTests\BookLoanWebAppTests.csproj", "{9D98F364-4A0E-44DC-9F2F-68B7625422E9}"
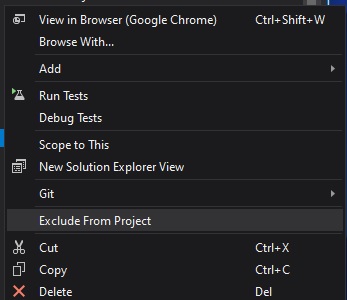
At this point, the solution will not build because the source within the Test subfolder will cause duplicate symbols that interfere with symbols within the main .NET Core project during compilation. To remediate this, select the Test subfolder within the solution explorer and select the Exclude From Project action as shown:
Following this, the .csproj project file of the main solution will contain the following actions to prevent the sub folder from being Compiled or from having content visible from the main application build:
<Project Sdk="Microsoft.NET.Sdk.Web">
  <PropertyGroup>
    <TargetFramework>net5.0</TargetFramework>
  </PropertyGroup>
  <ItemGroup>
    <Compile Remove="Test\**" />
    <Content Remove="Test\**" />
    <EmbeddedResource Remove="Test\**" />
    <None Remove="Test\**" />
  </ItemGroup>
  <ItemGroup>
    <PackageReference Include="Microsoft.VisualStudio.Web.CodeGeneration.Design" Version="5.0.2" />
  </ItemGroup>
</Project>
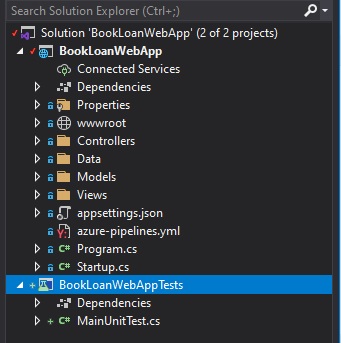
The projects within the solution explorer will look as shown, with the unit test project now being detected with visibility to changes within the Git repository:
The solution and both projects can now be built successfully without compiler errors.
Testing the Build and Execution of the Unit Test Project in the Pipeline
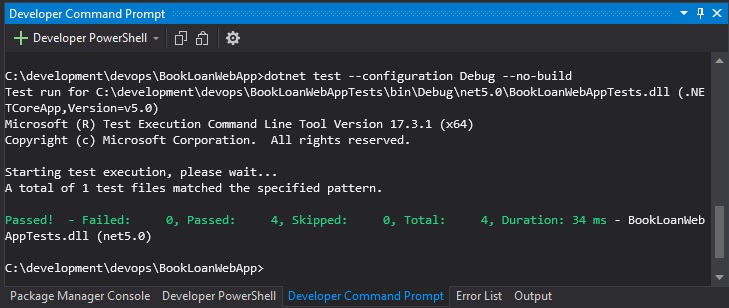
Next, add some unit tests into the unit test source file (I have named it MainUnitTest.cs). Ensure the solution with unit tests can be built without errors and the unit tests can run. Below is a quick run of the unit tests in the developer command prompt:
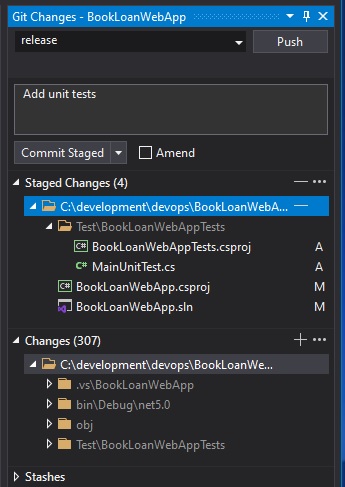
Next, commit and push the changes to the unit test project and main .Net Core project into the DevOps repository:
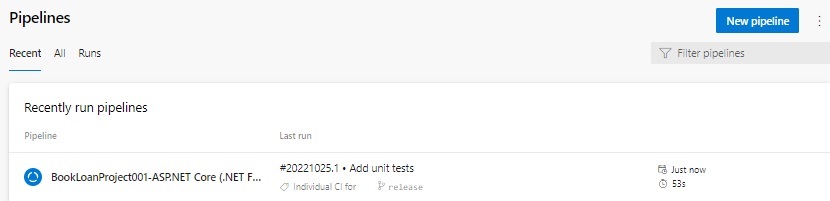
In the existing pipeline we created for the continuous build in Azure DevOps, we will attempt to run the pipeline and get the unit tests to run.
A view of the pipeline in progress is shown below:
In our classic pipeline, there is an error that I have experienced during the Build solution task:
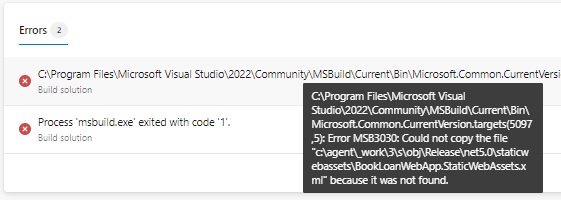
The error is shown below:
##[error]C:\Program Files\Microsoft Visual Studio\2022\Community\MSBuild\Current\Bin\
Microsoft.Common.CurrentVersion.targets(5097,5): Error MSB3030: Could not copy the file
"c:\agent\_work\3\s\obj\Release\net5.0\staticwebassets\BookLoanWebApp.StaticWebAssets.xml" because it was not found.
In various forums I have noticed the error is likely due to old binaries from a previous version of .NET framework within the agent _work subfolders that cannot be picked up by MSBuild from a newer version of .NET framework.
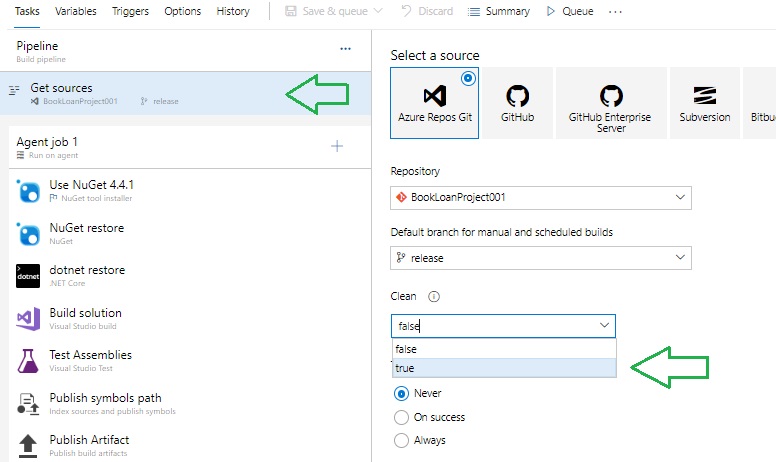
To remediate the above error, we can run a clean on the agent build folders in the Get Sources pipeline task as shown by selecting True for the Clean property:
In our classic pipeline, there is a task following the Build solution task, named Test Assemblies, which gives me the following warning:
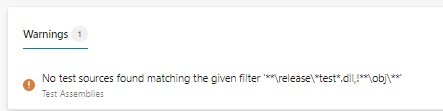
Our unit test project DLL is not being picked up by the Test Assemblies task, so we can create a task that can run our unit tests. I will show how this is done in the next section.
Creating the Unit Test Build Pipeline Task
To implement a build task that runs the unit tests within the test project, we do this as follows:
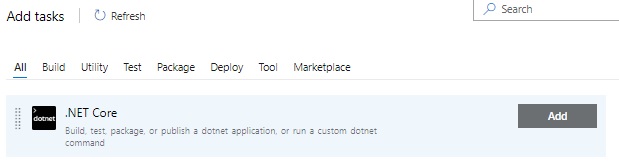
In our pipeline, we add a .NET Core task:
In the task, select Test from command drop down list. In the Path to project(s) field, enter the following wildcard path:
Test/**/*.csproj
The task will look as shown:
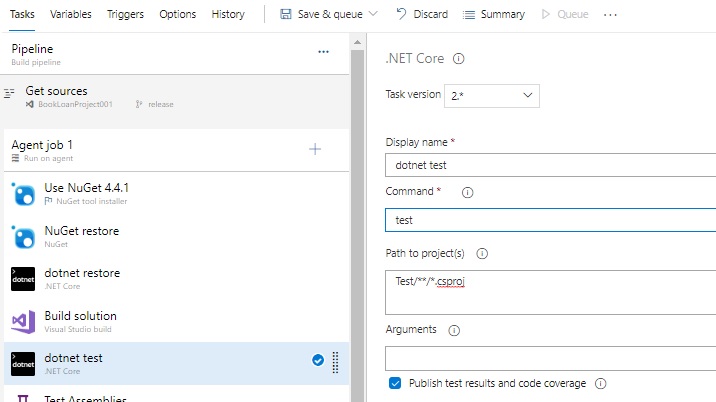
The folder wildcard path should now be able to locate the project configuration file of our unit test project, load it and run our unit tests.
Move the task, now named dotnet test up to just after the Build solution task.
Now save the pipeline. Run the pipeline manually.
We’ll see how the test run goes …
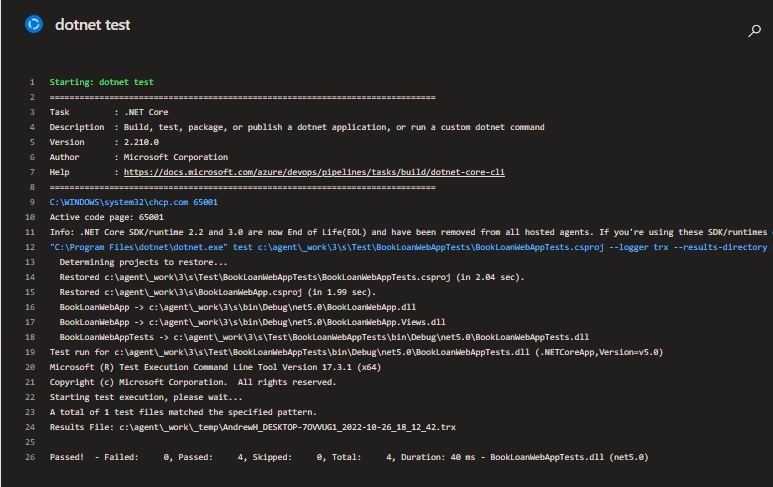
During the run of the pipeline test task, we can see at the bottom of the test log the total number of tests, the number passed, and the number that have failed:
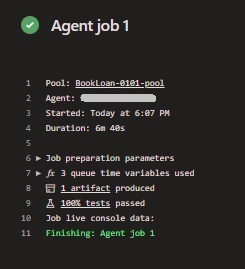
In the pipeline agent job summary, we will see a summary of the completed pipeline tasks, with the duration, artifacts, and test pass percentage:
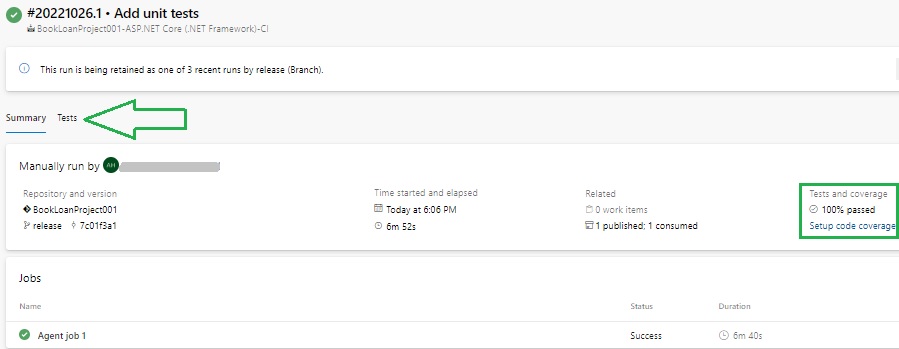
We then select the pipeline run summary by selecting the most recent pipeline run. What we notice here is that a Tests tab now shows, and to the right, Tests and coverage now shows with the test passing percentage:
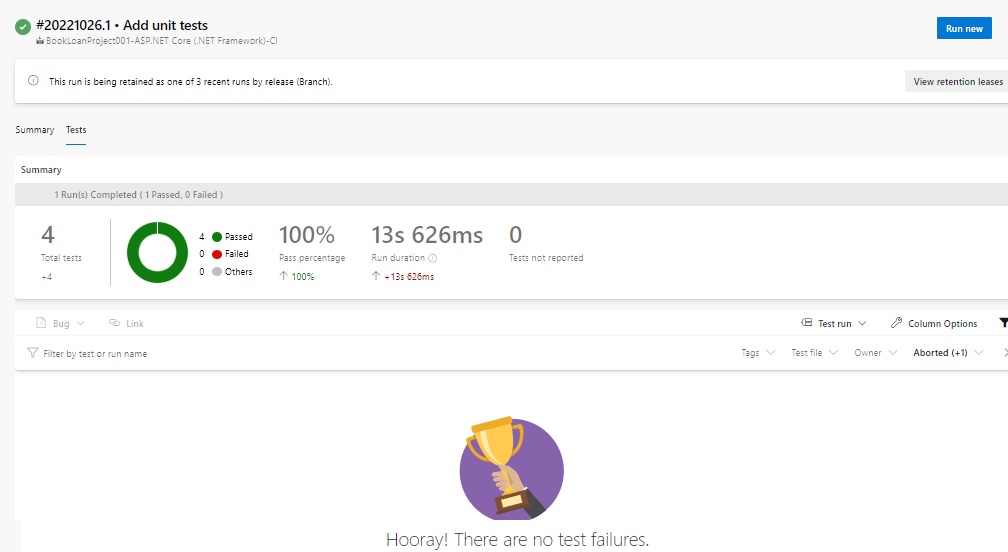
Clicking on the Tests tab will now show the unit test summary with a chart and test success rate.
We have seen how to integrate our unit tests into an Azure DevOps continuous build pipeline and enable a basic unit test run status report when our pipeline completes.
We could also amend our pipeline to send notifications to the team to report on a failed test task and prevent triggering any deployment of our artifacts into a release folder.
We can also include code coverage report into our pipeline to analyze test code coverage.
That is all for today’s post.
I hope that you have found this post useful and informative.
Andrew Halil is a blogger, author and software developer with expertise of many areas in the information technology industry including full-stack web and native cloud based development, test driven development and Devops.

