
Welcome to today’s post.
In today’s post I will show how to deploy artifacts from an Azure DevOps release pipeline into an Azure App Service web application.
In a previous post I showed how to deploy artifacts from a release pipeline into an on-premises web server from a self-hosted Azure DevOps release Agent.
I will show a different and more realistic scenario where we have an additional release stage where we include a deployment of a web application into a production stage, which will include deploying the build artifacts into Azure.
I will go through the initial scenario involving pre-deployment gates with a deployment of a web application into Azure. In a future post I may explore the multi-environment deployment scenario.
A deployment pipeline stage that deploys a web application into Azure can be created as an additional production stage within a release pipeline that can include other pipeline stages such as development, test, UAT etc.
In the following scenario I will just create an additional Production deployment stage to my existing Development deployment stage.
Regardless of what we have defined within our Development stage, we can set our Production stage with a manual deployment trigger to ensure we can cannot run it unless we manually action the deployment.
Creating a Deployment Stage from the Release Pipeline
If you are creating this from a new release pipeline, then you can create the initial stage by clicking on the Add button in the top of the Stages box. If you have an existing stage, you can hover the mouse under the Development stage and click on the Add button:

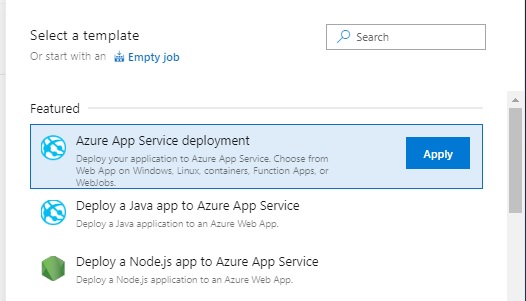
Select a template. As we are deploying to a web application, select Azure App Service deployment.
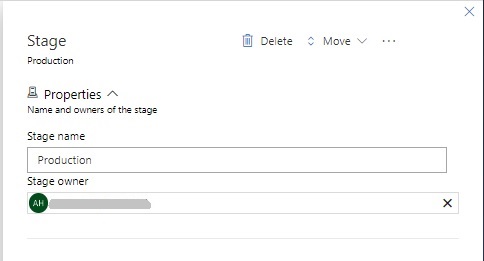
Next, we name the stage and select the stage owner.
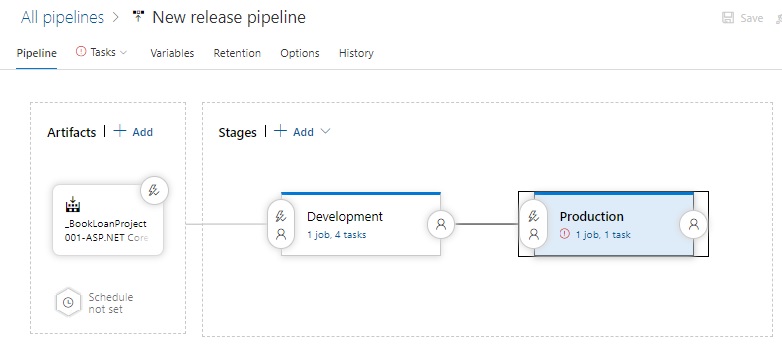
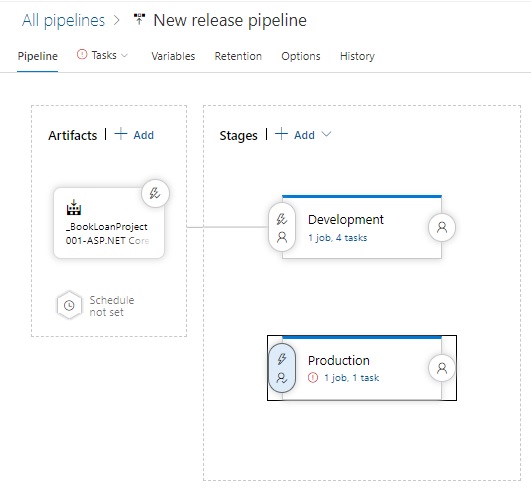
Our release pipeline stages will look as shown with the Development and Production stages connected. By default any added stage is connected to the previous stage. In this case, the Production stage deployment would by default be executed when the Development stage deployment completes.
In the next section, I will show how to prevent the Production stage from being automatically deployed.
Manually Triggering the Production Deployment Stage
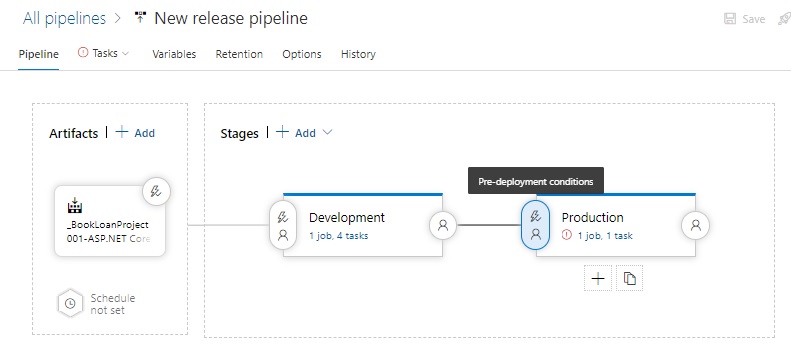
To prevent the Production stage from automatically deploying, we will need to override the pre-deployment condition of the Production stage. The pre-deployment condition icon is shown in the highlighted oval as shown:
Next, click on the pre-deployment condition. You will see the following triggers where I have selected the manual trigger:
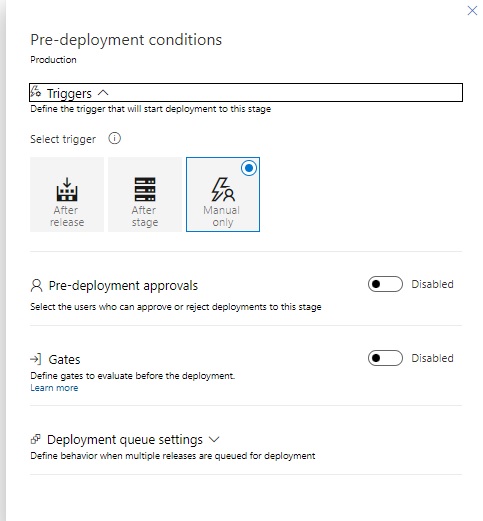
I will defer explaining each of the Production stage deployment pre-conditions to a future post on using pre-deployment gates. For this exercise set it to manual only.
Leave the Pre-deployment approval condition as disabled.
After setting our pre-deployment condition to a Manual trigger, the release pipeline stage diagram will look as shown, with the Development and Production stages disconnected.
At this point, the Production stage does not have the application deployment task configured. This is what I will show in the next section.
Configuring the App Service Web Deployment Stage Task
Defining the Azure App Service web application deployment stage task as done as follows.
Click on the Production stage. The following pipeline deployment process definition for the stage will show.
Any Azure subscriptions linked to your Azure DevOps organization will show in the drop-down list for Azure subscription. Once selected, you will see the Authorize button enabled.
Click on Authorize and enter your credentials. Once authorized, an Azure service principal will be created and added to the Contributor role that has access to the Azure resources.
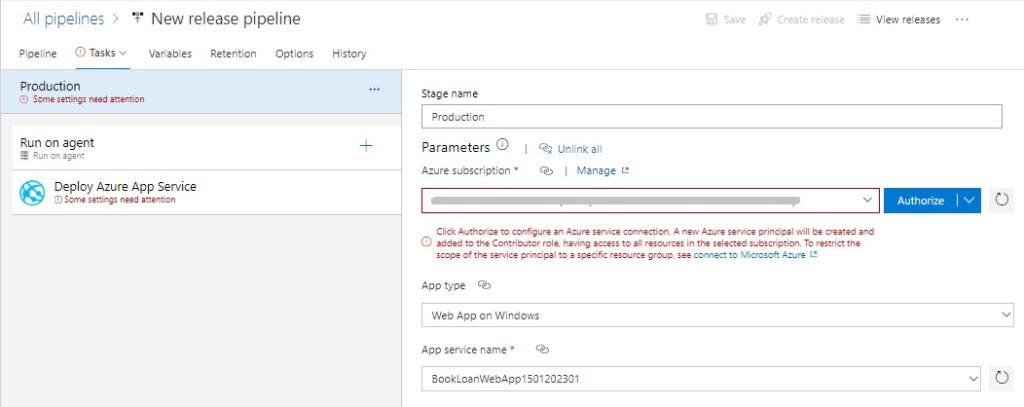
In the App type drop down list, select Web App on Windows.
Under the App service type drop-down list, here we select the Azure App Service web application.

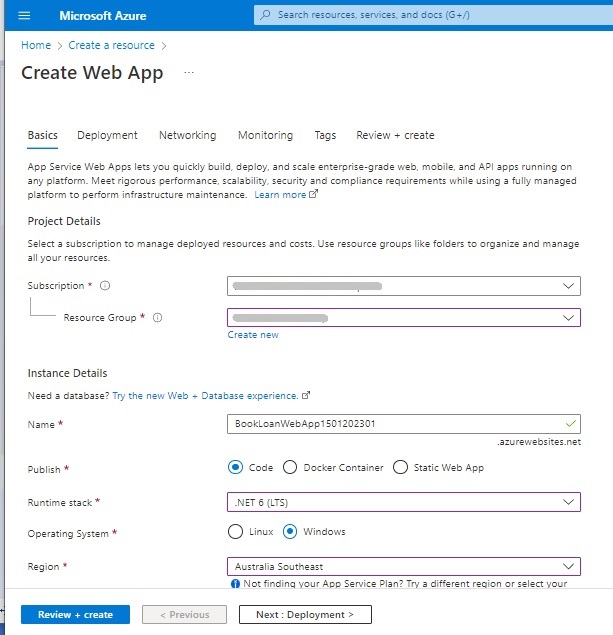
If we don’t have an existing web application under our subscription, we can create a Web application to contain our deployed application artifacts from the Azure Portal.
To define the Agent properties of the stage, click on the Run on agent task and select your Agent pool. You can either use one of the Microsoft hosted agents or one of your own self-hosted Agents.
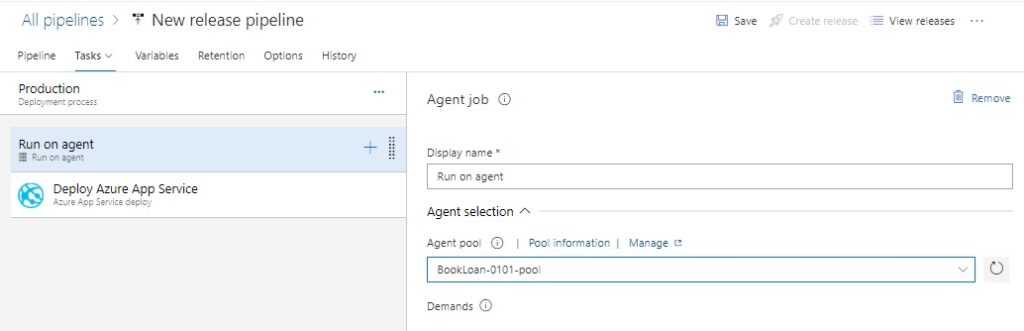
In the Deploy Azure App Service job task, you will see the Azure subscription and App Service name filled in from the deployment process definition header.
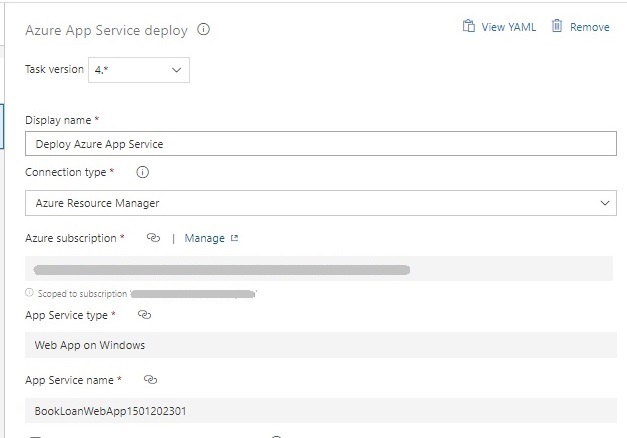
With the Connection type drop down list, we have two choices, with the Azure Resource Manager the default choice. A Publish Profile is a file that is generated by Visual Studio (versions 2019 and greater) when we publish the project to a destination folder within a solution. A .pubxml file that is created is stored in a \publish sub-folder within the \bin output folder.

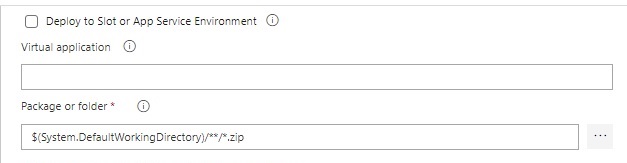
The remaining properties are defaulted. One important property is the Package or folder property which stores the compressed ZIP file of the artifacts that will be copied into the destination folder on the web site and decompressed.
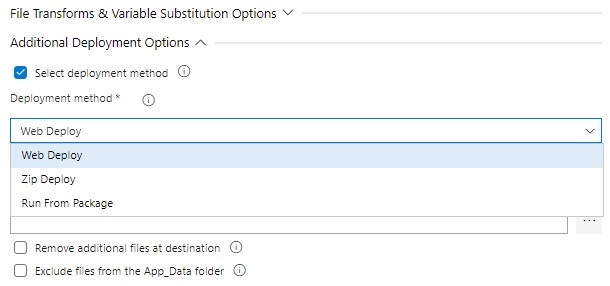
Another option is the Additional Deployment Options. Expanding this shows the deployment method check box. Enabling this gives three options (where Web Deploy is the default for a publish profile connection type):
In the next section, I will show how to start the pipeline by creating a new pipeline release instance.
Creating a New Pipeline Release Instance
Within the release pipeline designer, create a new release instance.
In the dialog that shows, you will see the Production stage (and any other stages in the release pipeline). For the purposes of this exercise, you can mark other stages (such as Development) as manually triggered and just run the Production stage.
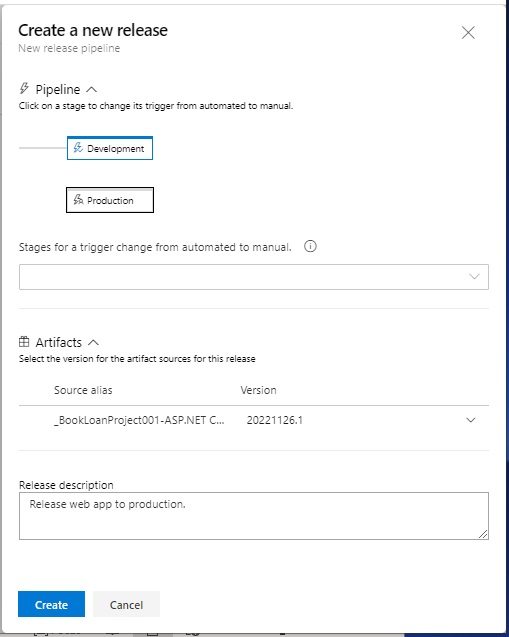
Once instantiated, the release instance flow will show the Production instance in a suspended Not deployed state. Click on the Deploy button.

The deploy action will present a dialog. Enter a comment then hit the Deploy button.

Now open Releases from the project menu.
We will next see the deployment job start running on our release agent.
If all goes well, you will see the deployment pipeline complete as shown in the log for the release pipeline instance:
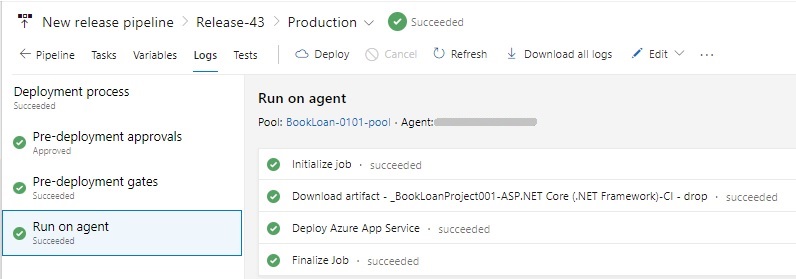
Once the job has completed without errors, we can be sure it was deployed into our production environment.
We can test this by browsing to the web application as it should show up as expected:

The steps I have provided in the production deployment of our web application using the Azure DevOps release pipeline has shown us how straightforward it is to deploy ASP.NET Core web applications into an Azure App Service production environment from a pipeline deployment stage.
In a future post I will expand on the above by showing how to use pre-deployment gates within our release pipeline stage to add restrictions on our deployment into a production environment.
That is all for today’s post.
I hope you have found this post useful and informative.
Andrew Halil is a blogger, author and software developer with expertise of many areas in the information technology industry including full-stack web and native cloud based development, test driven development and Devops.

