
Welcome to today’s post.
In today’s post I will show how to use deployment gates to control the deployment of artifacts from an Azure DevOps release pipeline.
In a previous post I showed how to deploy artifacts from a release pipeline into an on-premises web server from a self-hosted Azure DevOps release Agent. In that post we deployed the artifacts from a release stage without any additional conditions to control the deployment based on an automatic rule or a manual trigger. In this post I will show how to include additional rules to control deployment release conditions.
I will show a more realistic real-world scenario where we have an additional release stage where we include a deployment of a web application into a production stage, which will include deploying the build artifacts into Azure. In another previous post I showed how to deploy artifacts from a release pipeline into an Azure App Service web application. We will make use of the Azure deployment in the ensuing tasks.
I will show the following tasks:
- Create a new production stage in the release pipeline,
- Configure the pre-deployment conditions of the new stage to allow only a manual approval.
- Add an additional pre-deployment condition deployment gate to allow the deployment when all issues in the Azure Board are in a completed stage.
Why do we use Deployment Gates?
You would ask the valid question, “why don’t we just deploy to Azure whenever the release build completes?”. In many development projects, we wouldn’t allow deploy into production without at least some restrictions, such as ensuring all functional tests are completed, project board issues are resolved for the current sprint. We can also restrict deployment through manual approval through one of the members of the project team, such as project stakeholder (project manager, development manager etc.)
On the other hand, there are scenarios where we can allow deployment into Azure without any pre-deployment checks. These can include those projects where we are required to run the functional tests in an Azure web application within a deployment slot in the App Service. Once these tests pass, we can approve deployment into a UAT or Production slot. If the tests fail, then we could remove the deployed web application in the pre-production deployment slot. In this scenario, we would need to be more aware of the costs of testing our application in the cloud environment and be ready to remove resources when testing is completed during a sprint and only include resources in production.
I will go through the initial scenario involving pre-deployment gates with a deployment of a web application into Azure. In a future post I may explore the multi-environment deployment scenario.
Creating a Production Deployment Stage
I will first show how to create the release pipeline with a Production stage.
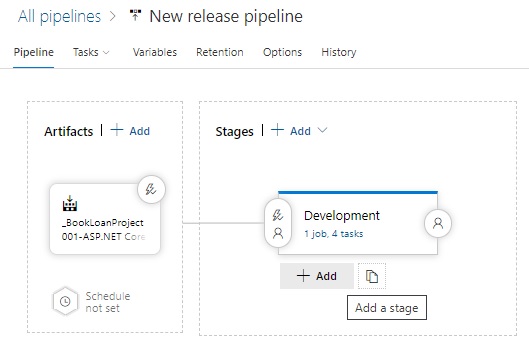
I already have an existing Development stage that has already completed some unit test tasks before running its own deployment into an existing on-premises development environment. First, hover the mouse under the Development stage and click on the Add button:
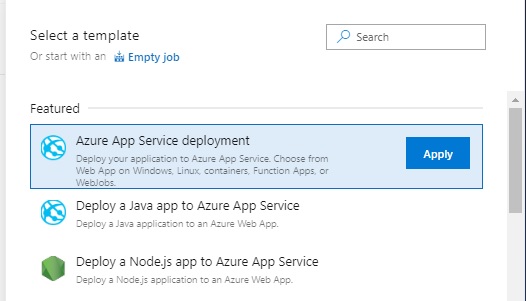
Select a template. As we are deploying to a web application, select Azure App Service deployment.
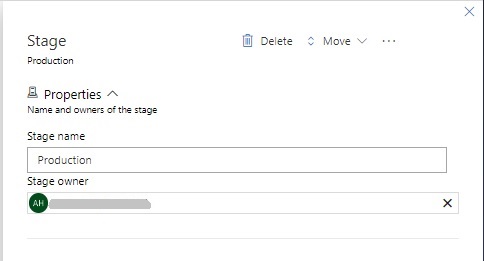
Next, we name the stage and select the stage owner.
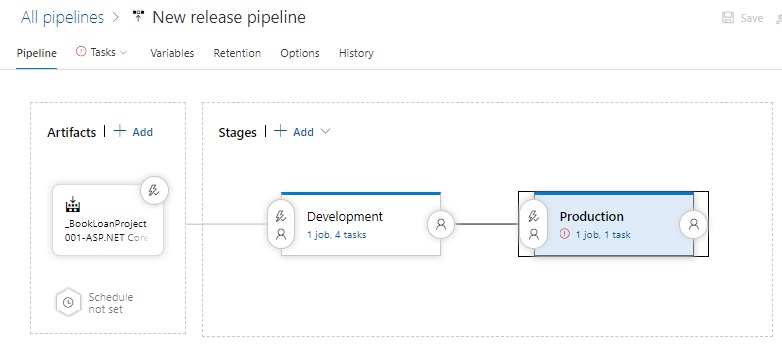
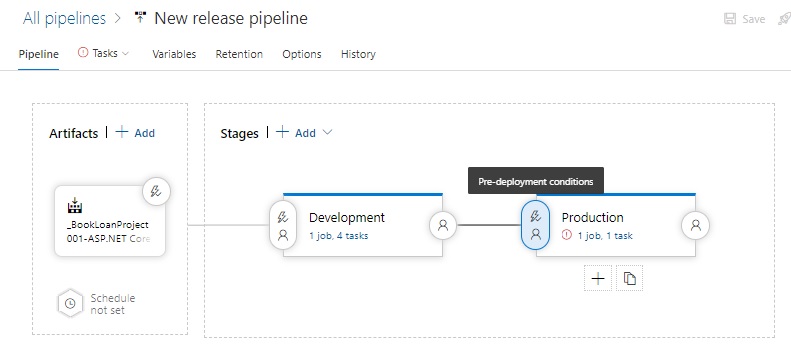
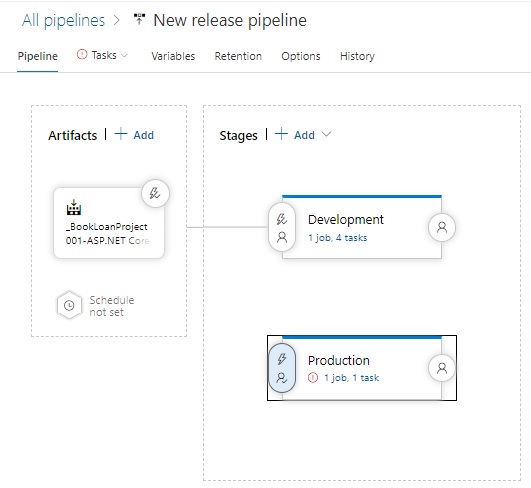
Our release pipeline stages will look as shown with the Development and Production stages connected. By default, any added stage is connected to the previous stage. In this case, the Production stage deployment would by default be executed when the Development stage deployment completes and its job tasks (such as unit test jobs and other tasks) complete without errors.
In the next section, I will show how to add a pre-deployment condition to our production stage.
Adding a Pre-Deployment Condition to the Production Stage
To prevent the Production stage from automatically deploying, we will need to override the pre-deployment condition of the Production stage. The pre-deployment condition icon is shown in the highlighted oval as shown:
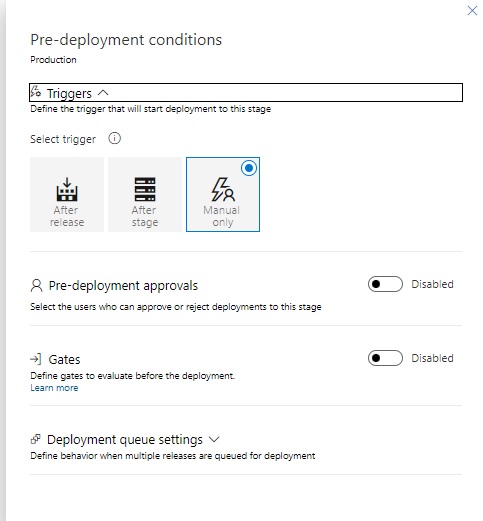
Next, click on the pre-deployment condition. You will see the following triggers where I have selected the manual trigger:
I will explain each of the Production stage deployment pre-conditions.
The three types of pre-deployment triggers that are available in pre-deployment conditions are:
- After release
This trigger occurs after a new release build has been created.
- After stage
This trigger occurs after the deployment of a stage in the release pipeline has completed.
- Manual only
This trigger occurs when an approver allows the stage to deploy manually.
If we have a development stage, normally we would just deploy the artifacts without any conditions or after we have passed functional tests executed within our release pipeline stage jobs. In a test or production stage, we would as a best practice allow a deployment to proceed after a previous stage has been deployed (development or test) and some additional condition(s) have been satisfied.
These conditions might include:
- The destination server passes some minimum performance requirements.
- Existing project issues and stories are in a done status.
Adding an additional condition based on project conditions can include running a shared query from the Azure Board that quantifies the number of issues that are outstanding. To be able to do this, we will need to add at least one evaluation gate to the pre-deployment condition for the stage.
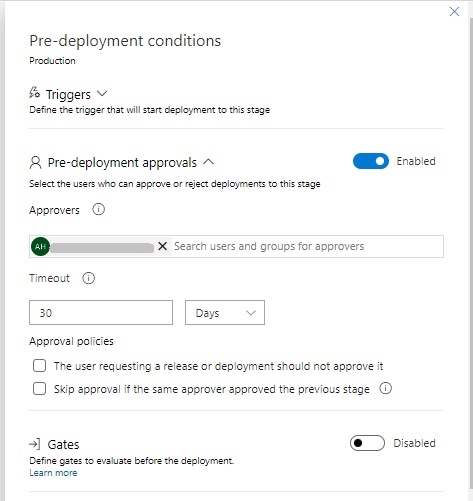
After selection of the trigger, we can enable the Pre-deployment approval condition.
We then select the approver(s) that are required to pre-approve the deployment of the stage. This means that the approver(s) can manually approve the stage before it can proceed, or they can reject the deployment.
In the next section, I will show how to add gates to our pre-deployment condition.
Defining Pre-Deployment Gate Conditions
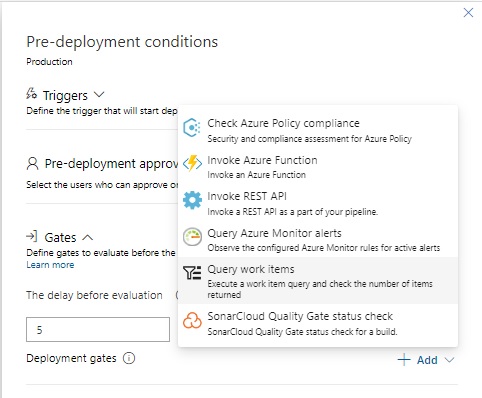
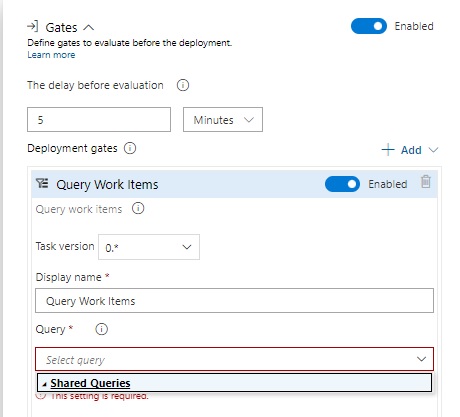
To define deployment gate conditions, we enable the Gates section, then we can add one of more conditions to define the deployment gate pre-condition.

Each deployment gate condition is created by adding a Deployment gate condition using the Add action. In the list of gate types, select Query work items as shown:
After Query Work Items is enabled, we will see the properties as shown:
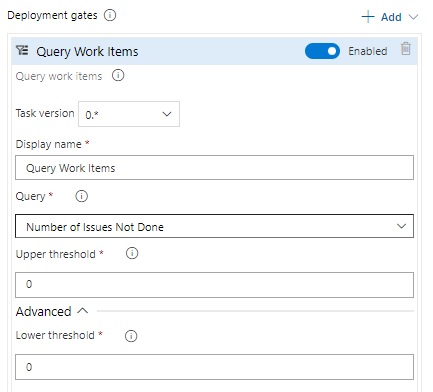
In the Query Work Items sub-section under each Deployment gate, we can specify a shared query that we have created from the query creation from the Azure DevOps Boards | Queries.
If we have not created any shared queries from the Azure Board then the query drop-down will initially be empty as shown:
In the next section, I will show how to create a shared query in the Azure Boards that can be used in the Deployment Gate.
Creating an Azure Board Shared Query
Creation of a shared Azure Board query can be done as follows:
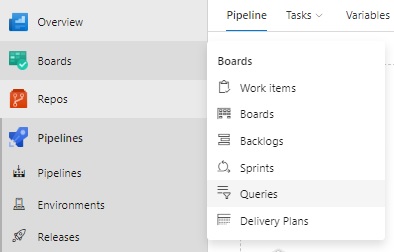
Select Boards | Queries:
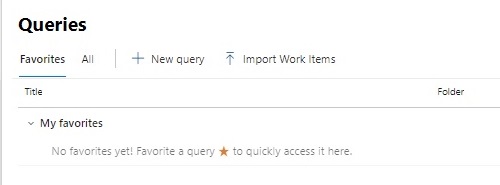
In the Queries pane, select New Query:
In the query editor, I have added the following conditions and operators as shown:
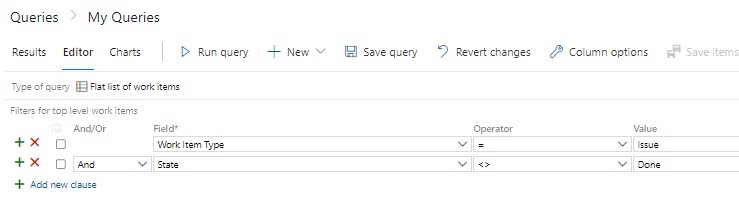
We select work item types of type Issue with status of Done.
When the query is run, the results show outstanding issue records:

In this case we can prevent the deployment pre-condition approval from commencing the deployment if the number of outstanding issues exceeds zero.
Next, we save the shared query:

Once saved, we can view the query from the Deployment gate Query drop-down list under Shared Queries:
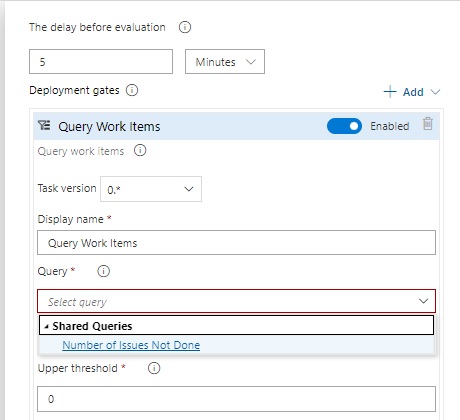
After selecting the query, we then set the upper and lower thresholds of the query result. By default, both values are zero. This makes sense from the above query that the outstanding issues should not exceed zero.

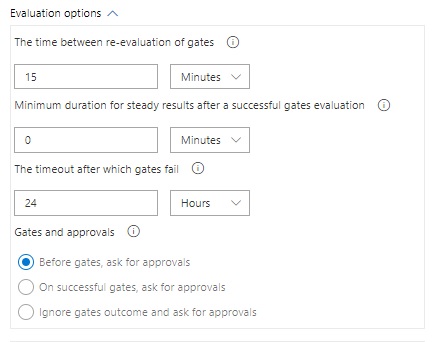
In a pre-deployment evaluation gate, the approval can be enabled/requested before the gate is evaluated, after the gate is evaluated, or the gate result is ignored before approval is requested.
We then save the above conditions for our Production stage.
After setting our pre-deployment condition to a Manual trigger, the release pipeline stage diagram will look as shown, with the Development and Production stages disconnected.
In the next section, I will give an overview of the production deployment task into Azure.
Defining the Production Stage Deployment Task
As I mentioned earlier, the definition and configuration of the Azure App Service web application deployment stage task within the Production stage job task was explained in my previous post. If you are deploying artifacts into Azure, you can use the task definitions in that post as a starting point.
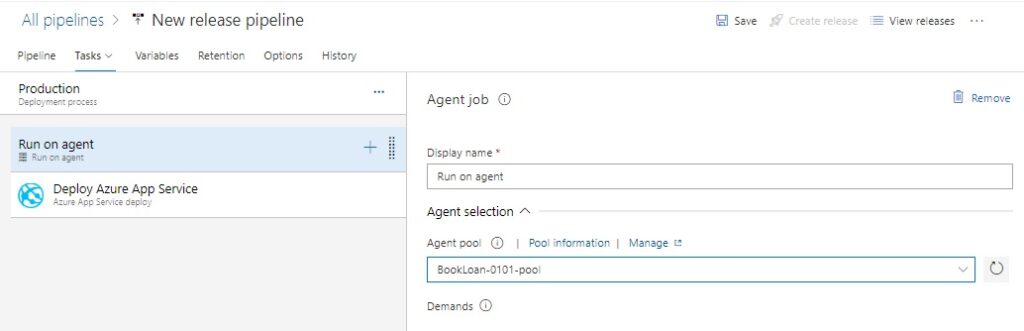
After the Deploy Azure App Service job deployment task is completed in the Production stage job, the following is the resulting definition:

Ensure your app service name refers to an existing web app service in your subscription.
To define the Agent properties of the stage, click on the Run on agent task and select your Agent pool. You can either use one of the Microsoft hosted agents or one of your own self-hosted Agents.
In the next section, I will show how to run and test the deployment gate within a pipeline release instance.
Testing the Deployment Gate in a Pipeline Release Instance
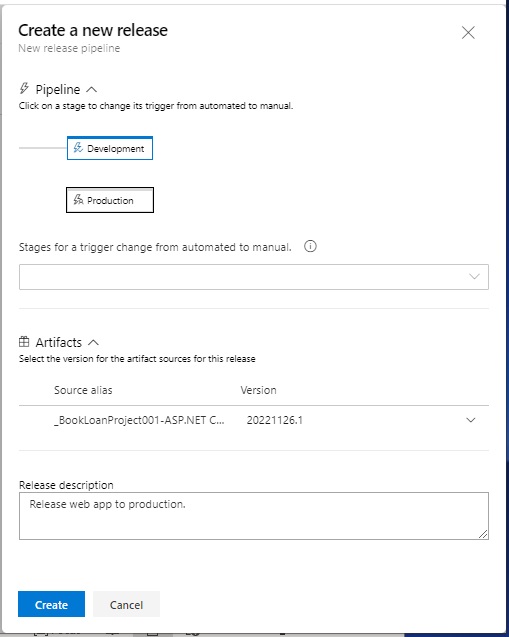
Within the release pipeline designer, create a new release instance.
In the dialog that shows, you will see the Production stage (and any other stages in the release pipeline). For the purposes of this exercise, you can mark other stages (such as Development) as manually triggered and just run the Production stage.
Once instantiated, the release instance flow will show the Production instance in a suspended Not deployed state. Click on the Deploy button.
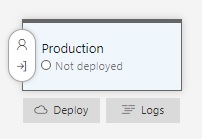
The deploy action will present a dialog. Enter a comment then hit the Deploy button.

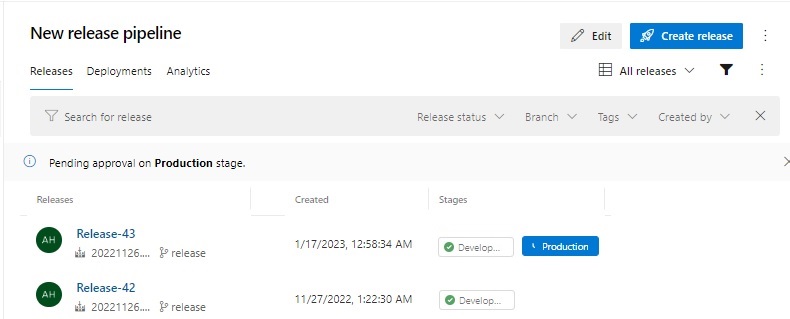
Now open Releases from the project menu.
You will see the release is in Pending state.
What this means is that there are additional conditions that are preventing the deployment from commencing.
When we hover over the production stage badge, it shows the following hint:

This tells us an approval is pending on the deployment. Click on the badge and the following dialog shows awaiting your approval. Enter a comment and click the Approve button.
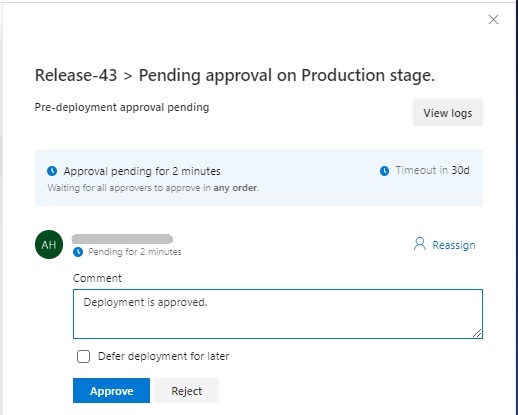
If you don’t approve the stage within the designated time out duration (in this case 30 days), then the stage will automatically reject and the deployment stage abandoned.
Once approved, the next screen shows confirmation of the approval.
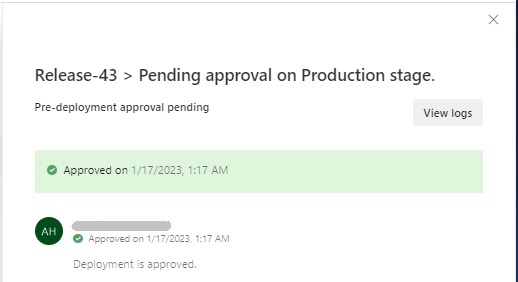
You will also see another notification screen with the post-deployment approval also in a pending state.

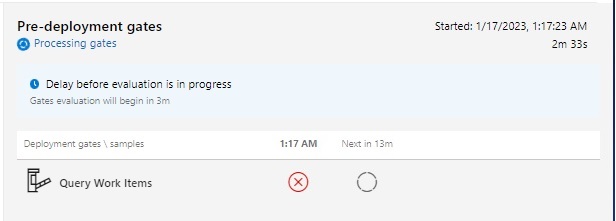
In the deployment process pre-deployment gate, you can view the status of the evaluation.
Recall that the query item we included as one of our deployment gates shows it as failing the evaluation as we had one existing issue outstanding in the To Do state.
The progress shows the progress of the evaluation is polled at periodic intervals, which as we recall from the configuration of the deployment gate, the time interval between evaluation of gates was by default set to 15 minutes. Below we can see the time showing when the next evaluation of the gate (and the query work item) will be in 13 minutes.
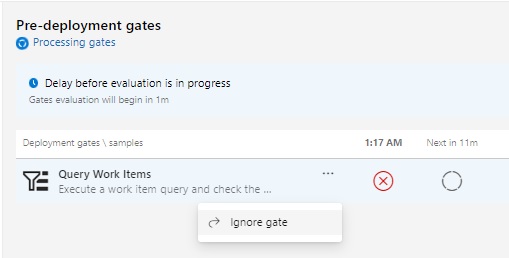
If we know the issue is a minor one, we can choose to ignore the gate by clicking on the ellipsis and selecting the Ignore gate action as shown:
In the next section, I will show how to resolve the Deployment Gate condition by resolving work item issue of the related work item query.
Resolving the Deployment Gate Condition from the Query Work Item
What we do next is rectify the query result by completing the issue on the Azure Board.
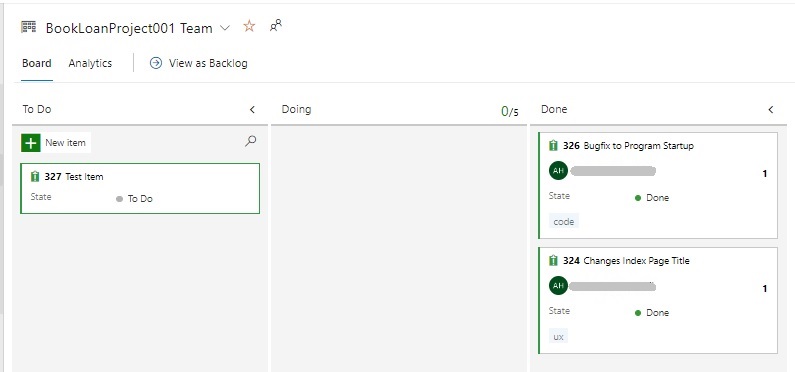
Open the Board. We will see the issue in the To Do column.
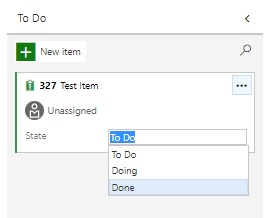
Change the status from To Do to Done.
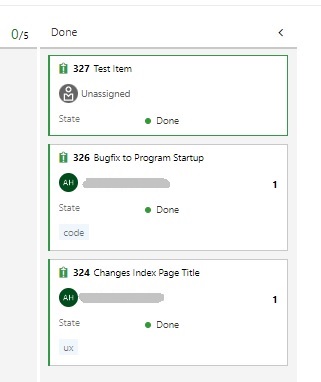
The item will move into the Done column as shown.
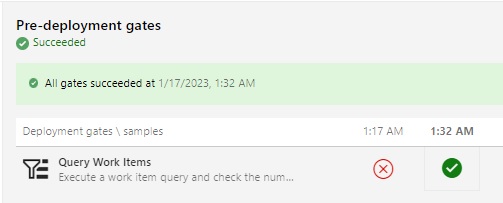
Return to the Pre-deployment gates pane. Once the countdown reaches the time interval, you should see the deployment gate evaluate successfully as shown:
We will next see the deployment job start running on our release agent.

Once the job has completed without errors, we can be sure it was deployed into our production environment.
We can test this by browsing to the web application as it should show up as expected:

The steps I have provided in the production deployment of our web application using the Azure DevOps release pipeline has shown us how to useful pre-deployment gates are in the deployment of applications into a production environment.
We are not just limited by checking Work Item Query results in our deployment gates, but also check for Azure Monitor Alerts, invoke Azure Functions, invoke a REST API, or run a quality check on the code build.
That is all for today’s post. I hope you have found this post useful and informative.
Andrew Halil is a blogger, author and software developer with expertise of many areas in the information technology industry including full-stack web and native cloud based development, test driven development and Devops.
