
Welcome to today’s post.
In today’s post I will discuss what a minimal Web API is and how we can create one using Visual Studio 2022.
In previous posts I have discussed how we create ASP.NET Core Web API applications using Visual Studio. In the earlier versions of Visual Studio 2019, 2017 and before, the tools did have the capability in the project templates to allow the creation of a Web API application. Since the release of Visual 2017, and the merging of the ASP.NET Web MVC (Model-View-Controller) and Web ASP.NET API templates into one that served both project types, the implementation of controllers within the Web API project was required to implement an API that supported REST-based API calls (GET, POST, PUT, DELETE).
From Visual Studio 2022 onwards, which has the C# 10 compiler, the dependency of having to implement a Web API with controllers is removed. What this means is that we can create our Web API application that has REST-based API calls with or without wiring up controllers into our API application.
Does the use of a minimal Web API allow us to implement all types and variations of Web API applications? No. As explained in the Microsoft site, there are many differences between minimal Web API applications and Web API applications with controllers. One of these differences allows Web API applications with controllers to run with the MVC architecture, that include provision for model binding.
Creating a Minimal Web API Application
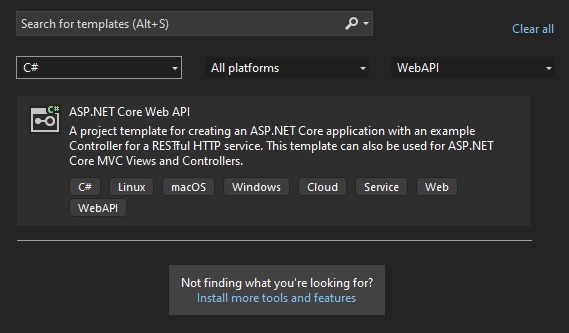
To create a basic minimal Web API application, we use the project template show below.
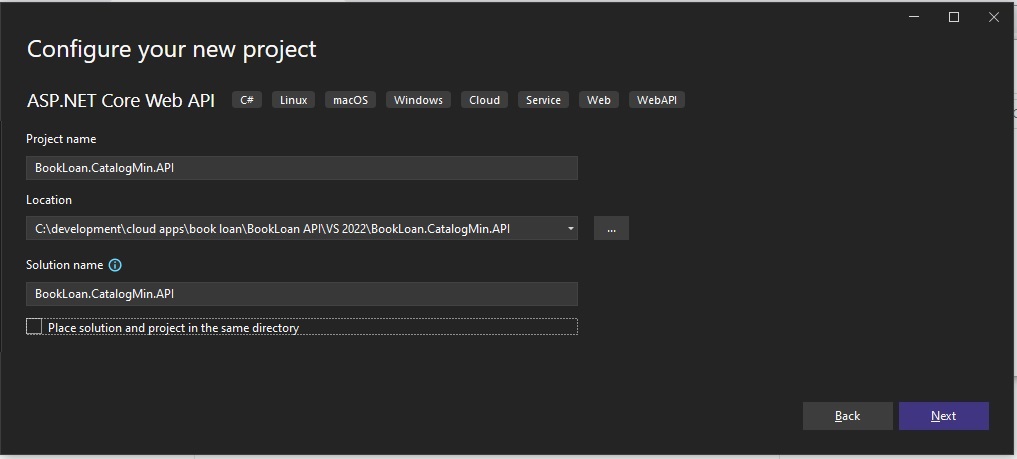
We than define the project name and paths for our code.
Next, we are presented with several project options for the Web API application, and they are shown below.
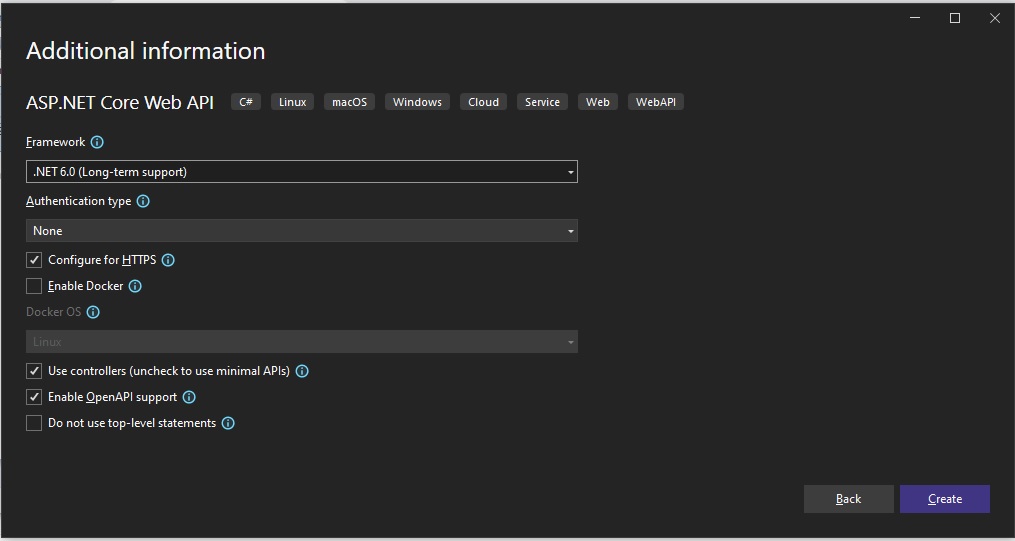
The following default option is checked:
Use controllers (uncheck to use minimal APIs).
When we uncheck the Use controllers option, our API is created as a minimal Web API.
With the controller option checked, the following line of code that adds wiring for controllers is included in the resulting Program.cs start up code:
builder.Services.AddControllers();
The following default option is checked:
Enable OpenAPI support.
With the OpenAPI option, the Web API includes provision for Swagger API. The following line of code adds support for Swagger API in the resulting Program.cs start up code:
builder.Services.AddSwaggerGen();
and
app.UseSwagger();
app.UseSwaggerUI();
The following option is unchecked:
Do not use top-level statements.
The top-level statements option used since C# 9 allows the compiler to minimize the code for the application by generating a start-up class and Main() method automatically without requiring the developer to do so. By unchecking the above option, top-level statements are created as application entry-points by the compiler.
Generated Code Following Selection of Minimal Web API Option
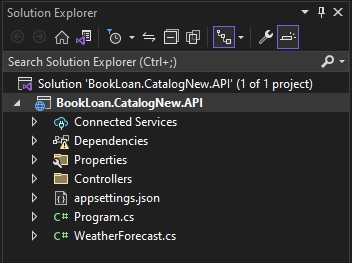
After the application template generates the application skeleton, you will see the solution structure containing our minimal Web API project as shown:

Notice that there is no controller file as we have unchecked controllers.
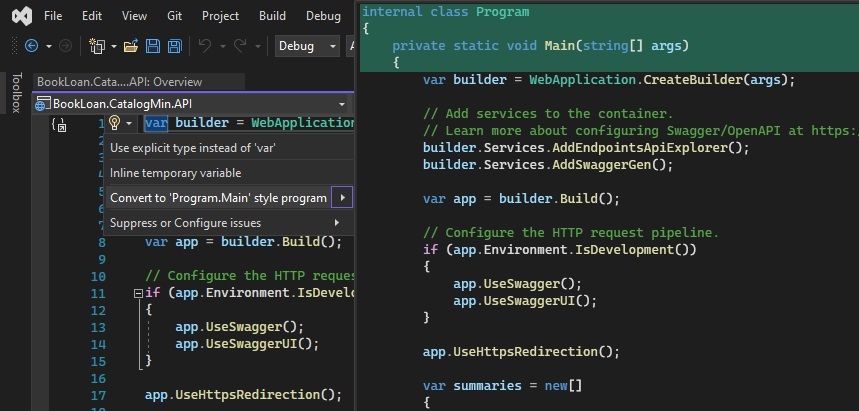
The entire generated code for the minimal Web API is contained in the Program.cs source file. Let’s have a look at that.
What we notice is the absence of any Startup class and Main() method entry point.
What we see is leaner code.
var builder = WebApplication.CreateBuilder(args);

// Add services to the container.
// Learn more about configuring Swagger/OpenAPI at https://aka.ms/aspnetcore/swashbuckle
builder.Services.AddEndpointsApiExplorer();
builder.Services.AddSwaggerGen();

var app = builder.Build();

// Configure the HTTP request pipeline.
if (app.Environment.IsDevelopment())
{
    app.UseSwagger();
    app.UseSwaggerUI();
}

app.UseHttpsRedirection();

var summaries = new[]
{
    "Freezing", "Bracing", "Chilly", "Cool", "Mild", "Warm", "Balmy", "Hot", "Sweltering", "Scorching"
};

app.MapGet("/weatherforecast", () =>
{
    var forecast = Enumerable.Range(1, 5).Select(index =>
        new WeatherForecast
        (
            DateTime.Now.AddDays(index),
            Random.Shared.Next(-20, 55),
            summaries[Random.Shared.Next(summaries.Length)]
        ))
        .ToArray();
    return forecast;
})
.WithName("GetWeatherForecast");

app.Run();

internal record WeatherForecast(DateTime Date, int TemperatureC, string? Summary)
{
    public int TemperatureF => 32 + (int)(TemperatureC / 0.5556);
}
Instead of adding container services through a ConfigureServices() method within a Startup class, we can add services to a container by creating a builder object then add services. This is done in the following example lines of code where Swagger services are added to the container:
var builder = WebApplication.CreateBuilder(args);

…

builder.Services.AddEndpointsApiExplorer();
builder.Services.AddSwaggerGen();
After adding our container services, the creation of an instance of the WebApplicationBuilder class allows us to add middleware to our application after building the web application with the following line of code:
var app = builder.Build();
The above code includes adding middleware to the web application with the following two lines of code:
app.UseSwagger();
app.UseSwaggerUI();
Next, the Web API REST HTTP GET calls are defined with the following middleware:
app.MapGet(…)
The above allows us to include the implementation of the API REST methods through a lambda expression in the same Program.cs source file.
Finally, the application is run with the following line of code:
app.Run();
If we move our cursor to the first line of code and open the Quick Actions drop-down context menu, we can enable the Program class and Main() entry point code.
Note that there can only be one Main() entry point in each project.
Recall back to the Web API project template where we had the various options to determine if we wanted to allow controllers or not.

If we check the template option Use controllers, the resulting solution structure for the generated project is shown below with a Controller.cs source file:
The generated code within the Program.cs source file is shown below:
var builder = WebApplication.CreateBuilder(args);

// Add services to the container.
builder.Services.AddControllers();

// Learn more about configuring Swagger/OpenAPI at https://aka.ms/aspnetcore/swashbuckle
builder.Services.AddEndpointsApiExplorer();
builder.Services.AddSwaggerGen();

var app = builder.Build();

// Configure the HTTP request pipeline.
if (app.Environment.IsDevelopment())
{
    app.UseSwagger();
    app.UseSwaggerUI();
}

app.UseHttpsRedirection();
app.UseAuthorization();
app.MapControllers();
app.Run();
As you can see, the above generated code for the weather forecast API looks a bit odd alongside our custom project name and namespace. Don’t be concerned! The purpose here was to generate a skeleton minimal web API with the startup code, which we could remove later and replace with our own web API code for methods and the service collection. The other aim here is to determine the differences between a standard Web API and a Minimal Web API.
I will go through what the differences are in the startup code in the next section.
Differences in the Startup Code between a Minimal Web API and Web API
The main difference between the above and the code for the minimum Web API generated code is the following container service that adds support for Controllers:
builder.Services.AddControllers();
In addition, the inclusion of the middleware for the mapping of controllers:
app.MapControllers();
When controllers are enabled and configured in the Web API, the Controllers.cs source requires the inclusion of the following namespace:
using Microsoft.AspNetCore.Mvc;
Then the controller class that contains our API controller methods is defined from the ControllerBase class. The generated sample is shown below:
using Microsoft.AspNetCore.Mvc;

namespace BookLoan.CatalogNew.API.Controllers
{
    [ApiController]
    [Route("[controller]")]
    public class WeatherForecastController : ControllerBase
    {
        private static readonly string[] Summaries = new[]
        {
        "Freezing", "Bracing", "Chilly", "Cool", "Mild", "Warm", "Balmy", "Hot", "Sweltering", "Scorching"
        };

        private readonly ILogger<WeatherForecastController> _logger;

        public WeatherForecastController(ILogger<WeatherForecastController> logger)
        {
            _logger = logger;
        }

        [HttpGet(Name = "GetWeatherForecast")]
        public IEnumerable<WeatherForecast> Get()
        {
            return Enumerable.Range(1, 5).Select(index => new WeatherForecast
            {
                Date = DateTime.Now.AddDays(index),
                TemperatureC = Random.Shared.Next(-20, 55),
                Summary = Summaries[Random.Shared.Next(Summaries.Length)]
            })
            .ToArray();
        }
    }
}
As we have seen from the above overview of the Web API project template in Visual Studio 2022, the options allow us to flexibly choose between a minimal Web API or a controller-based Web API.
As I mentioned earlier, your application requirements will determine which approach you choose to take.
There are many other ways to use and configure minimal Web API applications, which I will explore in future posts.
That is all for today’s post.
I hope you have found this post useful and informative.
Andrew Halil is a blogger, author and software developer with expertise of many areas in the information technology industry including full-stack web and native cloud based development, test driven development and Devops.

