Welcome to today’s post.
In today’s post I will be showing how to use test your .NET Core Web API services using the Postman third party utility.
The Postman utility is an extremely popular utility used by API developers and testers to test Web API method calls manually. The tool allows the tester to test different request types of HTTP REST calls, including GET, POST, DELETE and PUT. With each of the request types, you specify some of the following parameters:
- URI
- Query Parameters
- Request Header
- Request Payload
The utility allows requests to be grouped together within collections, which allows testers to locate their API tests and run the collections as a test suite independently of tests within other collections.
The POSTMAN Workspace
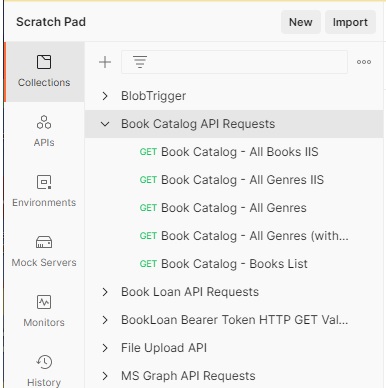
The most recent version as of this post is 8.7 and includes a new look workspace. The screenshot below shows the new Scratch Pad, which allows you to import collections from previous versions of Postman.
The power of testing API requests within Postman is realized when we make use of the Test Script feature and the Collection Runner.
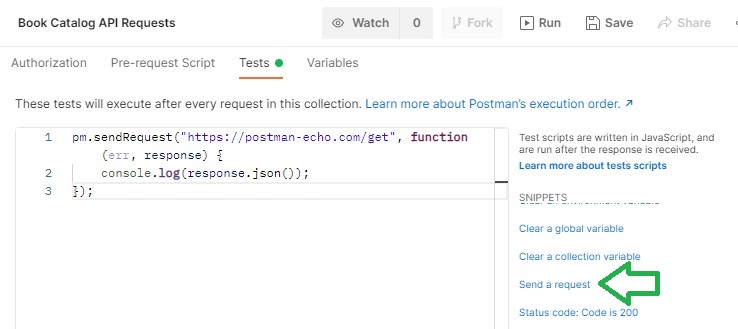
To access the Test Script feature of a request, select any collection. In the collection overview you will see the tabbed menus Auth, Pre-req, Test and Variables. Select the Test tabbed menu. You will see a blank editor and some test snippets.

To get an idea of how a test script looks like, select one of the script snippets. The code snippet will be copied into the blank editor.
Below is an example of a code snippet that tests a HTTP GET request:
Below is an example of a code snippet that tests an HTTP GET request response status:

In the next section, I will show how to create requests and test scripts within the Collection Runner.
The POSTMAN Collection Runner
To demonstrate how to create a basic sequence of tests that can be executed in a particular order, we need to use the Collection Runner.
The Collection Runner is accessible when we select any collection from the left pane. In the overview you will see a Watch, Fork, Run and Save tabbed menus. The Run menu is what allows us to run the request tests within the collection.

To create a collection of tests, we will need to create requests, and within each request we implement the test script. After we run the test script, we repeat the process on creating and testing the next request test script.
For example, if I want to test an API method that requires and authentication token to run, I will need to create the following two requests:
- An HTTP POST request to an API method that obtains a user authentication token based on user credentials.
- A HTTP GET request to call an API method to retrieve a list of records.
Suppose our URI for the authentication on my local development environment is:
http://localhost/BookLoan.Identity.API/api/Users/Authenticate
and the URI for retrieving a list of Books is:
http://localhost/BookLoan.Catalog.API/api/Book/List
For development testing, we could also run our Postman API requests through IIS Express URLs that are running within a .NET Core Web API session within Visual Studio.
Creating POSTMAN Test Scripts
In this section, I will go over the creation of test scripts for common user scenarios related to authenticated access of a method that retrieves books from the library catalogue. I will first describe the tests below.
The test for the Authentication is:
- Return a response status of 200.
- Response contains an authentication token.
The test for the Book retrieval is:
- Return a response status of 200.
- Response contains an array of objects.
To setup Tests for each request, we need the following:
- A Test Pre-Script that runs before the request.
- A Test script that tests the response type and response output.
The authentication token generation request has the following scripts:
Pre-Script: Get User Authentication Token
pm.globals.set("user_auth_token", "");
pm.globals.set("user_id", "user@tester.com.au");
pm.globals.set("user_pwd", "P@ss123");
(replace whatever credentials you need to use for testing your API in the script)
The pre-script above initialises some global variables that will be used within the test scripts. In the authentication request they will be used to populate the request body payload before the request is executed as an HTTP POST request.
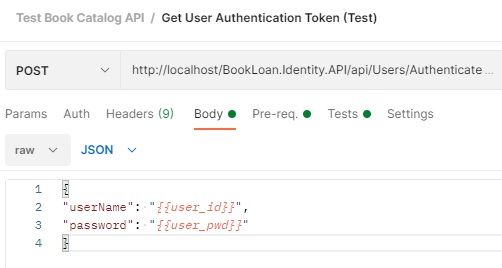
Request Body: Get User Authentication Token
In the request body, instead of hardcoding the key/value pairs in the JSON body, we can inject variables into the values of any of the keys as shown:
As we can see, use of the following notation:
{{variable-name}}
Allows the value of the variable variable-name to be used within either a request body or even in the URI query string.
An example of usage is:
http://localhost/BookLoan.Catalog.API/api/Book/{{variable-id}}
This allows us to use variables throughout any of the request tests within our collection and automate the test of the requests within the collection.
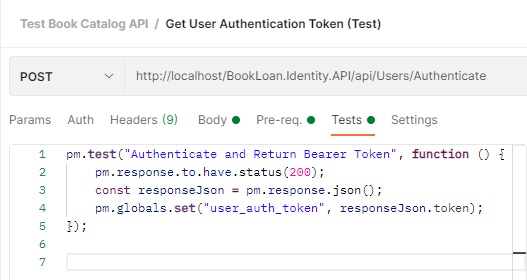
Test: Get User Authentication Token
pm.test("Authenticate and Return Bearer Token", function () {
    pm.response.to.have.status(200);
    const responseJson = pm.response.json();
    pm.globals.set("user_auth_token", responseJson.token);
    console.log("token="+pm.variables.get(responseJson.token));
});
The test runner will then inject the variables into the request body before execution of the request.
After the response returns, the test script above tests the response of the POST request, retrieves the element token within the response, then assigns the global variable user_auth_token to the token element value.
When the test script above is defined, it should look like the following:
The Book retrieval request has the following scripts:
Pre-Script: Book Catalogue – All Books IIS
None. The variables are not required to be assigned or modified before the call to the Book retrieval API method.
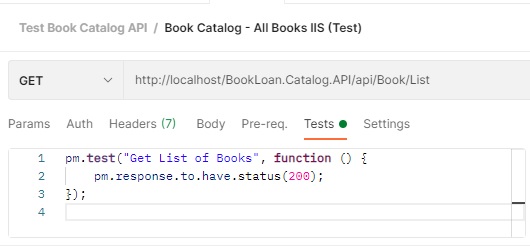
Test: Book Catalogue – All Books IIS
pm.test("Get List of Books", function () {
    pm.response.to.have.status(200);
});
When the test script above is defined, it should look like the following:
Next, add the following key to the request header:
Key: 	Authorization
Value: 	Bearer {{user_auth_token}}
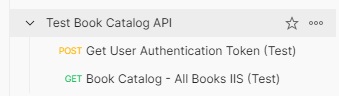
After the above tests are saved, the collection Test Book Catalog API will show the two requests that we will execute within the Collection Runner:
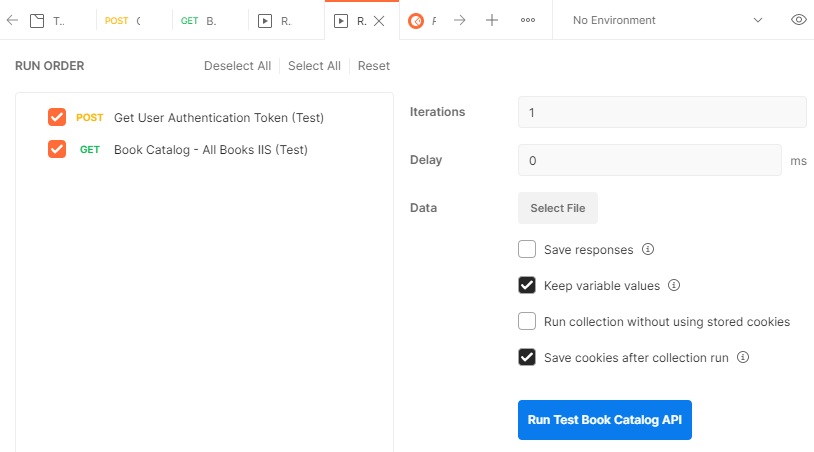
After we click on the Run button, the following Run Order for the Collection will display:
After clicking on the Run Test Book Catalog API button, we will get the following results:
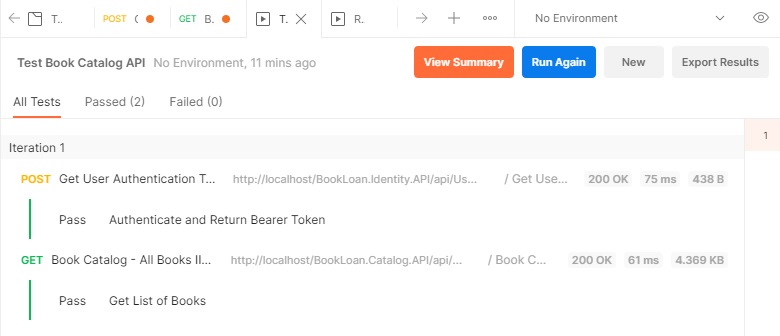
You will either see a Pass or Fail alongside each test.
You have seen how powerful the Postman utility is with allowing testers and developers to create and automate their own API test suites. The Postman site has an introduction to test automation which you can explore further:
In addition, the Postman site provides an introduction to test scripting.
As we have seen, creating basic test workflows is quite straightforward. The Postman site has a great introduction to the Collection Runner.
That is all for today’s post.
I hope you found this post useful and informative.
Andrew Halil is a blogger, author and software developer with expertise of many areas in the information technology industry including full-stack web and native cloud based development, test driven development and Devops.