
Welcome to today’s post.
In today’s post I will show how to build and configure a continuous delivery release pipeline within an Azure DevOps project.
In a previous post I have shown how to create a Continuous Integration build pipeline job within an Azure DevOps project. What I showed then was how to integrate a build of a project source code repository into a build pipeline that produced a build artifact that could then be used for a deployment into a server environment.
In addition, I showed how to integrate unit tests into our build pipeline and ensure the pipeline build is successful if all unit tests passed.
As I mentioned, the build artifact, which consists of a folder containing the scripts, binaries and markup files that consist of an application is then used as an input to the release stage of our deployment pipeline.
I will now explain how to build a continuous deployment release pipeline to deploy a basic ASP.NET Core web application to an IIS server.
Building a Continuous Deployment Release Pipeline
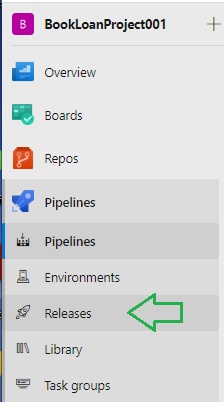
In Azure DevOps, after selecting your project, under the Pipelines, menu item, select the Releases menu option:
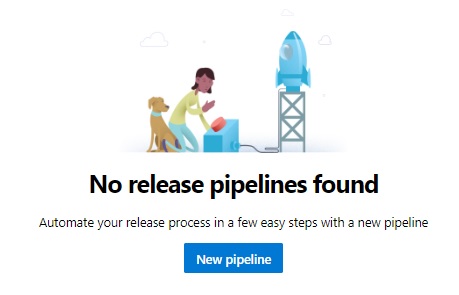
As there are no pipelines in the project releases, the screen will display a No release pipelines found message. In the same Pipelines screen, select New pipeline.
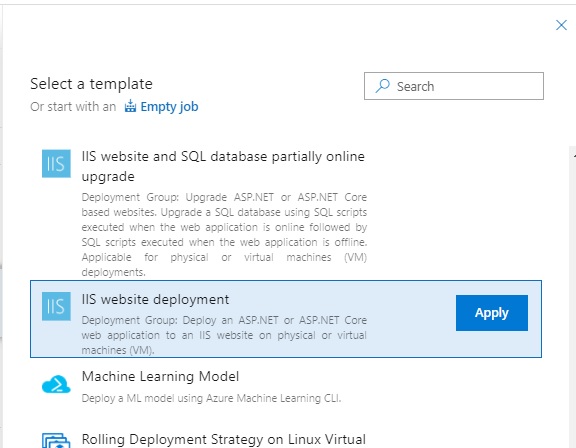
You will then see a job release templates pane to the right. There are many options and variations to choose from. I will select the option to deploy as an IIS web site. Select the option IIS website deployment.
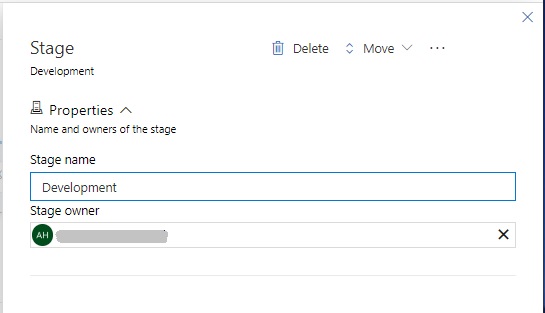
The next page in the configuration will present us with the definition of the release pipeline Stage.
A stage is equivalent to an environment in our development process, like Development, Test, Production where the main differences are configurations. Within each stage we can include other checks and validations including code quality, unit tests, security validations, issue counts and so forth. With each stage these additional checks, what we call Quality Gates and Release Gates determine whether the stage progresses onto a deployment of the current stage, a release into production, or even post release verifications that can notify project stakeholders of the status and/or health of a stage. These additional checks can also consist of manual gates that allow for approvers to manually approve the release of a stage pending a business decision.
Following the creation of a stage, the release pipeline will show with Artifacts and Stages.
The Artifacts consist of the inputs into the release pipeline. These will include the source code build of our application.
The Stages, as I explained consist of one or more environments that we will release the artifacts into. Each stage consists of a job and one or more tasks.
Each job includes the parameters of the environment deployment, such as configurations that are shared with the tasks within the stage.
Each task contains the scripts and logic to contribute towards deploying a part of the artifact into the environment for the stage.
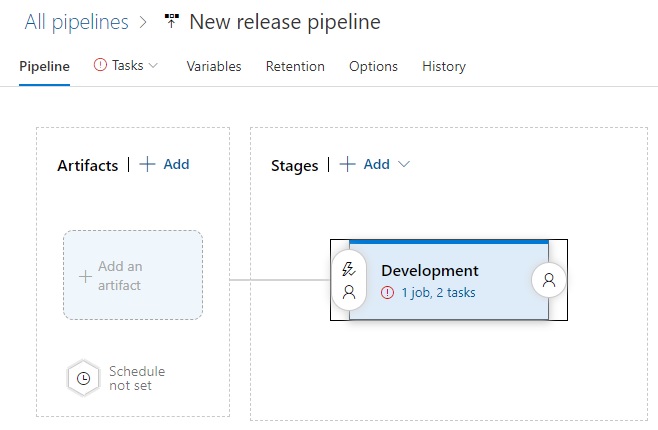
With the IIS website deployment template we selected, there is one job and two tasks in our stage definition.
Defining the Release Pipeline Stage
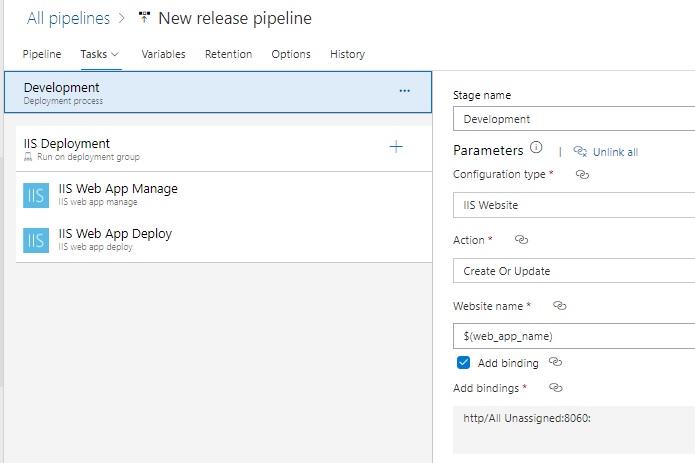
In the Stage definition, we are presented with the Parameters section.
This includes the following fields:
Configuration type
The configuration type for an IIS application includes one of:
IIS Website
IIS Application
IIS Virtual Directory
Action
The action type allows us to determine the release action, Create, Update or Create or Update. I have selected the idempotent action, Create or Update, which created the site when it does not exist, and updates it if it exists.
Website name
Then website name is the name we give to our website. In the selections below I have specified a user-defined variable, which is expressed in the Macro format:
$(web_app_name)
Where web_app_name is our user-defined variable.
Add bindings
If we select the Add binding option, then we are presented with the Add bindings field, which by default is set to:
http:// All Unassigned:80
With a web site deployment, we would ensure the port in the binding is unique across all the IIS server web sites, so 80 may clash with an existing Default Website that by default is set to port 80, if we have that contained in our IIS server.
Before I show the deployment group parameter definition, I will explain how the pipeline parameters are defined.
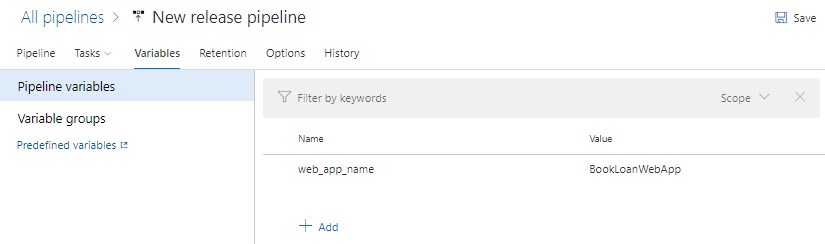
The pipeline variables are defined by selecting the Variables tab menu in the release pipeline definition pane.
There are two types of pipeline variables:
Pipeline variables
Pipeline variables are user-defined variables that are specific and local to the current pipeline.
Variable groups
Variable groups are user-defined variables that can be shared across multiple stages within the release pipeline. This is useful when you wish to share a common variable name, such as the web application name, that may be common to all the environments in the release pipeline.
To add a new variable, simply click the Add plus sign (+) and enter the variable(s).
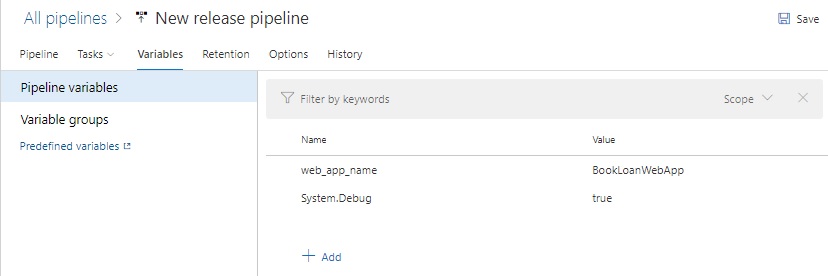
In addition, I have added an additional variable, which is a system variable, the System.Debug variable, when declared within our pipeline allows us to switch on useful debugging within the diagnostic logs. This gives us to more detailed information when a deployment fails or takes longer than anticipated.
In the deployment group definition, we specify the deployment group, deployment targets, tags, and the level of deployment parallelism. The deployment group selection is a required parameter.
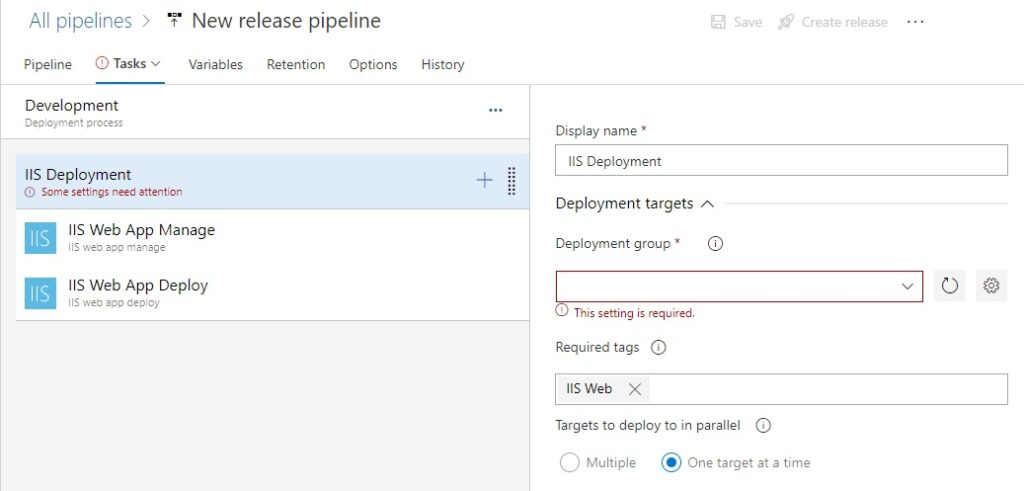
The deployment group is a logical set of at least one server that we will be deploying our build artifacts into. In one of my recent previous posts, I showed how to create a Deployment Group within Azure DevOps, then showed how to configure a self-hosted deployment Agent and configure it with the deployment group.
If you are using a Microsoft-hosted Agent for your builds, then it is sufficient to just create the deployment group.
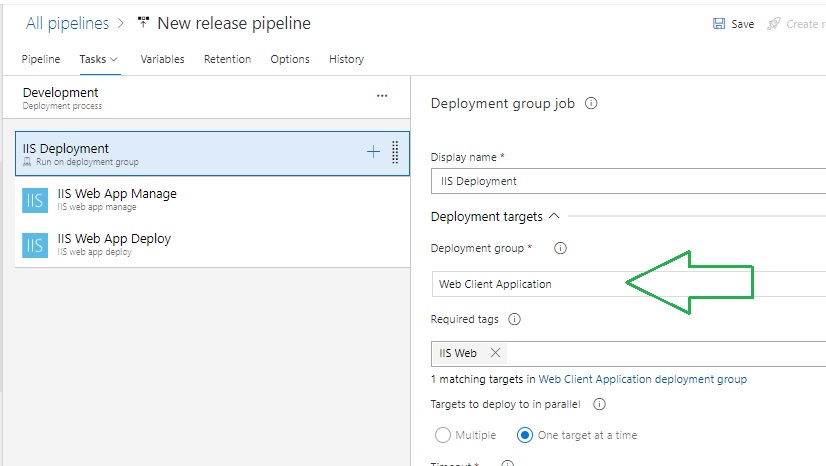
The screenshot below shows the deployment group selected:
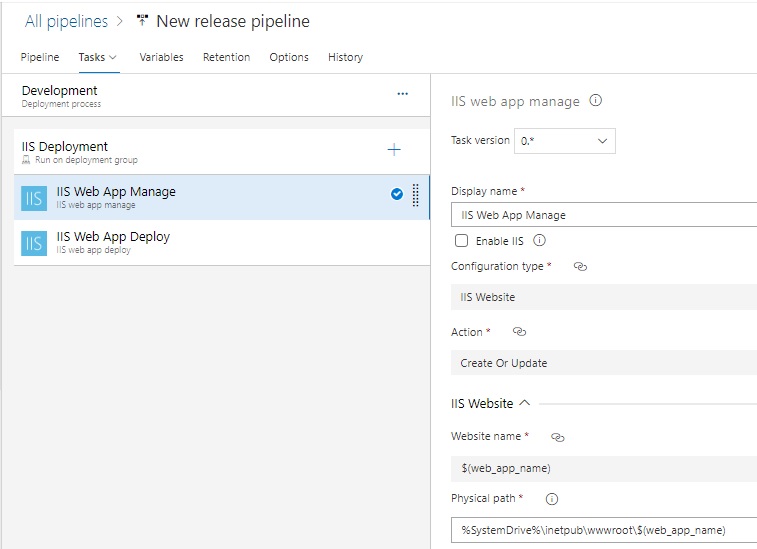
Next, we will focus on the first task, IIS Web App Manage in our Stage definition.
In here we will see some of the shared configuration parameters from the Stage definition header are pre-set, such as the Configuration type, Action, and Website name.
The physical path parameter can be taken as it is defaulted or overridden with a folder specific to our web application. In this case, I have defined the physical folder as:
%SystemDrive%\inetpub\wwwroot\$(web_app_name)
The name includes the usual root folder of our website with the web application name appended using the macro notation of our web application pipeline variable name.
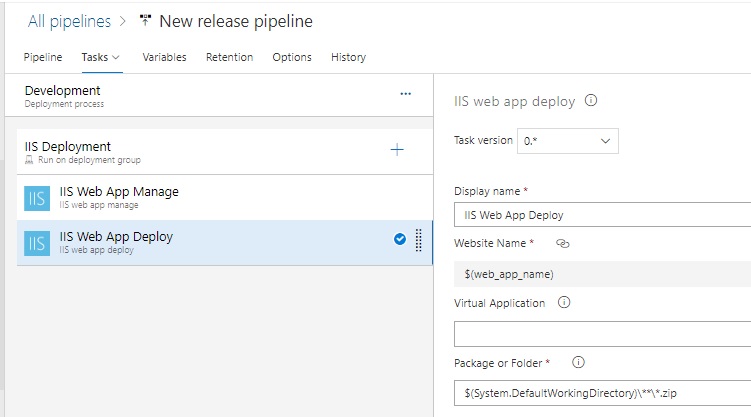
The next task we focus on in our stage is the IIS Web App Deploy task.
In this task, the main editable field is the Package or Folder parameter, where we specify the location of the ZIP file of the build artifact. In a self-hosted agent, the compressed artifact is located within a \drop sub-folder of the form:
C:\azagent\..\_work\r1\a\[Name of your source build pipeline]\drop\WebApp.zip
The deploy task is shown below with the defined package folder:
I will now explain how to define the release pipeline Artifact.
Defining the Release Pipeline Artifact
The Artifact in our release pipeline is the input that is passed within each of our defined stages and then released into the environment of the stage.
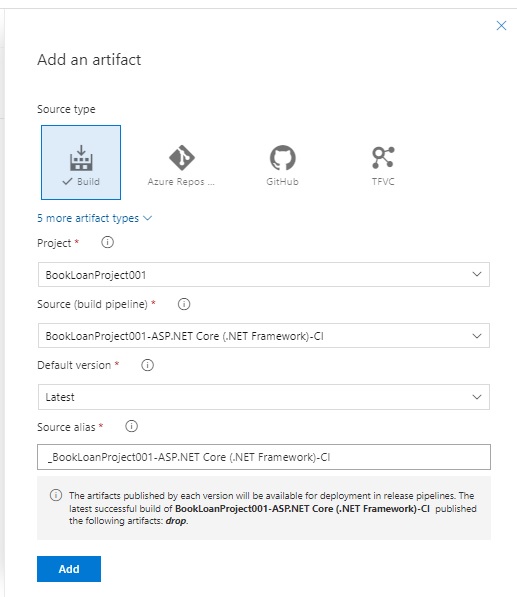
In the artifact definition, we can select either an existing artifact from an Azure DevOps build pipeline, an Azure repository, GitHub, or from a TFS repository.
Below, I have selected the build artifact from an existing Continuous Integration source build pipeline within the project. This requires selecting the project and source build pipeline. In one of my recent posts, I showed how to create a continuous integration source build pipeline in Azure DevOps that integrates with a GitHub repository.
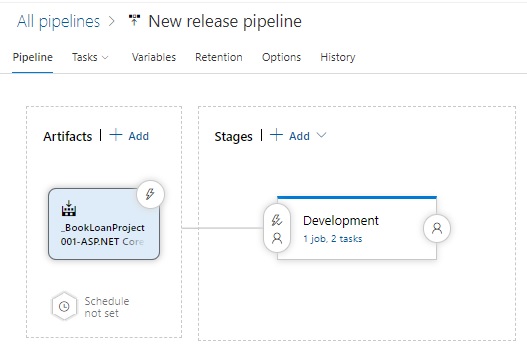
Once the artifact is created, we will have the release pipeline designer look as shown:
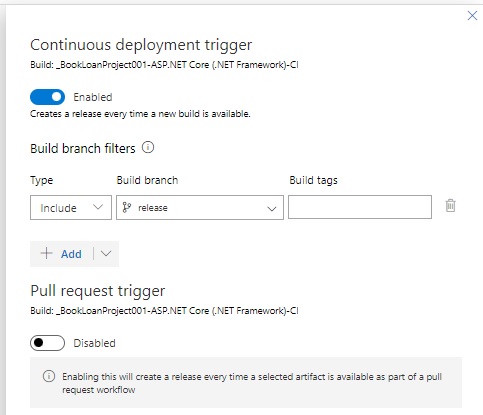
Defining the artifact itself will not trigger the release of the build artifacts into the subsequent stages. To achieve this, we click on the lightning icon on the top right of the Artifact box. We are then presented with two radio switch buttons, one for the continuous deployment (CI) trigger, and another for the pull request trigger. Enabling the CI trigger will allow the source build to kick off the release pipeline. In addition, specifying the Build branch filters with the build branch and/or additional build tags allows us to trigger the generation of the build artifact when a specific branch is built in the CI build pipeline.
After defining the trigger on our artifact, to automatically trigger the running of the jobs within the stage based on the artifact, we will need to set a pre-deployment trigger on the Stage as shown:

What we have done is trigger the deployment of the stage after the build artifact is available following the completion of the build pipeline. The artifact filter allows us to select which of the artifacts we have defined for this pipeline to nominate for this deployment stage. In some pipelines we may create multiple artifacts, each from a build pipeline that are deployed into multiple servers from different stages.
If the Manual only trigger option was selected, then a Deploy button would be shown below the Stage box in our designer.
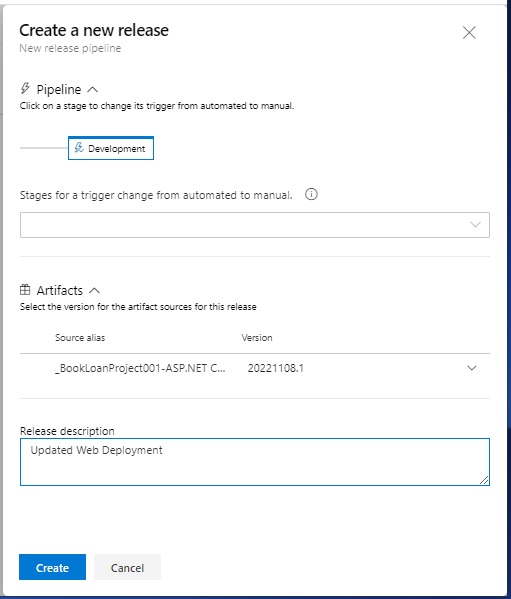
To start a release pipeline, click on the Create release button in the top right of the pipeline pane.

The new release creation dialog shows where we determine if the release pipeline is manual or automated. By default, is it is automated. Below I have kept it automated for this exercise:
In the next section I will show how to start the release pipeline.
Starting the Release Pipeline
We trigger the continuous build trigger either by a source code commit or by manually executing the build pipeline.
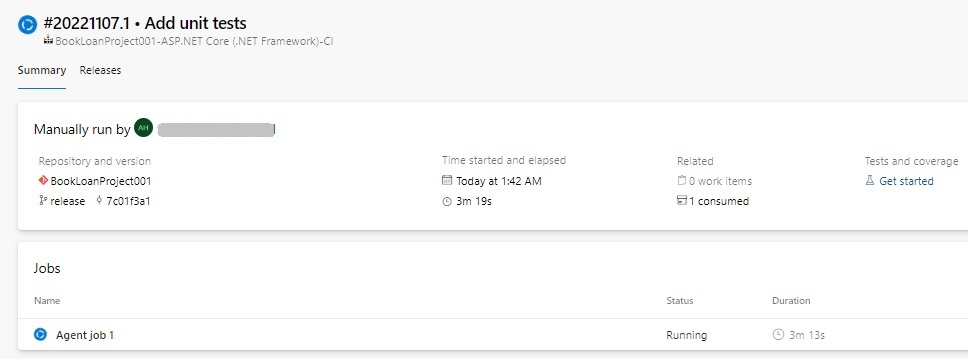
This will then trigger the generation of the build artifact in the release pipeline.
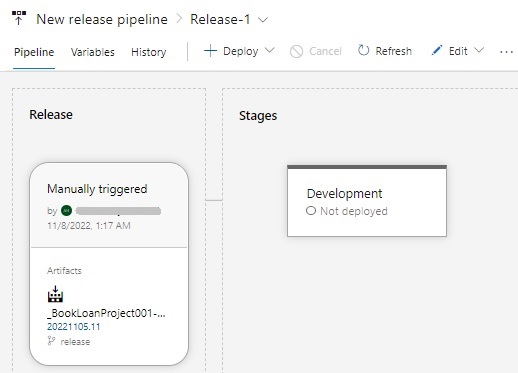
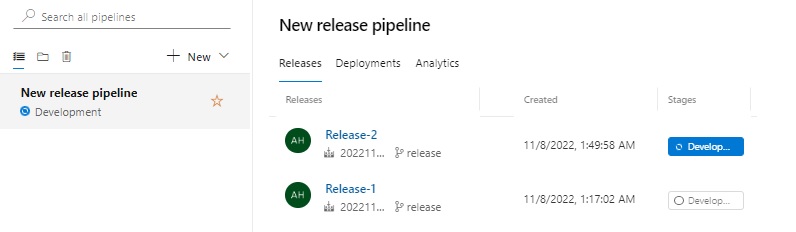
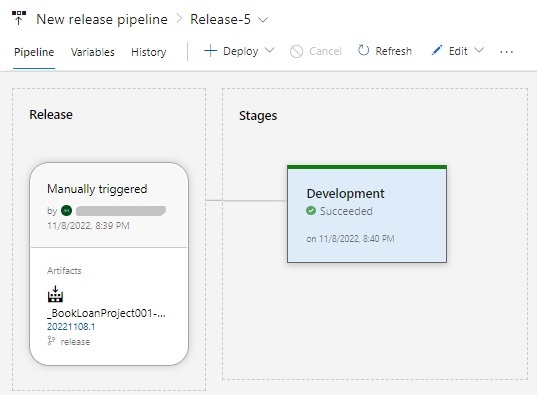
Returning to the Release pipelines pane and we will see the pipeline in progress with the currently in-progress stage badge showing blue as it runs.
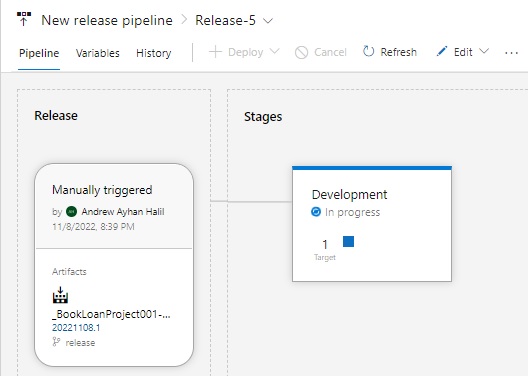
Clicking on the pipeline, will display the pipeline Release and Stages, with the Development stage showing progression:
Clicking on the Development Stage, we will see the summary of the pipeline transitions from the triggering of the Release stage to the completion of the deployment Stage.
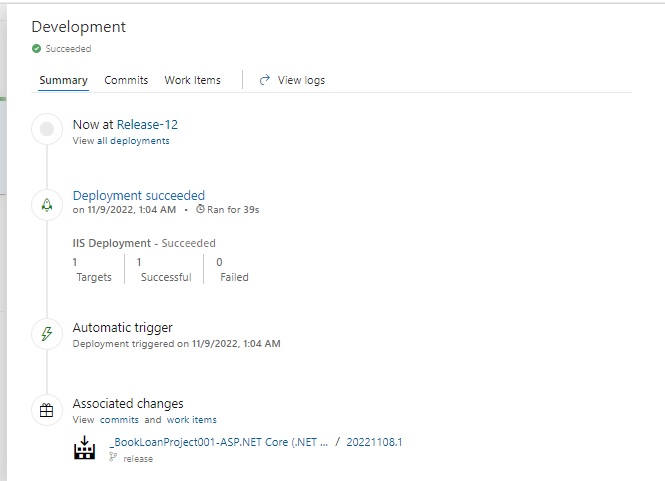
Returning to the pipeline diagram, we can see the completion of the deployment stage and time of completion.
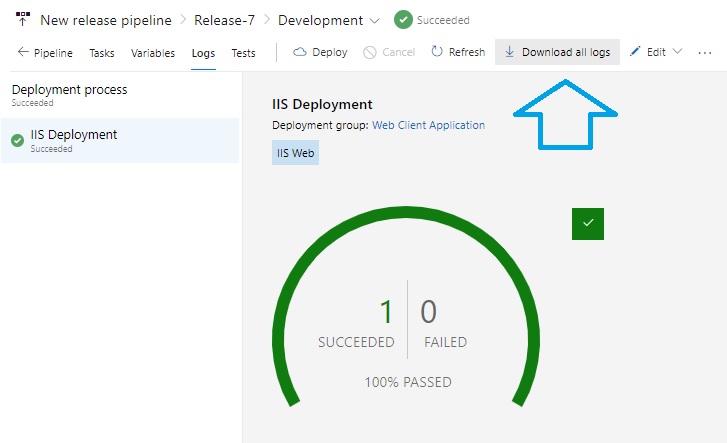
If we select the pipeline log in the deployment stage, a summary of successful and failed deployments will show. In addition, a ZIP containing the diagnostic logs of the release can be downloaded as shown.
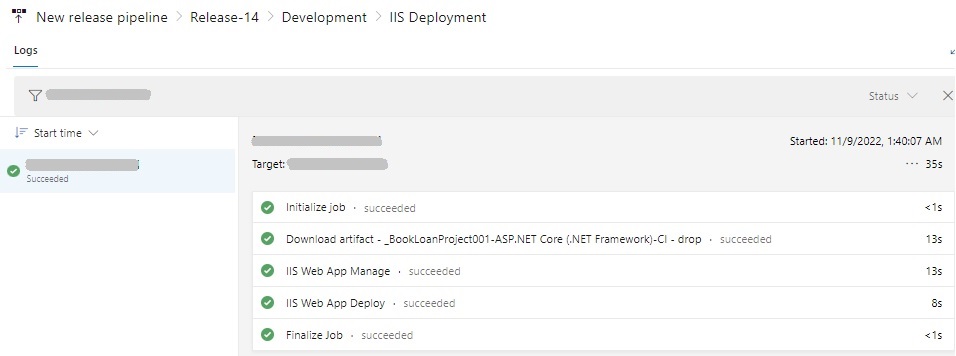
If we click on the deployment stage process, the execution of tasks and their respective durations on the release agent will display.
To validate the website has deployed, we can return to the deployment Agent server and check to see if the web site has deployed successfully.

There are other details I have not gone into such as manual and automated triggering of the deployment stage, and timer schedule triggers of the release stage.
I will discuss these in the next post.
That is all for today’s post. I hope you have found this post useful and informative.
Andrew Halil is a blogger, author and software developer with expertise of many areas in the information technology industry including full-stack web and native cloud based development, test driven development and Devops.

