
Welcome to today’s post.
In today’s post I will be showing you how to train a custom vision model to detect objects from images.
In the previous post I showed how to create a custom vision model that can be used for training and predictions. In the same post, I showed how to train the model to classify objects within images. I also showed how to create tagged training image datasets, which were then run through a training iteration to produce a model that could be called from a published Prediction API to determine outcomes on input images.
I also explained the two main types of object recognition that are used from models created from a custom vision resource. These are Object Classification and Object Detection.
With Object Classification, given an image, we want to classify the main object in the image into an object category. What this means is that we study variations of the object and classify each variation as a member of the same object category. All objects in the same classification have the same properties (color, shape, taste, material).
An example of object classification is a fruit that has a cylindrical shape, is colored green, has a stem, and is round. However we place the same or similar objects in the same location, the object is still the same, and has not changed its characteristics.
When an object classifier has identified the object’s shape and color as round and green, then it places the object into the apple classification.
If the object comes in different colors, like a red apple and green apple, we can apply additional labels to these objects to distinguish objects of different colors into different classifications.
A real-world example of object classification is distinguishing between red and green apples in a shopping checkout and determining the price per kilo.
With Object Detection, given an image, we want to distinguish any class of object(s) within the image and label them and their coordinates (or region). A detection of an object is achieved by analyzing the shape and characteristics of the new object, comparing it to other known, similarly shaped objects, then deciding if the new object has enough similar characteristics to be identified as one of the known class of objects.
Real-world examples of object detection include:
- Distinguishing invalid items in carry-on luggage detection system, such as a knife or fork, and allowing safer items like spoons.
- Detection of food items in a self-service checkout counter for theft prevention purposes.
- Detection of sharp objects including spills on work floors in common areas for occupation health and safety monitoring and cleaning services.
One of the main differences related to images that are used for object classifications and object detection is that classifications are used for objects tagged within images containing one object, and object detection uses locates positions of objects within images containing one or more objects.
In this post, I will be covering detection of objects within an image.
In the previous post, I have already shown how to create a custom vision resource using the Azure Portal. If you wish to, refer to those details then return here to continue the next part, which will explain how to create and train the vision model for object detection.
Creation of Custom Vision Models
To be able to create custom vision models, we can use the Custom Vision Studio in the custom vision portal. Access to the Custom Vision Studio is provided to users with Azure subscriptions. Aside from direct site access, it can also be accessed from the overview section of the Custom Vision Training resource.
If you are already signed into the Azure Portal, then to sign in to the Custom Vision Studio, click the Sign In link in the home page:

In the landing page, you will see the Projects page, where you can create custom vision training projects:
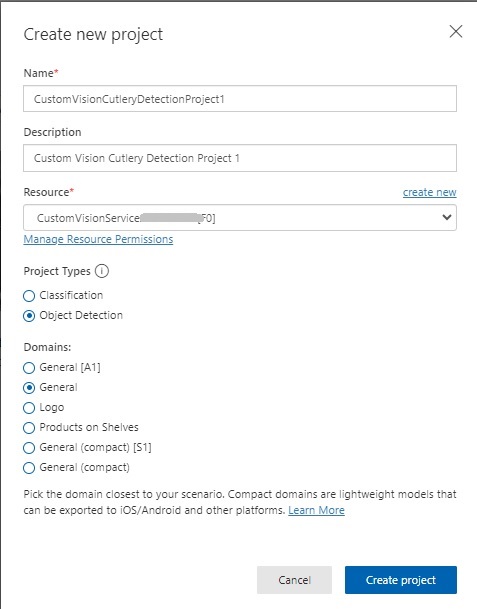
I then click Create project.
Image Tagging within the Custom Vision Project
In this section I will show how to create the training dataset for the model, then upload and tag images. I will then show how to decide how big our data sample should be before we can commence training.
To be able to train a custom vision model for object detection, we will have to deliver two tasks:
- Upload images.
- Tag the object within each image.
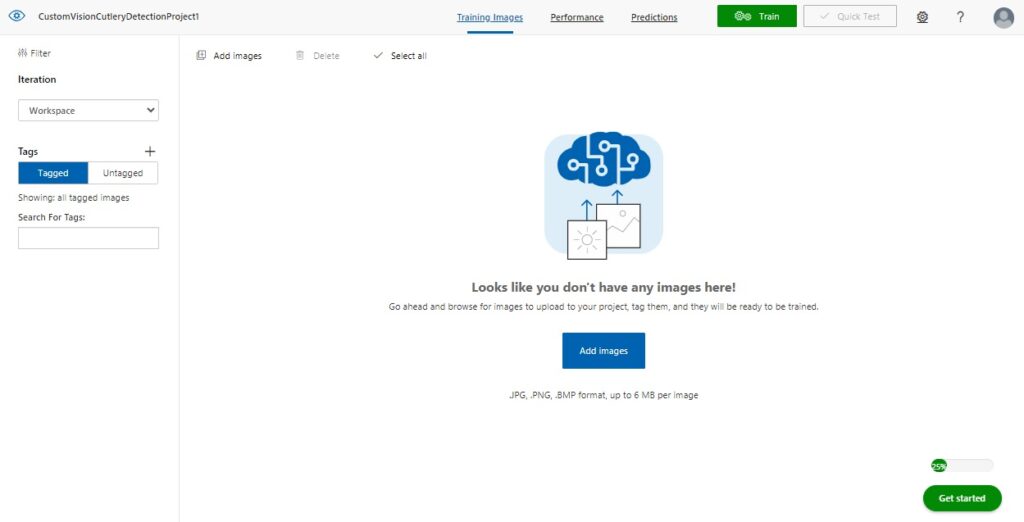
In the Training Images screen, you will see to the left the Tagged button highlighted, and to the right you will see a message that tells you that there are no images:
After clicking on the Add images button, you will be shown an image upload dialog, which will prompt you to upload the training images.
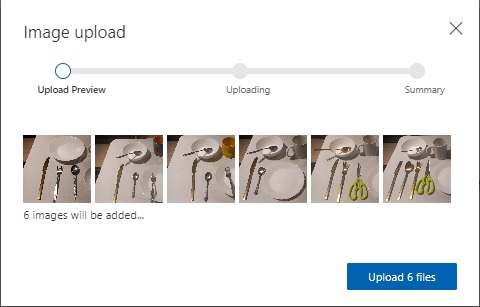
Notice that there is a difference between the image uploads for the object classification and object detection custom vision model projects. The distinguishing feature is that the uploads for object detection do not have a tag label text edit in the upload dialog. The reason for this is that images tagged within object detection models require the tags to be applied to individual objects within the image, whereas with object classifications, you can tag multiple image files with the same tag.
The next screen shows an upload of the first set of untagged images.
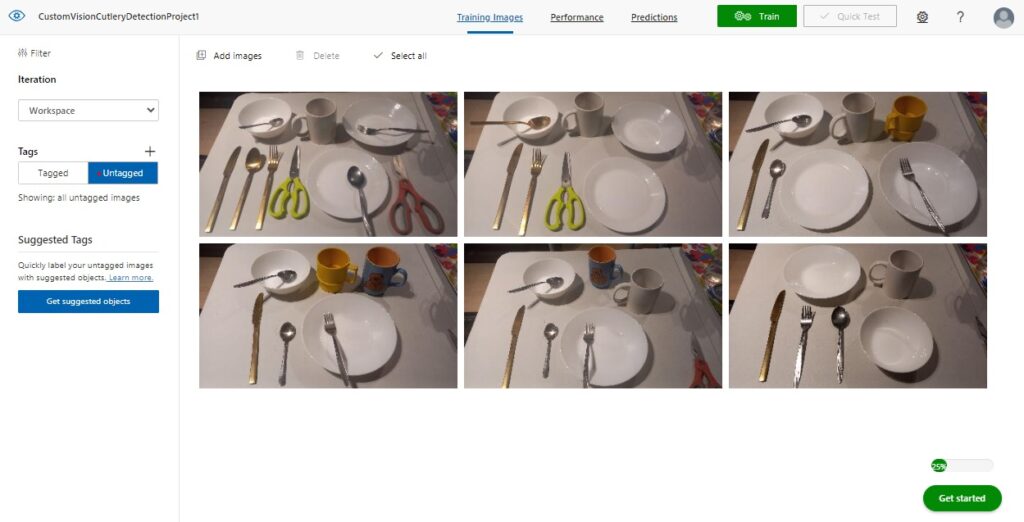
At this point, you do not know if the number and variety of images that have been uploaded is sufficient to be able to train the custom vision object detection model. The reason for this is that in some of the images, you may have objects that overlap and are not easily distinguished as clearly defined objects.
I will explain the complexity of tagging overlapping objects in the next section.
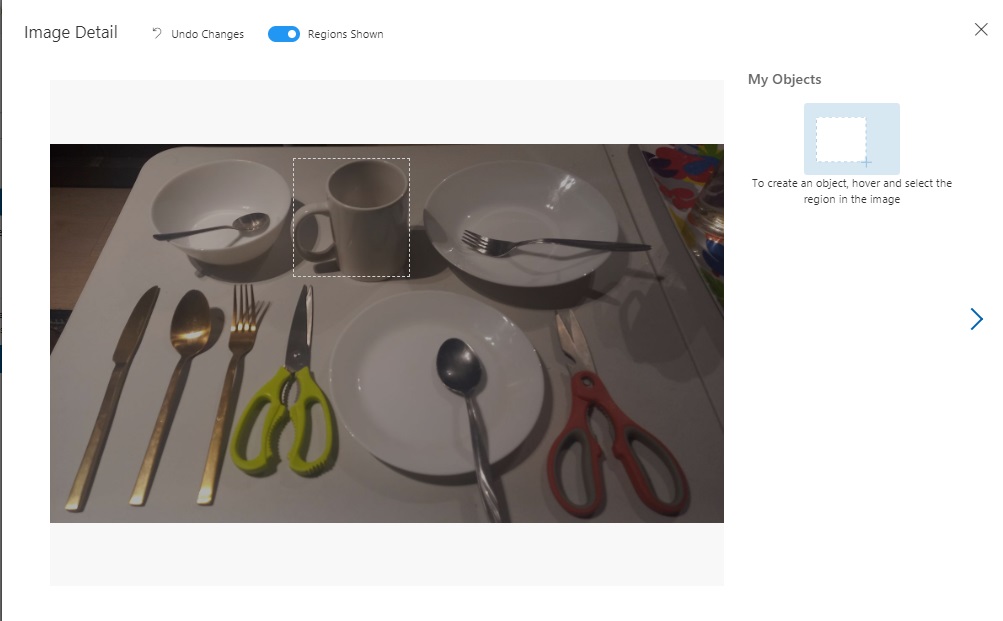
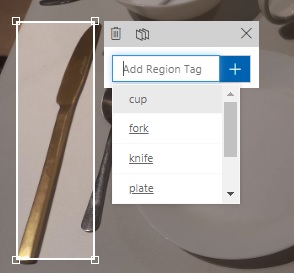
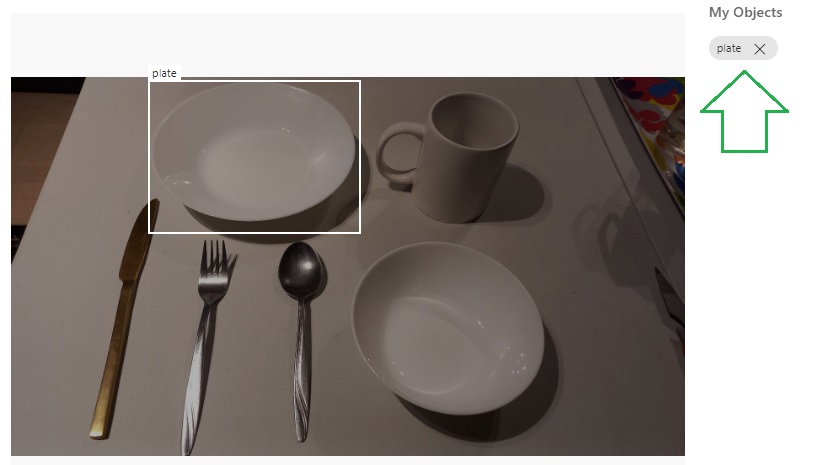
To be able to start tagging an image with region tags, double click on an image to open it up in the image tagging dialog.
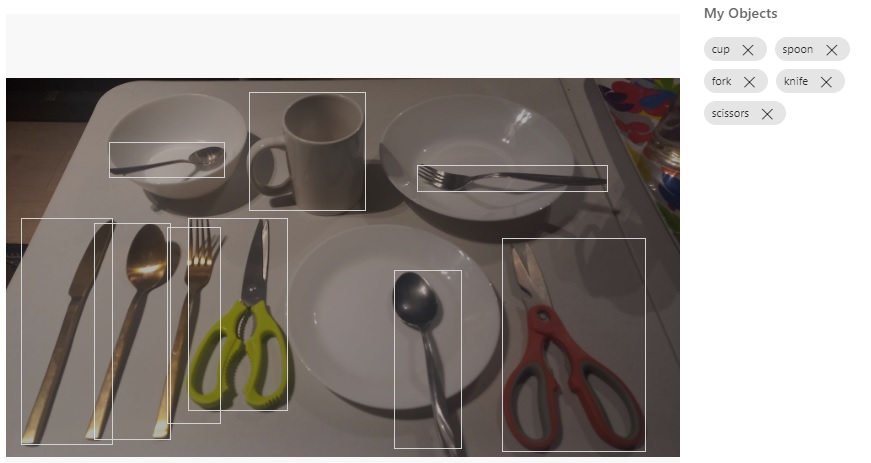
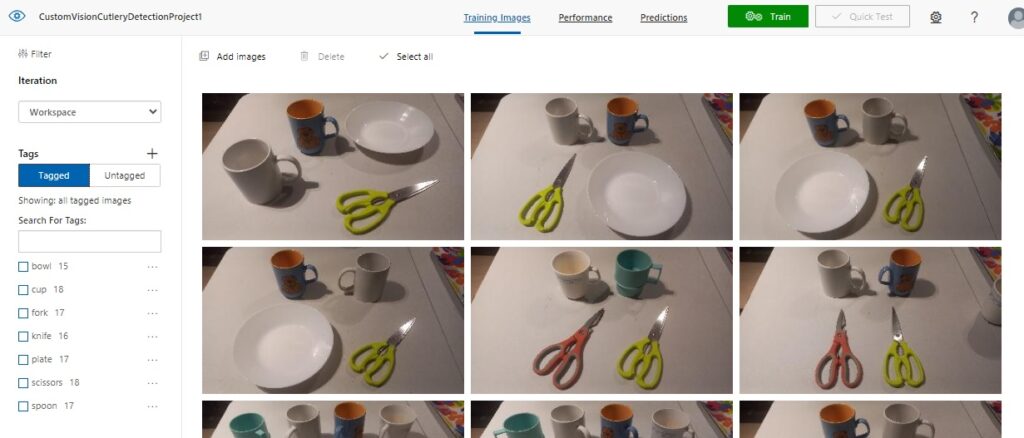
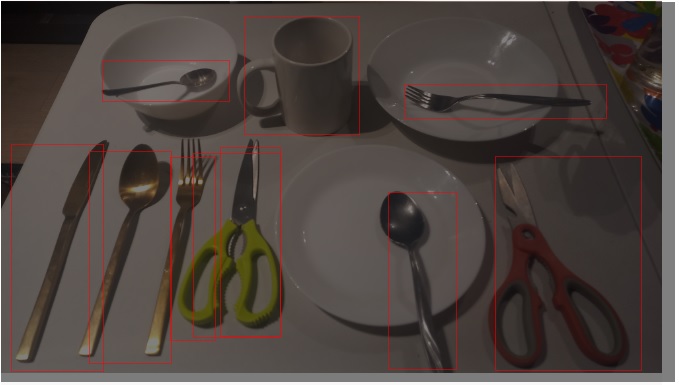
For the first image we can see a table with different cutlery and dining objects, such as spoons, forks, knives, cereal bowls, flat plates, recessed plates, and a kitchen scissors.
Hovering the mouse over the image, you will see objects highlighted with a dotted rectangle as shown:
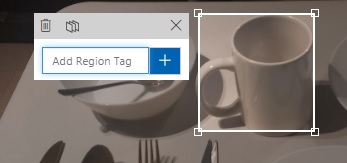
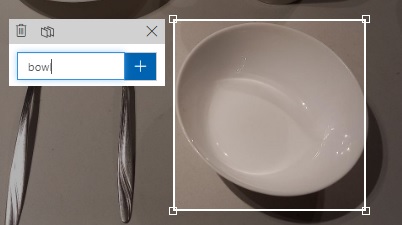
After clicking on the highlighted object, you will see a popup editor tooltip open that allows you to be able to add a label tag as shown:
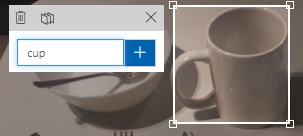
Then enter the label tag into the edit box as shown:
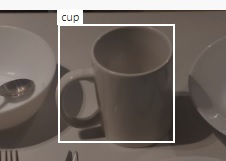
After entering the label tag, you will see the label appear on the top right corner of the highlighted object as shown:
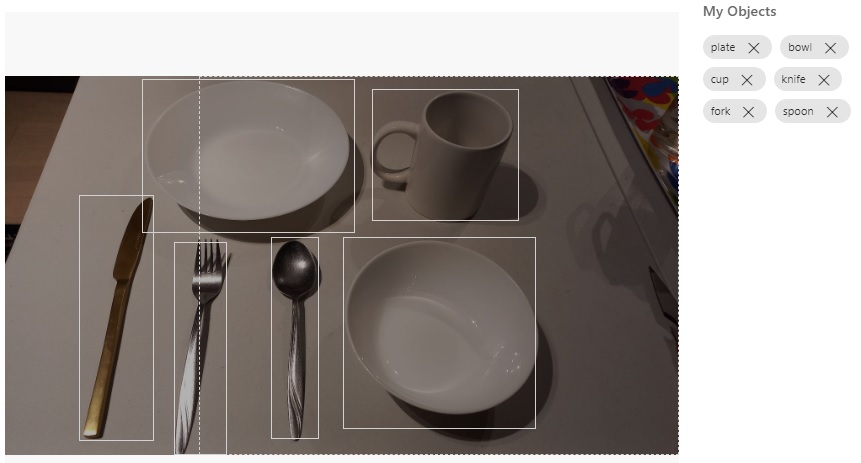
Then repeat the same process for the remaining objects in the image. For each image that is tagged, you will then see the labels as removable chips on the right of the image tagging dialog.
The labels for any of the tags can be removed by simply clicking on the X on the right of each label chip.
Once you have tagged at least one or more images with different labels, you will notice that when you tag any new objects, the popup editor tooltip will allow you to select from existing labels that you have already entered, with the most recently used label at the top of the edit drop down list:
At this stage, you could attempt to train your vision model with your existing training set, however, there is a restriction on the minimum number of tagged images that are required to be considered for a training iteration. I will explain this in the next section when explaining tips on tagging overlapped and isolated images.
The Skill of Tagging Objects in an Image
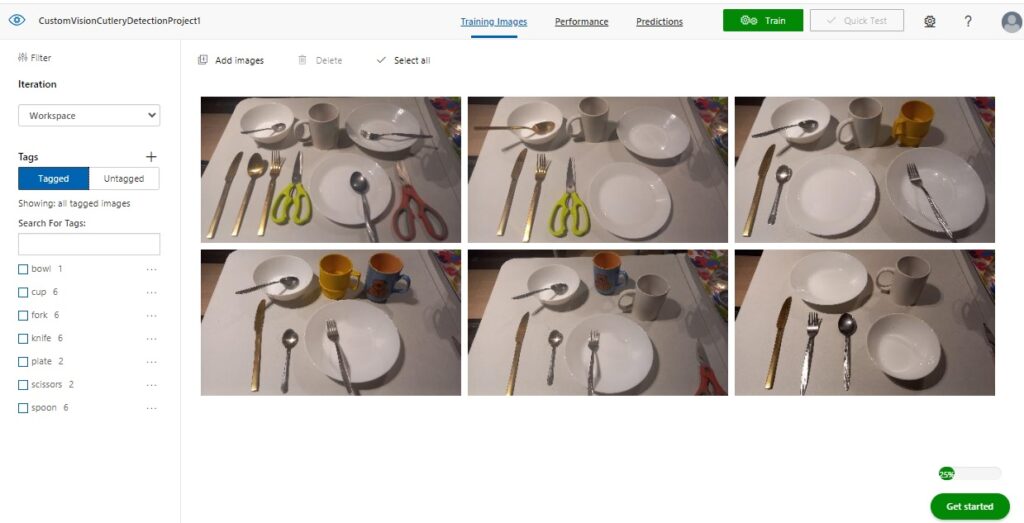
When using images that contain a variety of object placements and orientations, you will experience the problem where some of the tags within your images do not precisely represent the objects that are tagged. Below is an example of tagged images:
When we attempt to run a training iteration on a sample of tagged images, such as the one below, restrictions on the training requirements will prevent a training run from executing, telling us that our training data set does not have the required number of images per tag:
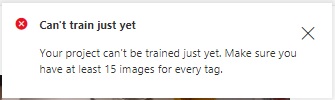
To resolve this issue, we will need to add additional tagged images with the following characteristics:
- Include images in the dataset that contain objects that are not overlapped.
- Include images that do not contain objects where the ends are cut off from the edge if the image boundary.
In addition, we will need to exercise the following tagging practices to provide as many accurate tags of images as possible.
- Avoid tagging objects that contain other objects.
- Avoid tagging objects that overlap other objects.
- Tag as many isolated objects that do not overlap other objects.
An image that contains isolated objects that can be tagged with maximum identification correctness is shown below:
Images like the one above will give us higher recall in the training results.
Another example is then we tag similar objects that from their viewing perspective may be considered the same but are in real-life are different objects. So, even though the image is ideal and contains separate isolated (non-overlapped) objects, the tagging of very similar objects can lead to the inaccurate identification of the objects.
An example would be a cereal bowl, which is shown below:
When we compare it to a recessed plate, they are quite similar, and only differ by their size. These could be misclassified as recessed plates, reducing the confidence level of the recognition of plates and bowls.
An example of overlapping is shown below, where I have indicated the overlapping regions within the image:
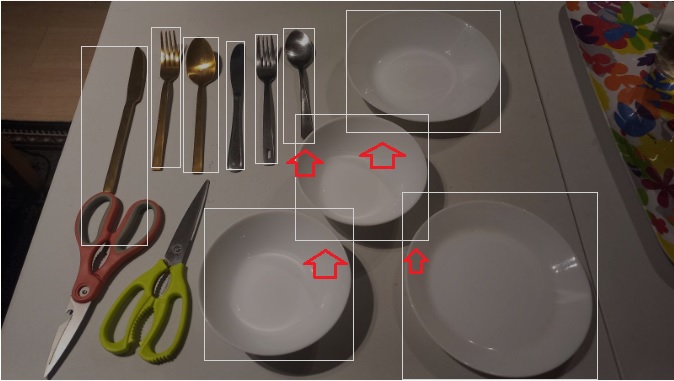
What you will notice from the above are the number of tagged image regions that contain overlapping areas of other objects. This can sometimes reduce the accuracy of the recognition algorithms in identifying the object.
After uploading and tagging enough images, we should be able to reach the minimum threshold of tags per image. Below is the running tally when we reach this minimum threshold:
Now that our training data is adequate, we can run a training iteration for our custom vision model, which is what I will show in the next section.
Running a Training Iteration and Results Interpretation
In this section I will show the results of running a training iteration and how to interpret the results.
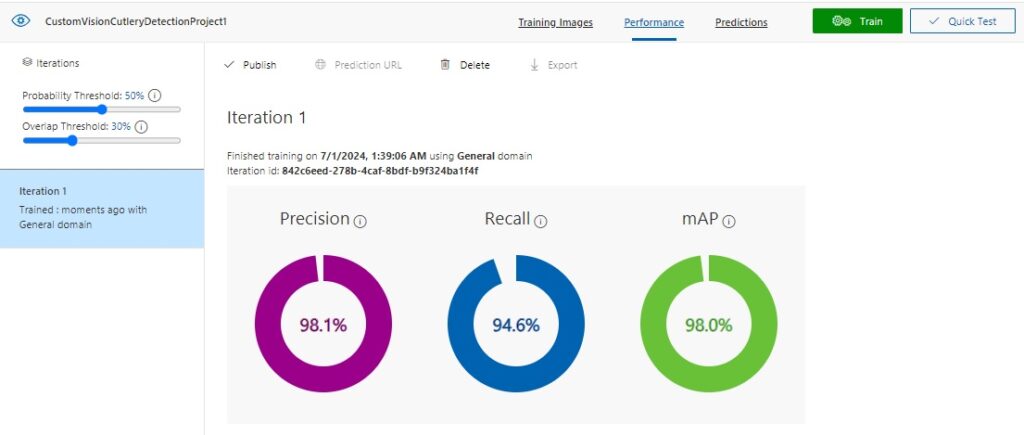
The configuration slider in the left pane shows that the Overlap Threshold percentage is not determined by overlapping objects. It is the percentage of overlap of a predicted bounding box with the actual bounding box to be considered correct.
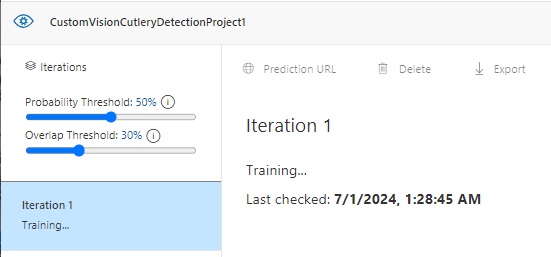
When the training iteration is completed, the following results are displayed:
The Precision result is the percentage of identified detections that are correct. For example, if we had identified 10 images of spoons, but one of the images was a knife, then the precision is 90 percent.
The Recall result is the percentage of detections that are correctly identified. For example, with 10 images of spoons, the model identified 9 spoons, so the recall is 90 percent.
The AP is the average precision.
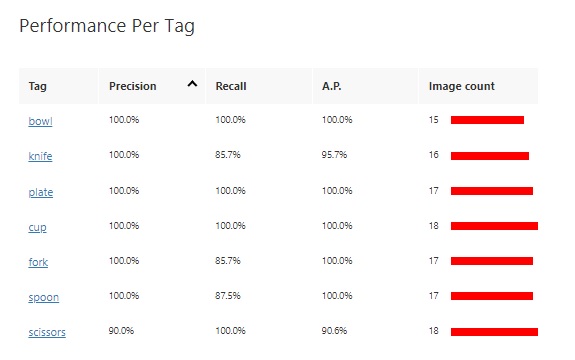
The results grid below the above result summary shows a breakdown of results for each tag and the sample image size.
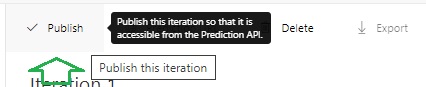
Publishing the Training Iteration to the Prediction API
With the resulting training run completed, we can publish the trained vision classification model so that predictions can be run against any image.
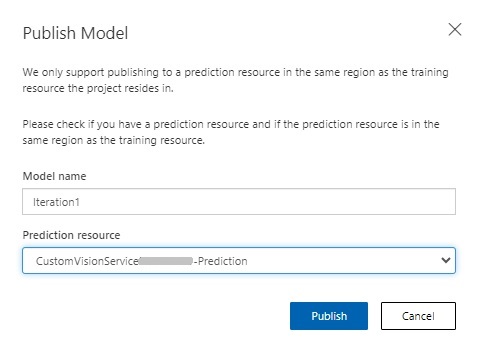
In the publish model parameters, enter the model and the custom vision prediction resource.
Once published, we will be able to run tests to verify that the trained custom vision model can apply its trained data to determine object classifications within input images. To run a test, click on the Quick Test menu option.
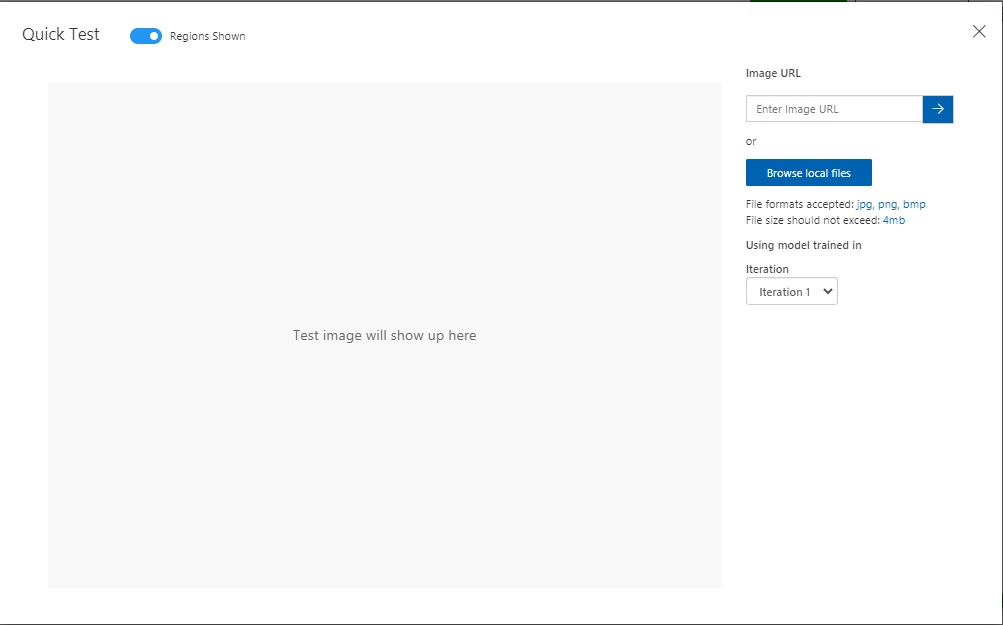
In the quick test input dialog, you will see a prompt for an uploaded image or an image URL:
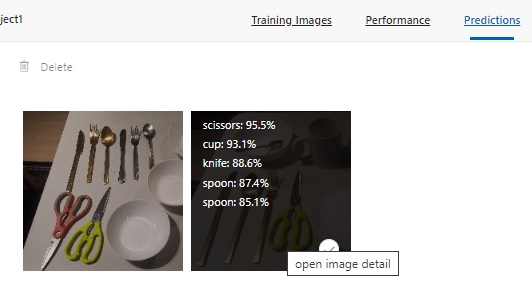
Below is an example of the first of three images that I have run predictions for: a table with placed cutlery and ceramic bowls and plates.
The predictions from the test for the image detection are shown in the Predictions grid to the bottom right of the test dialog. The top 5 prediction percentages are also displayed when you hover over the thumbnail for the same image in the Predictions pane.
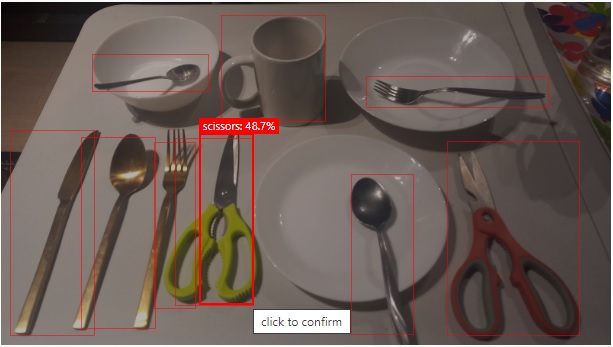
After selecting the image, you will see the predictions for each bounded image. Notice that the prediction for the green scissors is just 48.7%. As I have mentioned, an excess overlapping of the region bounding rectangle, which excludes some of the object can affected the prediction score.
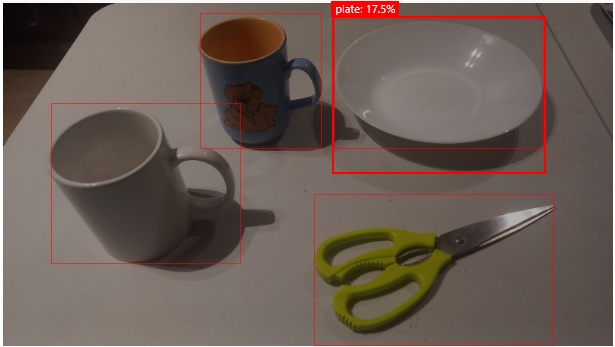
In another predictive test, the following image showed different prediction scores for the same identified object. The recessed plate is recognized as a bowl with a predictive score of 82.7%.
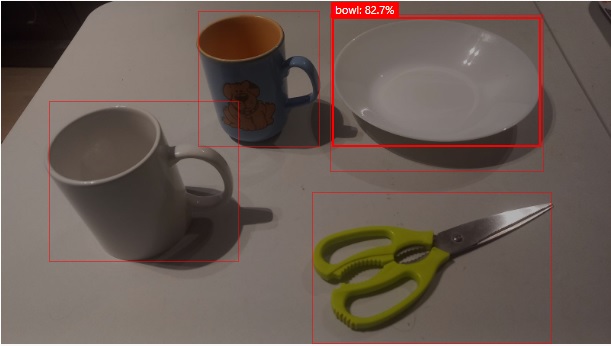
The same object is also recognized as a recessed plate with a predictive score of 17.5%.
Another interesting result is the prediction for the following image:
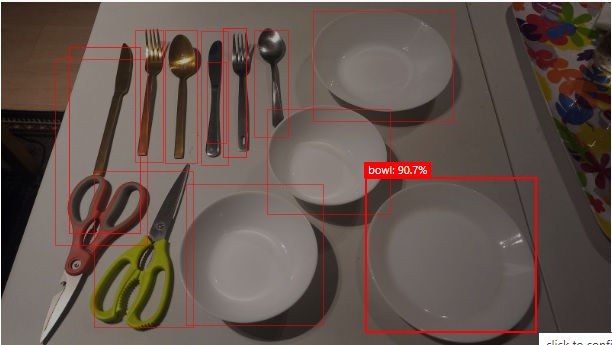
Notice that the plate is given a 90.7% prediction as a bowl, which we know is inaccurate.
Publishing the Training Iteration to the Prediction API
With the resulting training run completed, we can publish the trained vision object detection model so that predictions can be run against any image.
In the publish model parameters, enter the model and the custom vision prediction resource.
The Prediction URL is of the form:
https://[custom-vision-resource-name] -prediction.cognitiveservices.azure.com/customvision/v3.0/Prediction/[project-id]/detect/iterations/[iteration-name]/url
and requires the prediction key header and body containing the URL of the image to be provided.
We have seen how to create and build a vision object detection model for a custom vision resource. We also saw how to construct and label our training data model for the custom vision training resource. We then tested the model using the quick test and determined which objects had the highest predictions.
In the next post, I will show how to use a custom vision resource to train and predict outcomes for an object detection model.
That is all for today’s post.
I hope that you have found this post useful and informative.
Andrew Halil is a blogger, author and software developer with expertise of many areas in the information technology industry including full-stack web and native cloud based development, test driven development and Devops.

