
Welcome to today’s post.
In today’s post I will be showing how to use Azure DevOps Service to action a pull request from changes pushed from a Git repository and merge the change into the main branch of the repository.
I will assume you are already familiar with the setup of an Azure DevOps organization and project, a Git repository, and the basics of local Git versioning, including cloning, initializing, branching, and committing of changes from a local Git repository.
In a previous post I showed how to setup an organization and a project in Azure DevOps Services. The first task I will show here is to explain what a pull request is and how to action them in Azure DevOps Services. I then showed how to configure and import local Git repositories into a remote Azure DevOps repository. Following that, I showed how to apply branching and committing of Git changes into a remote Azure DevOps repository.
The next Git workflow task I will explain how to use in Azure DevOps Services is the pull request, and how to use it within an Azure DevOps Services environment.
I will fist explain what a pull request is and how to action them in Azure DevOps Services.
What is a Pull Request and how are they actioned
Following a commit then a push of a change within a feature branch from the local Git repository, the change will not go through to the main or master branch until a pull request is created and it is approved.
The reason why a pull request is required is that we would not want any change pushed and merged into the master branch without the requisite checks and validations. These would include things like code reviews, results of unit tests and code quality.
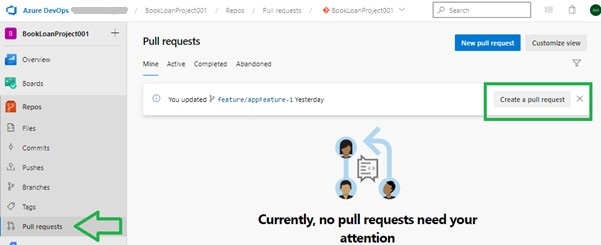
In the Azure DevOps Services interface, we can view the pull requests by selecting the Repository | Pull requests menu item as shown below:
Pull requests are also created from the Repos | Files menu item as shown below:
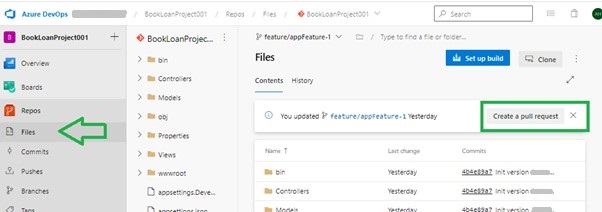
The Contents pane under Files will show any changes by a developer pushed from a branch. There will be a prompt from Azure DevOps to initiate a pull request as shown:

A pull request allows you to start a discussion related to the feature, escalate an issue, and request additional help, or request a member of the team to review the change.
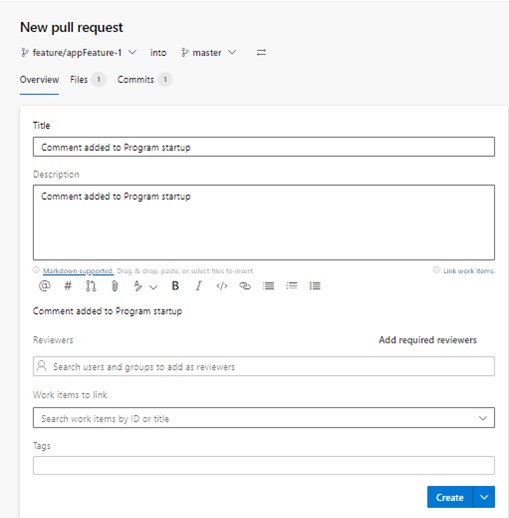
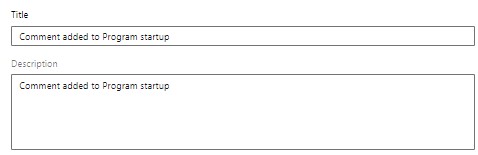
When we click on the Create a pull request action, the pull request details dialog appears:
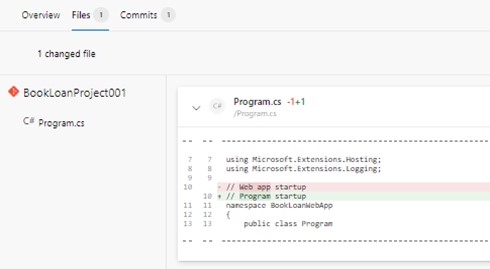
If we click on the Files tab, it will show us what file or files have been changed as part of this commit. This shows the source code that has been added and the previous source code and allows an approver to review the change and decide whether to approve or decline the pull request.
The first section of the pull request overview is the source and destination branches where the change originates from and where the change will be merged into after the pull request is approved.
The second section is the comment and description of the pull request, which is defaulted to the comment that is specified in the original source code git commit command. The title and/or description can be overridden with alternative text or left as is.
The third section is the approvers section. An approver is a member of your team within the project who can review changes to the project and approve or decline them. If the branch has a policy that requires it to have at least one approver review the changes associated with the pull request, then a selection will be required here.

In this case, we select one or more approvers as shown:

The fourth section is a field that allows you to link a work item (from the project board) to the pull request.

After we have filled in the above sections, we hit the Create button to create the pull request.
If the policy of the branch requires a minimum number of reviewers to approve the pull request, then once the minimum number of approvers casts an approve action on the pull request, then the commit will be permitted to merge commit into the master branch.
Approvers in a Pull Request
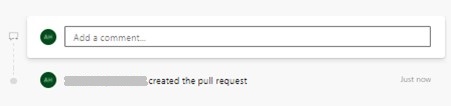
Once the pull request is submitted, the approver will receive a notification. In the Azure DevOps interface, they can be viewed from the Repos | Pull request menu item:

When the pull request is clicked, the details will show as follows:
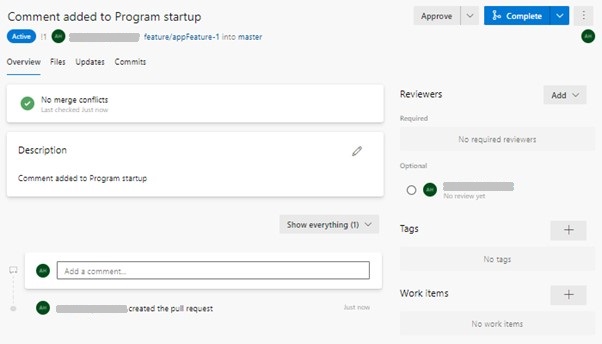
The pull request approval screen shows the following sections:
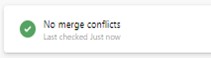
1.A status indicator. This tells us if the source change committed caused a merge conflict with a change made by another developer in another source change in the same source file and in the same lines of code. When this happens, the indicator will be red. To resolve a merge conflict, one of the developers that modified the same lines of code will then need to use the conflict resolution feature of git to choose which developers change to accept or manually change the line and re-commit and push the amendment back to the same branch. When the amendment is pushed back to the branch, Azure DevOps will attempt to resolve the pull request.
2.description field. This allows the reviewer to amend the description, perhaps to improve it in some way.

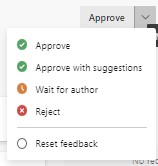
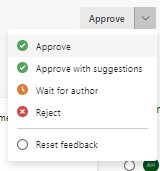
3.Status selection action. In the top-right corner of the pull request details, you will see a status drop down which the approver uses to vote on the change. They can either Approve, Reject or Wait for author.
4.Comments section. This section allows the reviewer to enter in a comment on an issue related to the commit or a constructive comment. If the approver disapproves of the commit, they may suggest fixing the issue with some recommendations and select a Rejection status.
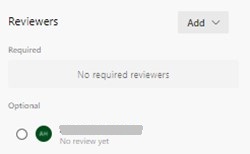
5.Approvers section. This action allows the selection of approvers for this pull request. An Optional or Required approver can be added with the Add button. Any optional reviewers shown can be set to be a required approver or removed.
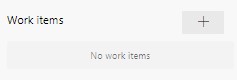
6. Associate work items section. This section allows the pull request to be linked to a work item from the project board, which can be an Epic, Task, Bug, Test Case etc.
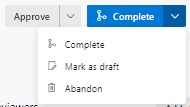
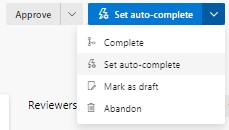
7.Merge action. This action allows the current approver to decide to either Complete or Abandon the pull request. Usually, this action is available if the minimum branch policy is met for a pull request. In the case for a minimum number of approvers being required to a pull request to be merged into the main branch, once the minimum number of approval votes is reached, the Complete action will be visible and actionable.
When the minimum number of approvers is reached for approval of a pull request, then the available action, Set auto-complete will merge the commit into the main branch and complete the pull request. In the case where I am the only required approver of the pull request and there is only one required approver specified, then the pull request workflow can auto complete the merge commit change into the main branch.
8.Audit history. This section shows comments and any changes to the pull request parameters:

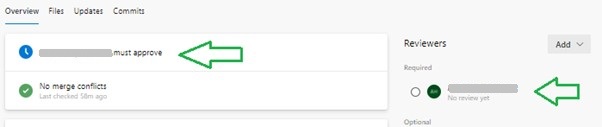
If I am specified as a required reviewer of the pull request, then this will be indicated in the status panel as shown:
If I am an optional or required reviewer, I can add a comment which will be part of the comment history for this pull request:

We will see next how to complete a pull-request.
Completion of a Pull-Request
When we hit the auto-complete button with the approval status selected, this will action the pull request.
A dialog will show re-confirming the completion with a few optional actions after the merge into the master branch completes:
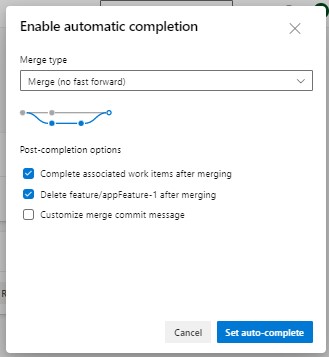
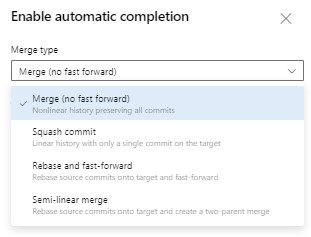
There are also some other merge types that can also be selected, and these are:
Accept the recommended options.
We can also cancel auto-completion of the pull request so that the approver of the pull request manually actions the request after the required branch policies are met.
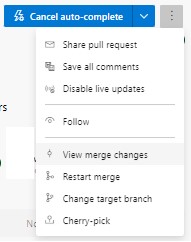
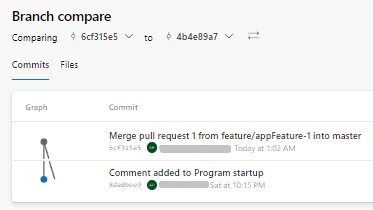
Before the pull request is approved and the commit is merged into the master branch, the commit and graph details are shown by selecting the View merge changes menu item:
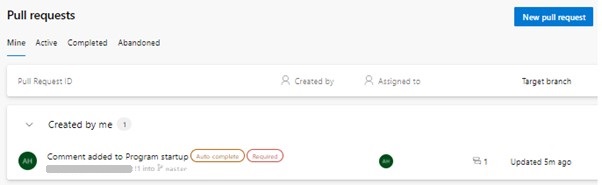
When we view the pull requests, we can see if the request is auto completable and if it has required policies.
To complete pull-request, open the pull request and select the Approve action as shown:
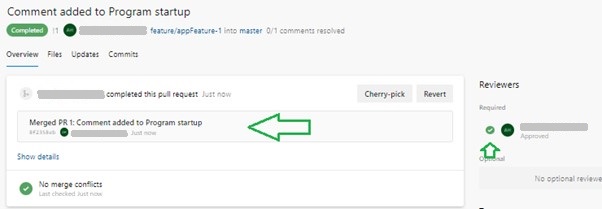
The pull request will be in a completion status, showing the green tick icon:
We have seen how to approve and action a pull request so that it can be merged into a main branch in an Azure DevOps repository.
In this post we have observed the following tasks:
- Opening a pull-request in an Azure DevOps project.
- Enter details in a pull-request.
- Approve a pull-request.
In the next post I will show how to resolve merge conflicts from a pull request and merge corrected changes into a master branch in the Azure DevOps repository.
That is all for today’s post.
I hope you have found this post useful and informative.
Andrew Halil is a blogger, author and software developer with expertise of many areas in the information technology industry including full-stack web and native cloud based development, test driven development and Devops.

