Welcome to today’s post.
In today’s post I will explain how to use an Azure Board to create issues, then link them to pull requests. I will then show how to control the status of the issues through pull requests.
In a previous post I showed how to merge pull requests of changes and merge them into the main branch of a repository.
The purpose behind creating issues and linking the issues to development work is to keep track of the status of changes and let other team members in the project, such as the Scrum Master or Testers what the progress is of the project in terms of issues and workloads.
Issues and tasks correspond to tickets that are part of the timeline within a release, with each phase corresponding to a part of the system lifecycle (which can be an implementation phase of a new system or a maintenance phase of an existing system). When the status of an issue or task changes from active to completed, then it can be moved to the next phase of the system lifecycle. The phases within the lifecycle in most projects can be development, testing, acceptance testing, and production. On an Azure (Kanban) Board, a change from one status to another is usually confirmed by moving an issue from one swim lane to the next. Once the issue or task is moved into the done column, it is ready to proceed through the systems development lifecycles.
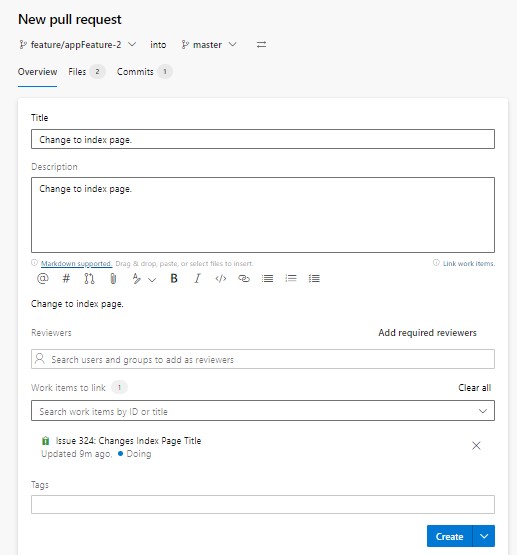
When we are presented with a new pull request, we are presented with the fields as shown:
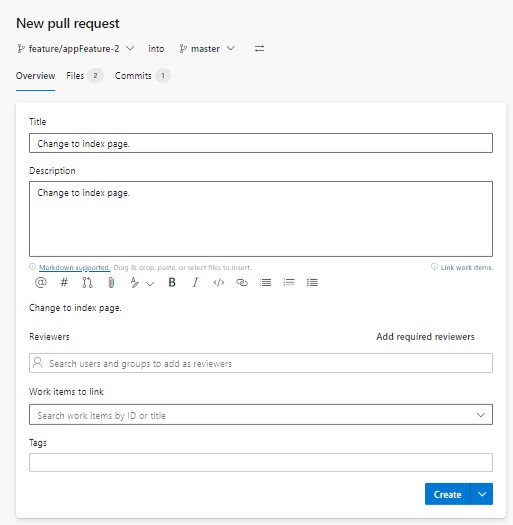
One field to bear in mind is the Work item to link field, which allows us to link the pull request to an existing Azure Boards issue. We will explore this a little later.
Azure Board Issues
To add an issue to the Azure Board, select the project, then the menu item Boards.
In the board pane under the To Do column, click on the green plus sign, then enter a name for the issue as shown:
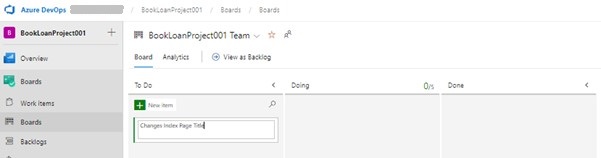
The titled issue is shown below:

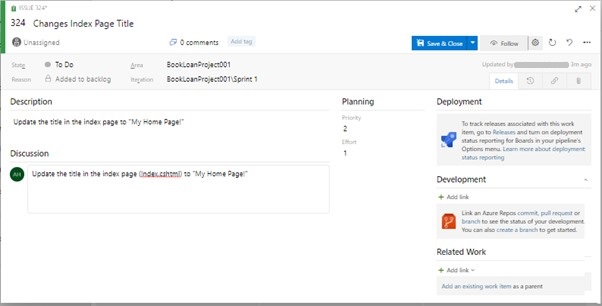
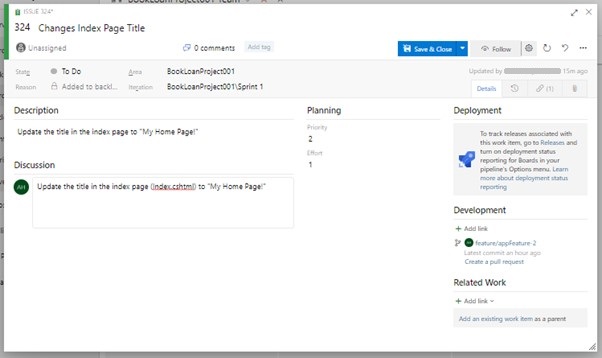
When we open the issue, the details are shown with the following details:
- Title
- Description
- Discussion (Comments)
- Assigned member
- State (To Do, Doing, Done)
- Area (Name of project)
- Iteration (Sprint within project with format [Project]\[Sprint])
- Planning Priority (Urgency of issue)
- Planning effort (Story points assigned to task/issue)
- Development (Track status by linking a commit, pull request or branch)
- Related work (A existing link to a work item)
The fields are shown below:
In the next section I will be showing how to link work items to a Boards issue.
Linking Work Items to a Board Issue
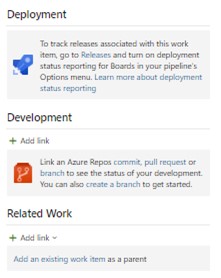
In the Related Work area to the right pane of an issue is the Add link action with a plus sign.
In the Development area to the right pane, this is where we can link a feature branch to the issue.
Click on the plus sign in Development area and the linking dialog will show.
Here we see the following fields:
- Link type (Branch, Build, Changeset, Commit, Pull Request etc.)
- Repository
- Branch
The branch drop-down list will show existing branches for the repository.
Select a branch.
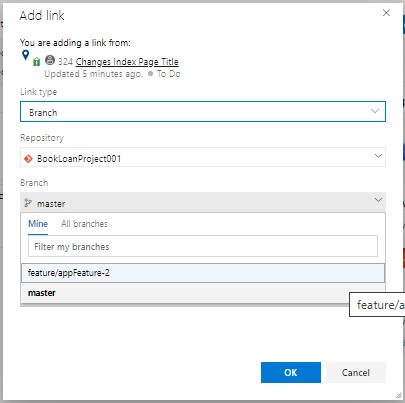
Add a comment. Accept changes.

Under the Development area we will see the link to the feature branch:
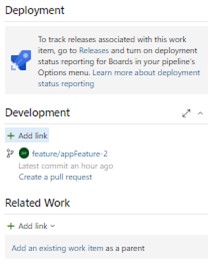
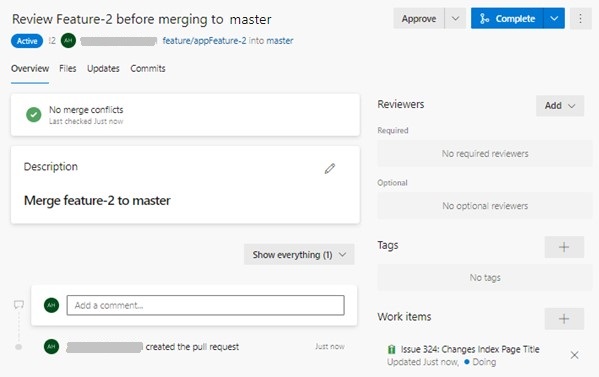
The issue details shown with the linked pull request.
Assign a team member to the issue.
Save the changes to the issue and close.
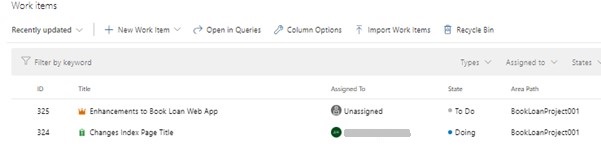
Select Boards and select Work Items.
Re-open the pull-request.
The issue linked to the branch shows in the pull request:
Instead of creating the pull-requests manually, we can also use the Azure DevOps CLI to create the pull-requests and assign the work items, description, repository, source, and target branches.
This can be done with the following commands (the project name can be changed as desired):
az devops configure --defaults organization=https://dev.azure.com/[your-organization] project="BookLoanProject001"

az repos pr create
--title "Review Feature-2 before merging to main"
--work-items 324
--description "#Merge feature-2 to master"
--source-branch feature/appFeature-2
--target-branch master
--repository BookLoanProject001 --open
OR
If we have already configured the organization and project in our CLI session, the more concise command can also be used:
az repos pr create
--title "Review Feature-2 before merging to main"
--work-items 324
--description "#Merge feature-2 to master"
--source-branch feature/appFeature-2
--project BookLoanProject001
--target-branch master
--repository BookLoanProject001 --open
After running the above command in the DevOps CLI, a new browser should open with the pull request details displayed in the Azure DevOps project with a link to the issue:
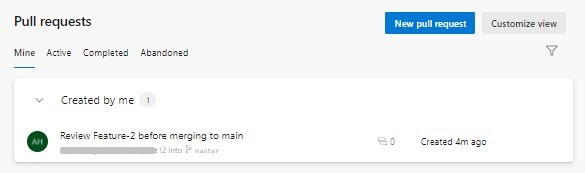
The new PR can be viewed selecting Repos -> Pull Requests:
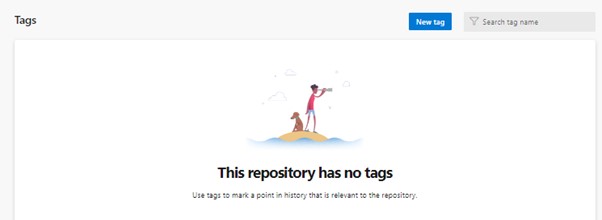
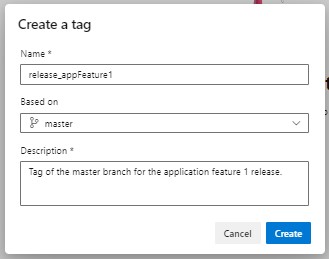
Next, we will tag the release. Open Repos -> Tags.
Select New tag…
Create the tag.
The new tag will appear under the Tags heading:

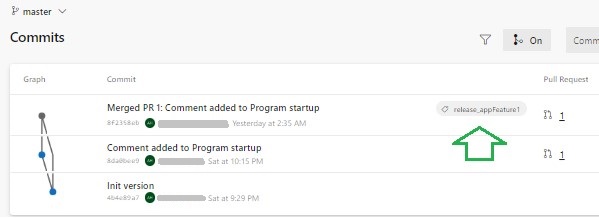
Select Repos -> Commits.
The new tag will show along the initial merge commit into the master branch:
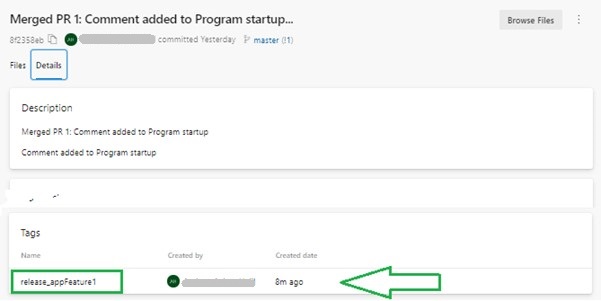
In the merge commit details, the tag shows in the Tags section:
Add comments and reviewers to the feature pull request.
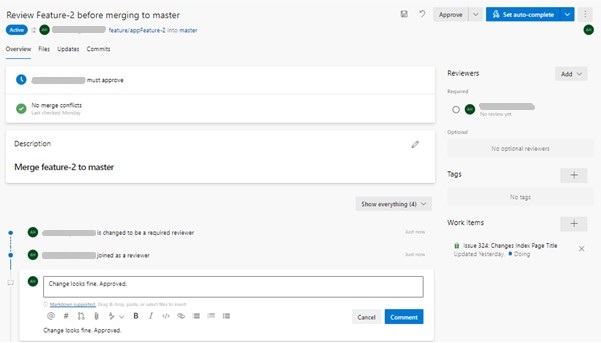
Approve the feature pull request.
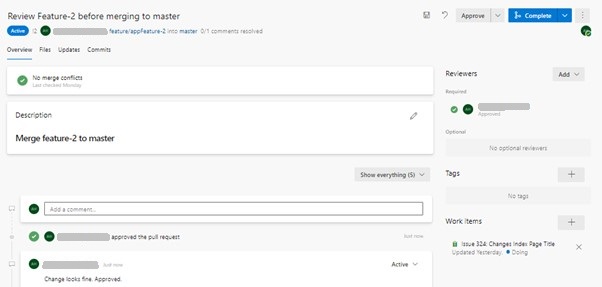
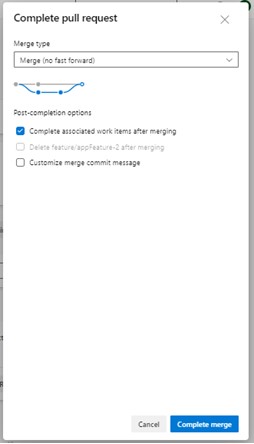
Complete the merge of the feature pull request.
Keep the option to complete the associated work item after merging.
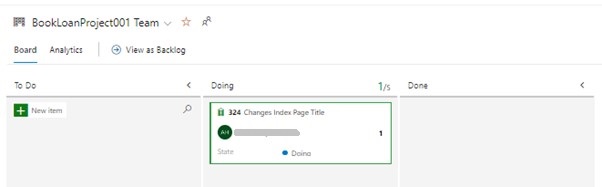
Once the merge is completed, you will see the review dialog status change over to Completed:
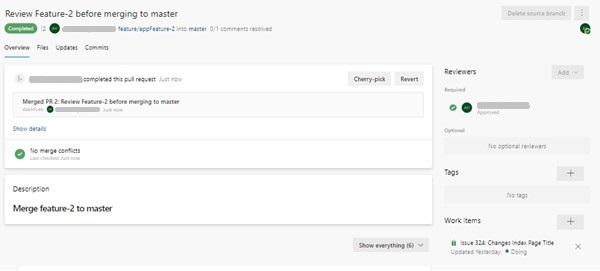
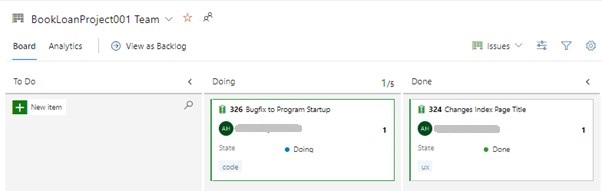
As the pull request has been successful and merged the change into the master branch, it has completed the linked work item and moved it to the DONE status as shown on the Azure Board:
From the above overview, we have seen how to complete the following tasks:
- Create issues on an Azure Board.
- Create a pull request using Azure DevOps CLI and link it to an existing branch that has been pushed to the repository.
- Complete a pull-request and auto-complete the linked issue on our Azure Board.
As a developer or DevOps engineer, you will find (if not already) the above tasks useful during a development iteration during a sprint of your project.
In a future post, I will show how to resolve a merge conflict during a pull-request and introduce a useful extension in Azure DevOps to allow us to achieve the resolution.
That is all for today’s post.
I hope you have found this post useful and informative.
Andrew Halil is a blogger, author and software developer with expertise of many areas in the information technology industry including full-stack web and native cloud based development, test driven development and Devops.