Welcome to my post!
In today’s post I will show how to enable support for Azure Blob Storage within SSIS packages developed within Visual Studio 2017.
Why do I need to setup Blob Storage in Azure for SSIS imports?
With SSIS packages, our first suggestion would be to use a table import task to specify a source table within an existing Azure SQL database, and a description table within another Azure SQL database.
Why would the most obvious approach not work as expected? The reason is that if we wanted to transfer not just a few hundred kilobytes of data, but megabytes of data from one local SQL database into an Azure SQL database, we would still need to specify a storage account from the Azure SQL database, that will store audit logs. We would also need to upload the data that we are going to import into the Azure database into the Azure storage. Then there are the storage account fees that we will pay as the size of uploaded blob data gets larger.
When a blob file, that can take the form of a CSV file is uploaded into Azure storage, then a data flow task maps and/or transforms the data in the file and inserts it into the destination Azure SQL database. The answer is that Azure data can only be imported into an Azure SQL database from SSIS using an existing Azure storage account, and within the storage account you will need to create blob storage that will hold imported files that will be imported into the Azure SQL database.
Before I show how SSIS packages will benefit from Azure integration features, I will explain in the next two sections what pre-requisites are required to achieve this.
SQL Server Data Tools
Before SSIS packages can be designed and developed within Visual Studio 2017, will require the installation of the SQL Server Data Tools, and can be obtained from the SQL Server Data Tools download.
The SQL Server Data Tools provides you with the capability to use SQL Server Integration Services (SSIS). The SSIS tool allows you to use more complex data imports and data transfers that can map and transform source data during the importation process.
SQL Server SSIS Feature Pack for Azure
After the data tools have been downloaded and installed, you will then need to download and install the MS SQL Server 2017 SSIS Feature Pack for Azure.
Below is a screenshot of the download for the SQL Server 2017 integration services feature pack for Azure:

We then select the download appropriate to your environment (32 or 64 bit):

When the MSI is run, you will see the initial setup screen as shown:

Following installation, you will notice some additions to the development environment, which I will explain in the next section.
Features added to the Visual Studio Development Environment
The SSIS Connection Manager
Inclusion of the Azure Storage connection manager allows you to set a data destination source to an Azure resource. For our import requirement, we require connections to Azure Storage accounts.

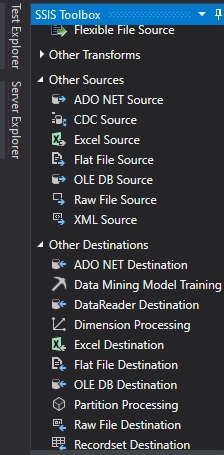
The SSIS Toolbox
The developer SSIS toolbox will contain components to support development of data migrations to and from Azure Blobs. In particular, the Azure Blob Upload Task is required for us to upload blobs into an Azure storage account.

Further down the toolbox, in Other Destinations, the OLE DB Destination task allows us to specify the Azure SQL database endpoint, the destination table, column mappings and insert the mapped data into the destination table.
In the above overview, we have seen how to setup our development environment to support the importation of local data into an Azure SQL database. What this did was to include Azure Storage accounts within SSIS data tasks.
In the next post, I will show how to make use of SSIS data tasks to import data from on-premises data into an Azure SQL Database.
That is all for today’s post.
I hope you have found this post useful and informative.
Thanks for reading.
Andrew Halil is a blogger, author and software developer with expertise of many areas in the information technology industry including full-stack web and native cloud based development, test driven development and Devops.