
Welcome to today’s post.
In this post I will be showing you how to create the data layer for your .NET Core application using the Entity Framework Core (EF Core) package.
The Entity Framework Core library is also an ORM (Object Relational Mapper) provider that provides the abstraction required to translate data objects from within SQL Server databases to C# class instances.
In this post I will first show how to install Entity Framework Core library within a .NET Core application. I will then show the following useful tasks with Entity Framework Core:
- Creating a database from within the PowerShell console command prompt.
- Configuring an existing database connection within the startup of the .NET Core application.
- Adding a new table to the data context using a model or DTO class
- Script an Entity Framework Core data migration
- Upgrade the SQL database from the Entity Framework Core migration script.
Installing Entity Framework Core
In this section, I will show how to install Entity Framework Core into a .NET Core application.
First of all, ensure that you have installed the Microsoft.AspNetCore.All (2.0.x) package from the NuGet Package Manager:
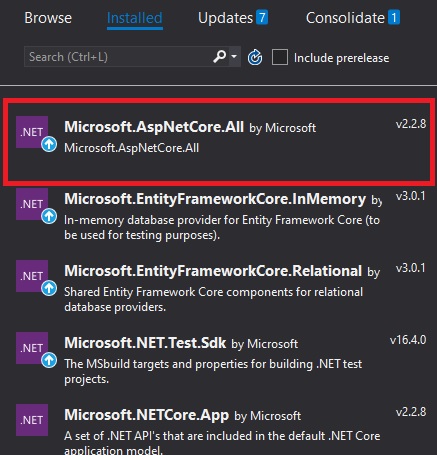
Next, install the NuGet packages Microsoft.EntityFrameworkCore, Microsoft.EntityFrameworkCore.Relational, Microsoft.EntityFrameworkCore.SqlServer and Microsoft.EntityFrameworkCore.Tools.
After installation, expand out the Dependencies folder in your solution.
You should (see after scrolling down) the EF Core packages Microsoft.EntityFrameworkCore.* that will be utilized for EF Migration, Schema creation and run-time use.

In the next section, I will show how to create a new SQL database using EF Core Code First.
Creating a new SQL Database with EF Core
In this section, I will show how to create a new SQL database.
I will show how to create a new Database using EF Code First. What this means is that we will be using code to script out the database table schemas. In previous versions of Entity Framework (4.0 and earlier), we were able to use the EF Database First approach, which relied on having an existing design mapped out using a modelling designer tool.
At this point there are no defined table data structures. We create the initial database as follows:
Step 1 – Create the Initial Database Based on the Db Context
Open PowerShell console within Visual Studio.
Run the following command:
Add-Migration InitialCreate
Next, run the command:
Update-Database
This will create the initial database.
Step 2 – Check database created
Open your app settings file appsettings.json and check the connection strings are there:
  "ConnectionStrings": {
    "AppDbContext": "Server=(localdb)\\mssqllocaldb;Database=aspnet-BookLoan-7939A8EF-89B2-46F3-9E64-E33629F164CB;Trusted_Connection=True;MultipleActiveResultSets=true"
  },
..
In the next section, I will show how to configure the database connection within the startup of the .NET Core application.
Configuring the Database within the Startup of the .NET Core Application
Before the application can communicate with the SQL database and associate it with the Entity Framework Core data context, we will need to add the data context service to the services container within the of the dependency injection framework.
Also, you will need to configure your connection string to be injected into the database options of the data context. This is done by adding the line of code to the ConfigureServices() Startup method as shown below:
services.AddDbContext<ApplicationDbContext>(
   options =>
 options.UseSqlServer(
      Configuration.GetConnectionString("AppDbContext")));
For further details on configuring the data context within a .NET Core application refer to the Entity Framework Core reference.
The data context is defined within a context class definition source ApplicationDbContext.cs. Within this context class, the overridden method, OnModelCreating(), which is from the abstract DbContext class within EF Core contains commands used to build the table schemas and relationships for your application.
using Microsoft.EntityFrameworkCore;

public class ApplicationDbContext: DbContext
{
        public ApplicationDbContext( DbContextOptions<ApplicationDbContext> options)
: base(options)
        { }

        protected override void OnModelCreating(ModelBuilder builder)
        {
           base.OnModelCreating(builder);
	       // Place any EF schema definitions here
           ...
}
This context code is usually in a subfolder in your project (in this case named by default Data). When the context is instantiated, the connection string is passed into the context via the options parameter.
Now open SSMS and open the server folder and the new database will show.

In the next section, I will show how to add a basic table to the database.
Defining a Model for a new Database Table
In this section, I will show how to use a C# class to define a Model or DTO (Data Transfer Object) that is used by the EF Data Context service to create a new table schema object for the SQL database.
Step 3 – Define the Model
Each custom table created within EF Code First, will require a model class definition before it can be declared and staged for creation.
In this example, we create a new table called BookViewModel as a C# class, which will define the model for the table.
A definition like this with property accessors will achieve the goal:
using System;
using System.Collections.Generic;
using System.ComponentModel.DataAnnotations;
using System.Linq;
using System.Threading.Tasks;

namespace BookLoan.Models
{
    public class BookViewModel
    {
        public int ID { get; set; }
        [Required]
        public string Title { get; set; }
        [Required]
        public string Author { get; set; }
        public int YearPublished { get; set; }
        public string Genre { get; set; }
        public string Edition { get; set; }
        public string ISBN { get; set; }
        [Required]
        public string Location { get; set; }
        public DateTime DateCreated { get; set; }
        public DateTime DateUpdated { get; set; }
    }
}
If we wish to ensure that any table fields are to have non-empty values when records are inserted and committed, the corresponding field in the model class will need to have the [Required] attribute above its definition.
After we have defined the Model class, we will need to declare the new table in the data context schema definition. I will show how this is done in the next step.
Step 4 – Define the Table Schema
Entering the following command within the OnModelCreating() method below the base.OnModelCreating() line in ApplicationDbContext.cs will define our table schema:
builder.Entity<BookViewModel>().ToTable("Books");
Save the change.
In the next step I will show how the above code change to the data context is committed to the SQL database using the EF Core Data Migration script.
Migrating EF Core Changes to the SQL Database
In this section, I will show how to apply the changes we made to the Model class, and the data context to the backend SQL database.
Step 5 – Apply the EF Code First Migration
Open PowerShell console within Visual Studio.
Run the following command (or similar):
Add-Migration add_bookloan_tables_05_11_2019
[where add_bookloan_tables_05_11_2019 = name of your migration]
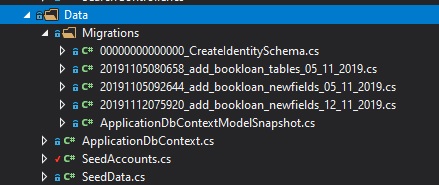
After this command is run, in your project \Domain folder you will see a new sub-folder \Migrations created which will contain the schema changes to your database. This is what EF Core will use to help migration your changes across to the database.
Note: To undo changes run:
Remove-Migration
This command will not work after Update-Database is run.
Next, run the command:
Update-Database
This will commit the schema changes to the database.
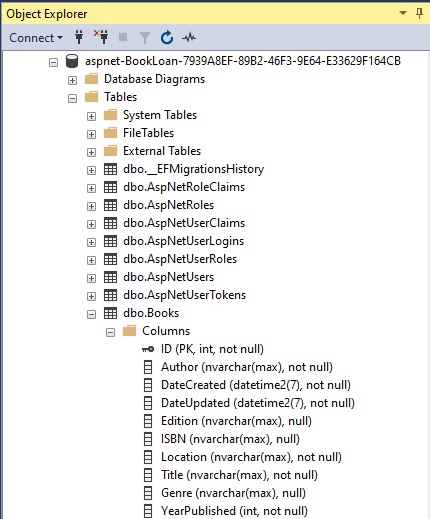
When completed, open the SQL Explorer or SSMS. Open server localdb)\MSSQLLocalDB.
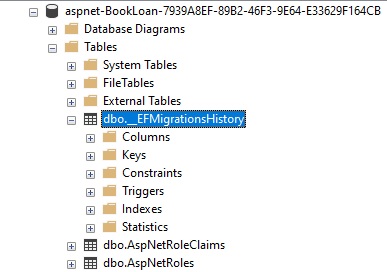
Expand the tables and you should see the identity tables created as shown:
Notice there is also an __EFMigrations history table. This is used to track each migration into the current database.
Run a SQL select on this table and you will see:
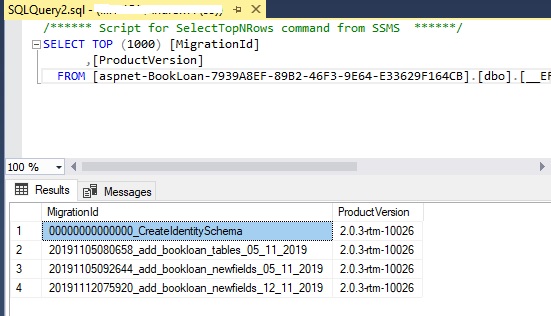
Notice that the MigrationId column contains the corresponding Migration generated by EF Core Code First.
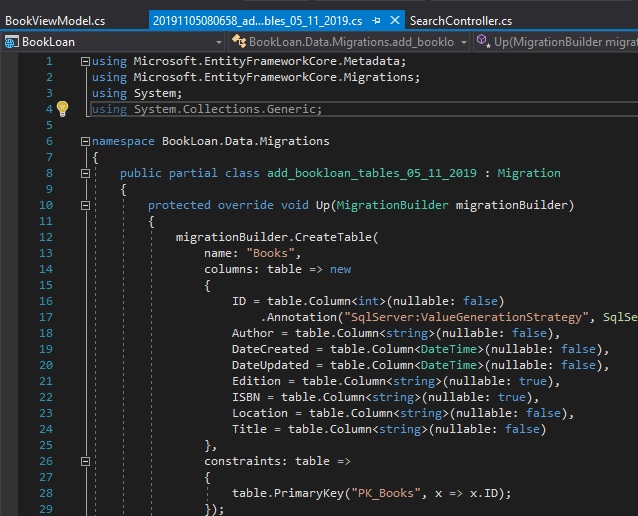
So, 20191105080658_add_bookloan_tables_05_11_2019
Corresponds to the generated partial Migration class as shown:
That’s all for now.
I hope this post has been informative. In a later post I will discuss how to make changes to your schema using EF Core.
Bye!
Andrew Halil is a blogger, author and software developer with expertise of many areas in the information technology industry including full-stack web and native cloud based development, test driven development and Devops.

