
Welcome to todays blog.
In today’s post I will show how to deploy an existing serverless function into Azure. In a previous post, I show how to create an Azure Serverless Function with .NET Core.
There are different ways in which we can deploy serverless functions into Azure, and these depend on the environment we are in. In a production environment, we should either use a script run from a deployment release pipeline and ensure that the changes have been tested in a lower environment before approval to go into production.
Once the serverless function is deployed to Azure, then an ARM template can be constructed by scripting it from the Azure portal. The template can then be used in a deployment pipeline with parameters to customize the deployment to work across test, UAT and production environments.
Where we want to test the serverless functions in an integrated environment, it makes sense to deploy to a test environment in Azure.
In this post I will show how to deploy Azure serverless functions from a local development environment.
Deploying Azure Serverless Functions from Visual Studio
In this section, I will show how to deploy serverless functions from a local development environment within Visual Studio.
In a local development environment, deploying a serverless Azure function can be done using two different development tools:
- Visual Studio Code
- Visual Studio
I will show how to publish an Azure function using Visual Studio.
Select the Publish option in the project.
The next dialog will provide two options:
Deploy to a local folder.
Deploy to an Azure App Service.
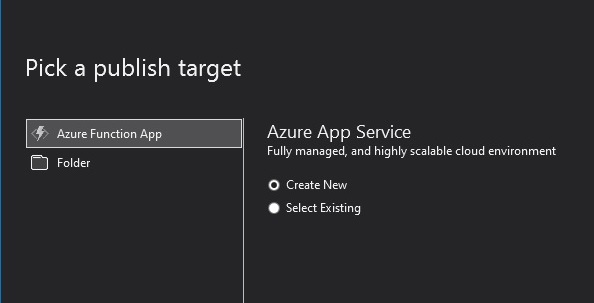
Select the Create New option in Azure App Service.
The following dialog shows:

Click Start to publish the app.
Select Create New Profile …
The Create App Service dialog opens.
In the Hosting Plan, select New...

In the Configure Hosting Plan, select Location and set Size to Consumption.
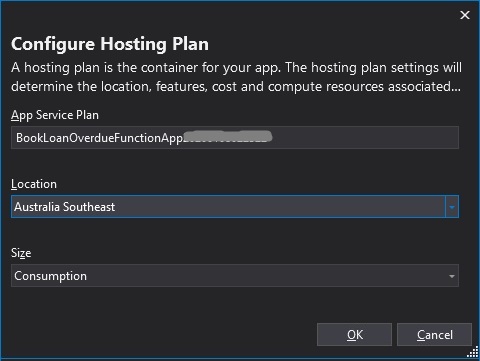
Click Ok.
The Publish screen opens:
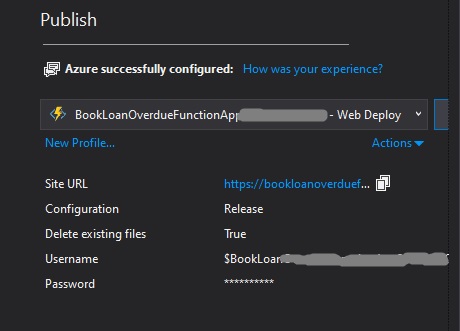
Click Publish to deploy.
After a few minutes the deployment will complete.
In the next section, I will show how we verify that the Azure Serverless function has been successfully deployed into Azure.
Verifying the Azure Serverless Function Deployment
In this section, I will show how we can verify that the serverless function has been successfully deployed to Azure.
To verify the function has been deployed to Azure we must login to the Azure Portal.
We then select Resources from the Azure Portal. You will see both an App Service Plan and an App Service, which is the Azure Function.

Click on the function. Select Overview.
You will see under the App Service plan / pricing tier the pricing option, which is Consumption.
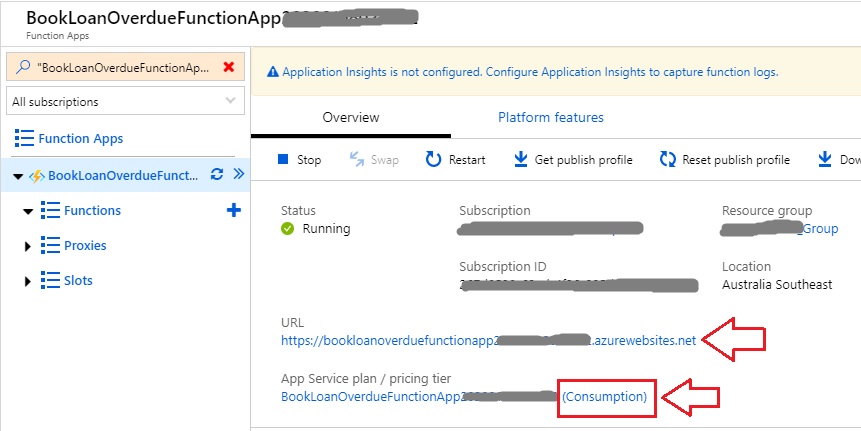
On the left-hand menu, you will notice the serverless function with the yellow lightning bolt alongside it.
From here you can perform additional management of the function:

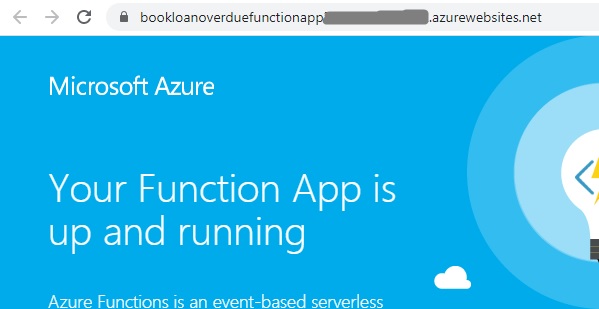
Copy the URL. Paste it into a browser.
You should see the confirmation that the function app is running:
To check the routing works, enter the additional routing and submit.
You should see a response back from the function:

To confirm the binaries have deployed successfully to Azure, open the console from the function platform menu. You will notice the function has a folder created for it as shown:
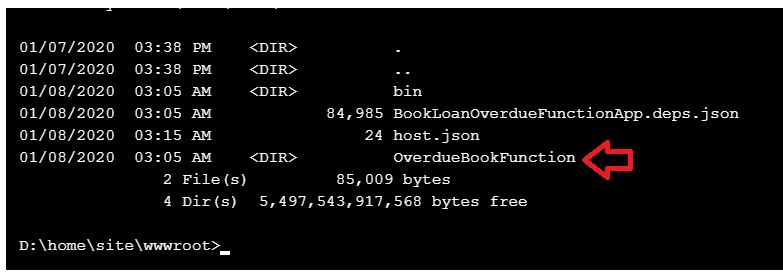
In addition, the function.json that determines the http trigger binding has also been deployed under this folder.

The above steps have shown that the Azure Serverless Function has been successfully deployed from a Visual Studio development environment into an Azure App Service.
In future posts I will be covering the development and deployment of Azure serverless trigger functions.
That’s all for today’s post.
I hope you found it informative and useful.
Andrew Halil is a blogger, author and software developer with expertise of many areas in the information technology industry including full-stack web and native cloud based development, test driven development and Devops.

