
Welcome to today’s post.
In today’s post I will be showing how to receive events from an Azure Event Hub.
In my previous post I showed how to send events to an Azure Event Hub.
After events are received from an Event Hub, they can be processed and analyzed by a reporting tool such as Power BI.
An Event Hub service is intended for high throughput and high-volume data, which can be stored and analyzed. The order of processing for our data is not important as it is with a transactional, fault-tolerant based broker service such as Azure Service Bus. Once our data within the Event Hub is processed and analyzed, it has a limited retention period after which it is removed.
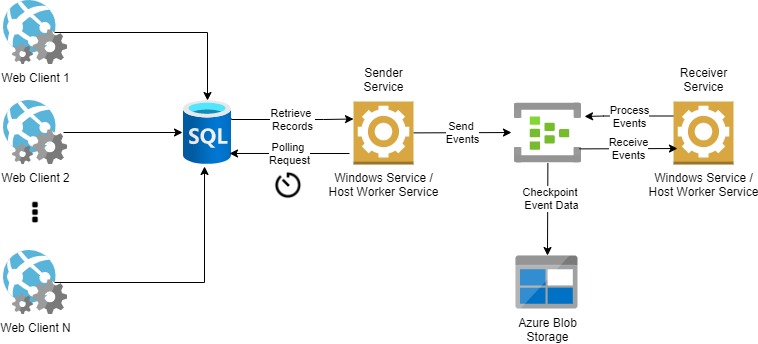
Below is the typical scenario for processing event hub events, including the sender process that was discussed in the previous post:
In the first section I will show how to receive events through an Event Hub Processor within a console application.
Receiving Events through a Console Application
To receive events from the Event Hub we can create a console application that will process the events.
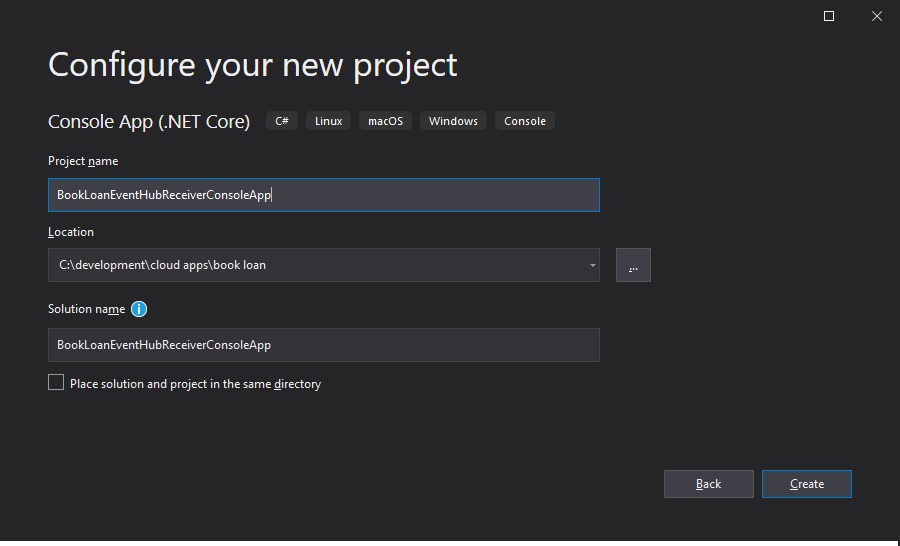
First, create a .NET Core console application as shown:
Then use the following NuGet packages:
Microsoft.Extensions.Configuration
Microsoft.Extensions.Configuration.Json
Microsoft.Extensions.DependencyInjection
Microsoft.Extensions.Hosting
Azure.Messaging.EventHubs
To receive events, we will need an Azure storage account and a blob storage container under the storage account. We can re-use the resource group we created for the sender. We do this as follows:
location=australiaeast
resourceGroup=BookLoanResources867
random_1=$RANDOM

az storage account create \
  --name bookloanstorage$RANDOM \
  --resource-group $resourceGroup \
  --location $location \
  --sku Standard_RAGRS \
  --kind StorageV2
Next, we add a blob storage container under the storage account as follows:
Select the Storage Account.
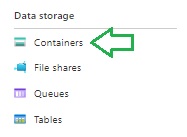
Select Containers under the Data Storage menu.
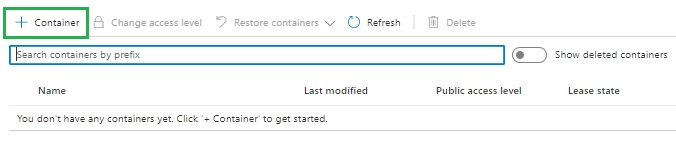
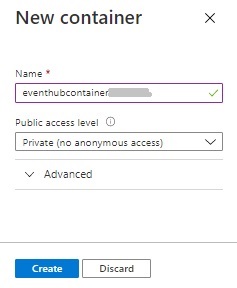
Select the create container action:
Name the container, then select OK.
Next, obtain the Azure storage connection string from the access keys and the container name and paste them into the app settings.
Implement the CreateHostBuilder() method (in program.cs) as we did for the sender console application.
Add the following NuGet package:
Azure.Messaging.EventHubs.Processor
In the next section, I will show how to implement a worker task to process the event hub events.
A Background Worker Task to Process Event Hub Events
We will now add a background worker task that will be used to receive and process the event hub events:
We first setup the configuration properties that include the event hub name, event hub connection string, storage account and blob container name.
public class CustomEventHubReceiverService : ICustomEventHubReceiverService
{
    private readonly ILogger _logger;
    private readonly string _eventHubName;
    private readonly string _eventHubConnectionString;
    private readonly string _blobContainerName;
    private readonly string _storageConnectionString;

    public CustomEventHubReceiverService(
       	IConfiguration configuration,
        ILogger<CustomEventHubReceiverService> logger)
    {
        this._logger = logger;

        try
        {
            _eventHubName = configuration
  			    .GetSection("AppSettings")
                .GetValue<string>("EventHubName");
        }
        catch (Exception ex)
        {
            _eventHubName = "";
        }

        try
        {
            _eventHubConnectionString = configuration
                .GetSection("AppSettings")
                .GetValue<string>("EventHubConnection");
        }
        catch (Exception ex)
        {
      	    _eventHubConnectionString = "";
        }

        try
      	{
            _blobContainerName = configuration
                .GetSection("AppSettings")
                .GetValue<string>("BlobContainerName");
        }
        catch (Exception ex)
        {
            _blobContainerName = "";
        }

        try
        {
            _storageConnectionString = configuration
                .GetSection("AppSettings")
                .GetValue<string>("BlobStorageConnectionString");
        }
        catch (Exception ex)
        {
            _storageConnectionString = "";
        }
    }
}
We then implement the processing of event hubs events. This includes using the blob container client and blob container when an instance of the event processor client is created. We also assign event handlers for successful event processing and unsuccessful event processing.
public async Task ProcessEventHubEvents()
{
    string consumerGroup = EventHubConsumerClient.DefaultConsumerGroupName;

    BlobContainerClient storageClient = new
        BlobContainerClient(
            _storageConnectionString,
            _blobContainerName
        );

   	EventProcessorClient processor = new EventProcessorClient(
        storageClient,
        consumerGroup,
        _eventHubConnectionString,
        _eventHubName
    );

    processor.ProcessEventAsync += ProcessEventHandler;
    processor.ProcessErrorAsync += ProcessErrorHandler;

    await processor.StartProcessingAsync();

    await Task.Delay(TimeSpan.FromSeconds(30));

    await processor.StopProcessingAsync();
}
The event handler following the processing of the event executes UpdateCheckpointAsync(), which places a checkpoint in the blob container folder to mark the event is being processed.
When the event processor is run again, the marked events are skipped.
static async Task ProcessEventHandler(ProcessEventArgs eventArgs)
{
    Console.WriteLine("\tReceived event: {0}",
        Encoding.UTF8.GetString(eventArgs.Data.Body.ToArray()));

    await eventArgs.UpdateCheckpointAsync(eventArgs.CancellationToken);
}

static Task ProcessErrorHandler(ProcessErrorEventArgs eventArgs)
{
    Console.WriteLine($"\tPartition '{ eventArgs.PartitionId}': an unhandled exception was encountered. This was not expected to happen.");

    Console.WriteLine(eventArgs.Exception.Message);

    return Task.CompletedTask;
}
Each event that is received after processing is shown below:
Received event: {"ID":"11","UserLogin":"andy@bookloan.com","Country":"Australia","WhenLoggedIn":"10/05/2021 12:15:00 AM"}
Received event: {"ID":"12","UserLogin":"billy@bookloan.com","Country":"Australia","WhenLoggedIn":"10/05/2021 12:17:00 AM"}
Received event: {"ID":"13","UserLogin":"stevie@bookloan.com","Country":"Australia","WhenLoggedIn":"10/05/2021 12:18:00 AM"}
Received event: {"ID":"16","UserLogin":"daisy@bookloan.com","Country":"Australia","WhenLoggedIn":"10/05/2021 12:23:00 AM"}
Received event: {"ID":"19","UserLogin":"stevie@bookloan.com","Country":"New Zealand","WhenLoggedIn":"10/05/2021 12:29:00 AM"}
Received event: {"ID":"14","UserLogin":"peter@bookloan.com","Country":"Australia","WhenLoggedIn":"10/05/2021 12:20:00 AM"}
Received event: {"ID":"15","UserLogin":"andy@bookloan.com","Country":"New Zealand","WhenLoggedIn":"10/05/2021 12:21:00 AM"}
Received event: {"ID":"17","UserLogin":"maisy@bookloan.com","Country":"Australia","WhenLoggedIn":"10/05/2021 12:26:00 AM"}
Received event: {"ID":"18","UserLogin":"peter@bookloan.com","Country":"Australia","WhenLoggedIn":"10/05/2021 12:27:00 AM"}
Received event: {"ID":"20","UserLogin":"doug@bookloan.com","Country":"Australia","WhenLoggedIn":"10/05/2021 12:32:00 AM"}
The event hub requests, messages and throughput show the spike in quantities as shown:
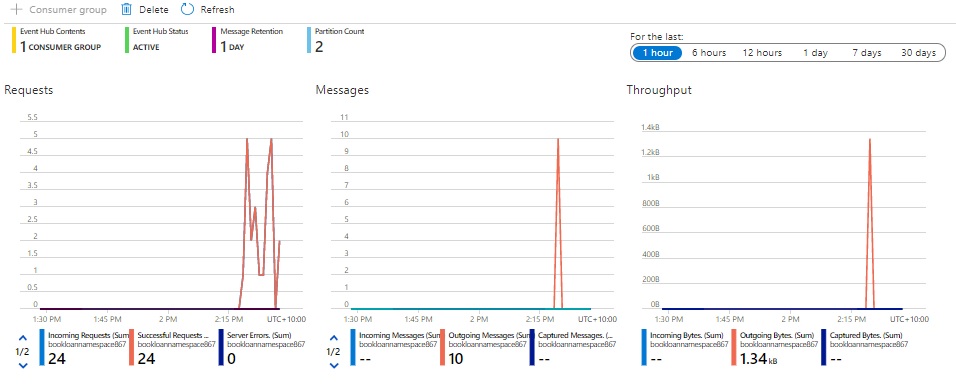
The outgoing messages (the egress) shows as 10 in the messages chart, with the total requests including processing of unmarked and marked events. The throughput is the total incoming (ingress) and outgoing (egress) data that passing through the event hub.
We have seen how to successfully process Azure event hub events using an event hub processor task within .NET Core. The example scenario was for just 10 records however the full power of event hubs is where we send and process thousands of records, which is useful for big data analysis of short-term trends and anomalies.
That is all for today’s post.
I hope you found this post useful and informative.
Andrew Halil is a blogger, author and software developer with expertise of many areas in the information technology industry including full-stack web and native cloud based development, test driven development and Devops.

