Welcome to today’s post.
In today’s post I will be showing you how to authorize ASP.NET Core MVC web applications using Azure AD (Entra ID).
In a previous post I showed how to authenticate ASP.NET Core web applications using Azure AD single sign-on.
Before we can apply Azure AD authorization within our web application, we will need to have the single sign-on functionality from Azure AD.
When a user is authenticated in the ASP.NET Core application, the User property within the Controller base class allows us to examine the user principal object, which contains the Identity property, which then contains a Claims property. When the user is a member of at least one group in the Azure AD Tenant, the Claims property will then contain one or more group claims. This will allow us to determine not only the group membership of the user, but also allow us to apply an authorization policy on these group claims when accessing ASP.NET Core methods within a controller.
Creating AD Groups for Users
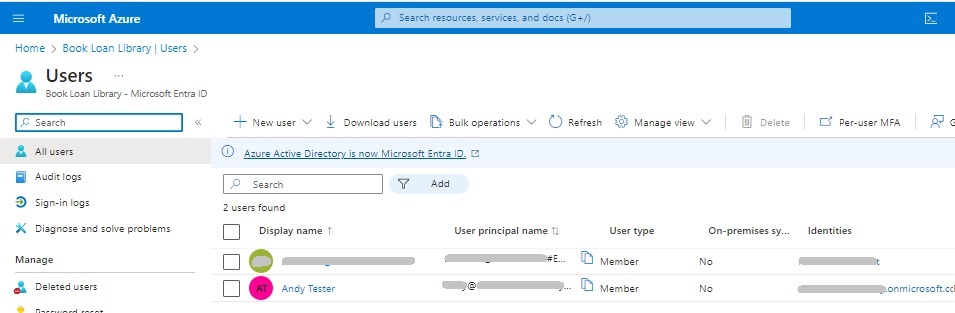
Before we can use authorization, our Azure Tenant will need at least one user, and at least one user that is a member of at one or more AD Groups.
Every user account in the tenancy has a user principal name in the format:
[login name].[tenancy name]@onmicrosoft.com
Where:
[tenancy name]@onmicrosoft.com
is the domain name.
In the Azure Tenant overview side menu, the Groups menu allow us to manage groups within our Azure Tenant.
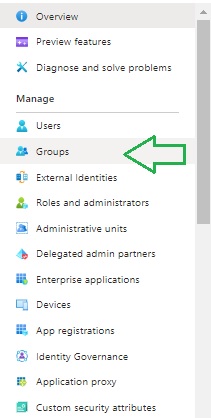
Before we can assign groups to user accounts, we will need to create groups within the tenancy.
In the Groups overview blade, there is a grid that will contain Azure AD groups. If you have no groups defined, then the grid will be empty as shown:
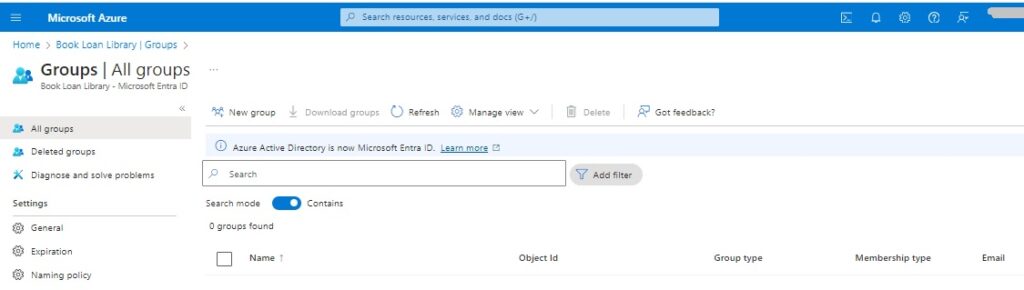
Each group has the following properties:
Name
Object Id
Group type
Membership type
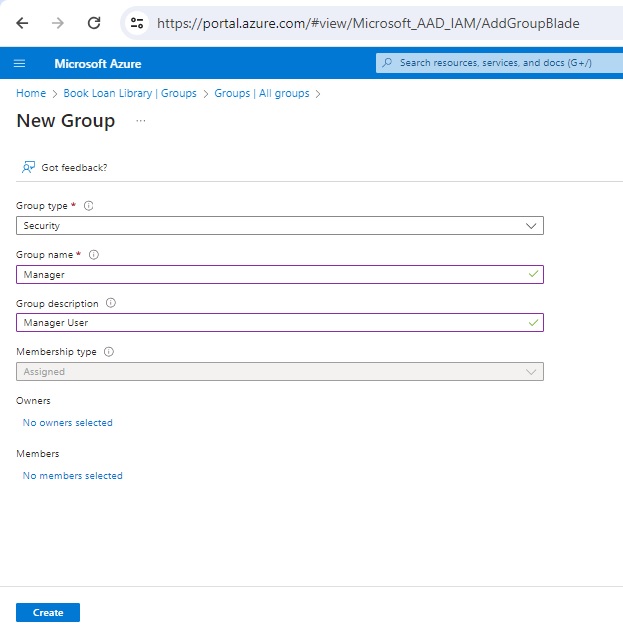
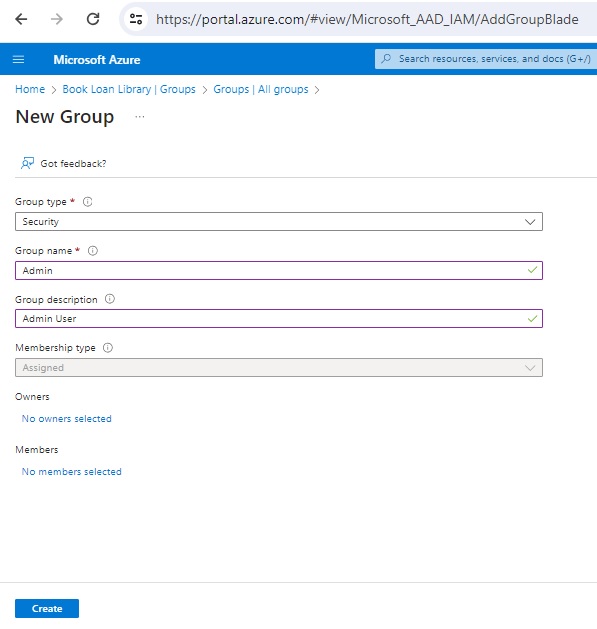
To start creating groups, click on the New group option. Below is the New group blade that allows us to create groups.
What I do next is to create three Azure AD groups:
Member
Manager
Admin The first group, Member is created as shown below:

Ensure the Group type field is Security.
Ensure the Group name field is Member.
Once you have entered the values, hit the Create button. Repeat the group creation for the Manager group as shown below:
Complete the group creation for the Admin groupas shown below:
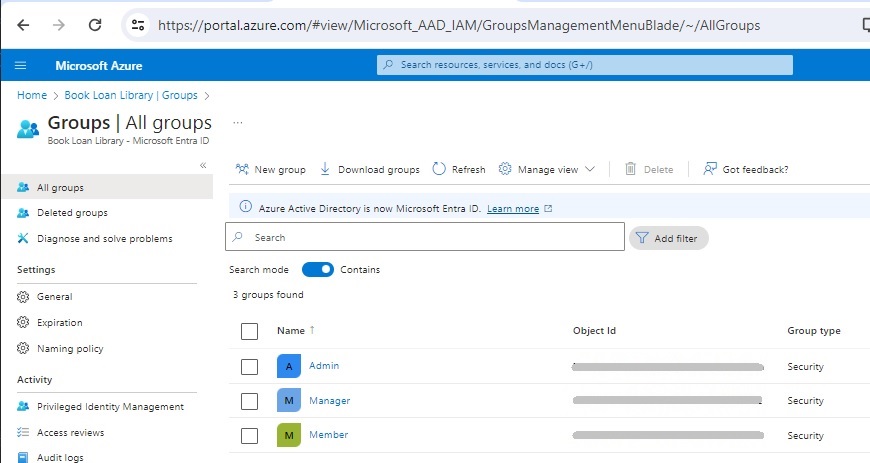
After the creation of the above three groups are completed, you will see them in the Groups blade as shown below:
In the next section, I will show how to configure the App Registration in the Tenant so that the tokens that are returned in the User context include the group claims.
Configuring Tokens to Include Group Claims
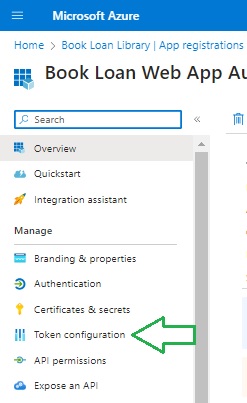
To configure the application sign-in to return group claims, you will need to apply the following actions within the App registration.
Select the Token configuration menu item:
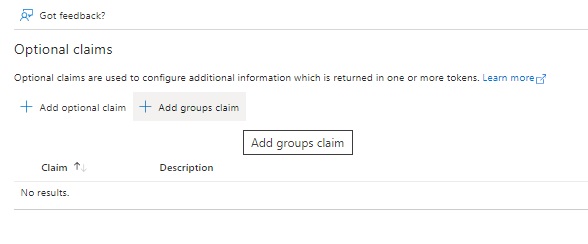
In the Token configuration blade, I in the Optional claims list there are no claims entries.
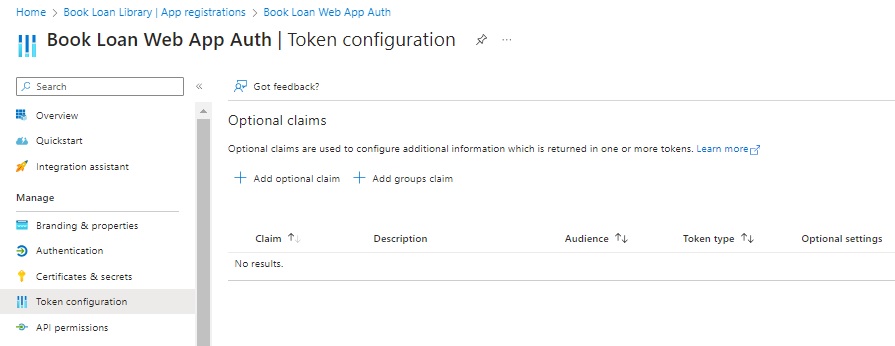
To add a claim entry, we can select one of the two claims:
Optional claim
Group claim
The Group claim option applies when we want to filter groups from a synced Active Directory (AD) into Azure Active Directory. When we return groups from AD, there is a limitation on how many groups we can embed into the User context that is returned in the sign-in. This is known as an overage problem (or limitation), and is remediated with the paid subscription of Entra ID. For our experiment, as I am not using a synced Azure AD or the paid Entra ID subscription, I will use the Optional claim.
Select the Optional claim, then proceed as follows:
In the Edit group claims blade, there are the following options:
Security groups
Directory roles
All groups
Groups assigned to the application
The option Security groups is applicable to our application, so we select that option.
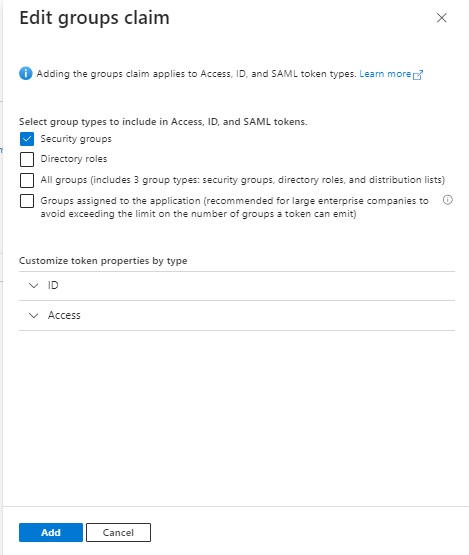
Click the Add action.
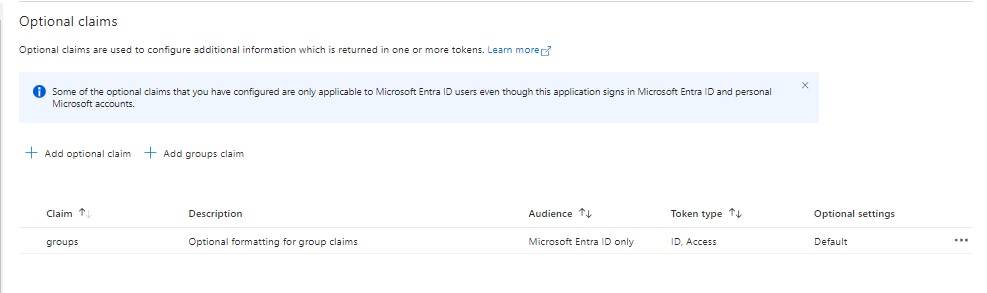
You will then see the selected optional claim shown in the Optional claims list:
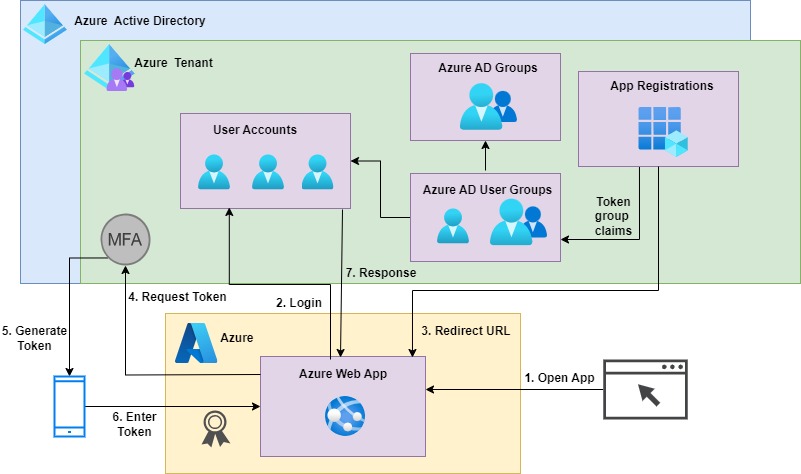
With the inclusion of the Azure AD groups and claims configurations in our App registration, the authorization architecture and flow resemble the diagram as shown:
After the above setup, we will make some changes to the application to support the group membership additions and claims configurations.
Application Changes to Support Azure AD Group Authorization
In this section, I will go over the changes required to the application code to provide Azure AD group authorization.
I will assume that the application already has SSO capability to Azure, and I will omit details that relate to authentication aspects as they are in my previous post on Azure authentication.
The AD groups we have setup in the Azure Tenant will be output as GUID strings to the identity claims within the HTTP context request.
In the appSettings.json configuration settings file, declare a Groups key with values for the three Azure AD groups as shown:
    …
    "Groups": {
        "GroupAdmin": "[Group admin ID]",
        "GroupManager": "[Group manager ID]",
        "GroupMember": "[Group member ID]"
    },
    …
In the program startup code, we can bind the three groups in the settings to a class, GroupMemberConfiguration as shown:
// Bind configuration "Groups" section to the GroupMemberConfiguration object
builder.Services.Configure<GroupMemberConfiguration>(
    builder.Configuration.GetSection("Groups")
);
The GroupMemberConfiguration interface and class is shown below:
IGroupMemberConfiguration.cs:
namespace BookLoanWebAppAuth.Models
{
    public interface IGroupMemberConfiguration
    {
        public string? GroupMember { get; set; }
        public string? GroupManager { get; set; }
        public string? GroupAdmin { get; set; }
    }
}
GroupMemberConfiguration.cs
namespace BookLoanWebAppAuth.Models
{
    public class GroupMemberConfiguration : IGroupMemberConfiguration
    {
        public GroupMemberConfiguration() { }
        public string? GroupMember { get; set; }
        public string? GroupManager { get; set; }
        public string? GroupAdmin { get; set; }
    }
}
To enable the group identifiers to flow into the Claims property of the Identity property of the User object, we will need to set the TokenValidationParameters.RoleClaimType property to ”groups”:
builder.Services.Configure<OpenIdConnectOptions>(OpenIdConnectDefaults.AuthenticationScheme,
    options =>
    {
            // Use the groups claim for populating roles
            options.TokenValidationParameters.RoleClaimType = "groups";
    });
If we want to populate the Claims property with application roles, then we would set the above property to “roles”.
The above would be sufficient to allow the group memberships to be checked for the current user with the IsInRole() method of the User property within our controllers.
To be able to validate user group memberships within a controller method, we will need to use the <Authorize> attribute and the Policy option. We will then need to configure the AddAuthorization() service policy options to enforce the requirement of group members within a policy role.
There are three different policy roles that we will need to define and implement. Each policy role requires the current user claims have at least one of their groups to be at least contained in at least one of the listed policy roles:
Member Policy Role
Member Group
Manager Group
Admin Group
Manager Policy Role
Manager Group
Admin Group
Admin Policy Role
Admin Group
Before I show how the authorization policy is defined, I will create some constants that give meaningful names to each of the three authorization policies and avoid hardcoding them throughout the application. We will name them with this convention:
UserIn[Group Name]Requirement
So, the constants to name the policies defined as shown:
GroupAuthorizationPolicies.cs:
namespace BookLoanWebAppAuth.Services
{
    public static class GroupAuthorizationPolicies
    {
        public const string UserInMemberGroupRequirement = "UserInMemberGroupRequirement";
        public const string UserInManagerGroupRequirement = "UserInManagerGroupRequirement";
        public const string UserInAdminGroupRequirement = "UserInAdminGroupRequirement";
    }
}
The group identifiers from the settings are defined in each of the group authorization policies with the RequireRole() method of the authorization service’s policy as shown:
// Adding authorization policies that enforce authorization using Microsoft Entra roles.
builder.Services.AddAuthorization(options =>
{
    options.AddPolicy(GroupAuthorizationPolicies.UserInMemberGroupRequirement,
        policy => policy.RequireRole(
            [
                builder.Configuration.GetValue<string>("Groups:GroupMember"),
                builder.Configuration.GetValue<string>("Groups:GroupManager"),
                builder.Configuration.GetValue<string>("Groups:GroupAdmin")
            ]
        ));
    options.AddPolicy(GroupAuthorizationPolicies.UserInManagerGroupRequirement,
        policy => policy.RequireRole(
            [
                builder.Configuration.GetValue<string>("Groups:GroupMember"),
                builder.Configuration.GetValue<string>("Groups:GroupManager")
            ]
        ));
    options.AddPolicy(GroupAuthorizationPolicies.UserInAdminGroupRequirement,
        policy => policy.RequireRole(
            [
                builder.Configuration.GetValue<string>("Groups:GroupAdmin")
            ]
        ));
});
For example, if one of the accounts for user Andy is in AD groups Member and Manager, then he will satisfy the requirements of policies:
UserInMemberGroupRequirement
UserInManagerGroupRequirement
If a user Davy is in AD group Member, then he will satisfy the requirements of policy:
UserInMemberGroupRequirement
Before I test the above authorization policies, I will show the program startup code below:
Program.cs:
using BookLoanWebApp.Models;
using BookLoanWebAppAuth.Services;
using Microsoft.AspNetCore.Authentication.OpenIdConnect;
using Microsoft.AspNetCore.Authorization;
using Microsoft.AspNetCore.Mvc.Authorization;
using Microsoft.Identity.Web;
using Microsoft.Identity.Web.UI;

var builder = WebApplication.CreateBuilder(args);

// Bind configuration "Groups" section to the GroupMemberConfiguration object
    builder.Services.Configure<GroupMemberConfiguration>(
        builder.Configuration.GetSection("Groups")
    );

// Add services to the container.
builder.Services.AddAuthentication(OpenIdConnectDefaults.AuthenticationScheme)
    .AddMicrosoftIdentityWebApp(builder.Configuration.GetSection("AzureAd"));

builder.Services.Configure<OpenIdConnectOptions>(OpenIdConnectDefaults.AuthenticationScheme,
        options =>
        {
            // Use the groups claim for populating roles
            options.TokenValidationParameters.RoleClaimType = "groups";
        });

// Adding authorization policies that enforce authorization using Microsoft Entra roles.
builder.Services.AddAuthorization(options =>
{
    options.AddPolicy(GroupAuthorizationPolicies.UserInMemberGroupRequirement,
        policy => policy.RequireRole(
            [
                builder.Configuration.GetValue<string>("Groups:GroupMember"),
                builder.Configuration.GetValue<string>("Groups:GroupManager"),
                builder.Configuration.GetValue<string>("Groups:GroupAdmin")
            ]
        ));
    options.AddPolicy(GroupAuthorizationPolicies.UserInManagerGroupRequirement,
        policy => policy.RequireRole(
            [
                builder.Configuration.GetValue<string>("Groups:GroupMember"),
                builder.Configuration.GetValue<string>("Groups:GroupManager")
            ]
        ));
    options.AddPolicy(GroupAuthorizationPolicies.UserInAdminGroupRequirement,
        policy => policy.RequireRole(
            [
                builder.Configuration.GetValue<string>("Groups:GroupAdmin")
            ]
        ));
});

builder.Services.AddControllersWithViews(options =>
{
    var policy = new AuthorizationPolicyBuilder()
        .RequireAuthenticatedUser()
        .Build();
    options.Filters.Add(new AuthorizeFilter(policy));
});
builder.Services.AddRazorPages()
    .AddMicrosoftIdentityUI();

var app = builder.Build();

// Configure the HTTP request pipeline.
if (!app.Environment.IsDevelopment())
{
    app.UseExceptionHandler("/Home/Error");
    app.UseHsts();
}

app.UseHttpsRedirection();
app.UseStaticFiles();

app.UseRouting();

app.UseAuthorization();

app.MapControllerRoute(
    name: "default",
    pattern: "{controller=Home}/{action=Index}/{id?}");
app.MapRazorPages();

app.Run();
In the landing page of the application, I will display the tests for the membership of the current user. To achieve this, I will define a user details model to store these from the controller:
UserDetailsModel.cs:
namespace BookLoanWebAppAuth.Models
{
    public class UserDetailsModel
    {
        public string? DisplayName { get; set; }
        public bool? IsAdmin { get; set; }
        public bool? IsManager { get; set; }
        public bool? IsMember { get; set; }
    }
}
I declare a user profile, which contains the user details. We could also use the same model class to contain user claims.
UserProfile.cs:
namespace BookLoanWebAppAuth.Models
{
    public class UserProfile
    {
        public UserDetailsModel? UserDetails { get; set; }
    }
}
In the index page, I display the tests of group memberships as shown:
Index.cshtml
@model BookLoanWebAppAuth.Models.UserProfile;

@{
    ViewData["Title"] = "Home Page";
}

<div class="text-center">
    <h1 class="display-4">Welcome</h1>
    <p>Learn about <a href="https://learn.microsoft.com/aspnet/core">building Web apps with ASP.NET Core</a>.</p>
</div>

<br />

<p>Group Memberships..</p>

<div>
<label class="form-label">Is Admin User?</label>
@if (Model.UserDetails.IsAdmin == true)
{
    <span class="form-control">YES</span>
}
else
{
    <span class="form-control">NO</span>
}
</div>
<br />

<div>
<label class="form-label">Is Manager User?</label>
@if (Model.UserDetails.IsManager == true)
{
    <span class="form-control">YES</span>
}
else
{
    <span class="form-control">NO</span>
}
</div>
<br />

<div>
<label class="form-label">Is Member User?</label>
@if (Model.UserDetails.IsMember == true)
{
    <span class="form-control">YES</span>
}
else
{
    <span class="form-control">NO</span>
}
</div>
<br />
<br />
The user details object has a method, IsMember() which tests group role membership:
User.IsInRole([group ID])
Where [group ID] is the group GUID identifier from Azure ID.
The role membership verification is shown in the home controller Index() code:
HomeController.cs
using BookLoanWebAppAuth.Models;
using Microsoft.AspNetCore.Authorization;
using Microsoft.AspNetCore.Mvc;
using Microsoft.Extensions.Options;
using System.Diagnostics;
using System.Security.Claims;

namespace BookLoanWebAppAuth.Controllers
{
    [Authorize]
    public class HomeController : Controller
    {
        private readonly ILogger<HomeController> _logger;
        private readonly IOptions<GroupMemberConfiguration> _groupRoleOptions;

        public HomeController(ILogger<HomeController> logger,
            IOptions<GroupMemberConfiguration> groupRoleOptions)
        {
            _logger = logger;
            _groupRoleOptions = groupRoleOptions;
        }

        public IActionResult Index()
        {
            string? userName = User.FindFirstValue("name");

            List<Claim> userClaims = User.Claims.ToList();
            UserDetailsModel details = new UserDetailsModel()
            {
                DisplayName = userName,
                IsAdmin = User.IsInRole(_groupRoleOptions.Value.GroupAdmin),
                IsManager = User.IsInRole(_groupRoleOptions.Value.GroupManager),
                IsMember = User.IsInRole(_groupRoleOptions.Value.GroupMember)
            };
            List<UserClaimsModel> list = new List<UserClaimsModel>();
            foreach (var claimValue in userClaims)
            {
                list.Add(new UserClaimsModel()
                {
                    ClaimType = claimValue.Type,
                    ClaimValue = claimValue.Value
                });
            }
            UserProfile userProfile = new UserProfile()
            {
                UserDetails = details,
                ClaimsList = list
            };
            return View(userProfile);
        }

        public IActionResult Privacy()
        {
            return View();
        }

        [AllowAnonymous]
        [ResponseCache(Duration = 0, Location = ResponseCacheLocation.None, NoStore = true)]
        public IActionResult Error()
        {
            return View(new ErrorViewModel
            {
                RequestId = Activity.Current?.Id ?? HttpContext.TraceIdentifier
            });
        }
        …
    }
}
In the next section, I will show how the membership looks like when run in the application for a user that is in group Member and a user that is in group Manager.
Testing Authorization Group Membership with the Azure AD Accounts
When the application is run and we set a breakpoint in the Index() method, the User.Identity.Claims property shows the following claims types:
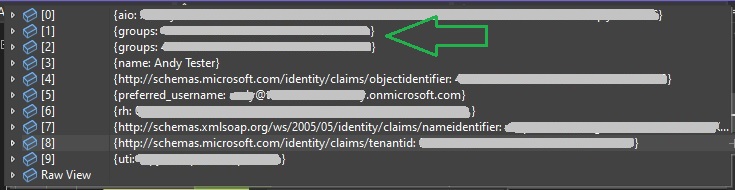
Notice also that the groups claim type shows an entry for each AD group that the user is a member of. In the case of user Andy, who is a member of the Member and Manager groups, there are two group claims in the identity token.
You will also notice that the groupRoleOptions property in the controller has the group ID settings values injected using the IOptions pattern from the application settings group Group and sub-keys Group[Group Name]:
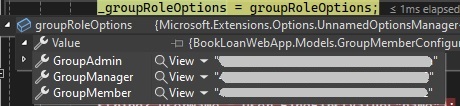
For more details on the IOptions pattern, refer to one of my previous posts where I show how to configure .NET Core applications using the IOptions pattern.
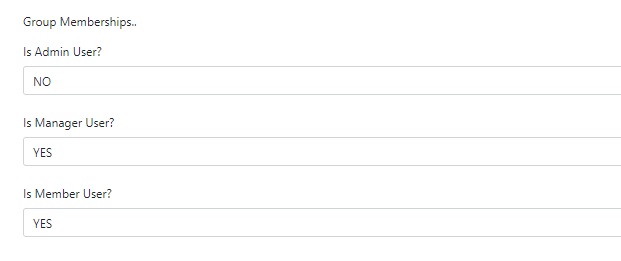
For the user that is a member of AD groups, Member and Manager, the role memberships will look as shown:
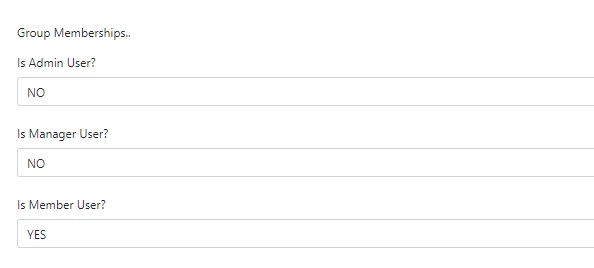
For the user that is a member of AD groups Member, the role memberships will look as shown:
In the next section, I will show how to apply authorization using the policies to the controller methods.
Testing Authorization of Controller Methods with the Azure AD Accounts
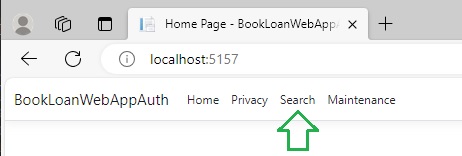
In the application, I add two controller methods and two menu links in the Index page. The menu link to the Search option is shown below:
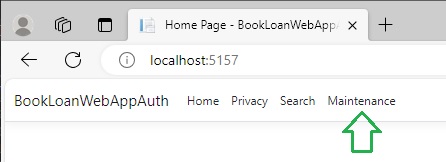
The menu link to the Maintenance option is shown below:
Now suppose that I want to allow Member users to access the Search view, but not allow them access to the Maintenance view. I also want to allow Manager users to access the Search and Maintenance views. To do this I try the following change:
I decorate the controller methods Search and Maintenance with the <Authorize> attribute and the Policy attribute set to UserInMemberGroupRequirement for the Search method and set to UserInManagerGroupRequirement for the Maintenance method.
This change is shown below:
 [Authorize(Policy = GroupAuthorizationPolicies.UserInMemberGroupRequirement)]
public IActionResult Search()
{
    return View();
}

 [Authorize(Policy = GroupAuthorizationPolicies.UserInManagerGroupRequirement)]
public IActionResult Maintenance()
{
    return View();
}
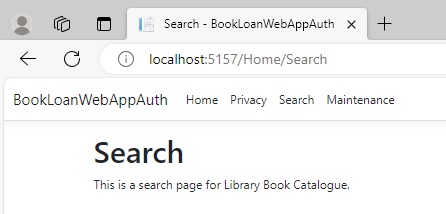
When I login as user Andy, who is a Manager, the Search and Maintenance views can be accessed without any issues.
When I login as user Davy, who is a Member, the Search view can be accessed as shown:
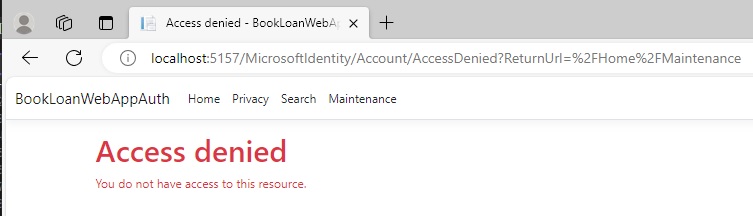
However, the Maintenance view is unable to be accessed and shows the following message when the view is opened:
From the above setup in Azure and application implementation, we have seen how to apply Azure AD group-based authorization within an ASP.NET Core MVC web application.
We saw how to use test group membership of logged in users, and how to protect access to controller methods from users that are in required groups based on declarative authorization policies.
That is all for today’s post.
I hope that you have found this post useful and informative.
Andrew Halil is a blogger, author and software developer with expertise of many areas in the information technology industry including full-stack web and native cloud based development, test driven development and Devops.