Welcome to today’s post.
In today’s post I will be showing how to build a continuous release pipeline that will deploy the artifacts of an Angular application into Azure.
The post today is a continuation of the previous post I published on how to implement a continuous build pipeline for an Angular application.
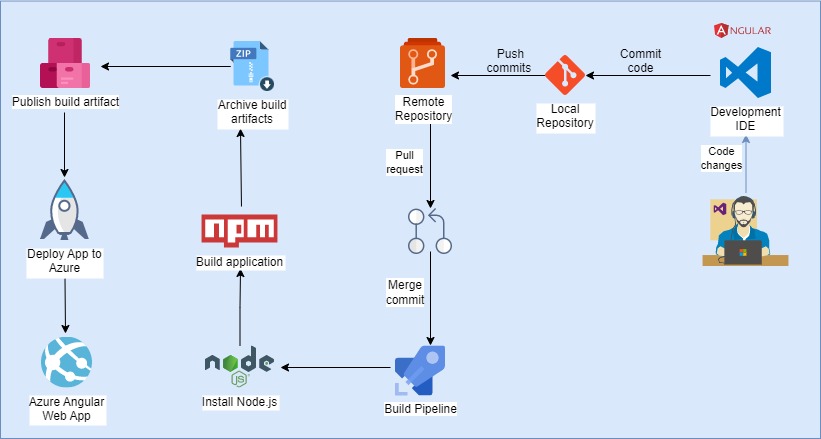
The purpose of the CI-CD pipeline is to provide us with a fully automated build and release pipeline that takes any source code changes from our Angular application, builds, validates, packages, and tests it, then deploys it to our destination server.
In my previous post, I covered the first six steps below.
- Triggering a continuous build pipeline when the repository is committed to the main branch.
- Building the application source within the continuous integration pipeline.
- Packaging the application build into an artifact.
- Archive the artifact.
- Publishing (dropping) the artifact into an accessible shared folder.
- Triggering the release pipeline.
- Deploying the application into an Azure App Service web application.
I will give an overview of the build and release pipeline in the next section.
Overview of the Continuous Release Pipeline
In this section and the upcoming sections I will be explaining how to configure and implement step 7 in the continuous release pipeline. Below is a diagram that explains the steps that will be taken in the workflow of the combined build and release pipeline:
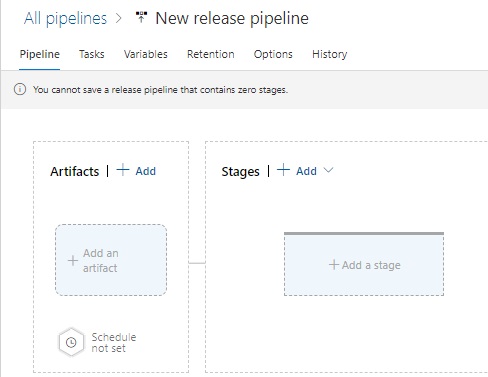
The continuous release pipeline is dependent on the outputs of the continuous build pipeline, so the first task for us is to create a new release pipeline, which we create from the Pipelines | Releases menu item in our DevOps project.
In the next section, I will show how to create and configure the build artifact for our release pipeline.
Creating the Build Artifacts for Our Pipeline
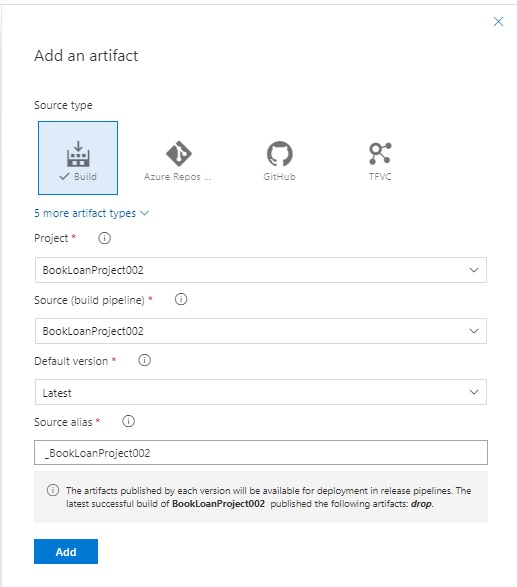
We will next configure a build artifact to our release pipeline. The build artifact from our continuous build was re-generated as an Azure artifact. Later we will enable the artifact trigger to provision the archived build artifact as an input to the Azure web application deployment task.
Below is the definition of the input artifact, which is based on our current DevOps project:
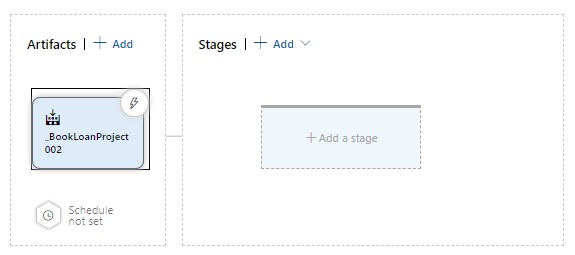
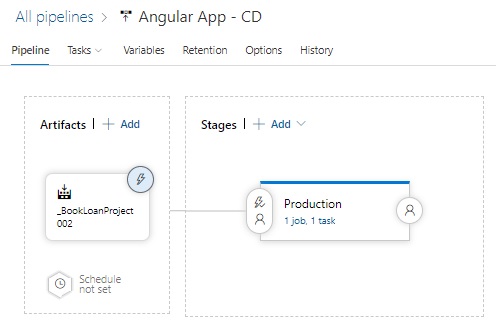
After saving the definition of the artifact, the release pipeline definition shows the completed artifact:
In the next section, I will show how to create and configure the deployment stages within our release pipeline.
Creating Deployment Stages in the Release Pipeline
We can next add a stage to our release pipeline by clicking on the Add action. A selection of templates is displayed in a palette. We select the Azure App Service deployment task template as shown:

After we hit the Apply action, the stage definition shows to the right pane. I enter a name for the stage, Production. As I haven’t defined any other stages like Development or Test, I choose Production as I am deploying into the cloud, which is a production environment. In real-world scenarios we would define a Development and/or Test environments possibly in separate Azure deployment slots, or even on hosted on-premises server(s).

Before we define the next part of the deployment task, we will need to create an existing Web app within the Azure portal, which is where we will deploy the artifacts into from our release pipeline.
Without the creation of the Azure web application, the deployment task cannot be completed.
Below is the creation of the Azure web application:
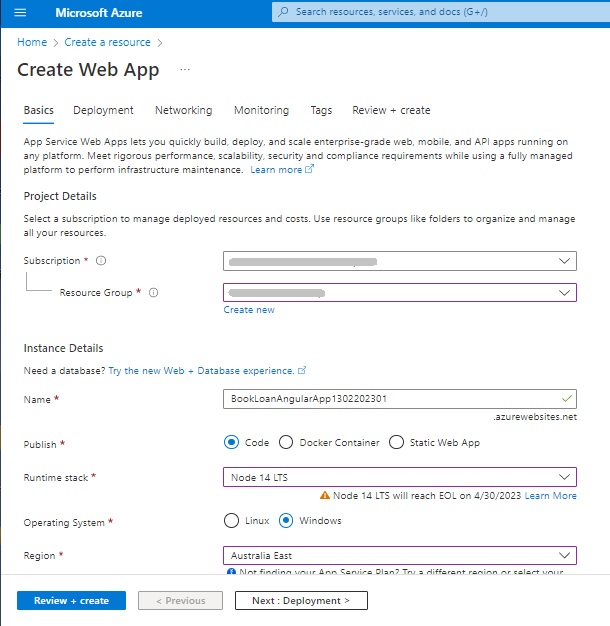
Note that I have selected a run-time stack of Node 14 LTS, which is the minimum version of Node.js that is needed for our Angular 15 environment. This may come useful should we make use of the Node build tools on the same App Service web server for additional tasks like unit and functional testing. If we confine our unit tests from our build agent from the build pipeline, then we could use a .NET runtime stack for the Azure web app. Remember that the dist folder that is deployed into the server contains pure JavaScript and no additional dependencies on Node or Angular libraries.
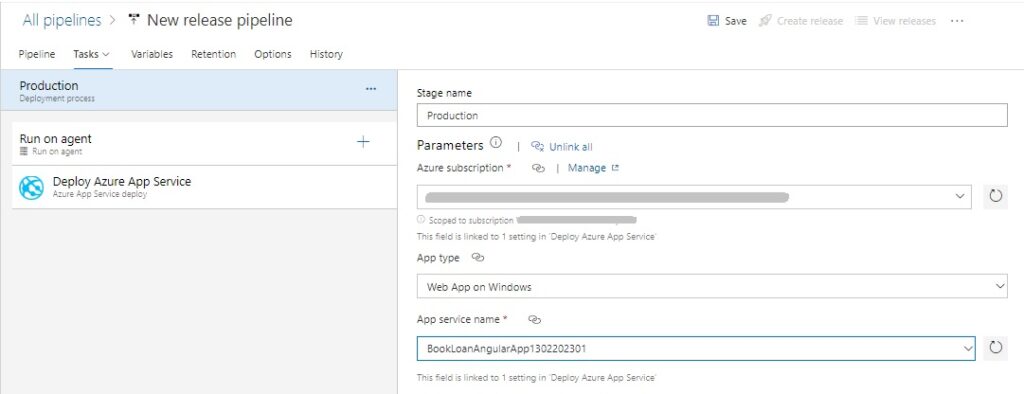
Once the Azure web app is created, we return to the Production stage pipeline definition, enter our Azure subscription details and App service name from the drop-down of existing App services under our subscription.
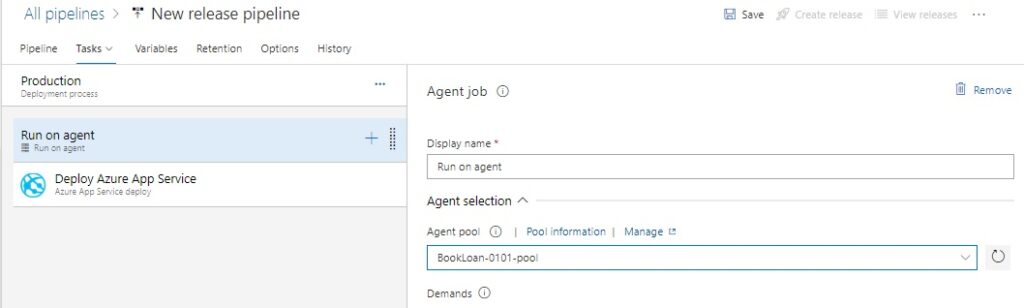
In the Agent job definition, we nominate the Agent pool to use. In this case I have nominated to use the Agent pool that corresponds to a self-hosted release Agent.
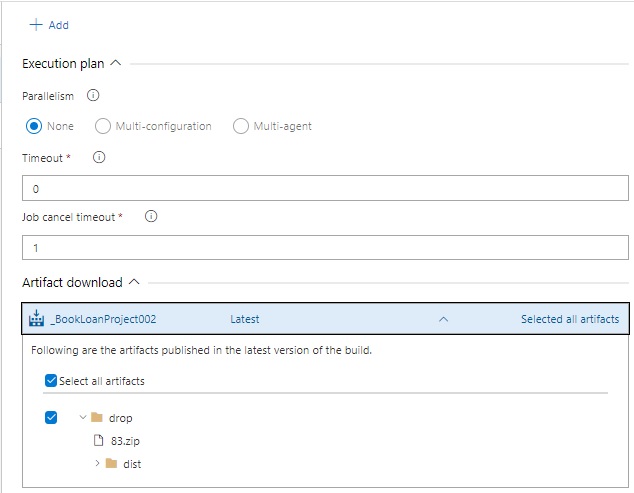
Further down in the task definition, I check the Artifact download field contains the zipped archive within the drop folder within Azure artifacts:
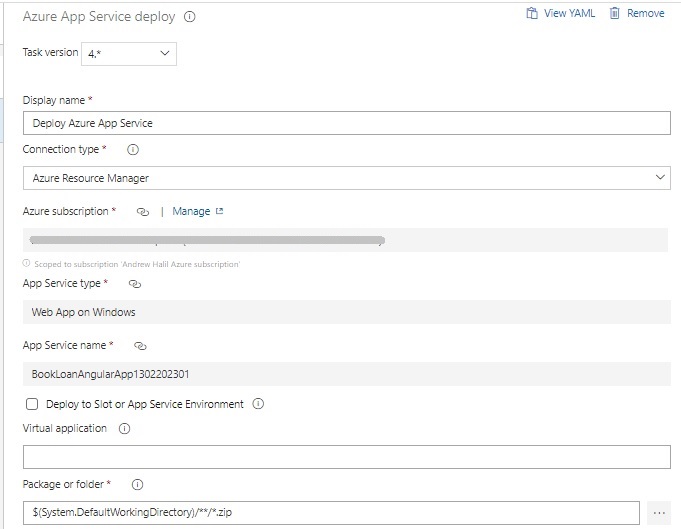
We select the Deploy Azure App Service pipeline task, check our Azure subscription details and App service name are defined. Keep the Package or folder field default value as it is.
Once the deployment task is saved, the release pipeline will look as shown:
In the next section I will show how to test the deployment of the release pipeline.
Testing the Deployment of the Release Pipeline
We can run a quick test of our release pipeline, which is still manually triggered.
Click ‘Create release’. The dialog below shows, where we select the Production pipeline stage to trigger manually. Select the version of artifact to use for this release.

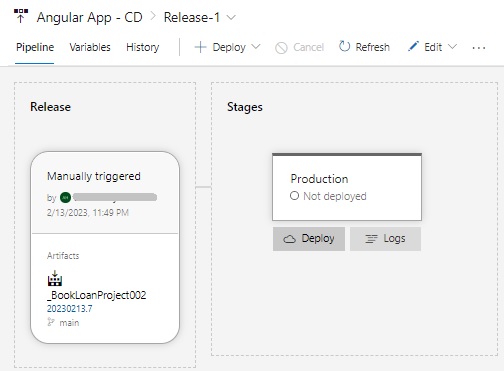
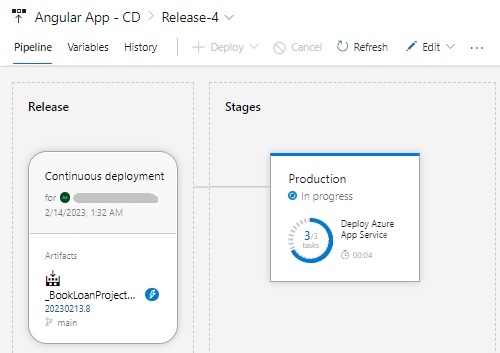
When the release instance is created and queued, open it. The Production stage will show as Not deployed. Click on the Deploy button (with the cloud next to it).
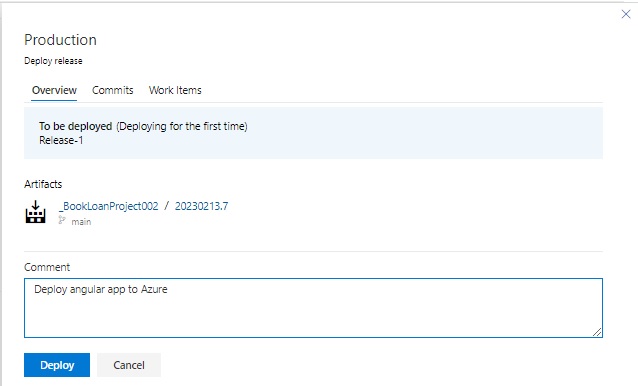
Review the artifact, enter an optional comment, and click the Deploy button.
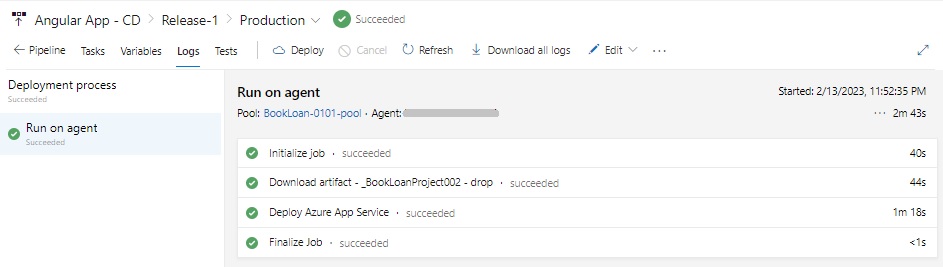
After a few minutes (or less), the release pipeline will run the tasks. If successful, the logs will display with successful ticks alongside them.
Open the Azure web app from the browser. It will be something like this (depending on whatever name you gave your Azure web app):
https://bookloanangularapp1302202301.azurewebsites.net
If you happen to experience the following error:

I will show what you can try to resolve this.
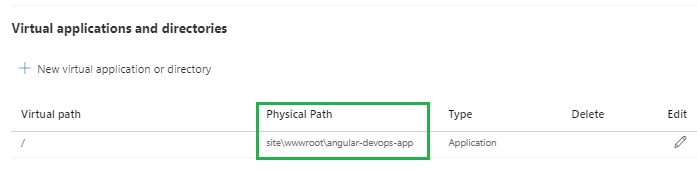
First open Azure App Settings (Settings | Configuration), then select ‘Path mappings’ tab.
Under Virtual applications and directories, amend the default physical path site\wwwroot to site\wwwroot\[your app name]. In the above app, this would be site\wwwroot\angular-devops-app.
Save the app configuration changes. After the Azure app restarts in the portal, re-attempt to browse to your app URL.
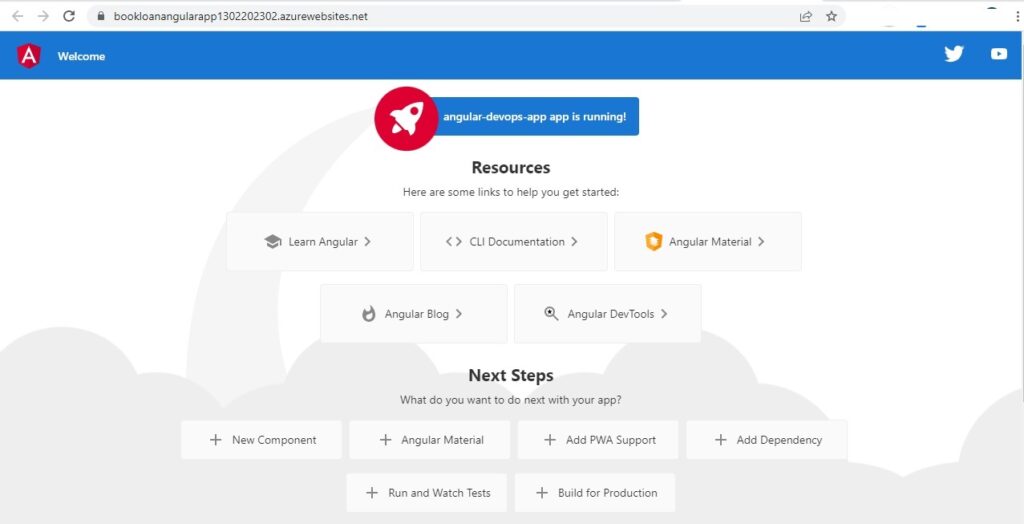
The application error should now disappear, and the same Angular app we created and run locally will appear:
In the next section, I will show how to automatically trigger the deployment of the release pipeline.
Automatically Triggering the Deployment of the Release Pipeline
In this section, I will show how to enable a trigger on the artifact definition in our release pipeline.
Open the pipeline definition, then click on the trigger icon on the top-right corner of the artifacts definition box.

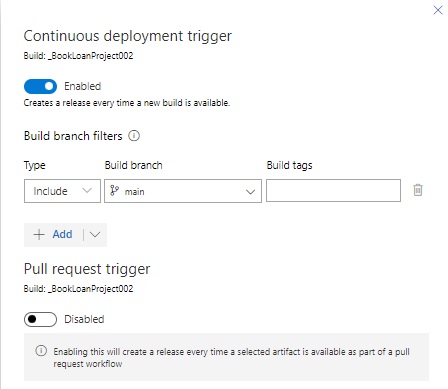
When the continuous deployment trigger definition opens, toggle the switch button to Enabled.
In the Build branch triggers section include the main branch as shown.
Save the pipeline trigger. The pipeline will now run and re-deploy the artifact to Azure.
To test a sample change can run end-end though our CI and CD pipeline, in our Visual Code development IDE make a small change to the index.html source file, changing the title to “AngularDevopsApp V2.0” as shown:
<!doctype html>
<html lang="en">
<head>
  <meta charset="utf-8">
  <title>AngularDevopsApp V2.0</title>
  <base href="/">
  <meta name="viewport" content="width=device-width, initial-scale=1">
  <link rel="icon" type="image/x-icon" href="favicon.ico">
</head>
<body>
  <app-root></app-root>
</body>
</html>
Save change.
Run the build command to regenerate the dist folder:
ng build
Commit changes.
Push the changes to the Azure DevOps repo.
The changes will go to the master branch.
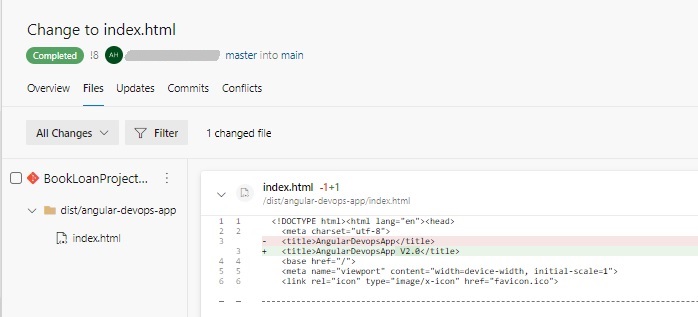
In Azure DevOps open the repository for the project, then action a pull-request to merge the changes into the main branch. To confirm the change has been applied to the main branch, open the index.html source file in the Azure DevOps main branch. It will show the change within the <title> element:
Once the merge is complete, the continuous integration pipeline will start running to rebuild our angular app.
Wait for the continuous release pipeline to complete deploying the updated app to Azure.
Open the Azure web application URL.
The app index.html will have been updated.
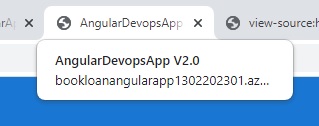
View the page source to confirm the title has changed!
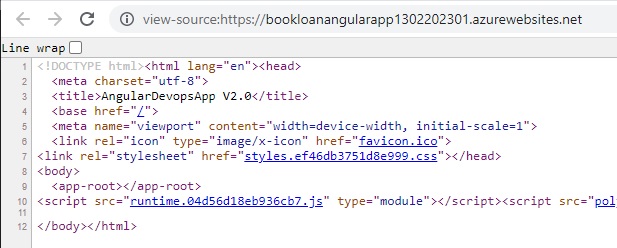
The above has shown how us how to deploy an Angular application from an Azure DevOps release pipeline. We have also seen how to integrate source code changes to an Angular code base, then build the changes through our build (integration) pipeline and deploy those changes to Azure using our release (deployment) pipeline.
We have just build powerful continuous integration and continuous release pipelines that allow us to provide an end-end development, build and release pipeline. We can also include other tasks in our integration pipeline, which can include code quality validations, unit tests and function tests.
That is all for today’s post.
I hope you have found this post useful and informative.
Andrew Halil is a blogger, author and software developer with expertise of many areas in the information technology industry including full-stack web and native cloud based development, test driven development and Devops.