
Welcome to today’s post.
In today’s post I will be showing you how to create a custom vision model and train it to classify objects from images.
There are two main types of object recognition that we can use from models created from a custom vision resource. These are Object Classification and Object Detection.
With Object Classification, given an image, we want to classify the main object in the image into an object category. What this means is that we study variations of the object and classify each variation as a member of the same object category. All objects in the same classification have the same properties (color, shape, taste, material).
An example of object classification is a fruit that has a cylindrical shape, is colored green, has a stem, and is round. However, when we place the same or similar objects in the same location, the object is still the same and has not changed its characteristics.
When an object classifier has identified the object’s shape and color as round and green, then it places the object into the apple classification.
If the object comes in different colors, like a red apple and green apple, we can apply additional labels to these objects to distinguish objects of different colors into different classifications.
A real-world example of object classification is distinguishing between red and green apples in a shopping checkout and determining the price per kilo.
With Object Detection, given an image, we want to distinguish any class of object(s) within the image and label them and their coordinates (or region). A detection of an object is achieved by analyzing the shape and characteristics of the new object, comparing it to other known, similarly shaped objects, then deciding if the new object has enough similar characteristics to be identified as one of the known class of objects.
A real-world example of object detection is distinguishing invalid items in carry-on luggage detection systems, such as detection of a knife or fork, and allowing safer items like spoons.
One of the main differences related to images that are used for object classifications and object detection is that classifications are used for images containing one object, and object detection uses images containing more than one object.
In this post, I will be covering object classifications.
In the first section, I will show how to create a custom vision resource using the Azure Portal.
Creation of a Custom Vision Resource
To create a Custom Vision resource, search the marketplace and find the following resource tile:
After selecting Create, we have the opening parameter screen:
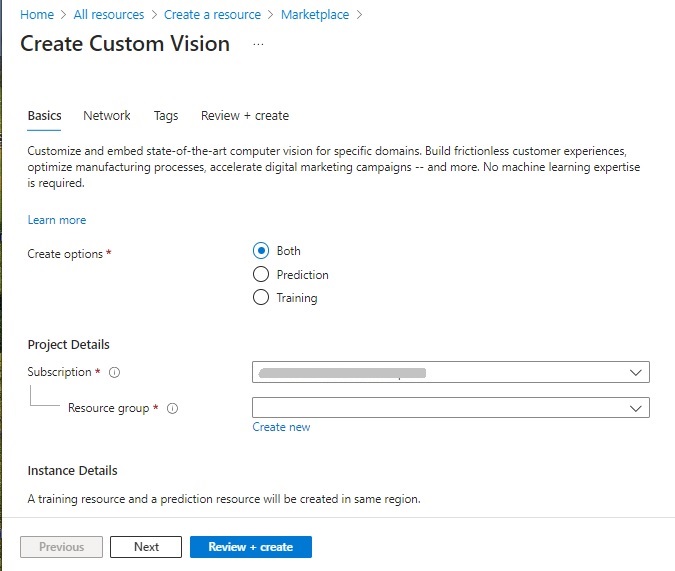
In addition to the subscription and resource group, there are the options to create the resource: Prediction, Training, or both.
The Training option allows the resource to be used for creation of a vision model and training the model to recognize and classify objects within images.
The Prediction option allows the resource to be used to predict outcomes based on the trained data.
In addition, the training and prediction resources will be created with a pricing tier. The higher, premium pricing tiers are useful when we need additional computation power or capacity to train our models.
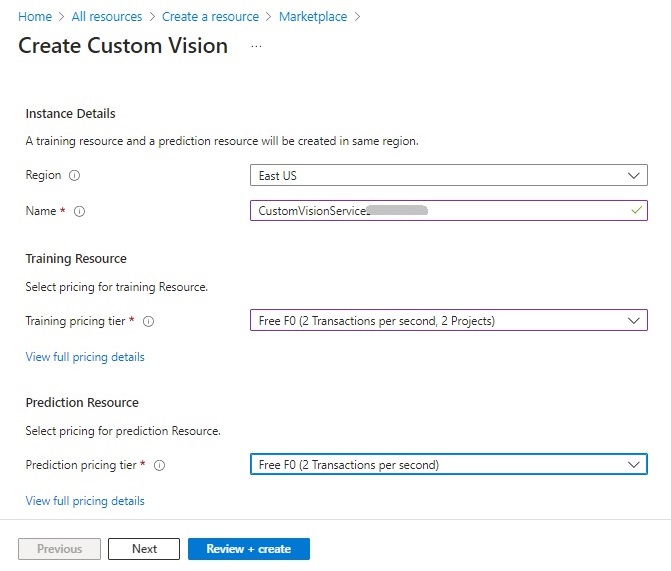
After the Custom Vision resource is created, there will be two resources created, with both in the same region:

The Prediction model will be named with the suffix _Prediction.
Creation of Custom Vision Models
To be able to create custom vision models, we can use the Custom Vision Studio in the custom vision portal. Access to the Custom Vision Studio is provided to users with Azure subscriptions. Aside from direct site access, it can also be accessed from the overview section of the Custom Vision Training resource. If you are already signed into the Azure Portal, then to sign in to the Custom Vision Studio, click the Sign In link in the home page:

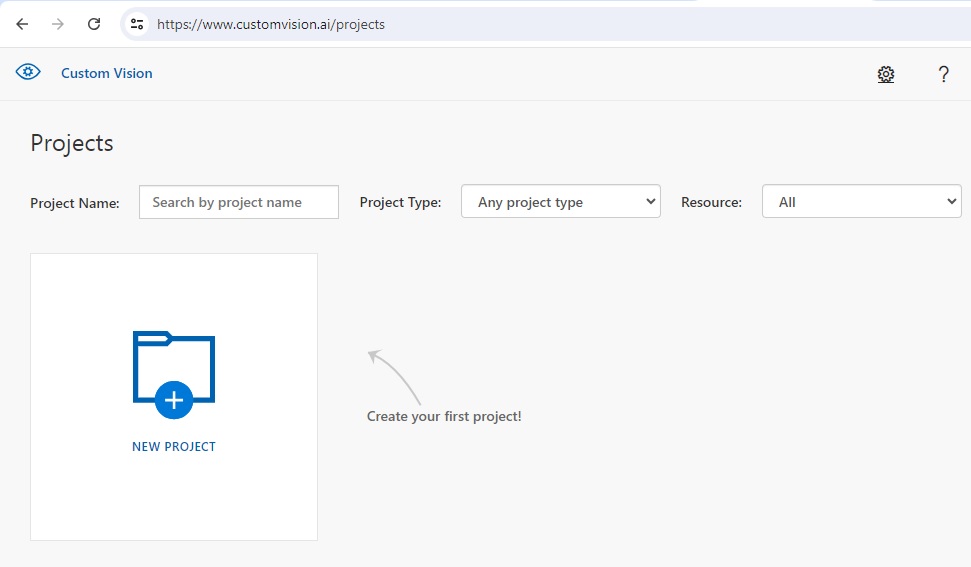
In the landing page, you will see the Projects page, where you can create custom vision training projects:
The first screen, after selecting New Project displays the required parameters. You will need to provide a resource name, Custom Vision training resource, project type, and classification type.

The project types, classification and object detection were discussed earlier, and for this post, we will be using the Classification project type.
The Classification types include options for Multilabel and Multiclass. With the Multilabel classification, you can add multiple tags for each image. With the Multiclass classification, you add a single tag for each image.
A multi-class classification identifies an object within the image, so we use a single tag to label the image. A multi-label classification identifies each object within the image with a unique label. Since classification projects involve an individual object within an image, we will use the Multiclass classification type.
In the Classification Types parameter, we select the domain that is the closest match to the objects contained within the images. In this case, I select General.
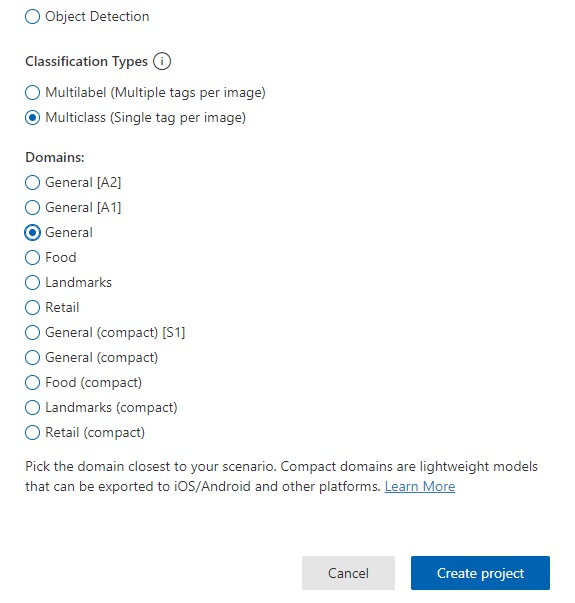
I then click Create project.
Image Tagging within the Custom Vision Project
In this section I will show how to create the training dataset for the model, then upload and tag images. I will then show how to decide how big our data sample should be before we can commence training.
To be able to train a custom vision model for object classification, we will have to deliver two tasks:
- Upload images.
- Tag the object within each image.
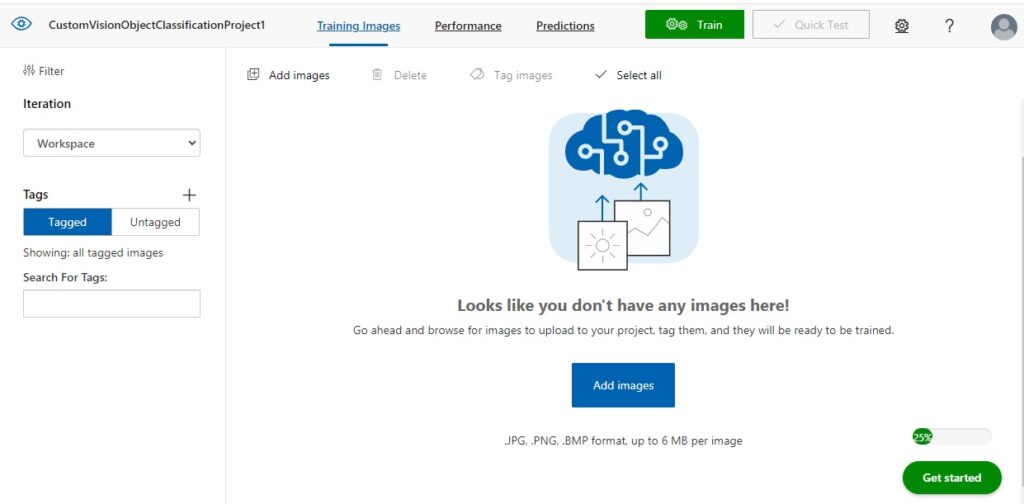
In the Training Images screen, you will see to the left the Tagged button highlighted, and to the right you will see a message that tells you that there are no images:
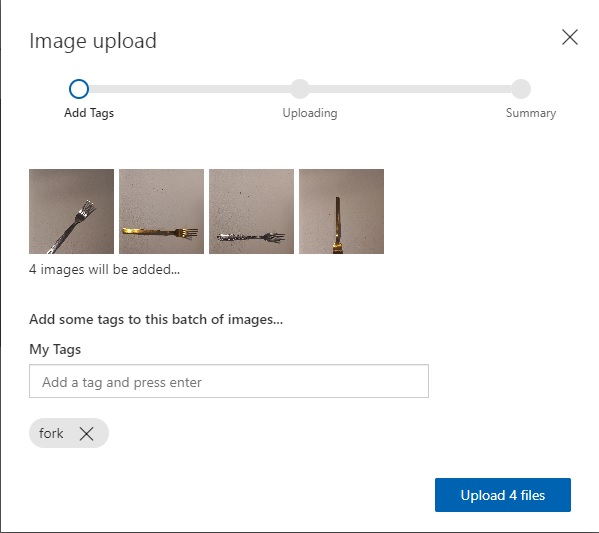
After clicking on the Add images button, you will be shown an image upload dialog, which will prompt you to upload the training images.
After uploading images for classification, you will have to add one tag for each group of images that are uploaded. An example of tagging multiple images with the same tag is shown below:
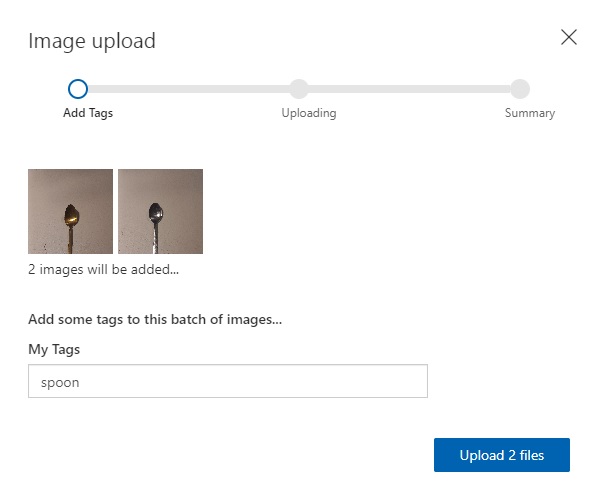
What we just did was classify the two spoon images with the same tag. This means that multiple images can have the same tag (or classification).
I then repeat the above for fork and knife cutlery images.
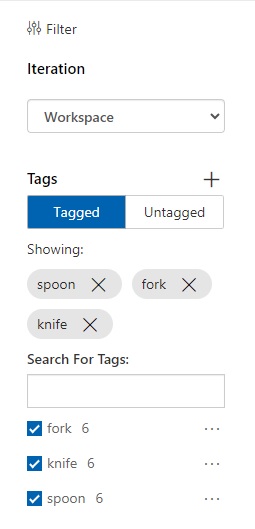
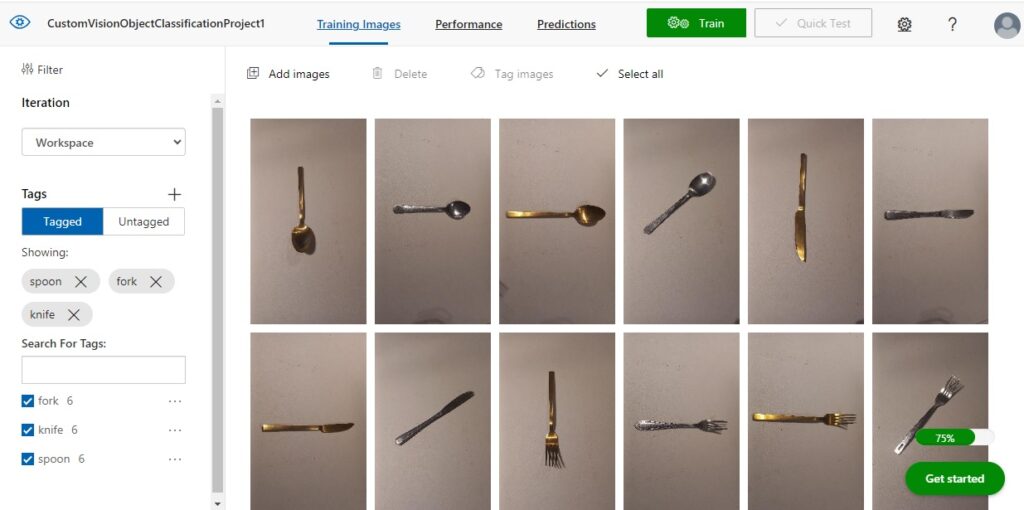
After the six images have been uploaded, you will see the images displayed in the Training Images pane to the right, and on the left pane, you will also see a tally of the number of tagged images by classification.

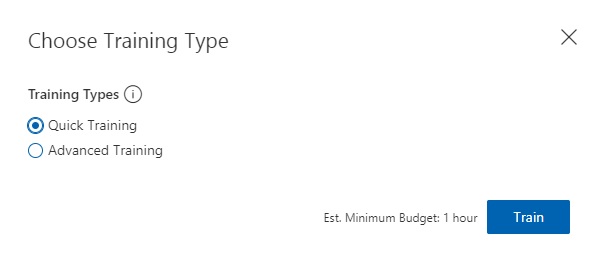
To train the model with the tagged images, you can select the Train option in the menu area.

Then select either option: Quick Training or Advanced Training. For evaluation purposes, select the quick training option.
After clicking on Train, you will likely see this error message:
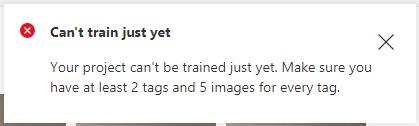
What this means is that we have not uploaded and tagged enough images to provide an adequately sized training dataset for our custom vision model.
I then upload and tag at least three more images for each of the three objects: spoon, knife and fork.
Once we have uploaded and tagged the minimum number of images, you will see the tally to the left.
As we now have enough labelled images in our training data set, we can now attempt to start the training process.
With the images we have uploaded for our training data, we should aim to provide a diversity of variations of each object that will allow the vision model to be trained not just with color or shape but also with positioning and orientation of the object.
In the next section, I will show how to run the training process and interpret the results.
Execution of Training for the Image Dataset
In the previous section, I showed how to create and tag images for use in our custom vision classification model. In this section I will show how to run the training process and analyze results.
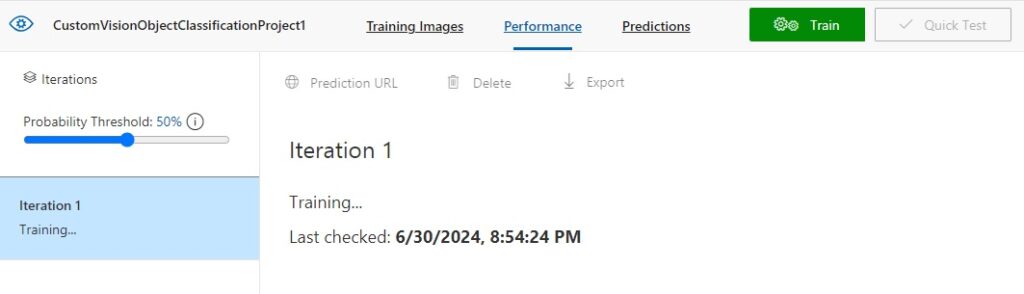
To start model training, in the menu area, click on the green Train action. After selection of the training option, you will then see the status of the run in the left and right panes.
When the training run is completed, the results from the first iteration will display in the right pane with three result categories, Precision, Recall and AP.
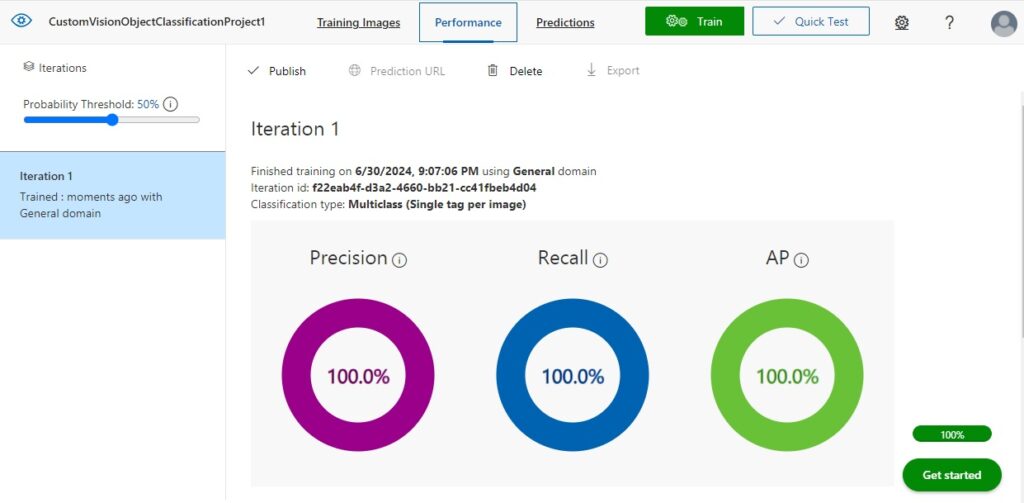
The Precision result is the percentage of identified classifications that are correct. For example, if we had identified 10 images of spoons, but one of the images was a knife, then the precision is 90 percent.
The Recall result is the percentage of classifications that are correctly identified. For example, with 10 images of spoons, the model identified 9 spoons, so the recall is 90 percent.
The AP is the average precision.
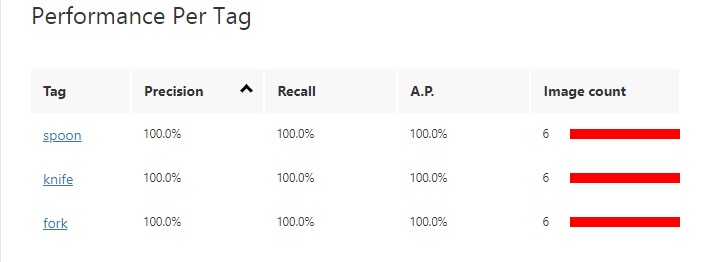
The results grid below the above results summary shows a breakdown of results for each tag and the sample image size.
Publishing the Training Iteration to the Prediction API
With the resulting training run completed, we can publish the trained vision classification model so that predictions can be run against any image.
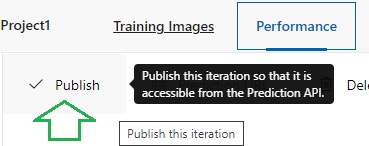
In publish model parameters shown below, enter the model and the custom vision prediction resource.
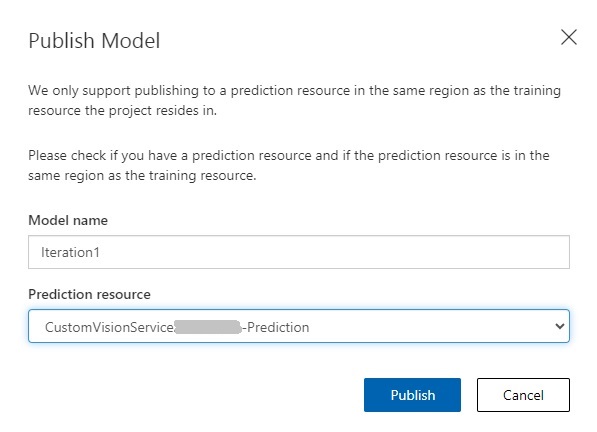
Once published, we will be able to run tests to verify that the trained custom vision model can apply its trained data to determine object classifications within input images.
The Prediction URL is of the form:
https://[custom-vision-resource-name] -prediction.cognitiveservices.azure.com/customvision/v3.0/Prediction/[project-id]/detect/iterations/[iteration-name]/url
and requires the prediction key header and body containing the URL of the image to be provided.
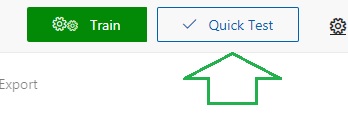
To run a test from the project, click on the Quick Test menu option.
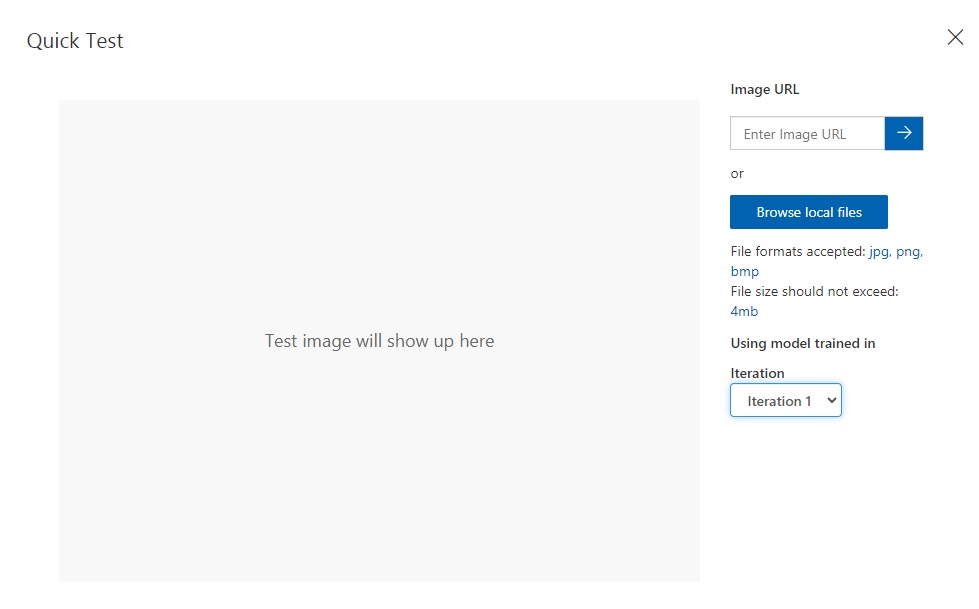
In the quick test input dialog, you will see a prompt for an uploaded image or an image URL:
Below is an example of an uploaded spoon image. The predictions for the image classification are shown in the Predictions grid to the bottom right of the dialog.
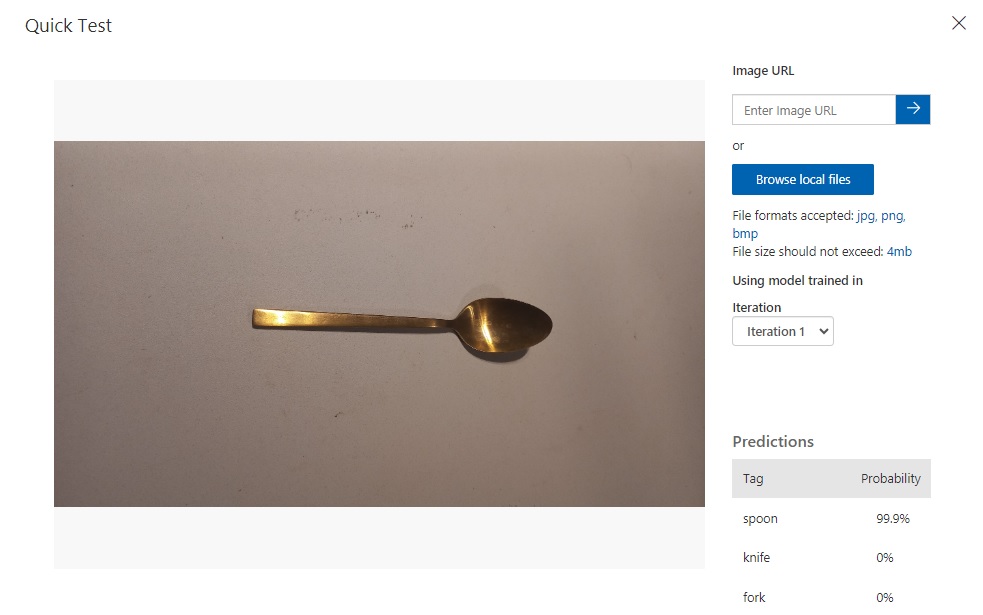
We can see that the object classification for the spoon image is 99.9% and 0% for the knife and fork objects.
We have seen how to create and build a vision classification model for a custom vision resource. We also saw how to construct and label our training data model for the custom vision training resource. We then tested the model using the quick test and determined which objects had the highest predictions.
In the next post, I will show how to use a custom vision resource to train and predict outcomes for an object detection model.
That is all for today’s post.
I hope that you have found this post useful and informative.
Andrew Halil is a blogger, author and software developer with expertise of many areas in the information technology industry including full-stack web and native cloud based development, test driven development and Devops.

