Welcome to today’s post.
In this blog I will show how to configure Angular Web API applications and prepare them for deployment from Visual Studio into Azure App Services.
With Angular Web API applications that are developed in a local development environment, the integrations to API services start off with mock API services, locally developed and hosted web API services, or external web API services. Given that most of the hard work has been done in developing the application locally, you are ready for the next step in configuring your application for deployment into a production environment, which can be an on-premises environment or a cloud environment such as Azure.
Pre-deployment Integrations to a Web API
In my previous post I showed how to deploy an Angular application to Azure App Services (Blog 86 – Deploying an Angular App to Azure) as a web application. In this post I will show how to configure any Azure endpoints within your application’s production configuration files so that the deployment can be as seamless as possible and limit post deployment issues.
I will show how the following can be achieved:
- Determining the Azure web API URLs to use in your application.
- Provisioning production environment integration points to your Azure App Service API from your Angular application.
- Deploying your Angular application to Azure with the Azure production specific API integration.
- Testing your Angular application can execute calls to the Azure Web APIs.
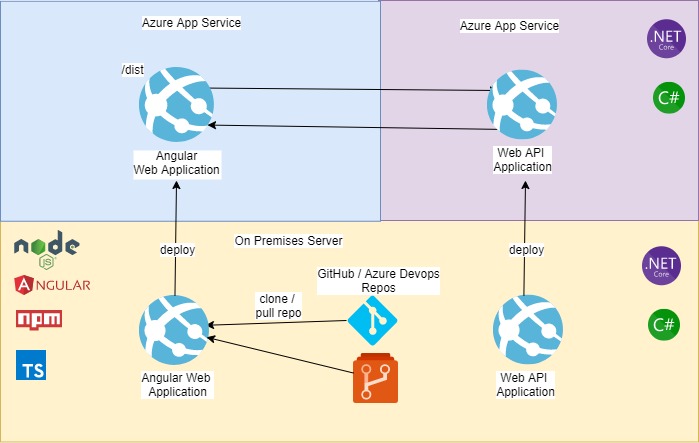
Below is a typical architecture of an Angular application hosted in an Azure App Service with integration with a .NET Core Web API hosted in a separate Azure App Service:
Determination of Base API Endpoints for your Application
The first step is to determine the API base URL that we will be using within our Azure hosted Angular application.
We do this by browsing to our Web API that is hosted in Azure.
In previous blog posts (Deploying .NET Core Applications to Azure and Deploying a Web API .NET Core App to Azure) I showed how to deploy an App Service Web application to Azure. The same method applies when deploying a Web API, as both are essentially hosted as web applications in an Azure App Service.
Browse to the Web API:
https://bookloancatalogapi.azurewebsites.net/index.htmlYou will see a list of methods within the Swagger UI:
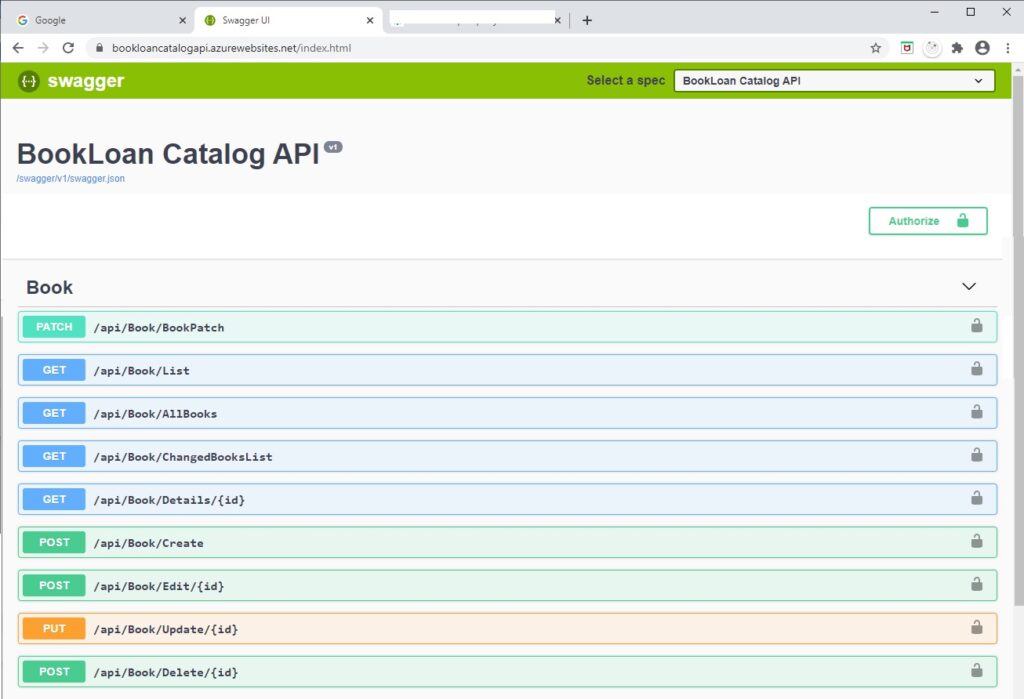
Expand one of the methods that we be using in our application.
We will choose AllBooks.
Click on it and execute it. From the result we will see the fully qualified URL:
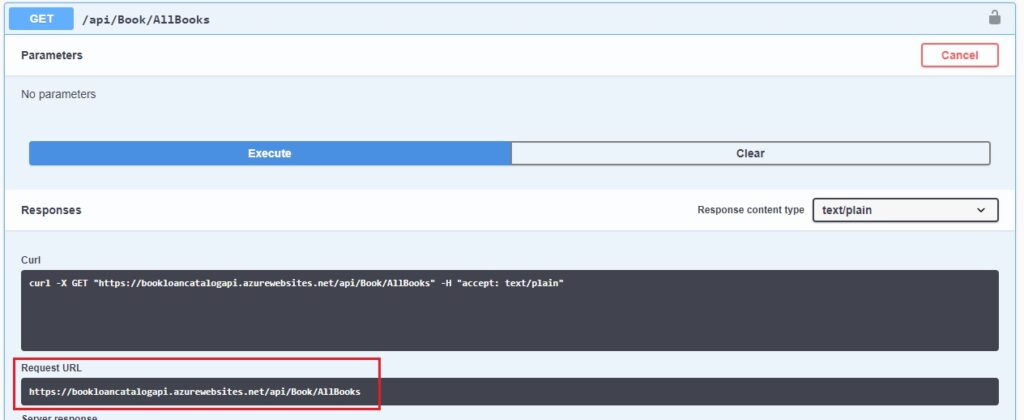
Copy this URL. We will need it in the next task.
Now we open our Angular application using Visual Studio Code.
Open the environments folder and the environment.ts file.
Add a new property within the environment constant as shown for our dev environment:
baseApiUrl: "http://localhost/BookLoan.Catalog.API/api"The amended source will look as shown:
export const environment = {
  production: false,
  baseApiUrl: "http://localhost/BookLoan.Catalog.API/api"
};
Open the environment.prod.ts file.
Add a new property within the environment constant as shown for our prod environment:
baseApiUrl: " https://bookloancatalogapi.azurewebsites.net/api"
The amended source will look as shown:
export const environment = {
  production: true,
  baseApiUrl: "https://bookloancatalogapi.azurewebsites.net/api"
};
Next, open apiService.ts under the services folder and apply the changes to support the environment variable:
import { Injectable } from '@angular/core'
import { HttpClient, HttpHeaders, HttpParams } from '@angular/common/http'
import { Book } from 'src/app/models/Book';
import { Subject} from 'rxjs'
import { environment } from 'src/environments/environment';

@Injectable()
export class ApiService {
    private baseAPI: string = environment.baseApiUrl;

    constructor(private http: HttpClient) {}

    getBooks(){
        return this.http.get(this.baseAPI + '/Book/AllBooks');
    }
}
Building and Testing the Angular Application Locally with Production Endpoints
As a best practice, your application should not hard code any setting including URL constants outside of the environment*.ts files. The above can be further improved by using Angular dependency injection of configuration files. By centralizing your application settings, you can improve maintainability of the application and when deploying it to a test or production environment.
Save the file.
Build and run the application.
Re-test the application on your local environment and ensure it works as expected.
After the application has been tested, we can then commence re-building the application for production deployment.
Run the command:
ng build --prod
As we recall from my previous blog post (Deploying an Angular App to Azure), when we build our Angular application using the –prod switch, this does the following:
- Packages our source and scripts into a folder called dist.
- Moves all content including images and stylesheets into a sub-folder called assets within the dist folder.
- Replaces the environment.ts file with environment.prod.ts in the production build so the resulting app artifacts are configured with production settings.
It is recommended to keep a separate file for each type of environment you will be deploying and hosting the application, such as development, testing, production etc, and the type of hosted environment, IIS, Azure etc.
The next step we take is to deploy the prod build of our application to our Azure App Service (refer to the blog I just referenced).
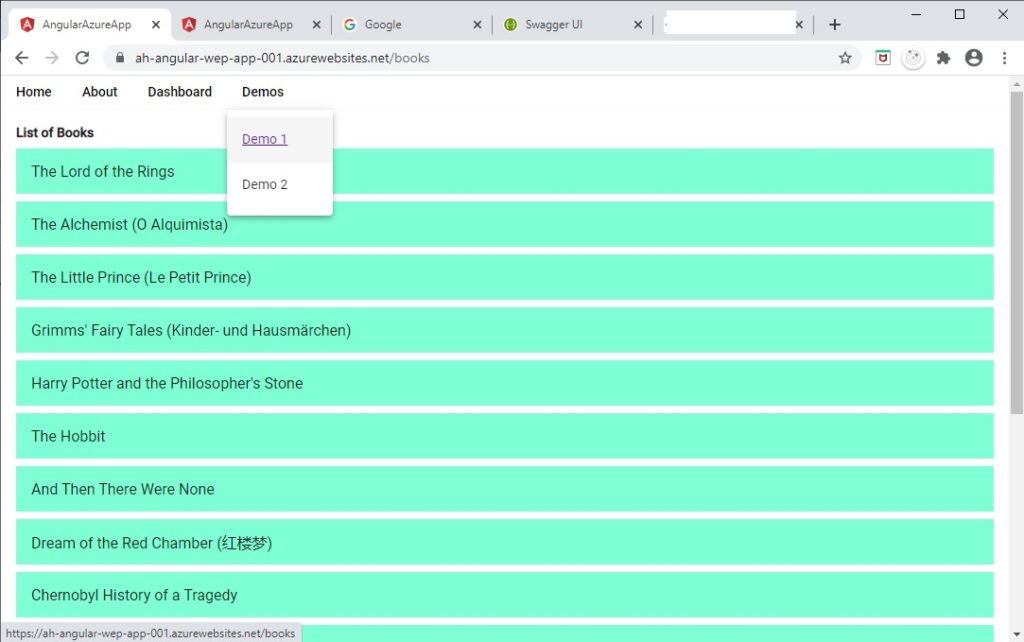
After completing the deployment, browse to the Azure site:
https://ah-angular-wep-app-001.azurewebsites.net/Select the demo menu item and wait for 5 seconds. The books should display as shown:
We can open the dev tools in Chrome and verify the API from Azure has been called with a valid response:
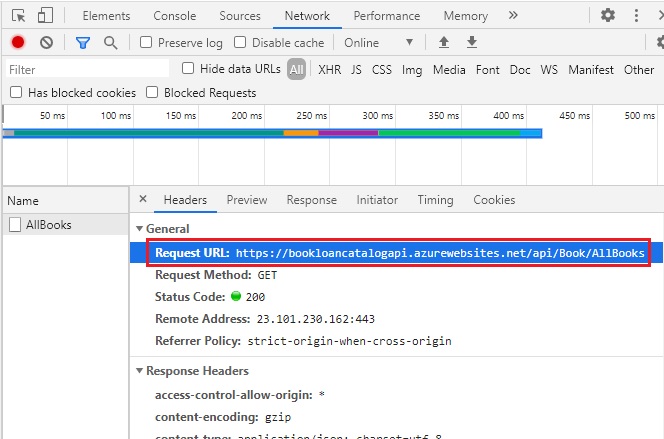
Apart from the URL and data, there should be no discernible difference between the local and production versions of your application.
To summarize, we have learnt the following from this blog:
- We have configured an Angular application to support Azure Web Service API.
- We have deployed an Angular web API application to Azure and confirmed it is running as expected.
The next step will be to experiment with adding some authentication to our application and to our APIs. That will be for a future post.
That’s all for this post.
I hope you found this post useful and informative.
Andrew Halil is a blogger, author and software developer with expertise of many areas in the information technology industry including full-stack web and native cloud based development, test driven development and Devops.