
Welcome to today’s post.
I will show how to create a build configuration that integrates your .NET Core Application for build, test and release pipelines with the TeamCity Continuous Integration / Continuous Deployment Tool.
Assuming you have already downloaded and installed the TeamCity tool.
The current version I am using for this post is TeamCity 2018 (there has since been a 2019 release).
In the following sections, I will go through the following steps to configure our build:
- Creating a configuration project in TeamCity.
- Configure the source code repository in our configuration project.
- Installing and configuring the NUnit Console in our configuration project.
- Checking out from a repository branch in our configuration project.
- Configuring the MSBuild version in our configuration project.
Creating a Configuration Project in TeamCity
Open TeamCity (the URL might be something like http://localhost:8080).
In the landing page, click on the Administration menu item.

Under Project related settings click on the Projects link.
Click on Create Project.

We will next require the source repository to be setup within our configuration project. I will show how this is done in the next section.
Configuring the Source Code Repository
In the Create Project screen select the location of the source repository.

If you are referencing a GitHub repository, then either the From a repository URL or From GitHub.com are equally valid methods to integrate.
I will admit it have tried the From GitHub.com option and had some issues with the URL opening GitHub. If I can find the workaround for this then I will re-post this with both alternatives. I will show how to link by the repository URL:
If we are linking to a repository in GitHub, then the URL will be of one of the forms:
GitHub Repository URL Types
| Branch Type | URL Format |
| Master | https://github.com/[account-name]/[repository-name]#refs/heads/master |
| Branch | https://github.com/[account-name]/[repository-name]/tree/[branch-name] |
After entering the URL and credentials click Proceed.
The Build Pipeline Steps
The next screen will confirm the integration of your GitHub project and TeamCity. Build steps will also be auto detected:
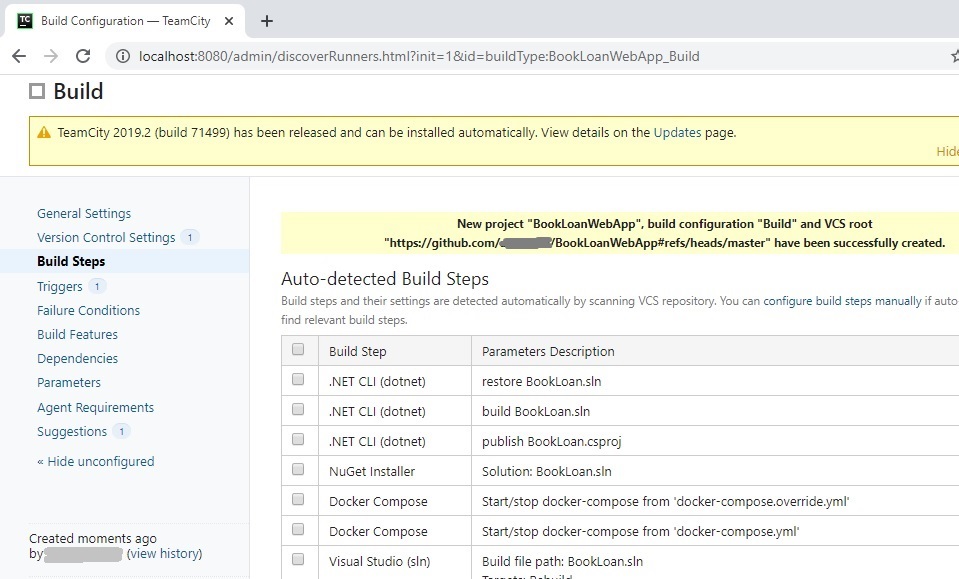
You may wish to select which steps to keep for these build steps:
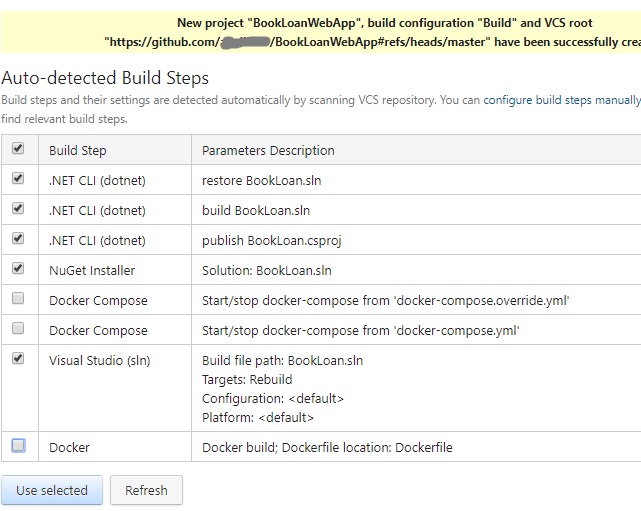
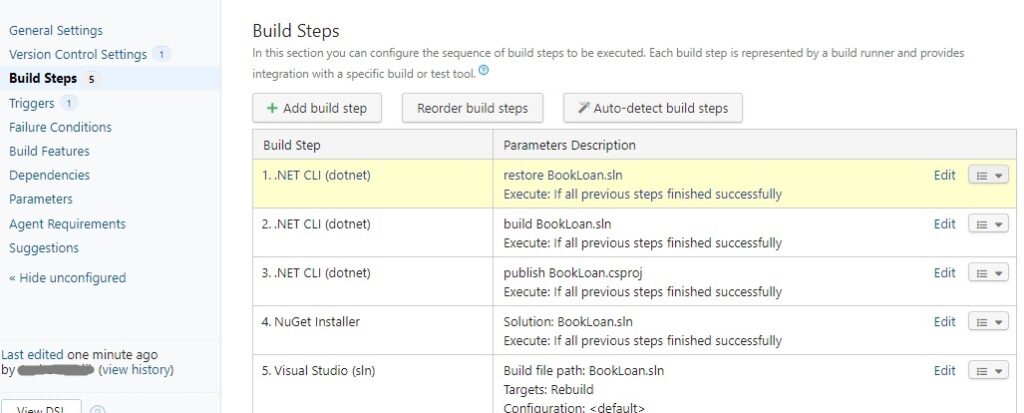
Below are the steps selected into the build pipeline:
In the next section, I will show how to configure the NUnit Test Adapter into the build pipeline.
Installing and configuring the NUnit (Test Adapter) Console
Next, you will need to install the version of NUnit Console that corresponds to the NUnit 3 Test Adapter of your NUnit Test project.
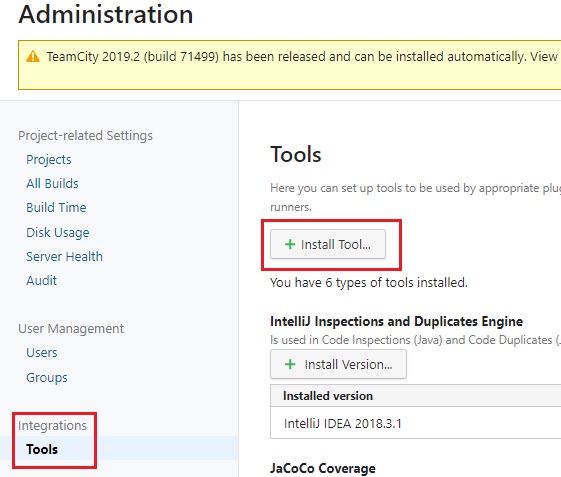
First, open Administration and click on Tools under Integrations:
After clicking Install Tool.. select NUnit Console and Add from the dialog:

The next dialog shows the required selection of the NUnit Console version:

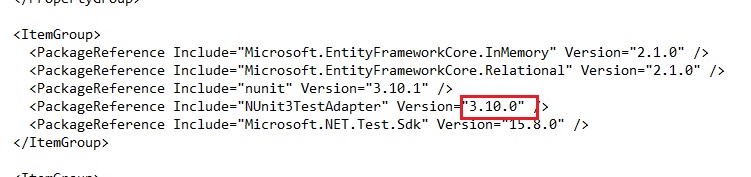
To decide which version to use, open the csproj file of your Unit Test project and look for the Version key value of the PackageReference corresponding to NUnit3TestAdapter.
In this case as shown, it is 3.10.0. (It may vary for your installation).
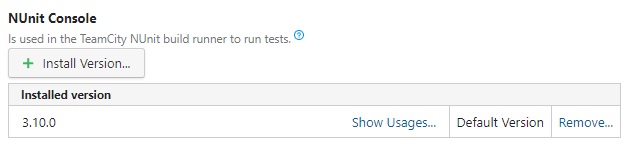
After selecting the version, click Add:

The NUnit Console will then be installed:
In the next section, I will show how to checkout our source using a specific branch.
Checkout from a Release Branch
The next task you will need to do is amend the checkout if you plan to use a branch instead of the master branch.
Click on Version Control Settings.
In the checkout rules, click on Edit:

In the checkout screen edit the VCS root name, VCS root ID, and Default branch (the Fetch URL is defaulted and should be the same unless you are targeting a different repository).

The VCS root name will be of the format:
https://github.com/[account-name]/[repository-name]#refs/heads/master
or
https://github.com/[account-name]/[repository-name]/tree/[branch-name]
depending on whether you choose to integrate with the master branch or a feature branch.
The VCS root ID can be generated by clicking on Regenerate ID. (The VCS root ID is of the format:
[Repository-Name] _HttpsGithubCom[Account-Name][Repository-Name]RefsHeadsMaster
Or
[Repository-Name] _HttpsGithubCom[Account-Name][Repository-Name]Tree[Branch-Name]
The Default branch is the branch that will be checked out by TeamCity. It will be of the format:
refs/heads/master
OR
tree/[Branch-Name]
Once the VCS settings are saved. Test the connection:
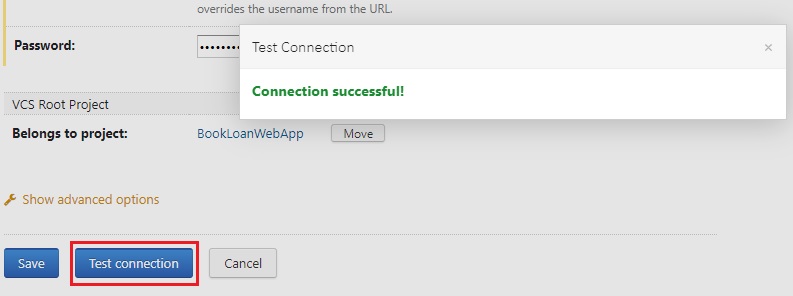
Then save the settings.
The updated VCS root will show in the checkout rules:

Next, if you attempt to run the build and get an incompatible agent issue with the MSBuild version missing as shown:

You will need to add a new MSBuild requirement to support the build.
In the next section, I will show how to configure an MSBuild version that is compatible with the same version that our .NET Core project is developed in.
Configuring the MSBuild Version
Click on Add new requirement. Select the latest MSBuild version in the list. Usually, for Visual Studio 2017, the MSBuild is at least version 15:

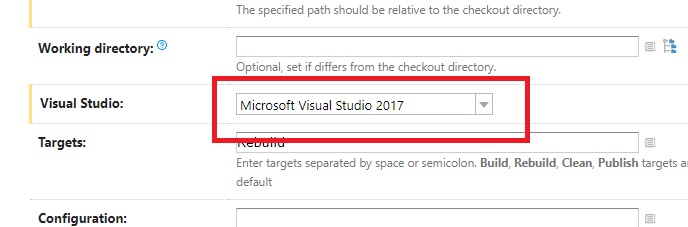
Next, open the build step for Visual Studio (sln):
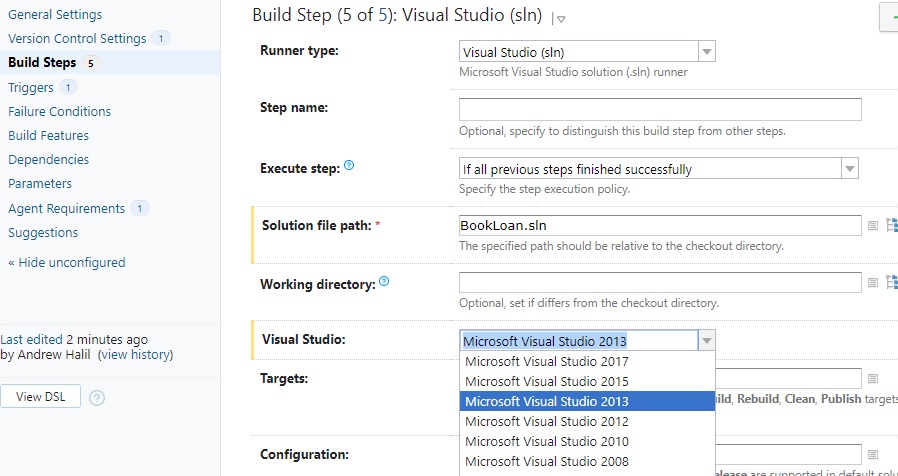
Select the Visual Studio corresponding to the edition installed on the same machine / server that your TeamCity installation is installed.
In my case (at the time of writing this post), I use Visual Studio 2017.
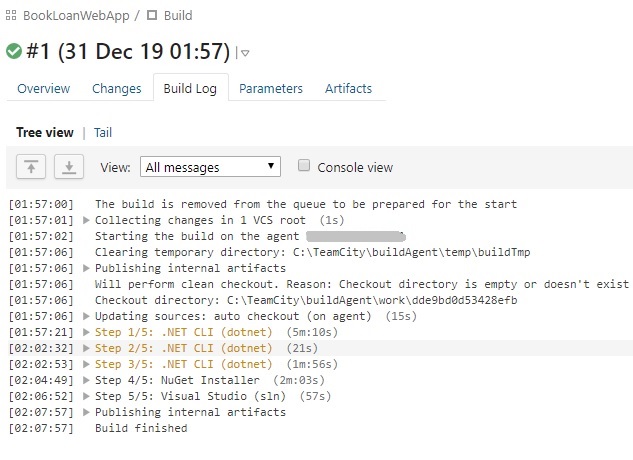
After saving, click on Run..
The build commences:

After a while, the build completes.
If successful, you will see a Build finished and no red errors in the previous steps:
In the above overview, we have seen how to completely configure the build of a .NET Core application within a TeamCity build pipeline. The tasks we have learnt in this post will be useful when we extend our pipeline to not only build an application from a source code repository, but to unit test it, then include the tests in a continuous build and deployment pipeline.
In a future post I will show how to add NUnitTest steps to your build release pipeline.
That’s all for today’s post.
I hope you found it useful and informative.
Andrew Halil is a blogger, author and software developer with expertise of many areas in the information technology industry including full-stack web and native cloud based development, test driven development and Devops.
