
Welcome to today’s post.
In today’s post I will be showing you how to create a basic identity application with ASP.NET Core that can provide useful features of user security.
When the need to implement customized identity application is required with a self-contained solution, then the ASP.NET Core identity framework with Visual Studio can be used to provide a solution. We could also use a solution that is from a third-party provider, which would host the security backend in a secure on premises server or in the cloud. The use of a third-party solution is a discussion in a future post. In this post, we will look at the initial stages of a customized approach.
Why the need for an Identity Application?
An identity application is applicable when we need to maintain the security of one of our applications. This would involve managing the security of the users of the application, that can include the following:
User management
Registering users, removing/revoking user accounts, amending user details, user authentication.
Authentication
Login, user credential authentication.
Password management
Resetting passwords, changing passwords, revoking passwords
Identity applications are self-contained, which means that the identity functions within it are not separated (or decoupled) out from its functionality. In a future post I will show how to separate out the identity functions into a service API, which can be used as a standalone security service for applications.
Creating an ASP.Net Core application that supports identity used to be tedious. With the project template within Visual Studio, most of the overhead of creating one is done.
Using Visual Studio 2017, you can create identity support for your ASP.NET MVC application using the built-in MVC Razor Identity scaffolding wizard.
The built-in identity scaffold provides the following features out of the box:
- Login
- Authentication
- Password changes
- 2 Factor Authentication
- User Account Management
- Reset Password
- Change Password
- Forgot Password
- Account Lockout
- User Registration
The above are very useful features that can be included within an implementation of user security within an ASP.NET Core application.
In the next section, we will see how to create an identity application within Visual Studio.
Creating the First Identity Application
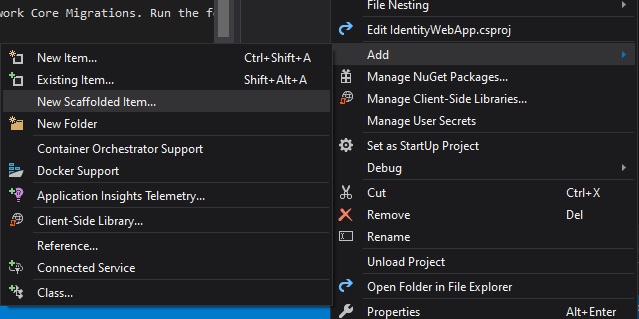
To start implementation of a new security application, go to the project in the solution explorer, right click and create a New Scaffolded Item…
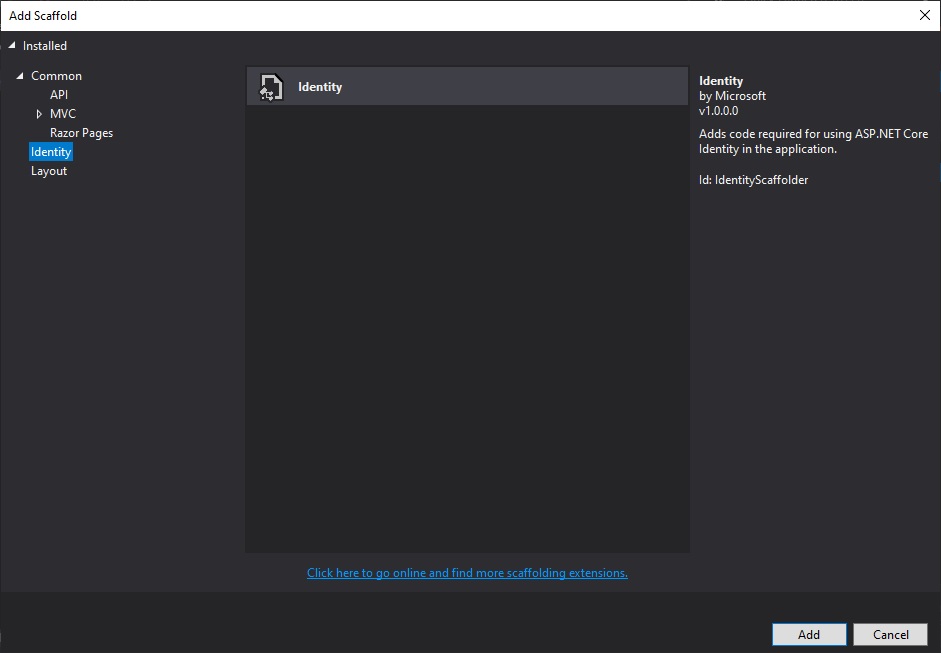
Select the identity scaffolder, then Add…
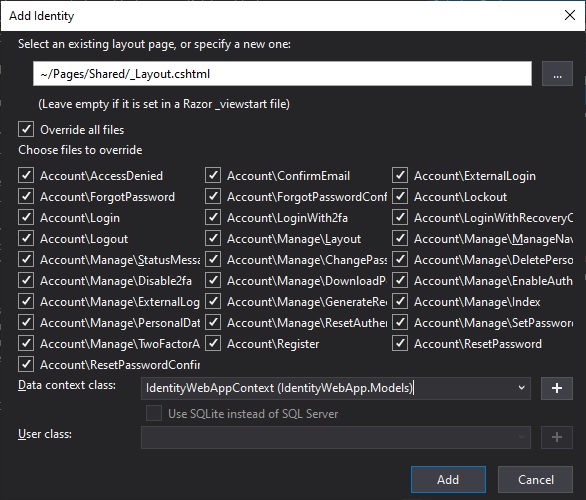
In the next screen, select all the files to override, then Add…
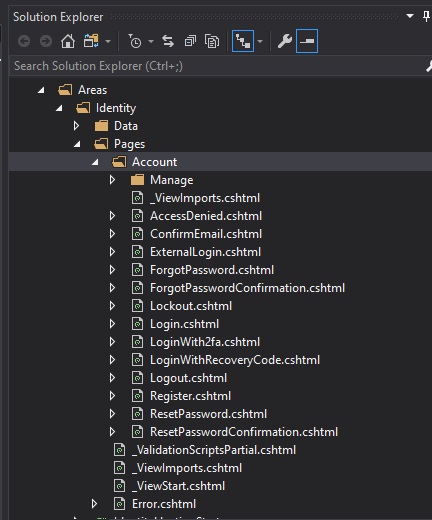
Wait a few minutes and the source and content files for identity will be created in the folder
Areas / Identity / Pages / Account
and
Areas / Identity / Pages / Account / Manage
In the next section I will show how to enable the login and user registration links and see how the application looks when it is run.
Enabling Login and User Registration Links
Before you can see the Login and Register menu links, you will need to do the following.
Open the shared layout view file in \Pages\Shared\_layout.cshtml.
Go to the source block showing the following:
<div class="navbar-collapse collapse d-sm-inline-flex flex-sm-row-reverse">
  <ul class="navbar-nav flex-grow-1">
     <li class="nav-item">
          <a class="nav-link text-dark" asp-area=""
asp-page="/Index">Home</a>
     </li>
     <li class="nav-item">
          <a class="nav-link text-dark" asp-area=""
asp-page="/Privacy">Privacy</a>
     </li>
  </ul>
</div>
Then just after the above, insert/type in the following source to expose the login partial view:
@await Html.PartialAsync("_LoginPartial")
Save the layout view.
Build the application.
In the next section I will show how to run the identity application.
Running the Basic Identity Application
When the application is run, the following menus will appear in the top right corner of the web form:

The login menu when clicked will show a functional login screen …
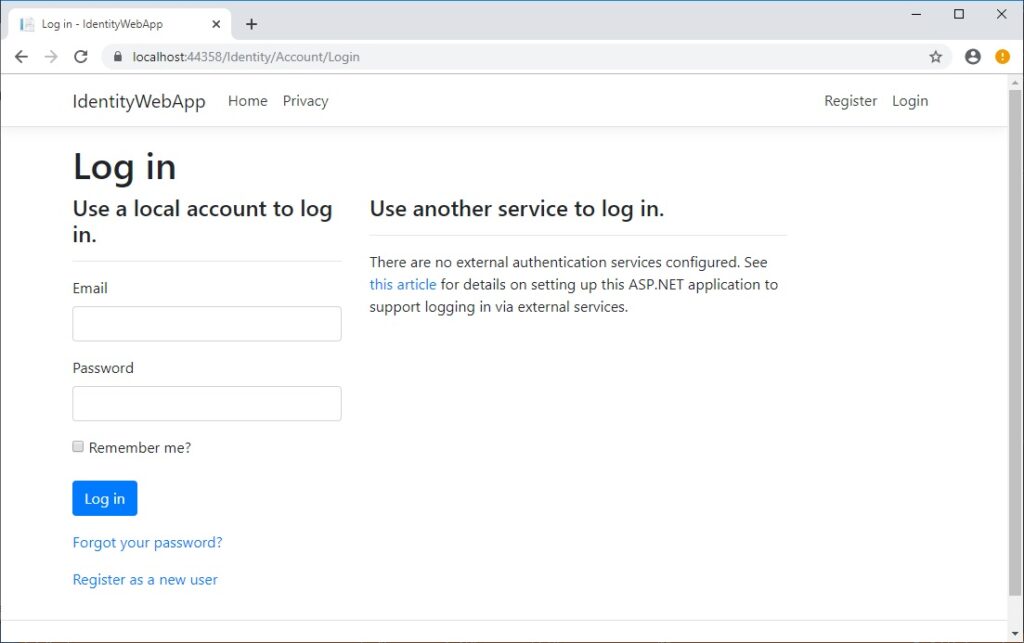
The user login screen is a starting point where we can retrieve the entered user credentials, then fill in the code for the Log in button event and implement a basic authentication validation for our application that integrates with the generated SQL backend user account tables.
Click on the register menu and a functional user registration screen will show …
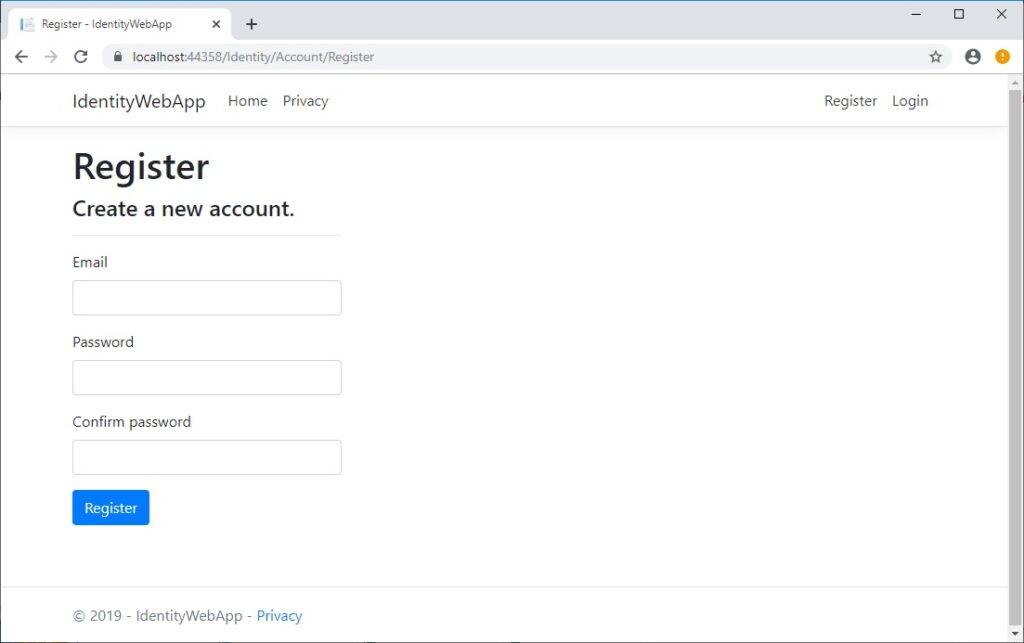
The registration screen is a starting point where we can then fill in the code for the Register button event and implement a basic login for our application that integrates with the generated SQL backend user account tables.
In a future post, I will show how to use Entity Framework Core and ASP.NET Core Identity to setup and manage user security within a .NET Core application.
Hope this has been useful for anyone either starting out with ASP.NET Core MVC or doesn’t have the time to develop a fully functional identity management system.
That is all for today’s post.
Andrew Halil is a blogger, author and software developer with expertise of many areas in the information technology industry including full-stack web and native cloud based development, test driven development and Devops.

