
Welcome to today’s post.
I will discuss how to create unit tests within a .NET Core test application using a BDD test utility.
What is BDD? BDD is Behavioral Driven Testing.
BDD is a natural way to write unit tests for applications. It uses natural language syntax that makes the unit tests and assertions easier to implement by testers and less technical staff that are involved in the testing process.
It structures tests into features with scenarios. These are equivalent to test scripts.
I will show how to use the BDD third-party tool SpecFlow within Visual Studio.
What is SpecFlow?
SpecFlow is a third-party development tool that aims at bridging the communication gap between domain experts and developers by binding business readable behavior specifications to the underlying implementation. The tool provides a practical approach to BDD development.
To be able to use SpecFlow to develop BDD tests you will require the installation of the NuGet packages:
SpecFlow

SpecFlow.Tools.MsBuild.Generation
To use SpecFlow for NUnit, the following NuGet package is required:
SpecFlow.NUnit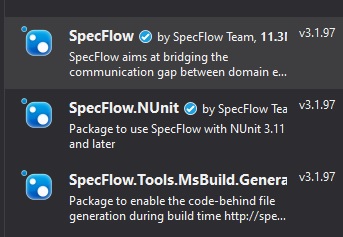
Note: SpecFlow requires a minimum version of NUnit, so install a compatible version of the NUnit package.
Being able to use the SpecFlow templates within Visual Studio requires installation of the SpecFlow extensions from the Visual Studio marketplace.
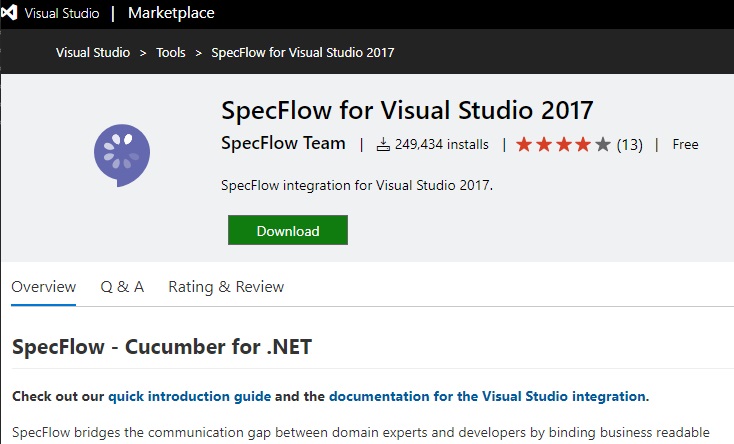
The extension requires installation. This will take a few minutes.
After installing the extension open Visual Studio.
Creating a BDD Unit Test Project with an existing .NET Core Application
If you use an NUnit project then ensure the SpecFlow package for NUnit has been installed beforehand.
Create an NUnit test project.
Select the test project and New Item..
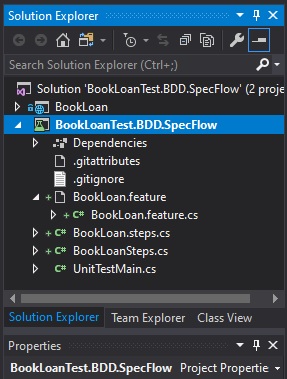
Add a reference to your .NET Core web application or .NET Core Web API application. The solution structure should look as follows:
The template dialog will open. Select the SpecFlow item category and the following sub-item templates for SpecFlow will show:
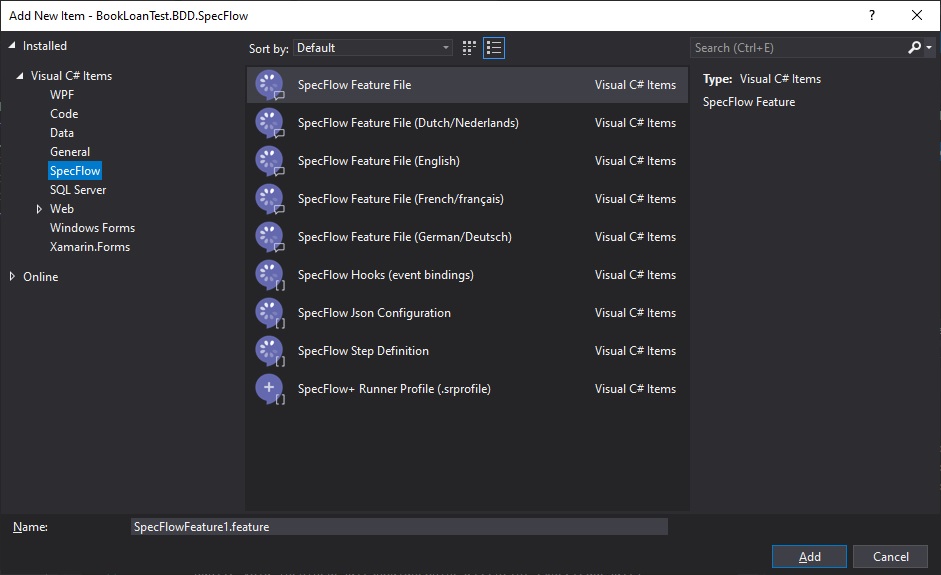
From here you can build your BDD project by adding add a new feature file or step file.
After a SpecFlow feature file is added, it will be prefilled with a sample feature (as shown):
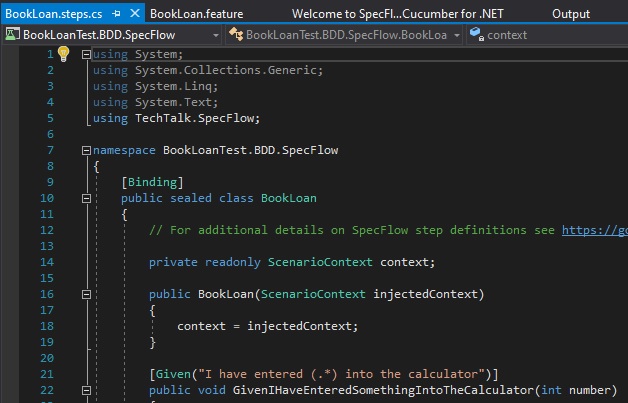
After a SpecFlow steps file is added, it will contain pre-generated code based on the Feature defined in the feature file.
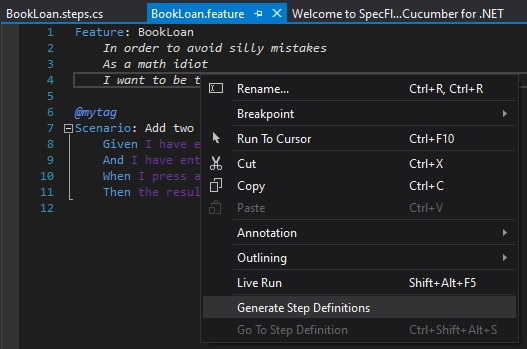
The step definitions can also be generated from the Feature file by right-clicking and selecting Generate Step Definitions:
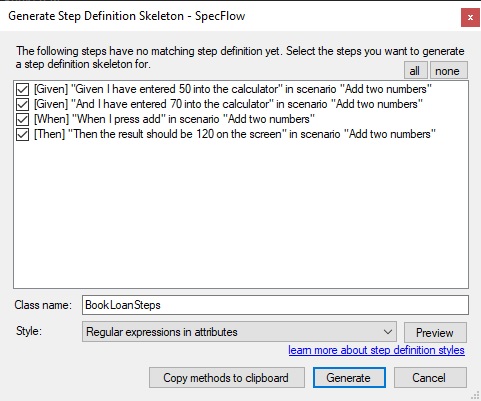
The following dialog displays allowing a class name to be specified:
To write feature files a good reference is the Gherkin language reference:
https://cucumber.io/docs/gherkin/reference/The gherkin editor for SpecFlow uses a context-sensitive intellisense style editor to build a feature.
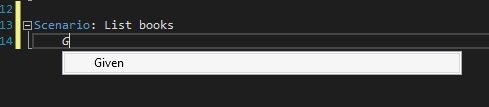
The gherkin primitives used to express scenarios are shown below:
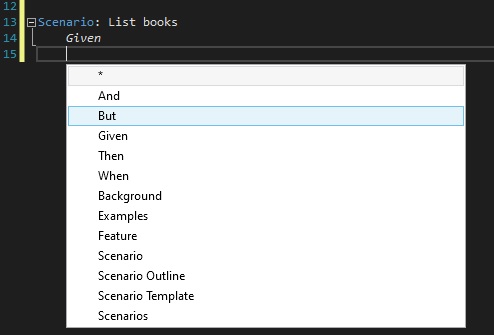
The most common primitives are:
| Given | This is the context of the scenario (there can be several per scenario) |
| When | This describes an action (normally one per scenario) |
| Then | This describes an expected outcome. (normally one per scenario) |
A method that lists books from the book loan library can be expressed as follows:
Given: I have opened the book loan application.

When: I list the books.

Then: I see a list of books.
Logical primitives are And, But. These are described as follows:
And - This is an extra condition with the Given primitive.

But - This is an extra exception condition after the Then primitive.
For example:
Given: I have opened the book loan application.

And: I have student access

When: I list the books

Then: I see a list of books

But: Only when there is at least one book
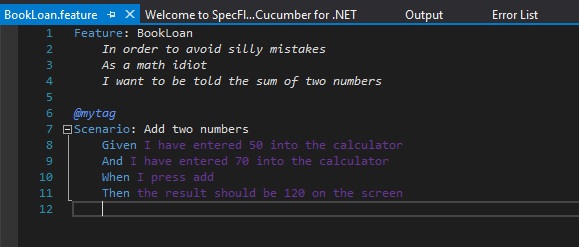
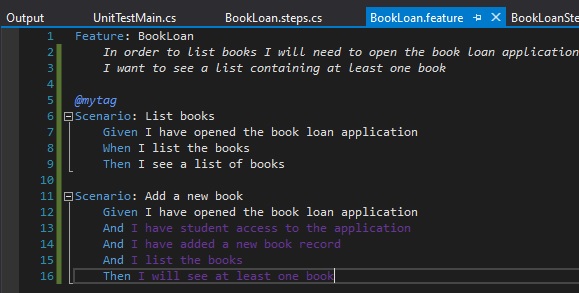
Wipe the default feature file and enter the feature and scenario as shown:

Generating the steps shows the dialog:
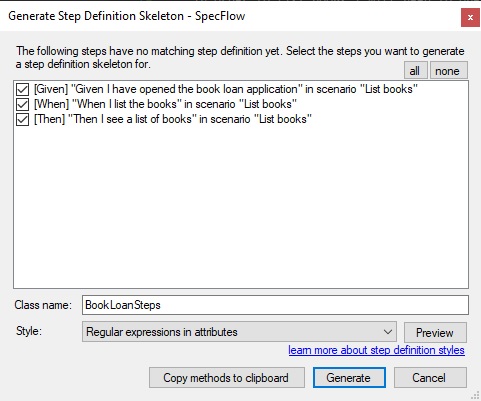
Selecting Preview will display see the class definition that will be generated:

Click Generate, then select an output file.
The generated steps file will look as shown with the skeleton code:
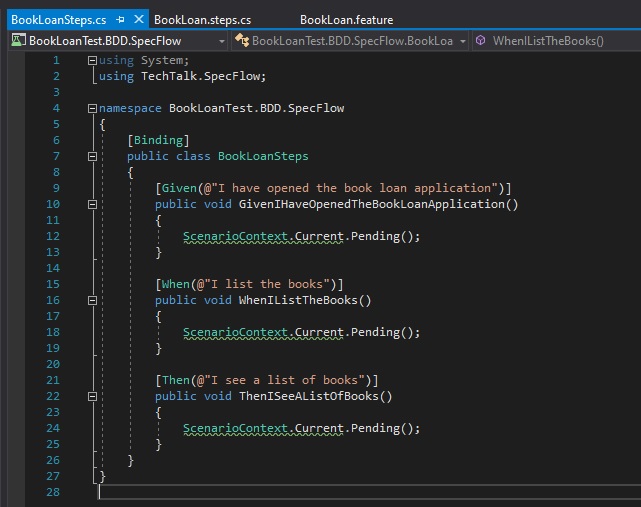
You can see the steps are defaulted and after building and running the tests will pass.
In the next two sections, I will show how to create a BDD Unit Test Project, and show how to test an existing .NET Core Application or API
Implementing a BDD Test with NUnit and .NET Core
To integrate NUnit and a .NET Core application into your BDD test we follow the guideline below:
- Declare any classes and interface definitions in the Step class declaration section.
- Declare any variables you wish to use within the class declaration section that you wish to use to prepare and generate test data.
- Create a constructor and include the unit test setup code within that.
- Embed code within each step code stub.
- The step code stub for the Then clause should end with an assertion.
An example constructor is shown below:
public BookLoanSteps()
{
  contextAccessor = new HttpContextAccessor();

  services = new ServiceCollection();

  opts = new DbContextOptionsBuilder<ApplicationDbContext>()
    .UseInMemoryDatabase(databaseName: "In_Memory_Db")
    .Options;

  services.AddDbContext<ApplicationDbContext>(options =>
      options.UseInMemoryDatabase("In_Memory_Db"));

  serviceProvider = services.BuildServiceProvider();
    context = serviceProvider
      .GetRequiredService<ApplicationDbContext>();

  services.AddTransient<IBookService, BookService>();
  services.AddTransient<ILoanService, LoanService>();
}
Code to implement the When action is shown:
[When(@"I list the books")]
public void WhenIListTheBooks()
{
  var book = new BookViewModel() { ID = 1, Author = "W.Smith",
    Title = "Rivers Run Dry", YearPublished = 1954 };
  context.Add(book);
  context.SaveChanges();

  book = new BookViewModel() { ID = 2, Author = "D.Lee",
    Title = "Red Mine", YearPublished = 1968 };
  context.Add(book);
  context.SaveChanges();

  book = new BookViewModel() { ID = 3, Author = "V.Prescott",
    Title = "Boundary Rider", YearPublished = 1974 };
  context.Add(book);
  context.SaveChanges();
}
Code to implement the Then result is shown:
[Then(@"I see a list of books")]
public void ThenISeeAListOfBooks()
{
  var bookService = new BookService(context, null);
  var books = bookService.GetBooks().GetAwaiter();

  result = books.GetResult();
  Assert.AreEqual(3, result.Count);
 }
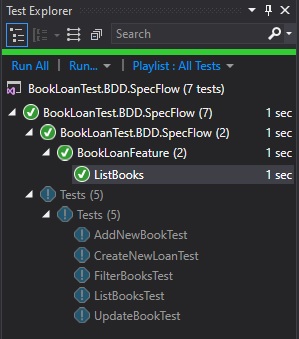
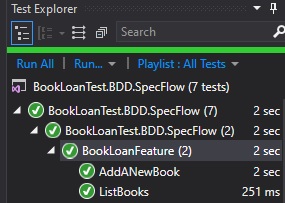
When built and run, the BDD unit test runner runs with the NUnit test running in the same Test Explorer as shown:
In the next section I will show how to generate additional scenarios to the BDD feature file.
Adding and generating additional scenarios to the feature file
To add additional scenarios to the feature file as shown:
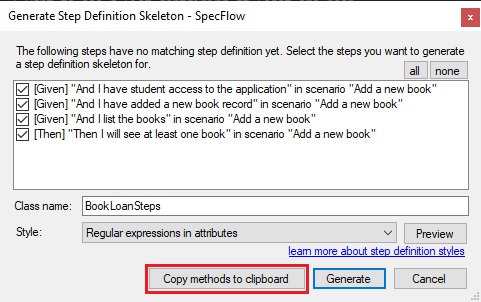
When attempting to re-generate this, the dialog will open and the Generate function will ask you to re-generate a new Step class file for the new scenario. To include the new scenario into the same Step class as the first feature and scenario select the Copy method to clipboard action:
Then paste in the new skeleton Step code into the existing Step class file.
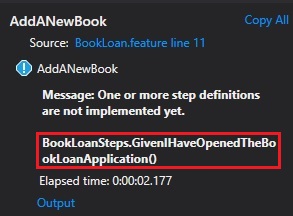
After adding code to the stubs, building and running the test for the new scenario, the result should show in the Test explorer. If you get the following common error:
Message: One or more step definitions are not implemented yet.Review the test runner result message for the scenario. Note the affected method framed in red below:
Then go to the code block and comment out the following line of code:
ScenarioContext.Current.Pending();
Repeat this for any further Step code until the test successfully completes the Then step.
You should see a result for each scenario as shown:
The above shows you how straightforward it is to install, setup, write BDD tests and implement BDD test steps. I’m so impressed with this tool! (so far).
For more details refer to the SpecFlow site at:
https://specflow.org/getting-started/I hope you found this post useful and informative.
I will look at other BDD test tools in a future post and how to integrate BDD tools into a CI tool like TeamCity.
That is all for today’s post.
Andrew Halil is a blogger, author and software developer with expertise of many areas in the information technology industry including full-stack web and native cloud based development, test driven development and Devops.

