
Welcome to today’s post.
In today’s post I will show how to troubleshoot continuous integration (CI) with GitHub and the Azure App Service.
Before we commence this blog, it helps to have read my previous post on configuring CI with GitHub and Azure App Service. Recall that we saw how to integrate a GitHub branch within a source repository into the Azure App Service build provider, Kudu, which handled the deployment of the resulting build artifacts of the source into an Azure web application.
In cases where the deployment has failed, I will introduce a method to diagnose and suggest remediation to enable successful deployment from the configured GitHub repository.
In the first section, I will show how to determine deployment errors within Azure App Services.
Determining Deployment Errors within Azure App Services
In this section, I will show how to determine the deployment errors that result from within Azure App Services.
In the Azure Portal, open the App Service resource.
Then, under Deployment select Deployment Center. Look for the Status column.
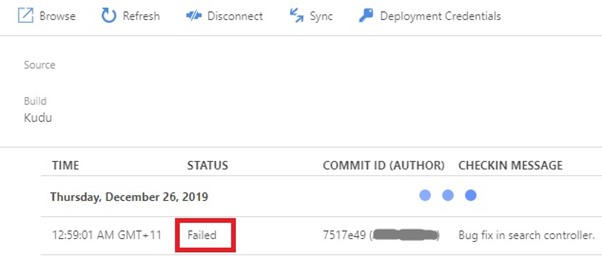
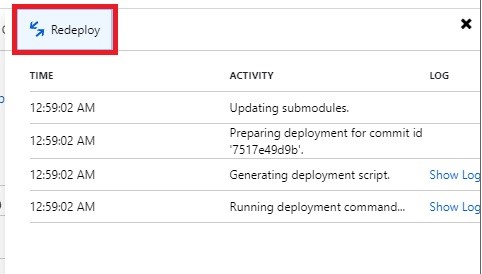
If it shows as Failed, then proceed to troubleshoot as follows:
Open the Kudu Services dashboard for your application service by browsing to the URL for the Azure web application:
http://[app name].scm.azurewebsites.net/Click on Diagnostic Dump as shown:
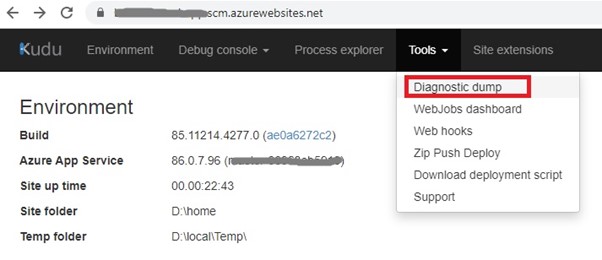
A zip file will be downloaded to your local machine of the format:
dump-MM-DD-HH-MM-SS.zipIn the next section I will show how we can examine and interpret the diagnostics log file.
Examining Diagnostics Log Files
In this section I will be showing you how to examine and interpret the diagnostic log files that are generated in the web application’s deployment sub-folder.
Open the ZIP file that was downloaded from the previous section. In the ZIP archive folder, navigate to the sub-folder:
\deployments\[GUID]Open file log.txt
Usually this log file will contain the reason for the error, or possibly more than one error. In this case the Kudu build has detected multiple .csproj files in the same repository.
An example error entry in the log file is shown below:
2019-12-25T13:59:06.6336872Z,D:\Program Files (x86)\dotnet\sdk\2.2.109\NuGet.targets(241,5): error MSB3202: The project file “D:\home\site\BookLoanTest\BookLoanTest.csproj” was not found. [D:\home\site\repository\BookLoan.sln],,0
In the next section I will cover some remediations to try one the above error. In other scenarios you may experiences other types of errors in which you will have to act on accordingly.
Applying Remediations for the Build
Based on the error that we have found, we can apply a temporary workaround.
We can try editing the (sln) solution file in the repository folder:
D:\home\site\repository
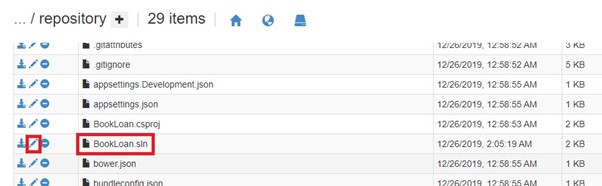
Open the solution file:
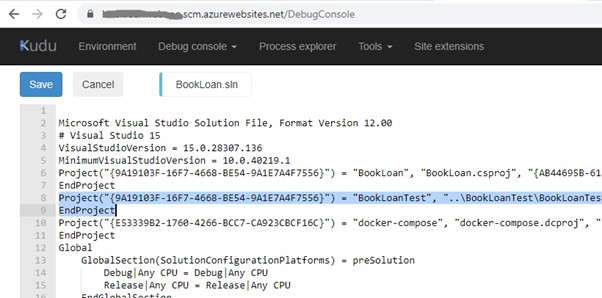
Remove the reference that is causing the error.
Save changes.
Attempt a rebuild.
This will fail again!
Why? Because the deployment script gets the same solution file from the remote repository!
One suggestion is to remove the test project from the solution file in the local Git development environment, then commit and push back to the remote repository.
Let’s try that.
Back in Visual Studio, remove the unit test from the solution.
Save the solution.
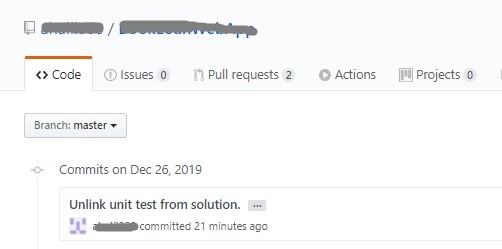
Commit the change to Git.
Push the change to GitHub.
In GitHub confirm the changes to the branch have been applied:
In the Azure Portal, return to the Application Service Deployment Centre.
Check the status column in the deployment section.
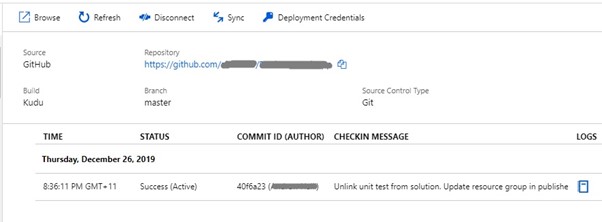
If the status shows as Success (Active), then your deployment has been triggered and is successful without errors!
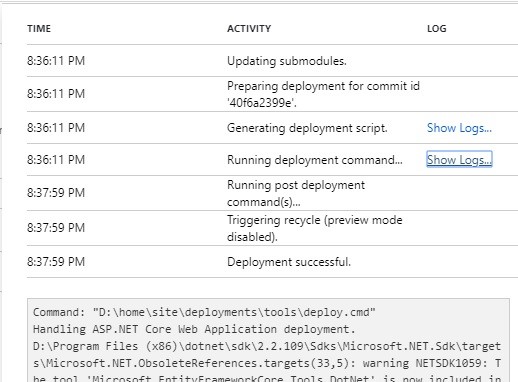
If you download the diagnostic dumps and open log.txt, you will see at the bottom of the file:
2019-12-26T09:37:59.8449306Z,Deployment successful.,2206ae50-ac29-481f-835e-79a98d82c4c4,0This tells us that the deployment has succeeded.
Now test by browsing to the web site:
http://[app name].azurewebsites.net/We have seen from the above overview how to troubleshoot and remediate errors from a continuous integration build and deployment from a GitHub repository into an Azure App Service web application.
That is all for today’s post.
I hope this has been useful and informative post to diagnosis and troubleshooting continuous integration of your GitHub projects with your Azure Application Service.
Andrew Halil is a blogger, author and software developer with expertise of many areas in the information technology industry including full-stack web and native cloud based development, test driven development and Devops.

