Welcome to today’s post.
In today’s post, I will show how to configure an Azure Service Bus resource in a .NET Core application.
I will first discuss how to create an Azure Service Bus cloud message broker within Azure portal. I will then discuss what configurations you will require before integrating Azure Service Bus queuing within your .NET Core applications.
Azure Service Bus is a cloud-based messaging service providing queues and topics with publish/subscribe semantics and rich features. This fully managed service is available in multi or single tenant configurations with no servers to manage or licenses to buy.
We can use a service bus to:
- Build reliable and elastic cloud apps with messaging.
- Protect your application from temporary peaks.
- Distribute messages to multiple independent backend systems.
- Decouple your applications from each other.
- Ordered messaging scaled out to multiple readers.
I will first give a brief overview on how to create a service bus within Azure.
Creating a Service Bus in Azure
In the Azure portal, create a new service bus.

Select a namespace, pricing tier, subscription, resource group and location:

If you are on a developer or free plan, selecting the Basic plan will give you free allocation of messages per month until you decide if you wish to upgrade the plan.
Creating a Queue within the Service Bus
The next task is to create a queue within your service bus namespace.
At the top menu of the portal, you will see the following:

Click on the Queue creation item. You will see the following dialog:
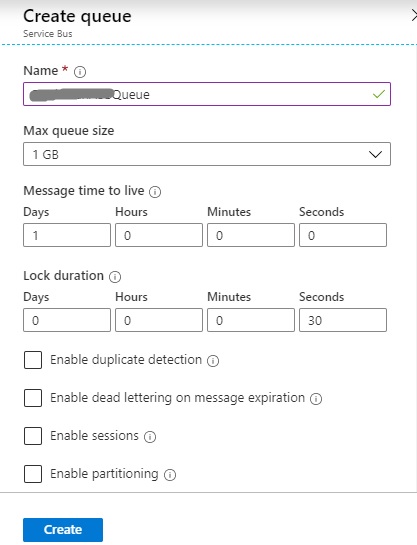
After specifying the queue name, queue size, message duration, create the queue.
Once created you will see the queue shown in the namespace for your service bus:

By default, the queue will be in an active state.
Selecting the overview will show the queue URL and a summary of message counts including active, scheduled, and dead-letter messages. The maximum queue size and current queue size is also shown.

The Azure service bus queue URL will be of the form:
https://[Service Bus Namespace].servicebus.windows.net/[Queue Name] In the next section, I will show how to extract the necessary endpoints and connection strings from the Service Bus resource in the Azure Portal to configure it within a .NET Core application.
Configuring the Azure Service Bus Queue in a .NET Core Application
In the following overview, I will provide the configurations you will require before implementing Azure Service Bus resources within a .NET Core application.
The configuration items you will require are:
- Connection string endpoint.
- Service Bus Namespace.
- Primary or secondary security access key.
To configure queue security and obtain a primary security access key, under the Settings menu, select Shared Access Policies:

Now select RootManageSharedAccessKey:
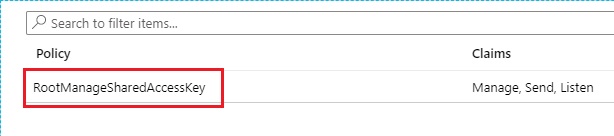
In the dialog that follows, you will see the primary key, secondary key, primary connection string, and secondary connection string.

In our application (web or web API) configuration we can use the Azure Service Bus API with the following configuration items:
- Connection string endpoint
- Queue name
The connection string endpoint format is shown:
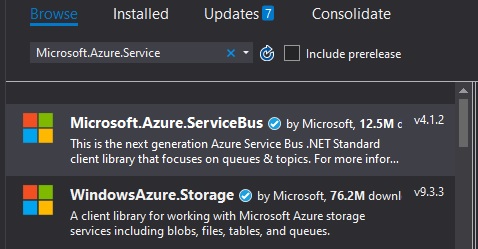
Endpoint=sb://[service bus namespace].servicebus.windows.net/; SharedAccessKeyName=RootManageSharedAccessKey;SharedAccessKey=[primary or secondary key]To access the Azure service bus library within Visual Studio, we will need to add the following NuGet package to the solution:
That’s all for today’s post.
I hope you found this post useful and informative.
In a future post I will show how to integrate Azure service bus queuing within your .NET Core applications.
Andrew Halil is a blogger, author and software developer with expertise of many areas in the information technology industry including full-stack web and native cloud based development, test driven development and Devops.