
Welcome to today’s post.
In today’s post I will discuss how to create a Microservice API using .NET Core.
As we will see, the use of .NET Core allows the creation of a lightweight application service known as a Web API, which can contain its own stateless services as well as its own data store.
In this post I will explain what a Microservice API is and then show how to create one using the project templates within Visual Studio.
What is a Microservice?
A Microservice is a self-contained service that is part of a collection of other self-contained services that make up a Microservice architecture pattern.
In particular, the following practices are observed:
- Each microservice has an independent data store.
- Each microservice is functionally independent.
- Each microservice should be fault tolerant.
- Communication between microservices should be decoupled.
The creation of a Web API service is just the starting point. From here we apply the above practices and we will achieve our goal of Microservice architecture.
With 1), the creation of an independent data store allows the Microservice to be self-contained but introduces other challenges in joining data from another Microservice.
With 2), all logic within an application should be refactored and localized within a Microservice where possible. Duplication of logic across Microservices will increase testing and maintenance overheads.
With 3), the usage of event queuing to provide a decoupled queue to provide messaging between Microservices increases scalability and availability. All event queues should be asynchronous so that the source Microservice is fully responsive. The destination Microservice should subscribe to queue events so as not to be in a synchronous waiting state.
With 4), The use of REST APIs to communicate with our Web API is not necessarily the only means of communication between separate microservices. Calls using REST API are not fully fault tolerant and are not decoupled. The use of REST APIs can be used between a client UI and a Microservice provided the posting of the call is asynchronous. Alternatively using an event bus to queue multiple calls from a UI is best practice to avoid blocking or freezing of the UI.
In the next section, I will show how to create a basic micro service Web API application.
Creating a Microservice Web API with Visual Studio
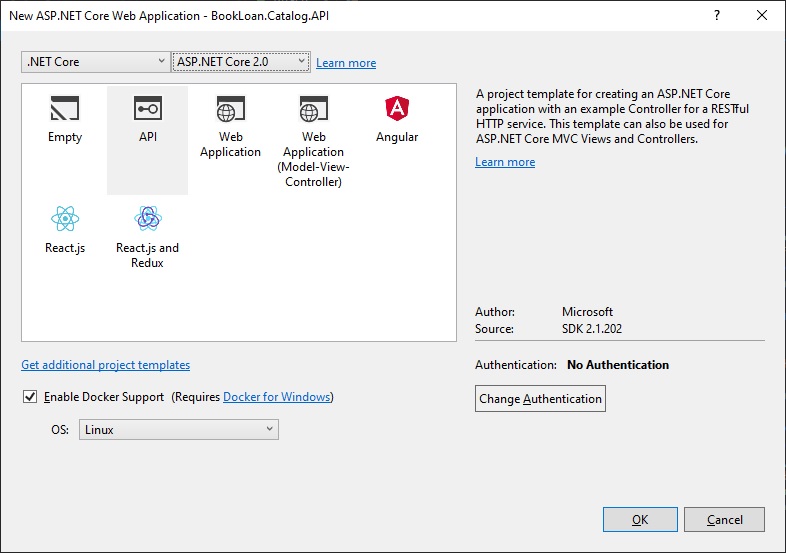
With Visual Studio 2017, a .NET Core project can be created in the following steps:
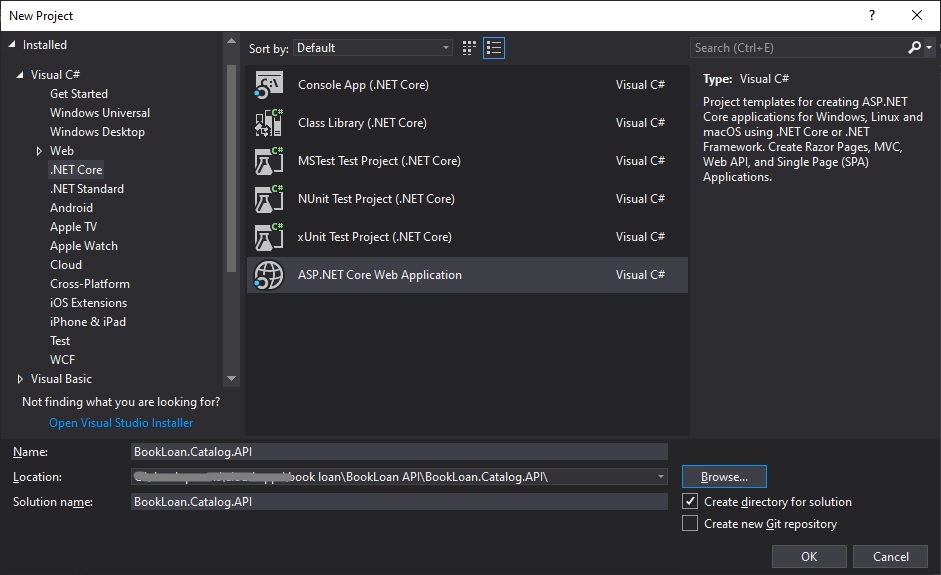
You can start with no authentication and add this in later.
Enabling Docker support is shown and is straightforward.
When created, a basic skeletal project structure is created. The default ValuesController.cs can be removed from the project.
From here, we can enable Swagger (Open API) support by installing the NuGet package Swashbuckle.AspNetCore.
In the next section, I will show how to integrate a SQL server database into the microservice.
Integrating a Data Store into the Microservice
If we wish to integrate an existing data store (which can be a SQL server database) into our Web API microservice such as the one below:
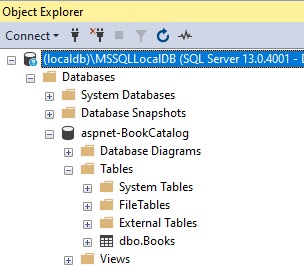
the following will need to be setup in our microservice:
- A connection string within our appSettings.Json file.
- Setup of SQL data context to EF Core within our startup.cs
- Implementation of an AppDbContext data context class.
- DbSets in our data context that map onto our SQL tables.
Our connection string in appsettings.Json will for a SQL Express database will resemble:
  "ConnectionStrings": {
    "AppDbContext": "Server=(localdb)\\mssqllocaldb;Database=aspnet-BookLoan;Trusted_Connection=True;MultipleActiveResultSets=true",
    ..
}
Our connection string in appsettings.Json for a SQL Server local database will resemble:
  "ConnectionStrings": {
"AppDbContext": "Server=localhost;Database=aspnet-BookLoan;User Id=????;Password=????;",
In our startup.cs the SQL database can be integrated with EF Core into our application data context as shown:
using Microsoft.EntityFrameworkCore;

public void ConfigureServices(IServiceCollection services)
{
   string connStr = "AppDbContext";
   // Initialise configuration settings
   services.AddDbContext<ApplicationDbContext>(options =>
      options.UseSqlServer(
         Configuration.GetConnectionString(connStr)));
   ..
}
The data context using the AppDbContext connection is shown:
public class ApplicationDbContext : DbContext
{
   public ApplicationDbContext(
      DbContextOptions<ApplicationDbContext> options)
            : base(options)
      {}

   protected override void OnModelCreating(ModelBuilder builder)
   {
      base.OnModelCreating(builder);
      base.OnModelCreating(builder);
      builder.Entity<BookViewModel>().ToTable("Books");
  }
  public DbSet<BookViewModel> Books { get; set; }
}
The mapping of our model classes to our data context data tables is done using the DbSet as shown:
public DbSet<BookViewModel> Books { get; set; }
Mapping of the data context tables to a corresponding SQL table is done as shown:
builder.Entity<BookViewModel>().ToTable("Books");
After implementing the data context, your microservice project should look as follows:
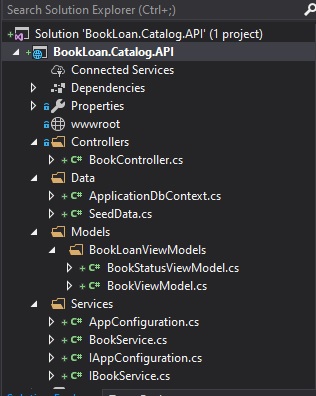
In the next section, I will show how to document the API methods by configuring the microservice to use Swagger UI.
Configuring the Microservice to use Swagger UI
We can also configure Swagger UI generation for our API controllers. We do this by adding the following code within ConfigureServices() in Startup.cs:
services.AddSwaggerGen(c =>
{
  c.SwaggerDoc("v1", new Swashbuckle.AspNetCore.Swagger.Info {
    Title = "BookLoan Catalog API",
    Version = "v1"
  });
}
We configure the Swagger and SwaggerUI middleware within Configure() in Startup.cs:
app.UseSwagger();
// Enable middleware to serve swagger-ui assets (HTML, JS, CSS etc.)
app.UseSwaggerUI(c =>
{
  c.SwaggerEndpoint("/swagger/v1/swagger.json",
    "BookLoan Catalog API");
  c.RoutePrefix = string.Empty;
});
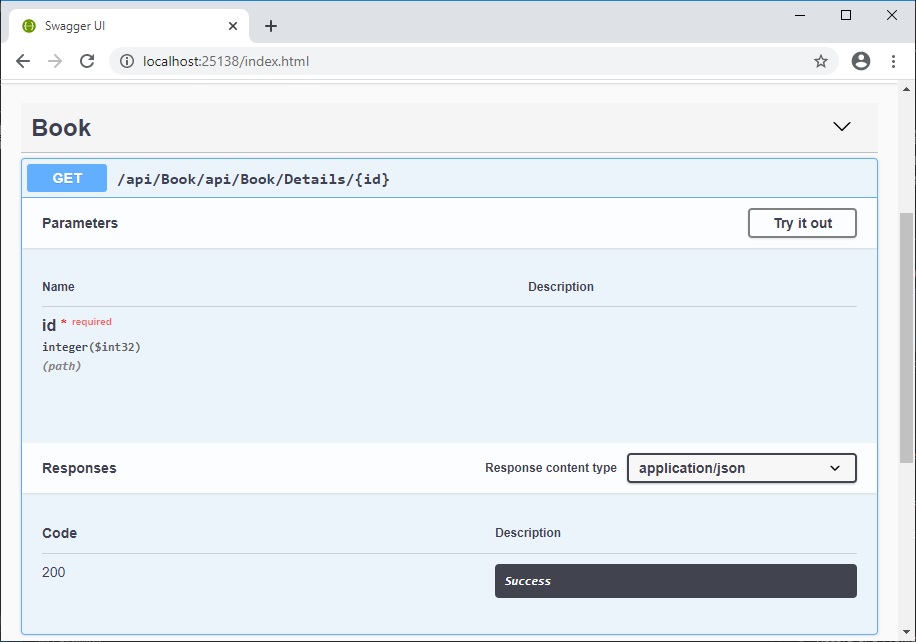
After the microservice is run, the Swagger definition for our API microservice service can be viewed from the index page as shown:

We can select any of the API methods and show the parameters and responses. From here we can also test out our API service by submitting the method and observing results.
We can see how it is quite straightforward to create a basic Microservice with Swagger API documentation and SQL data access. From here we can expand on this and extend our microservice into more complex API services.
That’s all for today’s post.
I hope you found this post useful and informative.
Andrew Halil is a blogger, author and software developer with expertise of many areas in the information technology industry including full-stack web and native cloud based development, test driven development and Devops.

