Welcome to today’s blog.
In today’s blog I will show how to configure a custom OAuth authorisation custom identity Web API service within Azure to authenticate access to a custom Web API using JWT (JSON Web Tokens).
In previous blog posts I have covered various topics on OAuth, JWT, Web APIs and Azure and how they are interrelated. During this post I will provide links to these so that you can gain a refresher on those areas.
Before I go through the details relating to the walkthrough of tasks needed to customize the identity API that is used to protect access for our web application, I will give an overview of the architecture of the web API application and identity web API in the Azure environment.
Architecture of a Secure Azure Hosted Web Application
The authentication of a Web API is important when we use a web client application such as an Angular SPA based application. The client application can either be hosted on premises or as an Azure cloud PaaS Application Service. In one of my recent previous post I showed how to deploy an Angular application to Azure App Services.
The diagram below depicts the connection between an Angular App hosted in Azure, that connects to an Azure App Service Web API identity service that uses the JWT token to login to an Azure App Service hosted Angular App, then use the same token to authenticate access to an Azure App Service Web API:

I will go through the tasks to achieve authentication between APIs hosted within Azure App Services. These are:
- Deploying an Identity Service Web API to Azure.
- Configuring your Identity service Web API to access SQL data.
- Registering users with the Azure hosted Identity service Web API.
- Testing user access to custom Azure Web API methods using Swagger UI.
We will start with task 1 in the next section.
Deployment of an Identity Service Web API to Azure
In this task we deploy an Identity Service Web API written in ASP .NET Core.
I will not go into the details on how to implement an identity service that uses OAuth and JWT.
The article I will refer you to is my blogs on creating identity services and implementing token authentication in .NET Core applications.
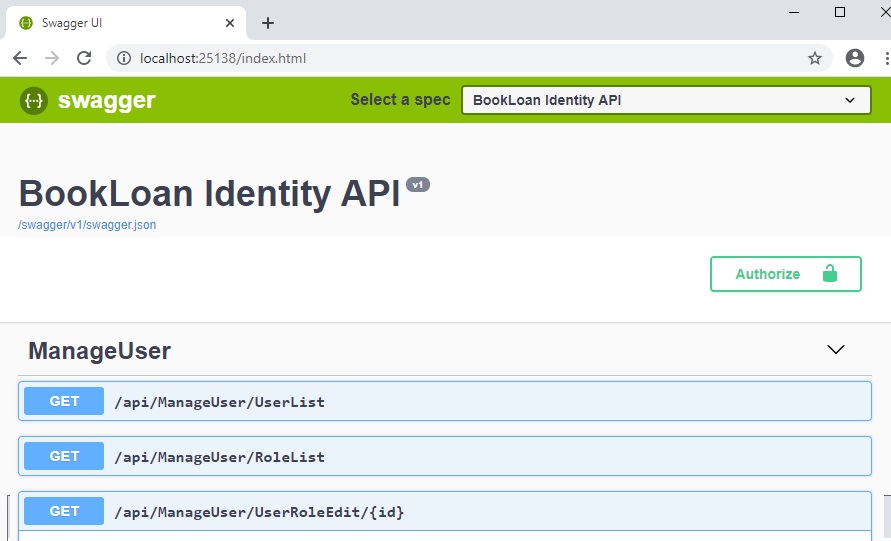
Ensure your Web API runs locally and the methods you wish to test are visible within Swagger UI:
The steps are similar when we are deploying a Web API application to Azure. See my blog on how to deploy Web API applications to Azure.
I will show the most significant steps and screens in the walkthrough:
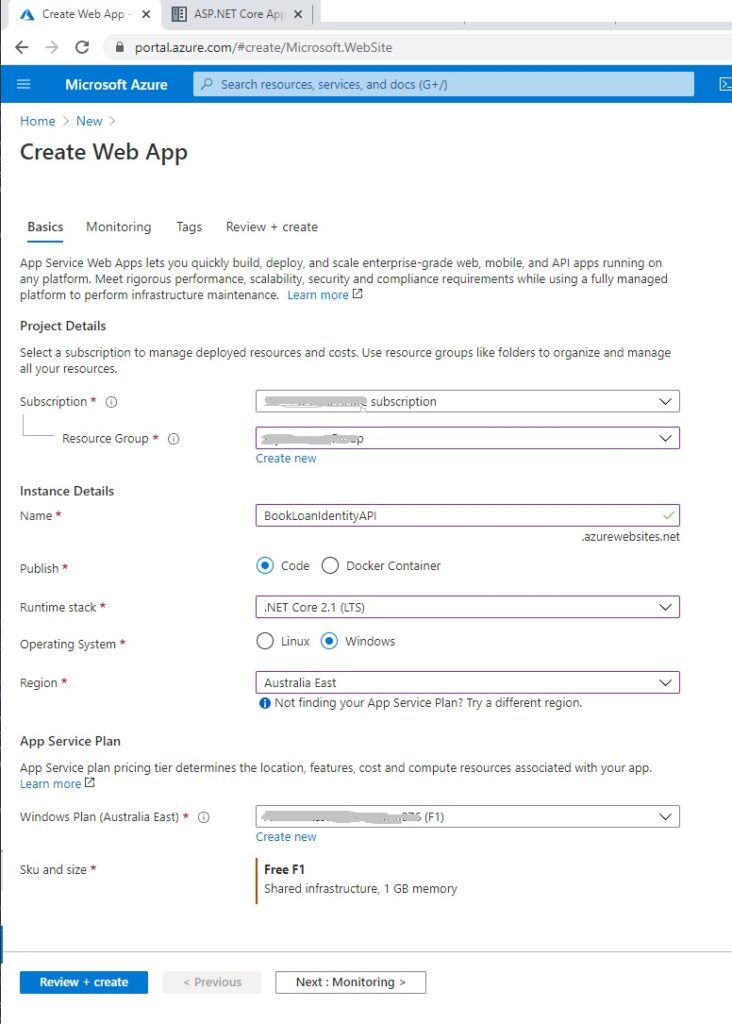
Create a Web App Service. Below is an example Azure App Service that will host our Web API:
Once the Web API has been created within Azure, we are ready to publish our local on-premises Web API to Azure.
To publish to an Azure App Service from Visual Studio, run the project Publish.. option.
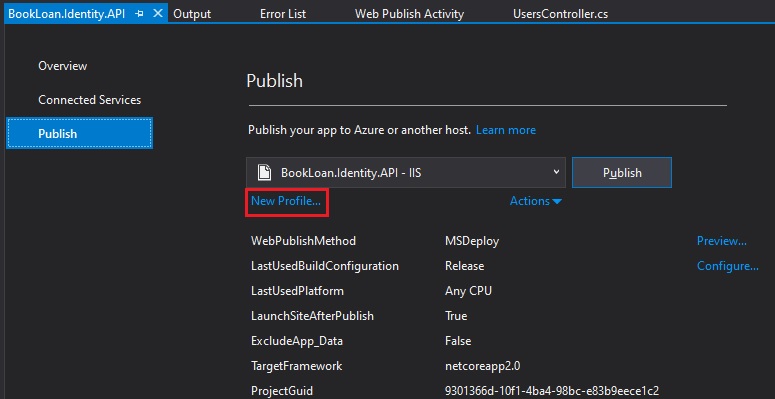
Select the New Profile… link.
In Pick a publish target, choose Select Existing and Create Profile.
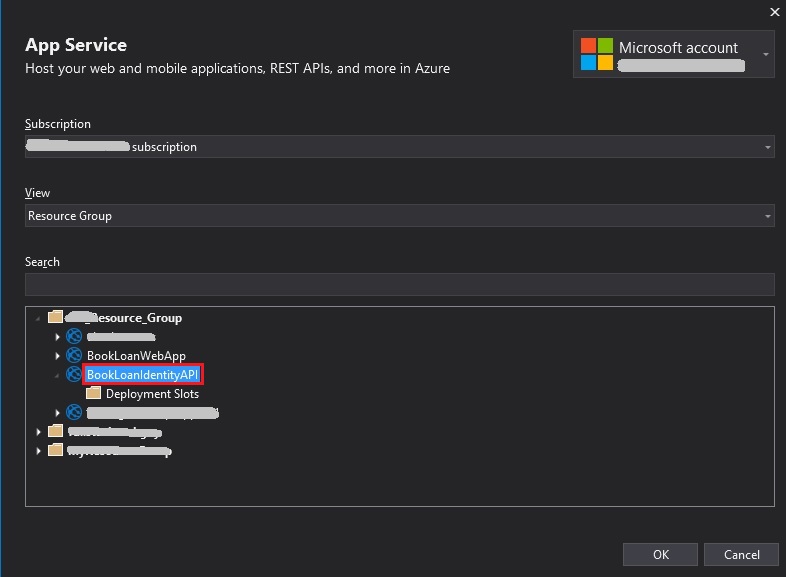
In the App Service selection screen, choose the Resource Group, then the existing Web App Service API that you wish to deploy to.
Back in the publish screen, select Configure.
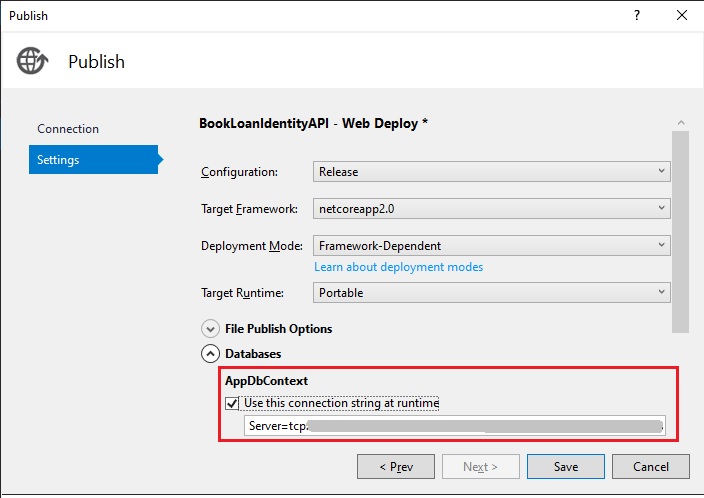
Configuring an Identity Service Web API to access the SQL Data Store
In the Connection configuration screen select Validate Connection.
In the Settings configuration screen expand Databases, then select Use this connection at runtime.
Enter the database connection string you have copied from the Azure database properties within the Azure Portal.
Next, publish the application. After a few minutes, the application will have deployed to Azure and will automatically run in the default browser as shown:
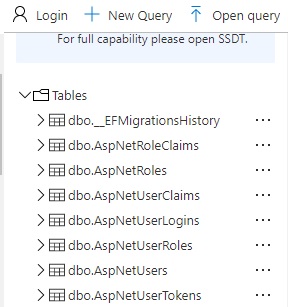
https://bookloanidentityapi.azurewebsites.netNext, in your Azure SQL database, check that the ASP.NET Core identity API tables are defined in the schema:
In the next section I will show how to register users with the Azure Hosted Identity Service Web API.
Registering Users with the Azure Hosted Identity Service Web API
We next test the secure API against our JWT tokens that we will generated from our identity API service.
First, we will need to create a user that we wish to test our authentication to the Web API.
The API for registering our user is:
http://bookloanidentityapi.azurewebsites.net/api/Users/registerOpen the Web API for our identity service.
The Swagger definition will open:

Enter a new user username and password. Execute the API.
Next, add a new role for the new user using the identity API method:
http://bookloanidentityapi.azurewebsites.net/api/ManageUser/AddRole
When the API has been executed, open a connection to the Azure SQL database using SSMS and run the following queries to confirm the new user and role data have been created:
SELECT * FROM [dbo].[AspNetUsers]
and
SELECT * FROM [dbo].[AspNetUserRoles]
Once we have setup registration of users within our identity service, we are now ready to test the users can access a custom protected web API. This will be done in the next section.
Testing User Access to Azure Web API methods using Swagger UI
I will now show how to test API security using JWT tokens. One of my previous blog posts that shows how to secure Web API applications using JWT tokens will be helpful.
We will use the identity API method to generate a JWT token from our user credentials:
http://bookloanidentityapi.azurewebsites.net/api/Users/token
When the user is authenticated using our token method, the response body will contain the JSON Web Token (JWT):

Next, we copy the generated token.
Note: If you do not see a valid token generated in the response then you can check the log files within the Kudu services in the App Service for the cause.
An obvious problem might be not making the password strong enough:
Hosting environment: Production
Content root path: D:\home\site\wwwroot
Now listening on: http://localhost:28313
Application started. Press Ctrl+C to shut down.
warn: Microsoft.AspNetCore.Identity.UserManager[14]
      User xxxx-xxxx-xxxx-xxxx-xxxx password validation failed: PasswordRequiresNonAlphanumeric;PasswordRequiresUpper.
warn: Microsoft.AspNetCore.Identity.UserManager[14]
      User xxxx-xxxx-xxxx-xxxx-xxxx validation failed: PasswordRequiresNonAlphanumeric
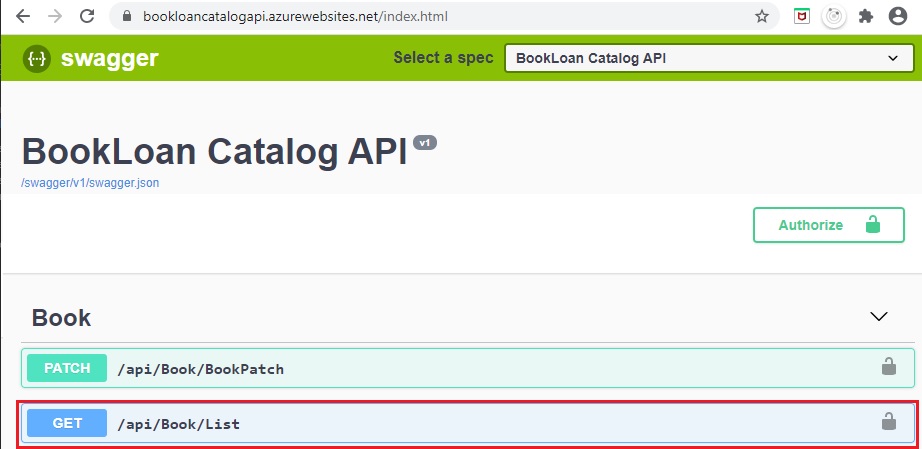
Open the Book Catalog API (our custom Web API):
https://bookloancatalogyapi.azurewebsites.net Select the method
/api/Book/Listfrom the Swagger definitions.
Notice the method has a padlock icon on the same line as the URL.
Click on the padlock icon.
An authorisation dialog will show.
In the dialog, paste in the token you generated from the identity service token call.
The token must be pasted in the format:
Bearer [token]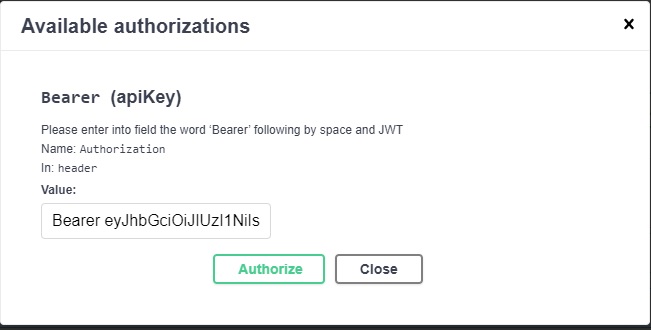
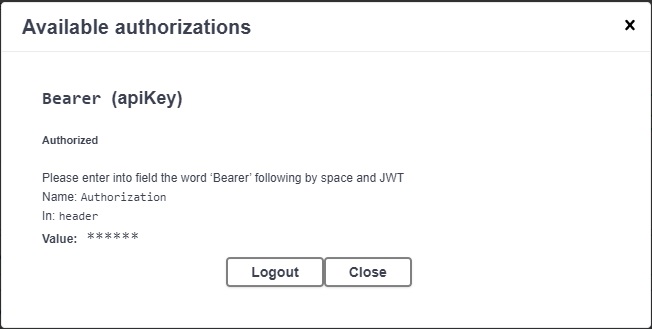
Once authorized, the Logout button will be visible:
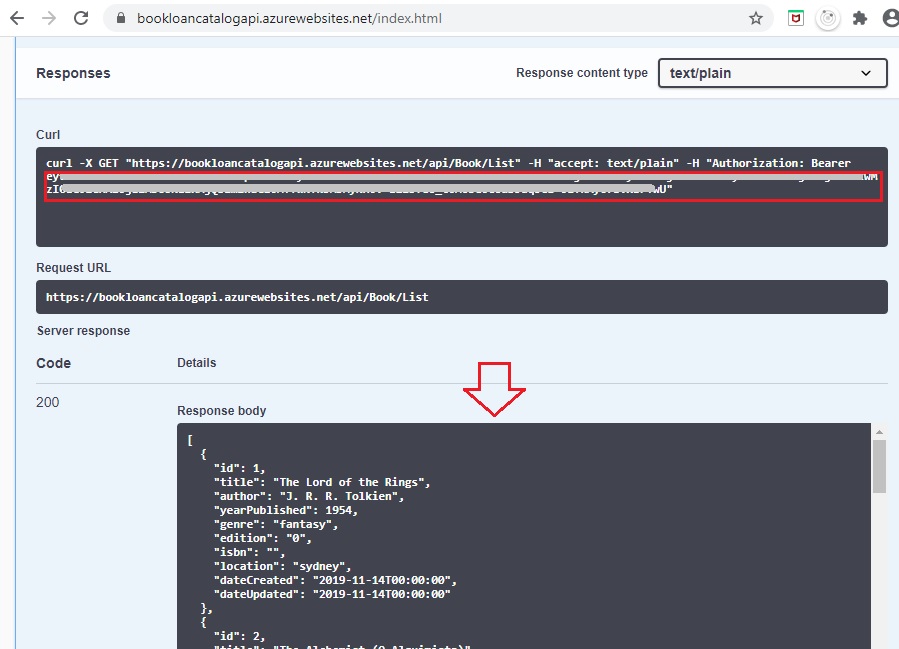
Now click Execute to run the secured Web API method.
Confirm if the Response body shows valid data and the response code is 200:
Now try logging out of the authorization dialog.
Return to the API method and try re-running it as shown:

Without a valid JWT token, you will expect to see a 401 error.
As you can see, once we have implemented a protected Web API, the implementation of an Azure protected Web API using PaaS environment is quite straightforward. Once we introduce Azure AD and the Microsoft Identity Platform as a means of securing our applications, the authentication and deployment becomes a little more complex. That will be discussed in a future blog down the track.
In a future blog, I will combine our experience of identity services and JWT authorization to provision authentication for Angular apps hosted in Azure.
That is all for today’s post.
I hope you found this post useful and informative.
Andrew Halil is a blogger, author and software developer with expertise of many areas in the information technology industry including full-stack web and native cloud based development, test driven development and Devops.