Welcome to today’s post.
Today I will be showing how to run an Angular application as a Docker Container.
In previous posts I have showed how to create docker images and containers for ASP.NET MVC applications and Web API services. In one post, I showed how to build a Docker Container within Visual Studio. In this case, instead of building a Docker Container for a server rendered web application, I will build one for an Angular web client application.
In today’s post I will demonstrate the following:
- Build a Docker Image for a basic Angular application.
- Run the Angular application within a Docker Container.
- Display the Docker container Angular application in the host environment.
To achieve our goal, we will use the most basic Angular application.
Creating this is straightforward using Visual Studio Code. Create a new folder for your application, then run the following commands in the terminal.
npm install
ng new angular-docker-app
Once this is done, build and run the application to ensure that everything works as expected.
In the next section, I will show how to build a Docker image for our application.
Building the Docker Image for our Angular Application
Next, in your project folder (containing the package.json file) create the following DockerFile:
FROM node:12.18-alpine AS build

WORKDIR /usr/src/app

ENV PATH /usr/src/app/node_modules/.bin:$PATH

COPY ["package.json", "package-lock.json", "./"]

RUN npm install
RUN npm install -g @angular/cli
RUN npm install --save-dev @angular-devkit/build-angular

COPY . .

CMD ng serve --host 0.0.0.0
EXPOSE 4200/tcp
I will explain what this script does.
The first line (FROM node:12.18-alpine AS build) pulls the node alpine image, version 12.18 from the docker hub image repository (https://hub.docker.com/_/node). The Node.js version on your host will determine which Node image you can download. In most cases you can download the latest available from the Docker site and it would be backward compatible with whatever Angular version is specified within your package.json.
The second line (WORKDIR /usr/src/app) sets the working directory for subsequent commands.
The third line (ENV PATH /usr/src/app/node_modules/.bin:$PATH) sets the environment path to the node_modules folder /usr/src/app/node_modules/.
The fourth line (COPY [“package.json”, “package-lock.json”, “./”]) copies the package*.json files from the host project folder into the container’s working folder.
The next three lines (RUN npm install…) install the Node libraries, including Angular CLI and the Angular Dev Kit for building our application.
The eighth line (COPY . .) copies the host project folder into the container’s working folder, this includes the Angular application’s /dist folder.
The ninth line (CMD ng serve –host 0.0.0.0) starts the Angular container application at IP address 0.0.0.0.
The last line (EXPOSE 4200/tcp) exposes the Application container application’s port to 4200.
To create out docker image we can run the following Docker command:
>docker build -f Dockerfile -t angular_docker_app:latest .
After running the above build command we should see the following output:
Successful build below:
>docker build -f Dockerfile -t angular_docker_app:latest .
Sending build context to Docker daemon  18.55MB
Step 1/10 : FROM node:12.18-alpine AS build
 ---> e13d60032d4d
Step 2/10 : WORKDIR /usr/src/app
 ---> Running in ad6fac6f766a
Removing intermediate container ad6fac6f766a
 ---> 546081a357c2
Step 3/10 : ENV PATH /usr/src/app/node_modules/.bin:$PATH
 ---> Running in e9558ec6c6d2
Removing intermediate container e9558ec6c6d2
 ---> 846d68da3b2b
Step 4/10 : COPY ["package.json", "package-lock.json", "./"]
 ---> c96a05b4a7f7
Step 5/10 : RUN npm install
 ---> Running in 6160f6291a73
Removing intermediate container 6160f6291a73
 ---> 76a5b0d4f10c
Step 6/10 : RUN npm install -g @angular/cli
 ---> Running in f73ec48c73ef
Removing intermediate container f73ec48c73ef
 ---> 2c91f11a3688
Step 7/10 : RUN npm install --save-dev @angular-devkit/build-angular
 ---> Running in f76505f50cf8
Removing intermediate container f76505f50cf8
 ---> 027f1010debf
---> aa2d942b35d2
Step 8/10 : COPY . .
 ---> c7d365a299f3
Step 9/10 : CMD ng serve --host 0.0.0.0
 ---> Running in 10f387340318
Removing intermediate container 10f387340318
 ---> e94f25414c54
Step 10/11 : EXPOSE 4200/tcp
 ---> Running in 39d32495f08d
Removing intermediate container 39d32495f08d
 ---> 9c3d7e134786

Successfully built e94f25414c54
Successfully tagged angular_docker_app:latest
Running our Angular Application within the Docker Image
There are two ways we can run our docker image within a container.
The first way to spin up the container is to use the docker run command:
>docker run --name angular_docker_app_container -d -p 63001:4200 -it angular_docker_app:latest
The above command does the following:
A container angular_docker_app_container is run as a detached process (switch -d) with internal container port 4200 mapped to host port 63001 (switch -p) using the image
angular_docker_app:latest.
Note: If you have problems selecting a port to use within the host environment, then use the following command to determine unused ports in your environment:
netstat -a -b
After running the above command in detached mode we will get a container id as output:
>docker run --name angular_docker_app_container  -d -p 63001:4200 -it angular_docker_app:latest

fdd19106d6a2066873e965f635f3d36da7530d5e8e8bfe481b19a092aa30006b
If we run the above in attached mode the output will resemble:
> angular-docker-app@0.0.0 start /usr/src/app
> ng serve
Browserslist: caniuse-lite is outdated. Please run next command `npm update`
 10% building 3/3 modules 0 active 「wds」: Project is running at http://localhost:4200/webpack-dev-server/
「wds」: webpack output is served from /
「wds」: 404s will fallback to //index.html
chunk {main} main.js, main.js.map (main) 11.5 kB [initial] [rendered]
chunk {polyfills} polyfills.js, polyfills.js.map (polyfills) 251 kB [initial] [rendered]
chunk {runtime} runtime.js, runtime.js.map (runtime) 6.09 kB [entry] [rendered]
chunk {styles} styles.js, styles.js.map (styles) 16.6 kB [initial] [rendered]
chunk {vendor} vendor.js, vendor.js.map (vendor) 4.08 MB [initial] [rendered]
Date: 2021-02-27T12:39:56.738Z - Hash: 7c1b321dfc9eef4df7c2 - Time: 12668ms
** Angular Live Development Server is listening on localhost:4200, open your browser on http://localhost:4200/ **
「wdm」: Compiled successfully.
Running our Angular Container Application within the Host Environment
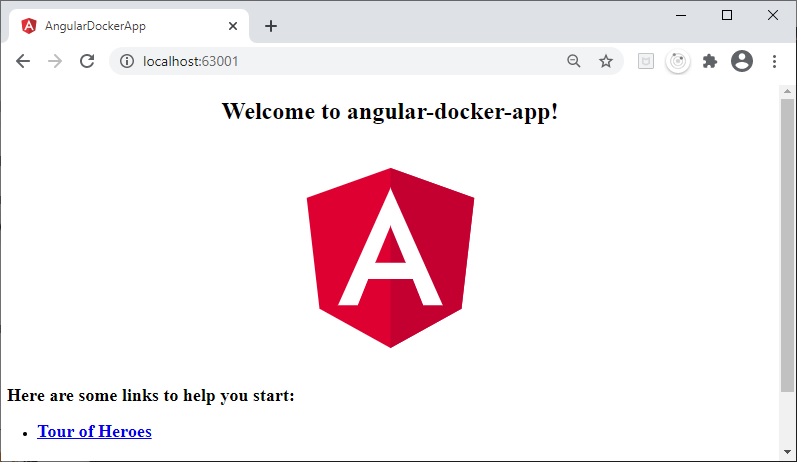
While the container is running (in detached or attached mode), you can open the browser in the exposed host port:
The browser will show our Angular application:
To spin up the Docker container using docker compose we create a docker-compose script as follows:
version: '3.4'

services:
  angulardockerapp:
    image: angular_docker_app:latest
    build:
      context: angular-docker-app
      dockerfile: ./Dockerfile
    ports:
      - 63001:4200
The compose file runs the image angular_docker_app:latest within container angulardockerapp.
The line (63001:4200) is a port mapping which exposes the Application’s internal container port 4200 to the port 63001 within the host environment.
Before we can run our container again, we will need to stop the container using:
docker container ls
docker container stop [container id]
To spin up the image as a container using docker compose, we apply the following command:
docker-compose up
The output after running compose is shown:
>docker-compose up
Recreating angulardockerapp_angulardockerapp_1 ... done                                                                 Attaching to angulardockerapp_angulardockerapp_1
angulardockerapp_1  | Browserslist: caniuse-lite is outdated. Please run next command `npm update`
angulardockerapp_1  | WARNING: This is a simple server for use in testing or debugging Angular applications
…
angulardockerapp_1  | 「wds」: Project is running at http://0.0.0.0:4200/webpack-dev-server/
angulardockerapp_1  | 「wds」: webpack output is served from /
angulardockerapp_1  | 「wds」: 404s will fallback to //index.html
angulardockerapp_1  |
angulardockerapp_1  | chunk {main} main.js, main.js.map (main) 11.5 kB [initial] [rendered]
…
angulardockerapp_1  | Date: 2021-02-27T13:55:02.150Z - Hash: 7c1b321dfc9eef4df7c2 - Time: 13497ms
angulardockerapp_1  | ** Angular Live Development Server is listening on 0.0.0.0:4200, open your browser on http://localhost:4200/ **
angulardockerapp_1  | 「wdm」: Compiled successfully.
Again, we can browse to the same port we exposed within our docker-compose.yml script and the Angular application will function identically.
After finishing you can remove the container using the above commands or Ctrl-C in the attached process.
That’s all for today’s post.
In future posts I will be showing how to add a web server to our Angular image and allow our container and allow environment variables to be used within our Angular container application.
I hope you found this post useful and informative.
Andrew Halil is a blogger, author and software developer with expertise of many areas in the information technology industry including full-stack web and native cloud based development, test driven development and Devops.

