
Welcome to today’s post.
In today’s post I will be discussing the reCAPTCHA test for websites and I will then show how to incorporate a reCAPTCHA into an Angular application.
As you will have used many websites before as a public user, and opened registration forms, contact forms, and other data entry forms within sites, you will have a fair idea of what reCAPTCHA already is from an end-user perspective. However, from a technical perspective, what is their purpose and how do they improve the security of websites and more importantly, your public facing web applications?
I will first explain what a reCAPTCHA is and its purpose.
What is ReCAPTCHA?
A reCAPTCHA is a form of test that is included within publicly facing web pages of a web site.
CAPTCHA (https://csrc.nist.gov/glossary/term/captcha) is an abbreviation for Completely Automated Public Turing Test to tell Computer and Humans Apart. It is an interactive tool that distinguishes between a human and an automated agent is using a web site form.
The main purposes of the reCAPTCHA test for a public web site are the following:
- To protect the site from automated spam attacks to unsecured data entry forms such as registration forms.
- To ensure the security of the web site so that dictionary attacks are not made to password reset pages that can be used to determine login credentials of site users.
- To ensure that a valid human interaction test ensures that requests to public data entry forms are accessed manually by humans and not automated processes.
With protected web pages that require additional authentication and authorization of site users, a reCAPTCHA is not necessary as the users are already authenticated and will not impose a spam threat to the web site.
The reCAPTCHA test was developed by Google, who have details on how developers can configure and use it within web sites that support JavaScript.
There are three versions of Google reCAPTCHA: reCAPTCHA Enterprise, reCAPTCHA V2 and reCAPTCHA V3. The enterprise version allows unlimited daily and monthly captcha requests to your web site and is priced as a subscription with an initial trial available.
reCAPTCHA V2 is the traditional captcha test that uses the visual or audio-based test with manual choices that answer the question.
reCAPTCHA V3 is a non-visual test that gives score back to the user that shows if the interaction with the page control (button, link, text control) is a genuine human interaction or an automated bot. The score is based on previous user interactions on the site page controls.
A reCAPTCHA challenge returns a response token which is valid for two minutes. After this duration, the captcha will be invalid and require re-validation by the end-user.
How ReCAPTCHA is Configured in the Web Site
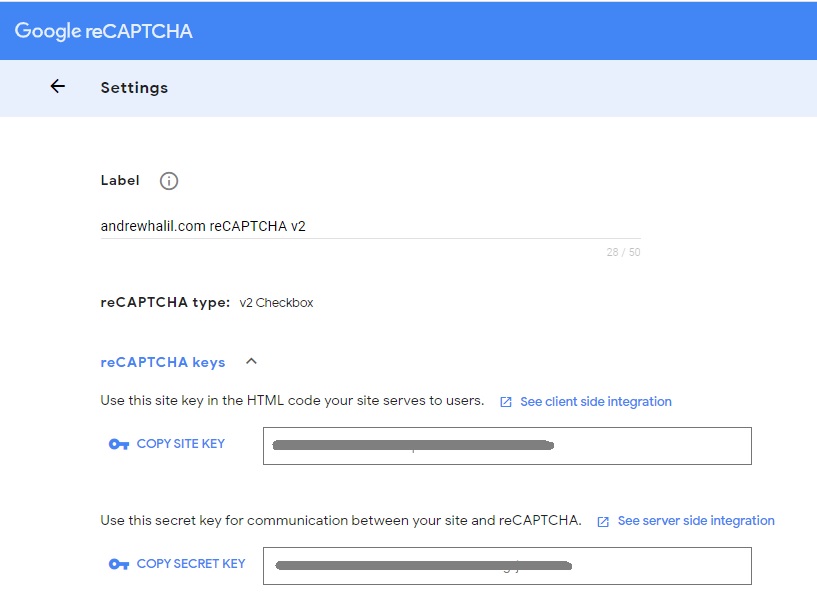
There are two parameters we require so that we can use the reCAPTCHA:
- Site secret key
- Site key
These keys are setup when we register for reCAPTCHA on the Google Developer site. Below are the configurations for reCAPTCHA V2 settings:
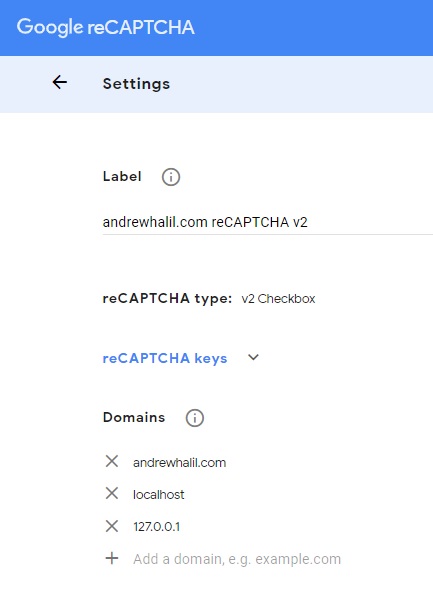
Our reCAPTCHA settings also require us to add some additional site URLs that we can use for development, testing and production:
Implementation of ReCAPTCHA in an Angular Application
To implement a basic captcha with reCAPTCHA V2, we can use the following NPM package:
https://www.npmjs.com/package/ng-recaptcha
To install the ng-recaptcha package we run the following command:
npm i ng-recaptcha --save
After installation, we can configure reCAPTCHA V2 in an Angular application as follows:
Declare and import the recapture modules and declare the site key as shown in the app module:
import { RECAPTCHA_SETTINGS, RecaptchaSettings, RecaptchaFormsModule,
RecaptchaModule } from "ng-recaptcha";

const globalSettings: RecaptchaSettings =
    { siteKey: '???????????????????????????????????????' };

@NgModule({
  declarations: [
    …
  ],
  imports: [
    …
    RecaptchaModule,
    RecaptchaFormsModule
    …
  ],
  providers: [
    …
    {
        provide: RECAPTCHA_SETTINGS,
        useValue: globalSettings
    }
  ],
  bootstrap: [AppComponent]
})

export class AppModule { }
If the recapture is used within a feature module, the modules are imported as shown:
import { RecaptchaModule, RecaptchaFormsModule } from 'ng-recaptcha';

@NgModule({
  declarations: [
    …
  ],
  imports: [
    …
    RecaptchaModule,
    RecaptchaFormsModule,
    …
    AccountsRoutingModule
  ]
})

export class AccountsModule { }
As I mentioned earlier, an example of how we can make use of a captcha to gate a registration form before displaying it to a genuine user.
A registration form is routed from the feature module as shown:
import { RegisterUserNewComponent } from
'./register-user-new/register-user-new.component';

const routes: Routes =
[
  …
  { path: 'register-user-new', component: RegisterUserNewComponent }
];

@NgModule({
  imports: [RouterModule.forChild(routes)],
  exports: [RouterModule]
})

export class AccountsRoutingModule { }
A registration form component’s HTML template that declares the captcha with the HTML tag <re-captcha …> is shown below:
<re-captcha
    (resolved)="resolved($event)"
    (error)="onError($event)" errorMode="handled">
</re-captcha>
We have two events, one for when the captcha is resolved and one for when an error occurs.
Within the registration form, the RecaptchaErrorHandlers type can be declared to allow errors to be trapped by the captcha.
import { Component, OnInit } from '@angular/core';
import { RecaptchaErrorParameters } from 'ng-recaptcha';

@Component({
  selector: 'register-user-new',
  templateUrl: './register-user-new.component.html',
  styleUrls: ['./register-user-new.component.scss']
})
export class RegisterUserNewComponent implements OnInit {
  constructor() {}

  ngOnInit(): void {
    console.log('opening register new form..');
  }

  public resolved(captchaResponse: string): void {
    console.log(`Resolved captcha with response: ${captchaResponse}`);
  }

  public onError(errorDetails: RecaptchaErrorParameters): void {
    console.log(`reCAPTCHA error encountered; details:`, errorDetails);
  }
}
We can link the captcha component through a register option on our login form:
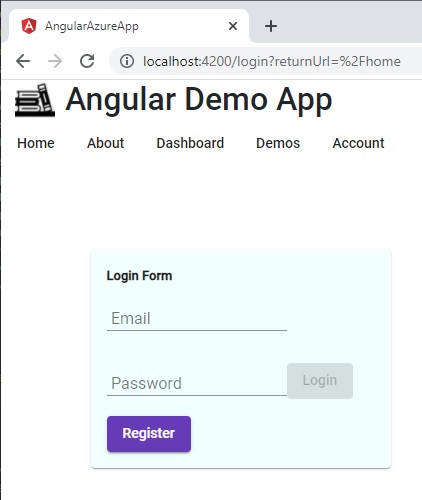
In the next section I will show how to test ReCAPTCHA on the login form.
Testing the ReCAPTCHA on the Login Form
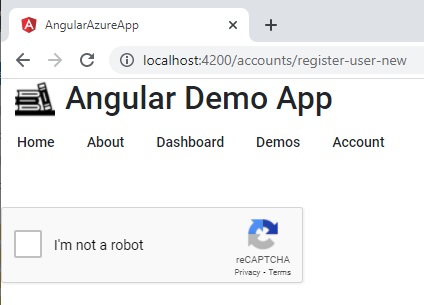
When the register form is actioned, we are presented with the following form with a reCAPTCHA awaiting input from the end user:
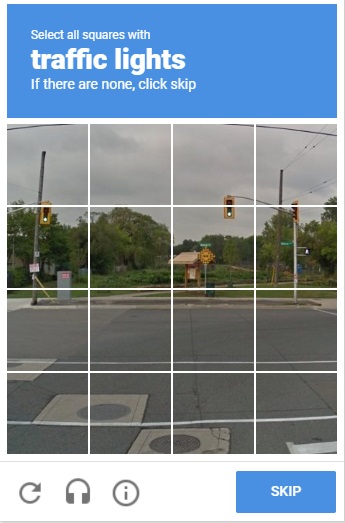
When the captcha is selected, the challenge is presented. Below is an example of a visual captcha challenge. This involves selecting all squares that answer the question:
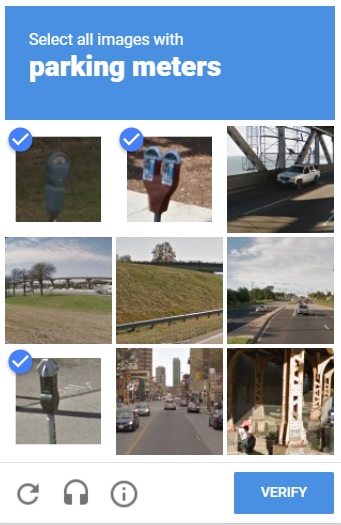
Below is an example when the user selected squares to answer the question:
When the challenge has been successfully answered, the reCAPTCHA will respond with a green tick, indicating the challenge has been resolved:

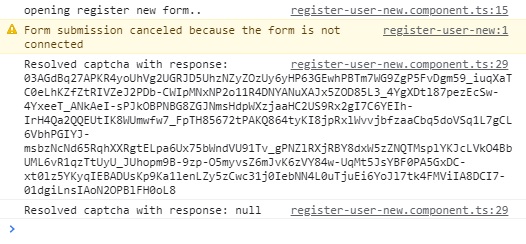
On resolution, the captcha will return a response token:
There are cases where the captcha can fail. Below are two common errors that can occur:
Invalid Key Type Error
Below is a common error that can occur when we attempt to use a site key that is intended for a different type of reCAPTCHA. Either the site key is intended for V2, V3 or Enterprise reCAPTCHA.

Expired verification
Another common error is when the reCAPTCHA time outs before the user has a chance to respond to the captcha.

Testing the ReCAPTCHA on the Login Form
In our registration component, we can include a user account registration component within the registration form component. By implementing the registration form template as a conditional HTML, we can gate the capture with a prompt requesting the user complete the captcha:

We modify the registration component source to include an asynchronous observable, isValidUser$, which determines whether the subsequent registration form is made visible or not:
import { Component, OnInit } from '@angular/core';
import { RecaptchaErrorParameters } from 'ng-recaptcha';
import { BehaviorSubject } from 'rxjs';

@Component({
  selector: 'register-user-new',
  templateUrl: './register-user-new.component.html',
  styleUrls: ['./register-user-new.component.scss']
})
export class RegisterUserNewComponent implements OnInit {

  isValidUser$ = new BehaviorSubject<boolean>(false);

  constructor() {}

  ngOnInit(): void {
    console.log('opening register new form..');
  }

  public resolved(captchaResponse: string): void {
    console.log(`Resolved captcha with response: ${captchaResponse}`);
    this.isValidUser$.next(true);
  }

  public onError(errorDetails: RecaptchaErrorParameters): void {
    console.log(`reCAPTCHA error encountered; details:`, errorDetails);
    this.isValidUser$.next(false);
  }
}
Below is the conditional HTML template that applies the observable to determine visibility of the account-user-new component:
<div *ngIf="isValidUser$ | async; else waitingUserValidation">
    <account-user-new [isRegistrationForm]='true'></account-user-new>
</div>

<ng-template #waitingUserValidation>
    <re-captcha
       (resolved)="resolved($event)"
       (error)="onError($event)" errorMode="handled">
    </re-captcha>
    <div>
       <br />
       Awaiting Validation of User Captcha
    </div>
</ng-template>
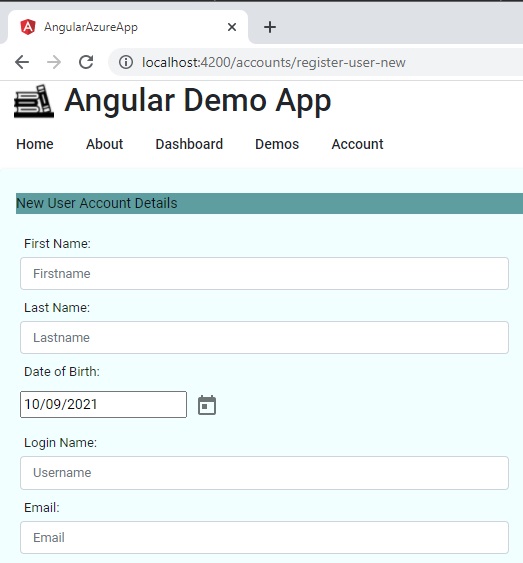
When the captcha is successfully answered by the user, the registration form will be visible as shown below:
As we can see from the above, making use of a captcha using the Google reCAPTCHA technology allows us to restrict automated bots and spam attacks on our web site public pages.
By making use of the above NPM package, we can apply it to our own Angular applications.
For high usage web sites, it is recommended to go for the reCAPTCHA Enterprise as this allows unlimited captcha challenges based on a subscription.
That is all for today’s post.
I hope you have found this post useful and informative.
Andrew Halil is a blogger, author and software developer with expertise of many areas in the information technology industry including full-stack web and native cloud based development, test driven development and Devops.

