Welcome to today’s post.
In today’s post I will be showing how to implement custom user role management within an ASP.NET Core Blazor web application.
In an earlier post I showed how to create an ASP.NET Core Blazor web application that supports management of user security using ASP.NET Core Identity UI services. After implementation of the application, we were able to register new user accounts, active them, and login to the application with the accounts.
In another post, I showed how to use the <AuthorizeView>, <Authorized>, and <NotAuthorized> tags within an ASP.NET Core Blazor web application to protect sections of menu items within navigation menus and HTML controls within Razor component forms from unauthorized user access.
In the previous post, I showed how to use role-based authorization within an ASP.NET Core Blazor web application to control levels of access for authenticated users. I showed how to seed administration users within the application and include a default access role for the user(s). This includes adding roles, role claims, and user role claims to the user account within the identity store. I also showed how to use the Roles attribute of the <AuthorizeView> tag to control user access and access levels for a user that is a member of a particular role.
In this post, I will show how to create a useful utility that can be used to manage the addition or removal of access roles from an account.
I will then show how to include the roles within the application and test the authorization and access levels of users within the application.
In the first section, I will show how to implement a utility to manage user roles.
Implementation of a User Manager Utility
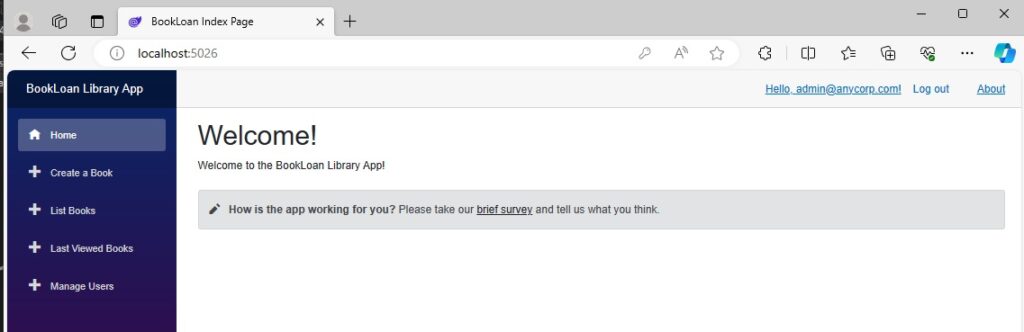
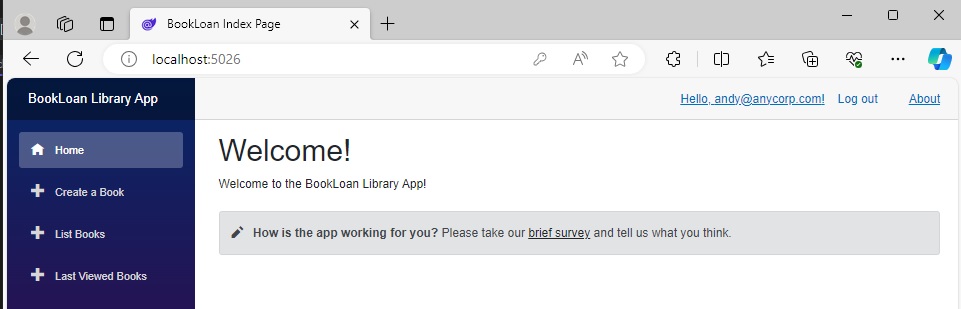
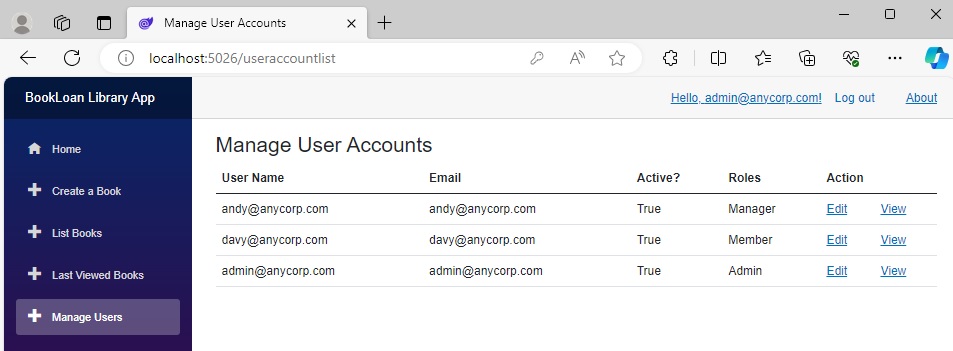
When we login to the application with any of the users, we can access most menu items in the navigation menu side bar. We added an extra access check to ensure that only users with the Admin role could access the Manage Users menu item.
Below is what the Admin user can see in the navigation menu:
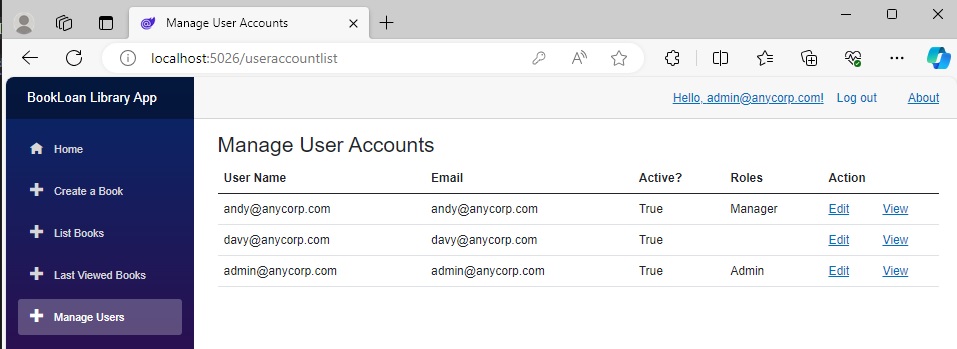
The Manage Users menu opens a screen that lists all current user accounts.
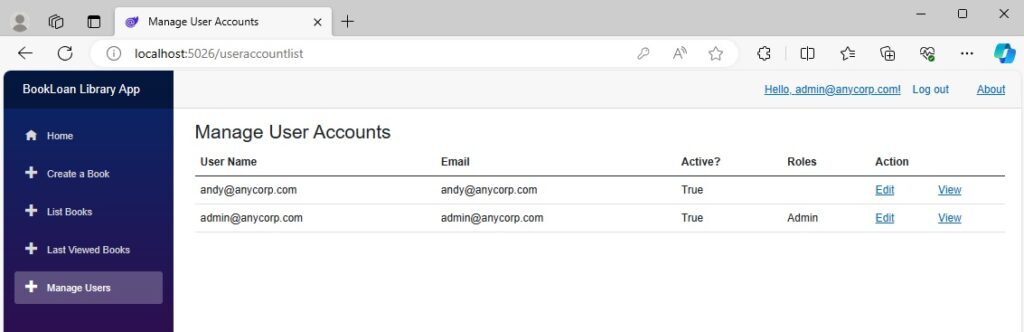
The starting point for the above list is the definition of the user account. The interface and class model for the user account is shown below:
UserAccount.cs:
namespace BookLoanBlazorServerAppAuth.Models.Admin
{
    public class UserAccount
    {
        public string? UserId { get; set; }
        public string? UserName { get; set; }
        public string? Email { get; set; }
        public List<string>? Roles { get; set; }
        public DateTime? DateCreated { get; set; }
        public bool IsActive { get; set; }
        public string? FormattedRoles { get; set; }
    }
}
IUserAccountList.cs:
namespace BookLoanBlazorServerAppAuth.Models.Admin
{
    public interface IUserAccountList
    {
        public Task<List<UserAccount>> GetUsers();
        public Task<List<string>> GetUserRoles(string userID);
    }
}
UserAccountList.cs:
using BookLoanBlazorServerAppAuth.Data;
using BookLoanBlazorServerAppAuth.Models.Admin;
using BookLoanBlazorServerAppAuth.Utils;
using Microsoft.AspNetCore.Identity;
using Microsoft.AspNetCore.Identity.EntityFrameworkCore;
using System.Text;

namespace BookLoanBlazorServerAppAuth.Services.Admin
{
    public class UserAccountList : IUserAccountList
    {
        private AppIdentityDbContext _db;

        public UserAccountList(AppIdentityDbContext db)
        {
            _db = db;
        }

        public Task<List<string>> GetUserRoles(string userID)
        {
            var user = _db.Users.Where(u => u.Id == userID).FirstOrDefault();

            if (user != null)
            {
                List<string> roleNames = new List<string>();

                var roles = _db.Roles.ToList();
                _db.UserRoles.Where(ur => ur.UserId == userID).ToList().ForEach(s =>
                {
                    var roleName = roles.Where(r => r.Id == s.RoleId).FirstOrDefault();
                    if (roleName != null)
                        roleNames.Add(roleName.Name);
                });

                return Task.FromResult(roleNames);
            }
            return Task.FromResult(new List<string>());
        }

        public Task<List<UserAccount>> GetUsers()
        {
            List<UserAccount> accounts = new();
            _db.Users.ToList().ForEach(a =>
            {
                List<string> roleNames = GetUserRoles(a.Id).GetAwaiter().GetResult();
                UserAccount userAccount = new()
                {
                    UserId = a.Id,
                    UserName = a.UserName,
                    Email = a.Email,
                    IsActive = a.EmailConfirmed,
                    Roles = roleNames,
                    FormattedRoles = RoleUtility.FormatListToHTML(roleNames)
                };
                accounts.Add(userAccount);
            });
            return Task.FromResult(accounts);
        }
    }
}
The method GetUsers() returns a list of items of type UserAccount. Within each user account returned from the method, there is a Roles property that includes the access roles that the user is a member of. There is also a property, FormattedRoles that contains an HTML formatted text with the user roles of the form:
[Role 1]
<br>
[Role 2]
<br>
…
[Role N]
A public static utility that contains the helper method FormatListToHTML(), is shown below:
RoleUtility.cs:
using System.Text;

namespace BookLoanBlazorServerAppAuth.Utils
{
    public static class RoleUtility
    {
        public static string FormatListToHTML(List<string> roleNames)
        {
            if (roleNames.Count == 0)
                return String.Empty;
            StringBuilder sb = new StringBuilder();
            roleNames.ForEach(s => sb.Append(s + "<br>"));
            var tmpString = sb.ToString();
            if (tmpString.Length - 4 <= 0)
                return String.Empty;
            return tmpString.Substring(0, tmpString.Length - 4);
        }
    }
}
In the next section I will show how to display the user roles.
Displaying User Roles
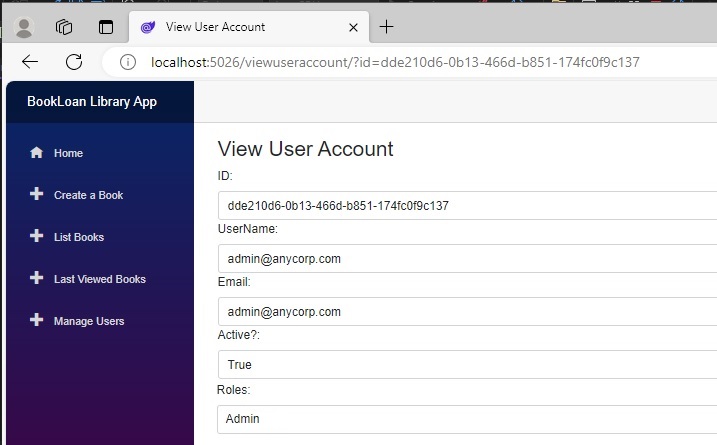
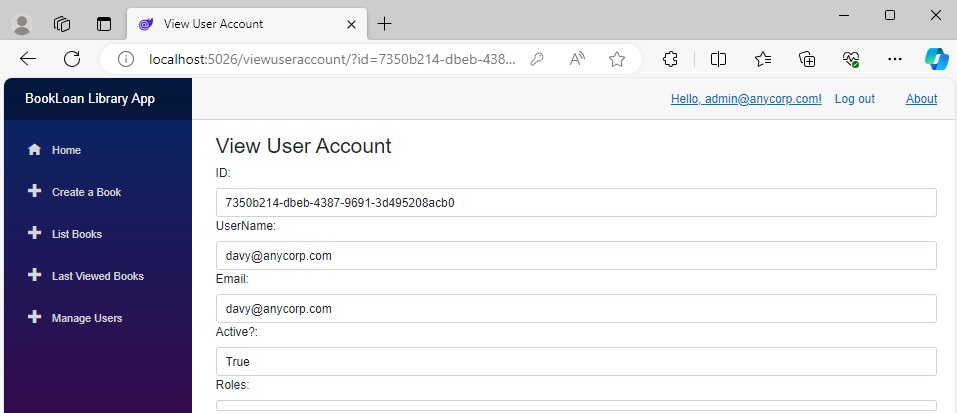
The first method we used to display user roles was in the user list screen, where we displayed the user roles in the Roles column. When the user details are selected in the View hyperlink in the Actions column, the details screen below shows the roles in the Roles display field:
The Razor component for displaying the user details is shown below:
ViewUserAccount.razor:
@page "/viewuseraccount"
@using Microsoft.AspNetCore.Components
@using BookLoanBlazorServerAppAuth.Services.Admin
@using BookLoanBlazorServerAppAuth.Models.Admin
@inject IManageUserAccount ManageUserAccountService

<PageTitle>View User Account</PageTitle>

<h3>View User Account</h3>

@if (user == null)
{
    <p><em>Loading...</em></p>
}
else
{
    <div class="form-field">
        <label class="form-label">ID:</label>
        <span class="form-control">
            @user.UserId
        </span>
    </div>

    <div class="form-field">
        <label class="form-label">UserName:</label>
        <span class="form-control">
            @user.UserName
        </span>
    </div>

    <div class="form-field">
        <label class="form-label">Email:</label>
        <span class="form-control">
            @user.Email
        </span>
    </div>

    <div class="form-field">
        <label class="form-label">Active?:</label>
        <span class="form-control">
            @user.IsActive
        </span>
    </div>

    <div class="form-field">
        <label class="form-label">Roles:</label>
        <span class="form-control">
            @user.FormattedRoles
        </span>
    </div>

    <br />
}

<br />

@code {
    [Parameter]
    [SupplyParameterFromQuery]
    public string ID { get; set; }

    private UserAccount user = new();

    protected override async Task OnInitializedAsync()
    {
        user = await ManageUserAccountService.GetUserAccount(ID);
    }
}
The ManageUserAccount class that is injected into the Razor component handles the retrieval of the account and management of user roles.
The interface for the manage user account is show below:
IManageUserAccount.cs:
using BookLoanBlazorServerAppAuth.Models.Admin;

namespace BookLoanBlazorServerAppAuth.Services.Admin
{
    public interface IManageUserAccount
    {
        public Task<UserAccount> GetUserAccount(string userID);
        public Task<List<string>> GetUserRoles(string userID);
        public Task AddUserRole(string userID, string roleName);
        public Task RemoveUserRole(string userID, string roleName);
    }
}
The class for the manage user account is show below:
ManageUserAccount.cs:
using BookLoanBlazorServerAppAuth.Data;
using BookLoanBlazorServerAppAuth.Models.Admin;
using BookLoanBlazorServerAppAuth.Utils;
using Microsoft.AspNetCore.Identity;
using Microsoft.AspNetCore.Identity.EntityFrameworkCore;
using System.Security.Claims;

namespace BookLoanBlazorServerAppAuth.Services.Admin
{
    public class ManageUserAccount : IManageUserAccount
    {
        private AppIdentityDbContext _db;

        public ManageUserAccount(AppIdentityDbContext db)
        {
            _db = db;
        }

        public async Task<UserAccount> GetUserAccount(string userID)
        {
            var userManager = new UserStore<IdentityUser>(_db);
            List<string> roleList = new();

            // Find user
            var user = userManager.Users.Where(a => a.Id == userID).FirstOrDefault();
            if (user == null)
                return new UserAccount();

            // Find user roles
            var userClaims = await userManager.GetClaimsAsync(user);
            foreach (var claim in userClaims) {
                if (claim.Type == ClaimTypes.Role)
                {
                    roleList.Add(claim.Value);
                }
            }
            return new UserAccount()
            {
                UserId = userID,
                UserName = user.UserName,
                Email = user.Email,
                IsActive = user.EmailConfirmed,
                Roles = roleList,
                FormattedRoles = RoleUtility.FormatListToHTML(roleList)
            };
        }

        public async Task AddUserRole(string userID, string roleName)
        {
            … [ see next section for details]
        }

        public async Task RemoveUserRole(string userID, string roleName)
        {
            … [ see next section for details]
        }
    }
}
The method GetUserAccount() takes a user identifier input and returns ab object of type UserAccount. I have omitted the implementation details for AddUserRole() and RemoveUserRole() and will show these in the next section.
Adding a User Role Utility
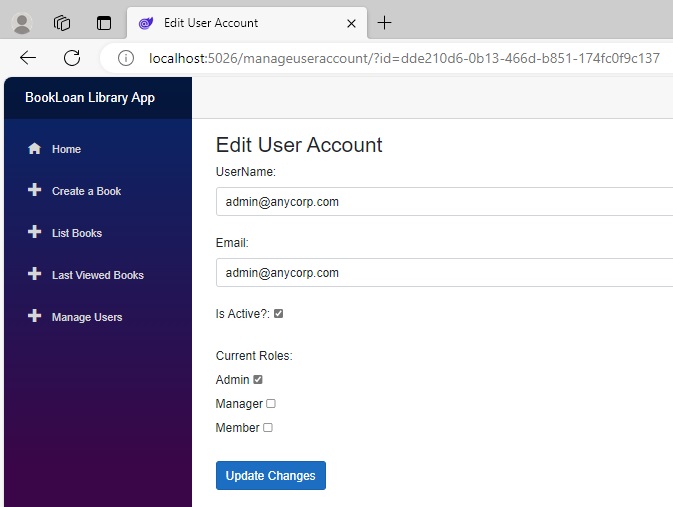
A user utility to allow changing user roles is accessed from the Edit action from the Action menu of the user accounts list.
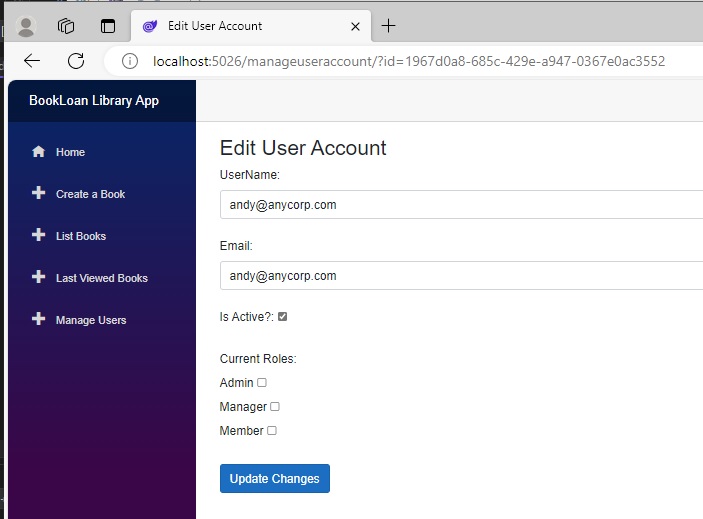
When the editable form for the user account displays, it shows which roles are checked for the user:
With the Admin user, I had already seeded the account with an existing role. However, with other users, the roles will be unchecked as I have not yet logged in as the administrator and added roles for those users. Below is the editable view for a non-admin account that has no roles assigned to it:
Before I explain how the Razor component for the above form is implemented, I will explain the model class for the editing.
The UserEditModel class consists of a few useful properties:
AvailableRoles: This is a list of all user roles that are selectable when maintaining roles for the user. In the application, I use three roles: Admin, Manager, and Member.
CurrentRoles: This is a list of roles that the user is a member of, that are assigned from the UserAccount object that is passed into the constructor.
The user edit model is shown below:
UserEditModel.cs:
namespace BookLoanBlazorServerAppAuth.Models.Admin
{
    [Serializable]
    public class UserEditModel : UserAccount
    {
        Dictionary<int, string> _roles;

        public List<string>? CurrentRoles { get; set; }

        public Dictionary<int, string> AvailableRoles
        {
            get { return _roles; }
        }

        public UserEditModel(UserAccount vm)
        {
            UserId = vm.UserId;
            UserName = vm.UserName;
            Email = vm.Email;
            IsActive = vm.IsActive;
            CurrentRoles = vm.Roles;
            FormattedRoles = vm.FormattedRoles;
            CreateLookups();
        }

        public UserEditModel()
        {
            CreateLookups();
        }

        private void CreateLookups()
        {
            this._roles = new Dictionary<int, string>()
            {
                { 1, "Member" },
                { 2, "Manager" },
                { 3, "Admin" }
            };
        }
    }
}
I will now show the implementation for the ManageUserAccount Razor component, which is shown below:
ManageUserAccount.razor:
@page "/manageuseraccount"
@using Microsoft.AspNetCore.Components
@using BookLoanBlazorServerAppAuth.Services.Admin
@using BookLoanBlazorServerAppAuth.Models.Admin
@using BookLoanBlazorServerAppAuth.Validations
@inject IManageUserAccount ManageUserAccountService;
@inject NavigationManager PageNavigation;
@inject IJSRuntime JS

<PageTitle>Edit User Account</PageTitle>

<h3>Edit User Account</h3>

@if (user == null)
{
    <p><em>Loading...</em></p>
}
else
{
     <EditForm Model="@edituser" OnSubmit="@Submit">
        <CustomBookValidation @ref="customValidation" />
        <ValidationSummary />

        <div class="form-field">
            <label class="form-label">UserName:</label>
            <span class="form-control">@edituser!.UserName</span>
        </div>

        <br />

        <div class="form-field">
            <label class="form-label">Email:</label>
            <span class="form-control">@edituser!.Email</span>
        </div>

        <br />

        <div class="form-field">
            <label class="form-label">Is Active?:</label>
            <InputCheckbox @bind-Value=edituser!.IsActive></InputCheckbox>
        </div>

        <br />

        <div class="form-field">
            <label class="form-label">Current Roles:</label>
            <br />
            <label class="form-label">Admin</label>
            <InputCheckbox @bind-Value=is_admin_selected></InputCheckbox>
            <br />
            <label class="form-label">Manager</label>
            <InputCheckbox @bind-Value=is_manager_selected></InputCheckbox>
            <br />
            <label class="form-label">Member</label>
            <InputCheckbox @bind-Value=is_member_selected></InputCheckbox>
        </div>

        <br />

        <AuthorizeView>
            <Authorized Context="EditUser">
                <button class="btn btn-primary" type="submit">
                    Update Changes
                </button>
            </Authorized>
        </AuthorizeView>

     </EditForm>
}

@code {
    [Parameter]
    [SupplyParameterFromQuery]
    public string ID { get; set; }

    private bool is_admin_selected = false;
    private bool is_manager_selected = false;
    private bool is_member_selected = false;

    private CustomBookValidation? customValidation;

    private UserAccount? user;
    private UserEditModel? edituser;

    private string? message = "";

    protected override async Task OnInitializedAsync()
    {
        user = await ManageUserAccountService.GetUserAccount(ID);
        edituser = new UserEditModel(user);
        is_admin_selected = edituser!.CurrentRoles.Contains("Admin");
        is_manager_selected = edituser!.CurrentRoles.Contains("Manager");
        is_member_selected = edituser!.CurrentRoles.Contains("Member");
    }

    private string Message = String.Empty;

    private async void Submit()
    {

        customValidation?.ClearErrors();

        var errors = new Dictionary<string, List<string>>();

        if (string.IsNullOrEmpty(edituser!.UserName))
        {
            errors.Add(
                nameof(edituser.UserName),
                new() { "User 'UserName' is required." }
            );
        }

        if (string.IsNullOrEmpty(edituser!.Email))
        {
            errors.Add(
                nameof(edituser.Email),
                new() { "User 'Email' is required." }
            );
        }

        if (!is_admin_selected && !is_manager_selected && !is_member_selected)
        {
            errors.Add(
                "Roles",
                new() { "A user role is required." }
            );
        }

        if (errors.Any())
        {
            customValidation?.DisplayErrors(errors);
        }
        else
        {
            this.UpdateUser();
        }
    }

    // Update entered user properties.
    private async void UpdateUser()
    {
        if (is_admin_selected)
            await ManageUserAccountService.AddUserRole(this.edituser!.UserId, "Admin");
        else
            await ManageUserAccountService.RemoveUserRole(this.edituser!.UserId, "Admin");

        if (is_manager_selected)
            await ManageUserAccountService.AddUserRole(this.edituser!.UserId, "Manager");
        else
            await ManageUserAccountService.RemoveUserRole(this.edituser!.UserId, "Manager");

        if (is_member_selected)
            await ManageUserAccountService.AddUserRole(this.edituser!.UserId, "Member");
        else
            await ManageUserAccountService.RemoveUserRole(this.edituser!.UserId, "Member");

        message = "User roles have been successfully updated!";
    }
}
The Razor interface for editing the user account consists of the fields for the user login, email, is active and the roles. The user roles are check boxes that set the role to be added or removed from the user.
The markup for the checkboxes is shown below:
<div class="form-field">
    <label class="form-label">Current Roles:</label>
    <br />
    <label class="form-label">Admin</label>
    <InputCheckbox @bind-Value=is_admin_selected></InputCheckbox>
    <br />
    <label class="form-label">Manager</label>
    <InputCheckbox @bind-Value=is_manager_selected></InputCheckbox>
    <br />
    <label class="form-label">Member</label>
    <InputCheckbox @bind-Value=is_member_selected></InputCheckbox>
</div>
The values for each checkbox are stored in the component variables:
private bool is_admin_selected = false;
private bool is_manager_selected = false;
private bool is_member_selected = false;
When the form initializes within OnInitializedAsync(), the checkbox values for the current user roles are set from reading the CurrentRoles property of the UserEditModel that I explained earlier, and which is instanced with the edituser variable.
is_admin_selected = edituser!.CurrentRoles.Contains("Admin");
is_manager_selected = edituser!.CurrentRoles.Contains("Manager");
is_member_selected = edituser!.CurrentRoles.Contains("Member");
Notice that I have not made use of the AvailableRoles property of the EditUserModel in the component. I was in the middle of experimenting with a dynamic approach to generating the checkboxes and using the CurrentRoles property to check them during rendering but haven’t got this idea quite right. When that is done, I will update the post in the future date.
In the next section I will show how to add or remove roles from the user account using the ASP.NET Core Identity API.
Adding Roles to an Existing User Account
Like I did during the seeding process for the admin account, I have parametrized the process and thrown the addition and removal of roles into their own method within the ManageUserAccount account, which I showed earlier.
First, a method, AddUserRole() to add a role to a user account is shown below:
public async Task AddUserRole(string userID, string roleName)
{
    var userManager = new UserStore<IdentityUser>(_db);
    var roleManager = new RoleStore<IdentityRole>(_db);

    // Find user
    var user = userManager.Users.Where(a => a.Id == userID).FirstOrDefault();
    // Find role
    var role = await roleManager.FindByNameAsync(roleName);

    if ((user != null) && (role != null))
    {
        try
        {
            // Check if existing user role.
            bool bUserIsInRole = await userManager.IsInRoleAsync(user, roleName.ToUpper());

            // Add user role if it does not exist.
            if (bUserIsInRole == false)
                await userManager.AddToRoleAsync(user, roleName.ToUpper());
            await _db.SaveChangesAsync();

            // Add role claim
            var claims = new List<Claim>();
            var claim = new Claim(ClaimTypes.Role, roleName);
            claims.Add(claim);
            await roleManager.RemoveClaimAsync(role, claim);
            await roleManager.AddClaimAsync(role, claim);

            // Add user claim
            await userManager.RemoveClaimsAsync(user, claims);
            await userManager.AddClaimsAsync(user, claims);
            await _db.SaveChangesAsync();
        }
        catch (Exception ex)
        {
            Console.Write("Error " + ex.Message.ToString());
        }
    }
}
The method takes two input string parameters, a user identifier, userID, and the role name, roleName. Then it attempts to find the user account, and checks if the role exists. If both are found, then the role is checked against the current user roles. If the role is not part of the user role, then it is added as a user role. The role claims, which are not dependent to the user role claims are removed, then added back to the role claims.
This ensures that we don’t add two role claims. Likewise, the user role claim is removed, then added back to the user role claim. After the role and user role claim insertions, the changes are saved back to the identity store.
Then, a method, RemoveUserRole() to remove a role from a user account is shown below:
public async Task RemoveUserRole(string userID, string roleName)
{
    var userManager = new UserStore<IdentityUser>(_db);
    var roleManager = new RoleStore<IdentityRole>(_db);

    // Find user
    var user = userManager.Users.Where(a => a.Id == userID).FirstOrDefault();
    // Find role
    var role = await roleManager.FindByNameAsync(roleName);

    if ((user != null) && (role != null))
    {
        try
        {
            // Check if existing user role.
            bool bUserIsInRole = await userManager.IsInRoleAsync(
                user, roleName.ToUpper()
            );
            // Remove user role if it exists.
            if (bUserIsInRole == true)
                await userManager.RemoveFromRoleAsync(user, roleName.ToUpper());
            await _db.SaveChangesAsync();

            // Remove user role claim
            var claims = new List<Claim>();
            var claim = new Claim(ClaimTypes.Role, roleName);

            claims.Add(claim);

            await userManager.RemoveClaimsAsync(user, claims);
            await _db.SaveChangesAsync();
        }
        catch (Exception ex)
        {
            Console.Write("Error " + ex.Message.ToString());
        }
    }
}
The method takes the same input string parameters as the addition method and runs the same existence check for the user account and the role. If both are found, then the reverse operation of the addition method is applied, where the user role and user role claim are removed. However, the role claim is not removed.
The reason why the role claim is not removed is that the role in the role claim is dependent on the role entity which may be used by multiple users. Another lookup on existing user accounts to ensure that no other users are using the existing role would be required.
When the application is run with the above methods, to test the role maintenance we open the editable view for a user with no roles.
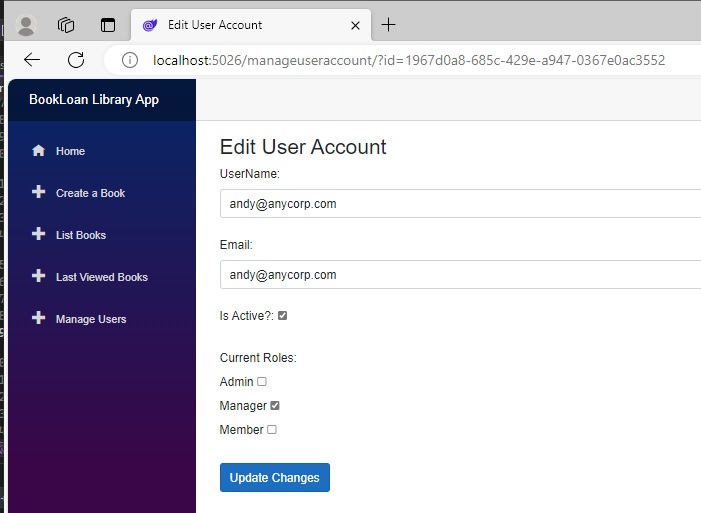
We then check the Manager role, then click Update Changes.
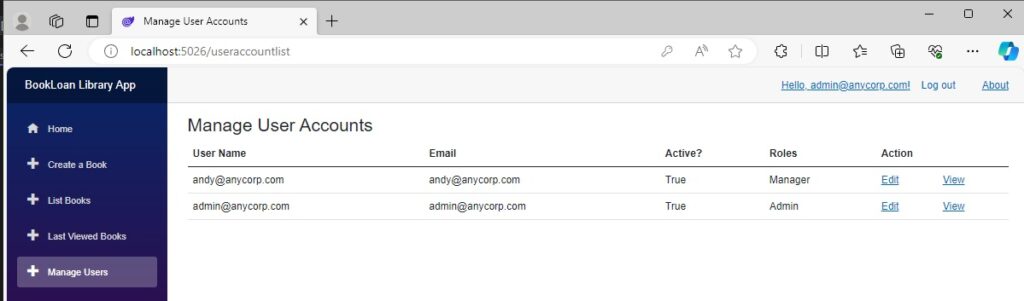
When we go back to the Manage Users screen, provided the code has run as expected, we can see the new role showing in the Roles column:
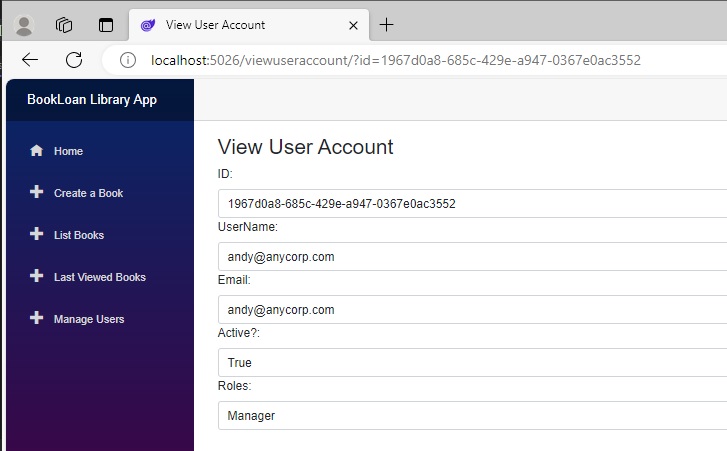
Selecting the View action for the user gives us the user view details with the formatted roles displayed:
In the next section I will show how to test the user role-based authorization with AuthorizeView.
Testing User Role Based Authorization with AuthorizeView
Recall that when I added the role to the user account, I also created a role claims, then added the role claims to the user account. Whenever we want to use the <AuthorizeView> tag and the Role attribute to control user access and access levels based on role memberships for user accounts within the Blazor application, we must have the user role claim added to the user account. The claim type within the user role claim is what is checked when using the authorization view in Blazor.
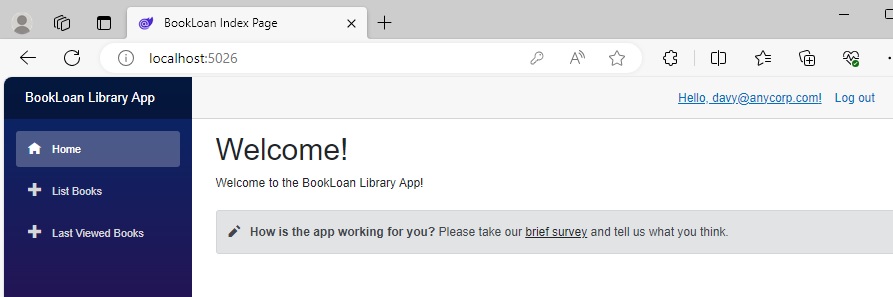
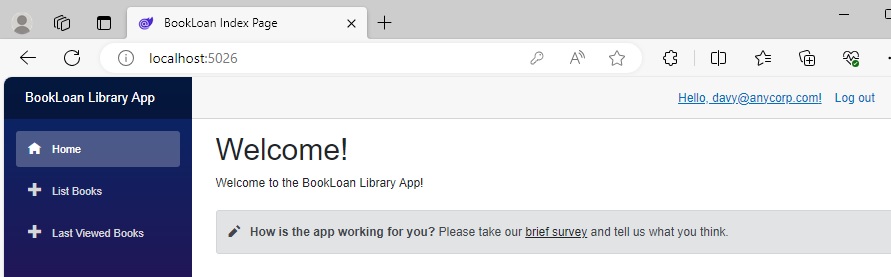
When we login as the non-Admin account and arrive on the landing page with the navigation menu sidebar, we can see that the Manage Users option is no longer visible:
In the navigation menu Razor component markup is have changed the nav link for the Create a Book option from:
<AuthorizeView Roles="Admin " Context="InnerAuthView">
    <div class="nav-item px-3">
       <NavLink class="nav-link" href="createbook">
          <span class="oi oi-plus" aria-hidden="true"></span> Create a Book
      </NavLink>
   </div>
</AuthorizeView>
to
<AuthorizeView Roles="Admin,Manager" Context="InnerAuthView">
    <div class="nav-item px-3">
       <NavLink class="nav-link" href="createbook">
          <span class="oi oi-plus" aria-hidden="true"></span> Create a Book
      </NavLink>
   </div>
</AuthorizeView>
To test our other role, which is Member, we can go through what we did for the Manager role and see how that impacts the navigation menu view. After adding a new account, davy@anycorp.com.au that has a Member role, and logging into the application, we can see that the visible menu items are:
The user account lists show the new user with no assigned role:
Again, the user view shows no role:
After we add the Member role for the new user, we will have three levels of user access.
After logging out and in as the new user, we will see the navigation menu side bar with just three options:
At this point, we could ensure that the Member user could at least action the List Books menu item, then any new users without roles would only see the Home link in the navigation menu side bar.
As we have seen, with the use of user roles, we can control user access to different parts of the application.
If you are connecting to an existing identity store such as Azure Active Directory that has roles defined within each account, we can apply the above access levels within our applications.
In future posts, I will investigate other security topics in ASP.NET Core Blazor and ASP.NET Core web applications.
That is all for today’s post.
I hope that you have found this post useful and informative.
Andrew Halil is a blogger, author and software developer with expertise of many areas in the information technology industry including full-stack web and native cloud based development, test driven development and Devops.