
Welcome to today’s post.
In today’s post I will be showing you how to deploy into Azure a chatbot application implemented with the Azure Bot SDK Framework and Visual Studio 2022.
In previous posts I have shown how to deploy .NET Core applications and Web API applications from Visual Studio into Azure. A chatbot application has also API endpoints that allow messages to be transmitted to the chatbot, so it is like a Web API application.
Chatbot Application Deployments using Azure CLI and the ARM Templates
In another post, I showed how to create a basic chatbot using the Azure Bot Framework SDK. When we created the chatbot application with the Visual Studio Project Templates, the generated application skeleton folders included a deployment folder that contained pre-generated JSON formatted deployment scripts that can be run under the Azure CLI to deploy the application to Azure.
The pre-generated scripts in the deployment folder, DeploymentTemplates include parameter files and template files for new and existing resources. After the parameter file is populated with the correct parameters, the scripts can be run with Azure CLI commands to both create the Azure resources and to deploy the application source code into the created Azure App Service (web application) folder in Azure.
In a previous post, I showed how to create and author ARM Templates with Visual Studio. I also showed in another post how to deploy Web Applications into Azure using ARM Templates.
An Azure chatbot application is structured and deployed similarly to an Azure Web Application, with both hosted under an Azure App Plan and deployed as a Web Application App Service. The only difference being that an Azure chatbot application requires creation of an additional channel registration, which is the Azure Bot resource.
The prerequisites before running the ARM deployment templates are that in addition to an Azure account, we require the creation of a resource group and a user managed identity.
A command to create a resource group using the Azure CLI is below:
az group create --name "rgcbotXXXXXXXXXX" --location "australiaeast"
A command to create a user managed identity resource using the Azure CLI is below:
az identity create --resource-group "rgcbotXXXXXXXXXX" --name "idcbotXXXXXXXXXX"
After running the above identity creation command, the resulting JSON output will contain some of the following output keys and values:
{
    "clientId": "XXXXXXXXXX",
    "name": "idcbotXXXXXXXXXX",
    "tenantId": "XXXXXXXXXX",
    …
}
Make a note of the clientId and tenantId values, as we will use them later to help us determine the parameters for the deployment of the chatbot application to Azure.
The remaining resources, which include the following services:
– App Service Plan resource
– App Service resource
– Azure Bot resource
Are created within the deployment template, with each resource dependent on either a resource group or managed user identity.
How Azure Bot Resource is Created in the Azure Portal
Before we can determine what parameters are required for the deployment of an Azure Bot resource, it makes sense to understand the types of parameters that are required to run the manual creation of the resource in the Azure Portal.
In the Azure Portal, the Azure Bot resource can be found from the marketplace, where the creation tile is shown below:
Selecting the Create option takes us to the Create an Azure Bot dialog:
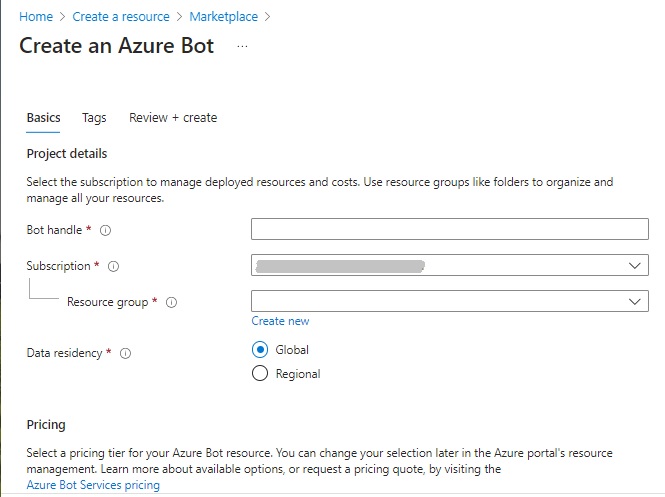
Notice the first two parameters, the Bot handle is the name of the bot resource, and the Data residency parameter is the region where the bot resource data will be stored.
Further down the creation dialog, we see the next two parameters:
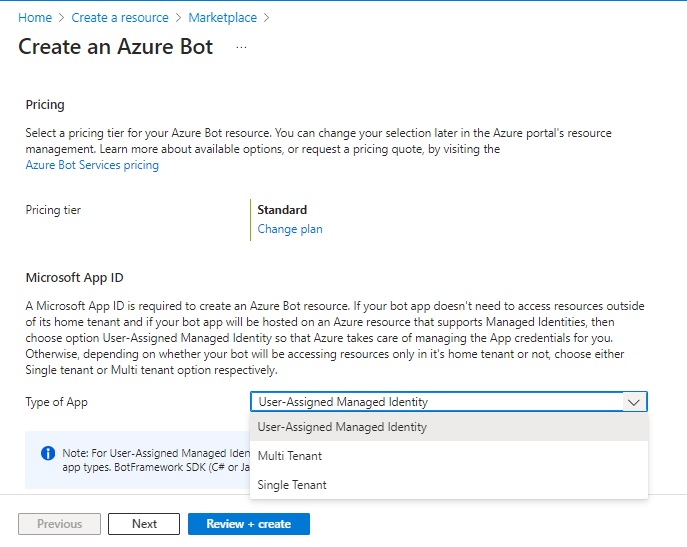
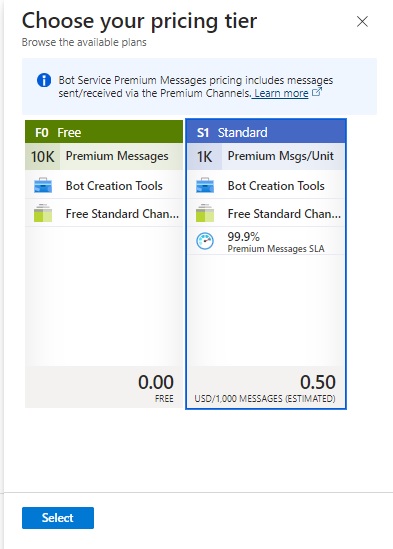
The pricing tier is set to the default option, Standard, which is for production level deployments, however, you can change to the alternative Free tier option, which is the experimental and evaluation option.
The next parameter, the Microsoft App ID, we need to determine the type of application we will create the application identifier for. The options are:
User-Assigned Managed Identity
Multi Tenant
Single Tenant
The selection of the Microsoft App ID creation type is shown below:
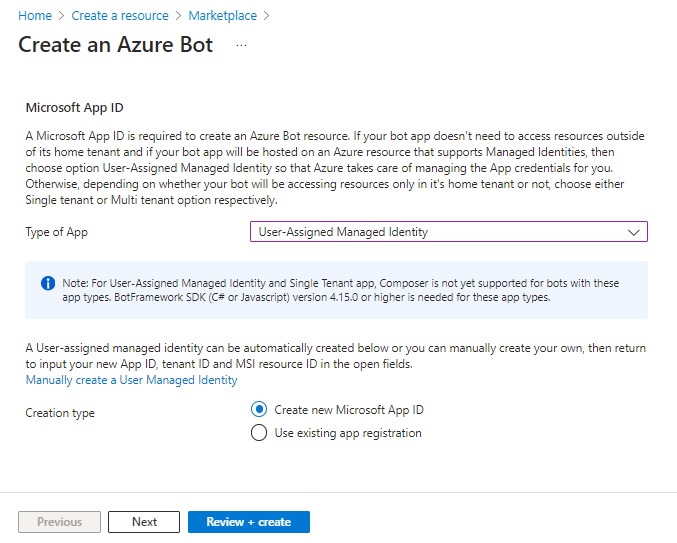
The Creation type parameter has two options,
Create new Microsoft App ID
Use existing app registration
In the next section, I will show how a parameters script file is used to deploy of the chatbot application.
Parameters Required for Deployment of the Chatbot Application
The ARM deployment template parameters script file:
\DeploymentTemplates\preexisting-rg-parameters.json
will require changes to the input parameters that target the Azure resources that will be created.
Below is the parameters ARM script file with a description of the required values entered surrounded by description within the brackets [..]:
{
    "$schema": "https://schema.management.azure.com/schemas/2019-04-01/deploymentParameters.json#",
    "contentVersion": "1.0.0.0",
    "parameters": {
        "appId": {
            "value": "[the clientId GUID value generated identifier when the identity was created]"
        },
        "appSecret": {
            "value": ""
        },
        "appType": {
            "value": "UserAssignedMSI"
        },
        "botId": {
            "value": "[cbotappXXXXXXXXXX - the bot name/handle of the Bot resource]"
        },
        "botSku": {
            "value": "F0"
        },
        "newAppServicePlanName": {
            "value": "[appplanXXXXXXXXXX - the name of the app service plan]"
        },
        "newAppServicePlanSku": {
            "value": {
                "name": "F0",
                "tier": "Free",
                "size": "F0",
                "family": "F",
                "capacity": 1
            }
        },
        "appServicePlanLocation": {
            "value": "[australiaeast – or whatever your region]"
        },
        "existingAppServicePlan": {
            "value": ""
        },
        "newWebAppName": {
            "value": ""
        },
        "tenantId": {
            "value": "[the tenant ID GUID value from the identity creation, or from the current Azure subscription]"
        },
        "existingUserAssignedMSIName": {
            "value": "[idcbotXXXXXXXXXX – the identifier of the identity resource created]"
        },
        "existingUserAssignedMSIResourceGroupName": {
            "value": "[rgcbotXXXXXXXXXX – the resource group]"
        }
    }
}
In the ARM template script file under the variables section, there are three important variables, that are derived from the input parameters, which determine the web application name, site host URL, and the Bot Endpoint URI. These are defined below:
"variables": {
    …
    "webAppName": "[if(empty(parameters('newWebAppName')), parameters('botId'), parameters('newWebAppName'))]",
    "siteHost": "[concat(variables('webAppName'), '.azurewebsites.net')]",
    "botEndpoint": "[concat('https://', variables('siteHost'), '/api/messages')]",
    …
}
If the web app parameter is left blank in the parameter script file, then the web app name will be the same as the Bot Handler (Id) name of the Azure Bot resource.
The Site Host URL will be [web app name].azurewebsites.net.
The Bot Endpoint URI will be https://[site host]/api/messages.
In the next section, I will show how to execute the ARM deployment templates with the parameters script file.
Execution of the Chatbot Application Resource Deployment
In this section, I will show how to run the ARM deployment templates with the modified parameters file to generate the Azure resources.
First, we change over to the project directory:
cd "\HomeAutoBotWithCLU"
The next command generates the Azure resources with the resource group and the ARM deployment parameter and template files:
az deployment group create --resource-group "rgcbotXXXXXXXXXX"
--template-file "DeploymentTemplates\template-with-preexisting-rg.json"
--parameters "DeploymentTemplates\preexisting-rg-parameters.json"
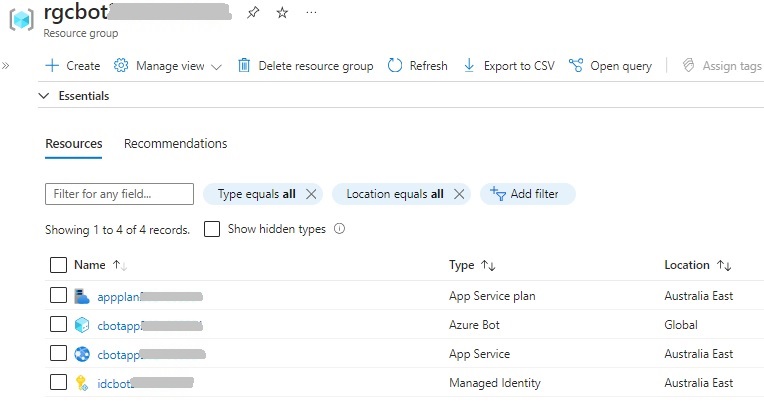
When the deployment completes, you will see the following key and value on the output JSON, showing the success of the deployment:
"provisioningState": "Succeeded",
In the Azure Portal, after selecting the resource group that we had created earlier, we should see resources of type App Service plan, Azure Bot, App Service and Managed Identity.
At this point, the deployed Azure resources for the chatbot application cannot be run as no source code has been deployed. I will show how to deploy the generated application binaries from the project folder in the next section.
Publishing the Chatbot Application Source Code to Azure
In this section, I will show how to deploy the generated application binaries from the project folder.
Before we can deploy any of the chatbot source to the Azure App Service web application, we will need to prepare our project files and create a ZIP of the source that is to be pushed into the web application in Azure.
To prepare the project files, we first build our project in release configuration mode. The reason for this is that by default the application is deployed to Azure in the default production slot.
Next, we go to our Azure CLI prompt, change directory to the project folder and run the following command:
az bot prepare-deploy --lang Csharp --code-dir "." --proj-file-path "[the CSPROJ filename, e.g. HomeAutoBotWithCLU.csproj]"
The –code-dir switch, with the “.” parameter corresponds to the current folder.
The –proj-file-path switch is the path and file name of the CSPROJ project file relative to the –code-dir folder.
After the above command is completed successfully, you will see a file .deployment (with no file name) in the project folder.
To complete the deployment process, we will need to create a compressed ZIP file within the project folder and populate the file with all the project sub-folders and files.
After our populated ZIP source file is ready, we can execute the publication of the chatbot application.
To publish the Bot application to Azure, run the following Azure CLI command:
az webapp deployment source config-zip --resource-group "rgcbotXXXXXXXXXX" --name "cbotappXXXXXXXXXX - name of app service" --src "HomeAutoBotWithCLU.zip - name of the ZIP source file"
In the next section, I will show how to test and run the chatbot application.
Running and Testing the Chatbot Web Application
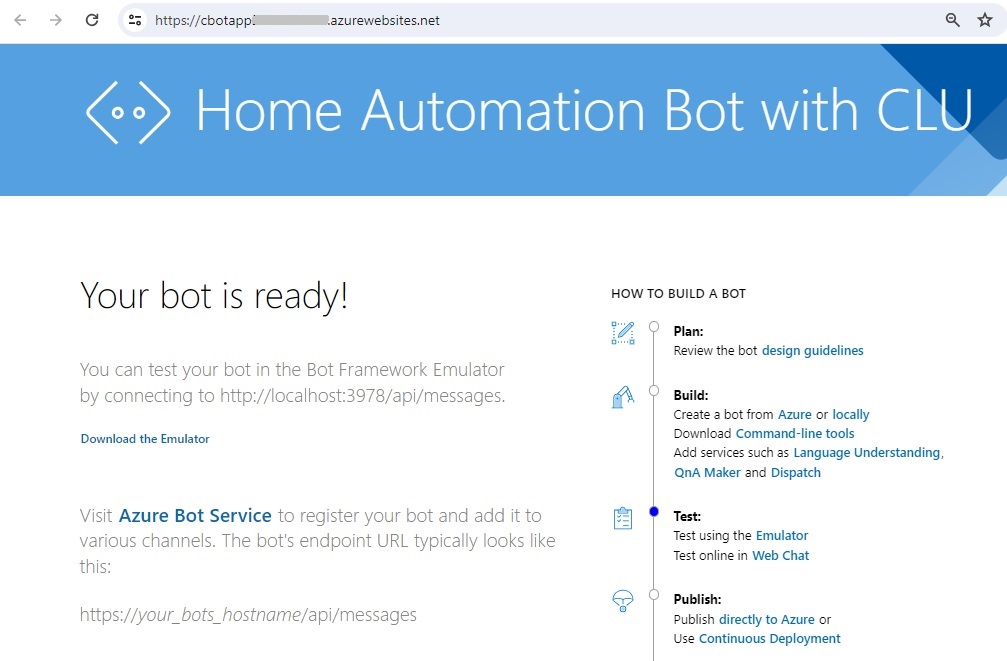
To run the chatbot web application, browse to the URL of type:
[app service name].azurewebsites.net
If the application deployment was successful, then the landing page will look like the page as shown:
To test the application, we open the Azure Bot resource in the portal. The tester for the chatbot resource is accessible in two areas:
In the landing page showing the Test and refine your bot option with the Test in Web Chat action:
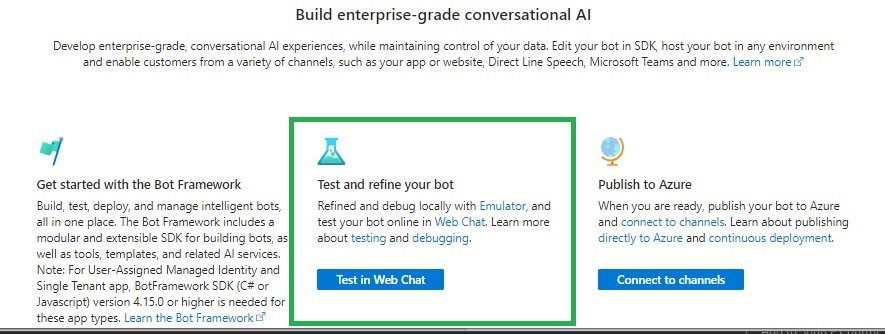
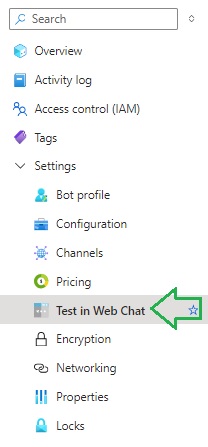
Under the Settings left menu, with the Test in Web Chat sub-menu option:
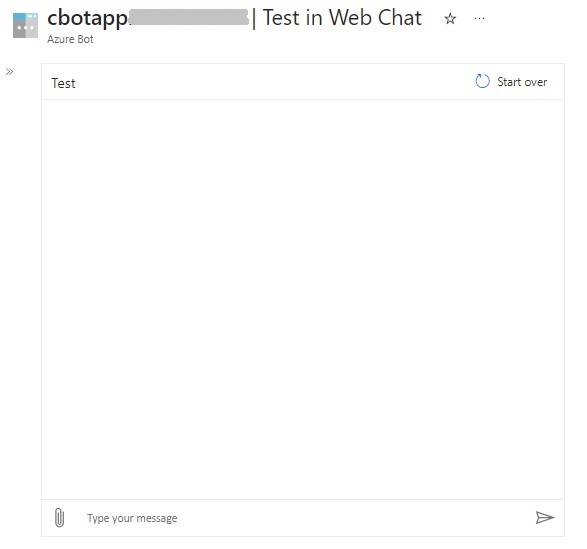
When the test option is selected, another window opens, and you will see a test chat conversation dialog open:
Type in a message or utterance.
After typing in the following utterance:
open the dining room lights.
I get the following responses:
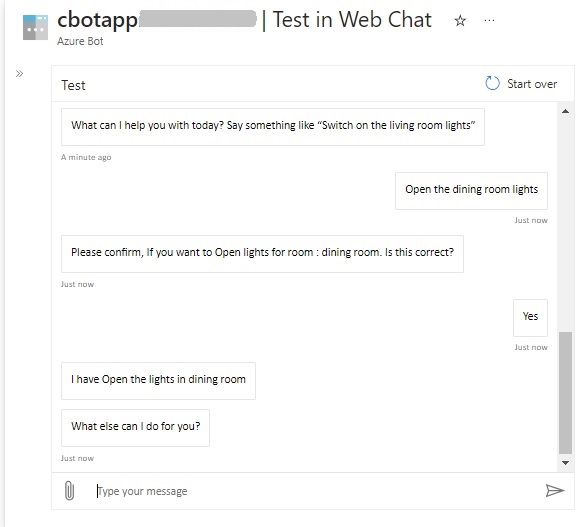
The above responses are consistent with what we get when connected to the Bot Framework Emulator.
The above has shown us how to deploy to Azure a chatbot application developed with Visual Studio with the Bot Framework SDK.
We could also deploy the same chatbot application to Azure from a GitHub or Azure DevOps repository, or from an Azure DevOps continuous integration and release pipeline.
In a future post I will show how to configure an Azure chatbot to provide voice capability.
That is all for today’s post.
I hope that you have found this post useful and informative.
Andrew Halil is a blogger, author and software developer with expertise of many areas in the information technology industry including full-stack web and native cloud based development, test driven development and Devops.

