
Welcome to today’s blog.
In today’s post, I will show you how, using Git bash, you can apply common merging operations that allow you to combine changes from your local Git development branch into the corresponding branch in the remote Git repository. In addition, I will show how you can resolve a common problem that may occur while using Git for Visual Studio 2017 plugin.
In the first section I will give an overview of some basic Git commands that will become useful when we apply merges and commits later.
In the final section I will then explain two Git issues and how to apply some of the Git commands to resolve the issue from outside of the Visual Studio development environment.
Useful Commands to use in Git Bash
Staging changes for the current repository
The first command I will explain is the git command to add source files that have changed within the current Git folder (and all subfolders) to a staging status:
git add -A
The staging status of a source file indicates that is has been modified within the current set of cloned or checked out files from the repository and is ready to be merged into the set of changes for the next commit.
The command below achieves the same outcome as the above with the -A option:
git add --all
Getting the Status of the Current Branch in the Repository
To retrieve the status of the current repository branch, use the command:
git status
It will tell you whether the current repository branch is committed, staged, merged, merged in progress.
Committing Changes to the Repository
To commit all changes within the current repository, use the command:
git commit
The above will commit all changes without a message to the current repository. To commit changes to the repository with a message, use the following command:
git commit -m "some message"
To add and commit changes to files in one operation, you have the following command:
git commit -A
To add and commit changes to files in one operation with a message, you have the following command:
git commit -A -m "some message"
Another variation of the above the command below which achieves the three operations in one command is:
git coa -m "some message"
Pushing Committed Changes to the Remote Repository
After all changes have been staged and committed within the local repository, to push committed changes to the remote Git repository use the following command:
git push origin [branch]
Where [branch] is the name of the current branch your committed source is checked out to.
Resolving two Common Git Issues that Occur in the Git Extension
In this section, I will cover the steps I have taken to resolve two common Git errors that occur when using the Git extension within Visual Studio. These are the “Changes not staged for commit” and “Merge in Progress” errors.
Resolving the “Changes not staged for commit” Error
Local source files that have been modified before source files in the repository have been pulled from the remote repository or new local source files that are not in the current remote repository will show up with a “Changes not staged for commit” error.
The two errors that I have mentioned can occur in pairs, so I will go through a time when both errors have appeared.
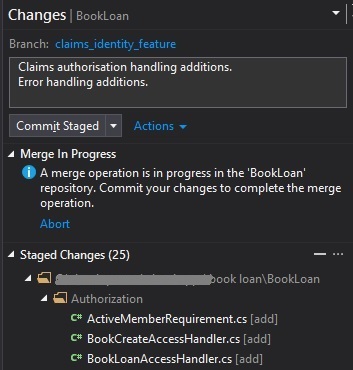
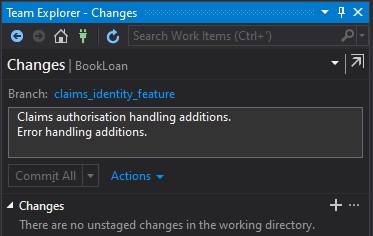
Open the Team Explorer tab in Visual Studio 2017 to view outstanding changes to your current branch. In the screen below you will see the staged changes and a Merge In Progress alert:
Open Git Bash console prompt.
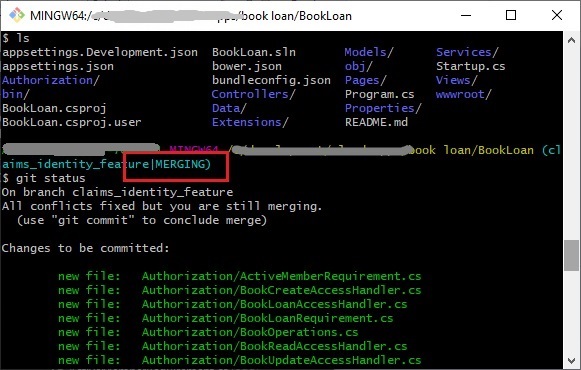
Run the command git status.
You will see the error/warning:
“All conflicts fixed but you are still merging”
Change to the source folder you are attempting to merge source.
You will see the folder showing a merging state and source files yet to be committed:
On scrolling down further you will see the following source files that are modified and not staged for commit:
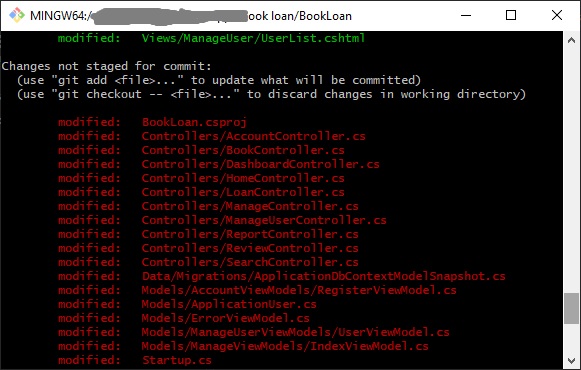
In the Visual Studio Team Explorer, the corresponding files will be the project source changes that are un-staged:

Then run the following command if you wish to commit all staged and un-staged changes:
Running the following command will commit all staged and un-staged changes within the local Git repo:
git add -A
You will notice the newly staged files will be listed and amended with newlines replaced by carriage returns:

You will notice the un-staged files are now staged.
Note: The following command will all achieve the same goal as staging all files for commit:
git add --all
Go back to the Visual Studio IDE and you will see there are no more un-staged files, they have all been staged for a commit.
In the next section, I will show how to resolve the Merge In Progress issue.
Resolving the “Merge in Progress” Issue
I will show you how to deal with the “Merge in Progress” message that so often pops-up after you have opened the Team Explorer tab in Visual Studio 2017 to view outstanding changes to your current branch.
The above is the same error I get during when attempting a merge from the Git plugin within Visual Studio using the Git extension.
In the Team Explorer changes pane (see screenshot in previous section), recall the error Merge In Progress that showed? There was a suggestion below that:
Commit your changes to complete the merge operation. If you have managed to successfully resolve the changes not staged for commit issue, then follow the following steps to resolve the merge issue.
Now go back to Git Bash and enter the following git command to commit the staged changes:
git commit -m "some message"
Note also that the following git commands achieve the same goal:
git coa -m "some message"
git commit -A -m "some message"
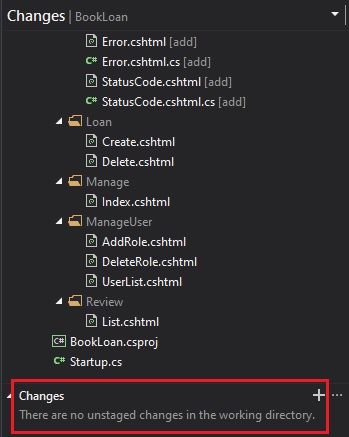
Once the commit has been run to the repository, the folder will show the “merging” status has gone from the source folder:

Notice the “MERGING” label has gone from the Git source folder.
Check Team Explorer in the Visual Studio IDE and there are no longer any staged files, they have been committed!
Now synchronize changes to the remote repository.
To apply a sync (or push) to the remote repository, run the command:
git push --set-upstream origin [your branch]
In the resulting output in the command console, you will see the files committed successfully to the remote repository:

Back in Visual Studio Team Explorer Synchronization Window, for the current branch, you will see that there are no outgoing commits, with all changes successfully pushed into the remote repository:

Check the GitHub repository and the changes for the local Git branch have been pushed remotely:

Expanding the master branch, verify the new branch has been created within your repository:

As a last task, within the new branch, check the timestamp of the files that have been pushed to your remote repository.

After checking in the branch, you may wish to merge the changes from the branch into the master branch. This is in one of my previous blogs on merging in Git where I showed how to use branching and merging with Git.
That’s all for this post.
I hope you found this post useful and informative.
Andrew Halil is a blogger, author and software developer with expertise of many areas in the information technology industry including full-stack web and native cloud based development, test driven development and Devops.

