
Welcome to today’s post.
In today’s post I will show how you can add useful end-to-end user interface automated testing to an ASP.NET Core web application.
End to end testing, or E2E testing is a form of acceptance testing, where the system behavior from a user perspective is simulated by running a set of scripts that automate the running of different features within an application. The main benefit of E2E testing is that any changes to the application’s visible or non-visible components that are not picked up by unit testing may be picked up during E2E testing and flagged to the test team for remediation.
In previous posts I have shown how to add end-to-end user interface automated testing to an Angular application using the Protractor test runner and end-to-end integration testing. The Protractor test runner, which is derived from the Selenium WebDriver is the default end-to-end test utility for Angular applications.
Explaining Interactive Unattended Testing
End-to-end interface tests can either be run in interactive mode or in headless mode. In a previous post, I showed how to configure an Angular application to run headless end-to-end tests in a Chrome browser.
An interactive, unattended, complete end-to-end test execution of a large system can take many hours to run and complete. During the test run, only one browser can run at time since the user input events from the mouse and keyboards are consumed by one browser at a time. Because of this limitation, multiple systems when tested in parallel, are done so across multiple machines or virtual machines.
The purpose of automated end-to-end testing is to perform integration testing and user-acceptance testing of a user interface without test user intervention.
Implementation of tests that allow for the automation of end-to-end user interface testing requires a developer or test engineer to script the tests using a host language such as c#, and an end-to-end testing library such as Selenium or Protractor. In addition, a BDD language can be used to implement validations for each of our tests.
Installation of the Selenium Test Driver in Visual Studio
With non-Angular web applications such as ASP.NET Core, the default test driver is Selenium, which happens to have a NuGet package available for use within a .NET Core unit test project.
To setup an end-to-end automated test with an ASP.NET Core web application, we can follow the steps as follows:
Initially, we add a new unit test project to our web application solution in Visual Studio.
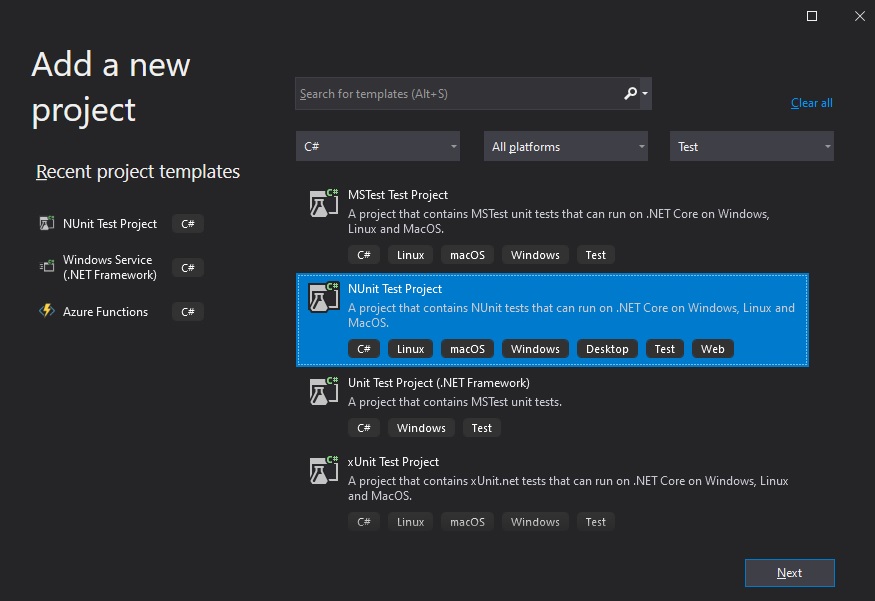
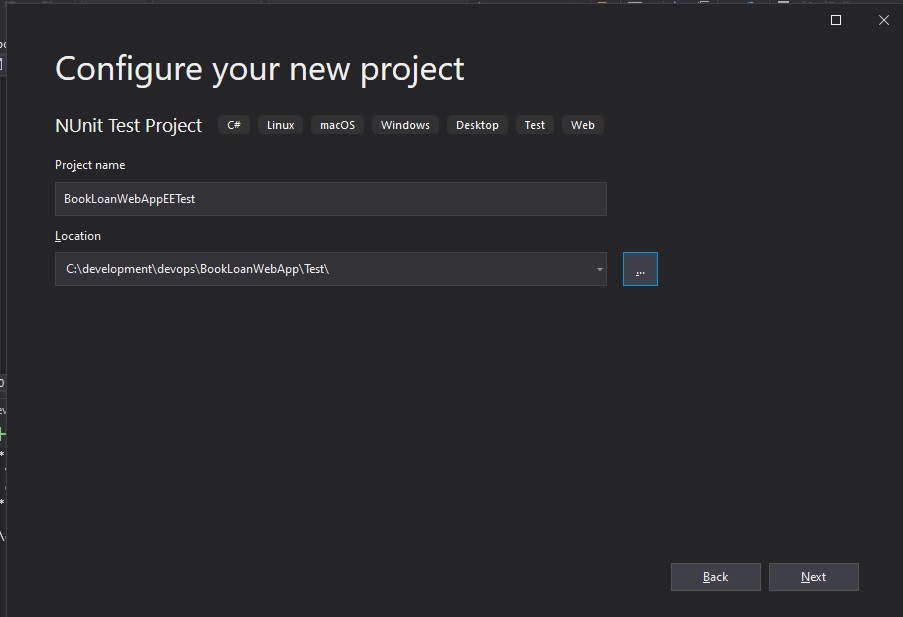
When configuring the folder location of the unit test project, ensure that it is created within a subfolder of the main project’s root folder that contains the .sln and .proj files.
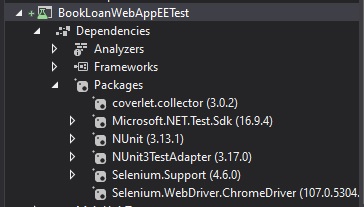
Once the unit test project is created, open the NuGet package managed and search for packages starting with “selenium”. You will find two packages named:
Selenium.Support
Selenium.WebDriver.ChromeDriver
These packages are shown below:

Once the packages are installed, they will be under the Dependencies\Packages folder under your unit test project file.
Initially, the unit test file will be empty with one stubbed test.
using NUnit.Framework;

namespace BookLoanWebAppEETest
{
    public class Tests
    {
        public void Test1()
        {
        }
    }
}
Configuration of the Selenium E2E Test in a Unit Test Project
First, we add the library references to the unit test source as shown:
using OpenQA.Selenium;
using OpenQA.Selenium.Chrome;
Before we can run the end-to-end tests, we will need to add some plumbing code to connect the unit test to the Selenium automated test driver to the driver corresponding to the browser.
We do this as follows:
Add variables in the private section of the test class to store the context, web driver and application URL:
private TestContext testCtxtInst;
private IWebDriver driver;
private string applicationURL;
Next, create a Setup() method and add the two lines to initiate the Chrome web test runner:
[SetUp]
public void Setup()
{
    this.applicationURL = "http://localhost:8060";
    this.driver = new ChromeDriver();
}
Before testing commences, the test driver will be initialized and the web application we will test will be initialized.
The bootstrapped code will look as shown:
using NUnit.Framework;
using OpenQA.Selenium;
using OpenQA.Selenium.Chrome;

namespace BookLoanWebAppEETest
{
    public class Tests
    {
        private TestContext testCtxtInst;
        private IWebDriver driver;
        private string applicationURL;

        [SetUp]
        public void Setup()
        {
            this.applicationURL = "http://localhost:8060";
            this.driver = new ChromeDriver();
        }

        [TearDown]
        public void TearDown()
        {
            this.driver.Quit();
        }

        public TestContext TestContext
        {
            get
            {
                return this.testCtxtInst;
            }
            set
            {
                this.testCtxtInst = value;
            }
        }
    }
}
In the next section I will show how to run a simple e2e test with the Selenium test driver.
Running a Simple E2E Test with the Selenium Test Driver
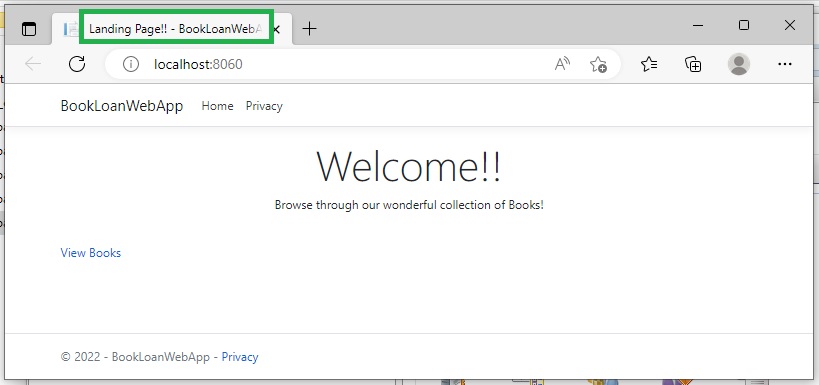
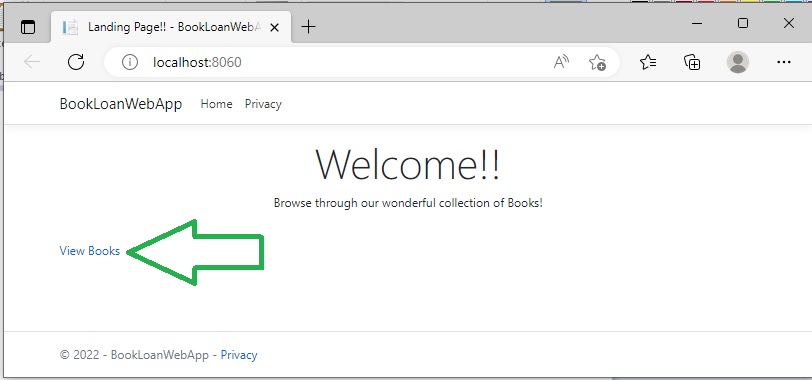
The first part of the application I want to test is to check the title the application is correct.
To do this we will need to search the DOM within our web landing page for the title:
“Landing Page!! – BookLoanWebApp”
as shown in the green border below:
The corresponding CSHTML is shown below:
@{
    ViewData["Title"] = "Landing Page!!";
}

<div class="text-center">
    <h1 class="display-4">Welcome!!</h1>
    <p>Browse through our wonderful collection of Books!</p>
</div>

<br />

<div>
    @Html.ActionLink("View Books", "List", "Book", null, new { id="viewBookLink" })
</div>
To find the exact HTML DOM element in the web page, we can click on any element in the page, right-click and inspect. Expand the DOM element and the title will be contained within a pair of
<h1> … </h1>
tags.
To test the web page title, we just do the following:
driver.Navigate().GoToUrl(this.applicationURL + "/");

// Test title is correct.
var title = driver.Title;
Assert.AreEqual("Landing Page!! - BookLoanWebApp", title);
Automation of Interface Element Actions in an E2E Test
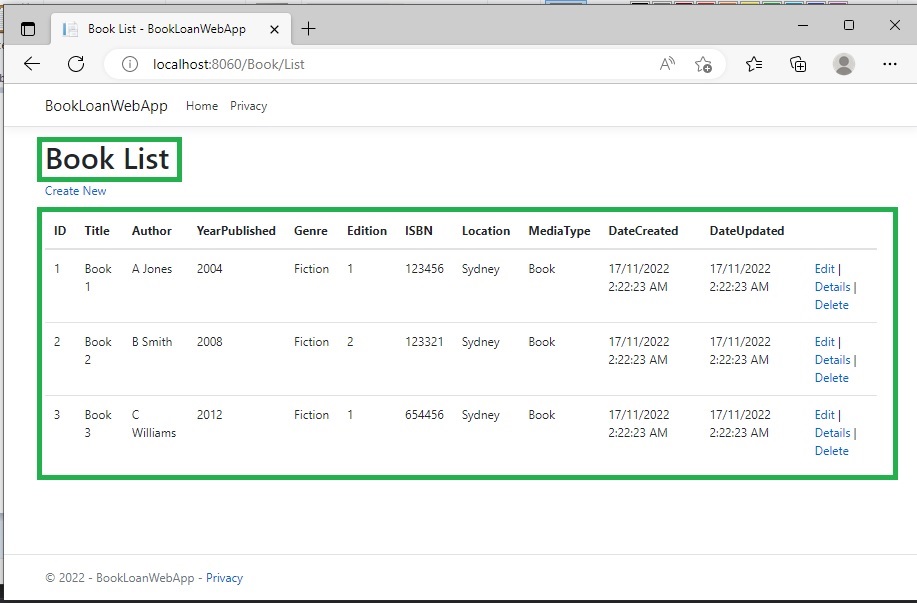
Another test I will make is to automate a click on a page link View Books shown below:
Which will take us to a list of books, where we can test the heading and the total number of books as shown:
To automate the opening of the books list we write the following:
driver.Navigate().GoToUrl(this.applicationURL + "/");

driver.Manage().Timeouts().ImplicitWait = System.TimeSpan.FromMilliseconds(500);

// Click on view books link.
var viewLink = driver.FindElement(By.Id("viewBookLink"));
viewLink.Click();
The above includes a short delay to allow the web page to render the elements. This can be adjusted depending on the complexity of your web page.
To check the page heading and ensure there are books in the list, we run the following test assertions on elements in the page:
// Test book list heading is correct.
var listHeading = driver.FindElement(By.TagName("h1"));
Assert.AreEqual("Book List", listHeading.Text);

// Test number of books is greater than zero.
var booksList = driver.FindElements(By.TagName("tr"));
Assert.IsTrue(booksList.Count > 0);
We can see that the CSHTML for the list (which I have shortened) is as shown:
@model IEnumerable<BookLoanWebApp.Models.BookViewModel>

@{
    ViewData["Title"] = "Book List";
}

<h1>Book List</h1>

<p>
    <a asp-action="Create">Create New</a>
</p>

<table class="table">
    <thead>
        <tr>
            <th>
                @Html.DisplayNameFor(model => model.ID)
            </th>
            <th>
                @Html.DisplayNameFor(model => model.Title)
            </th>
            <th>
                @Html.DisplayNameFor(model => model.Author)
            </th>
	…
            <th>
                @Html.DisplayNameFor(model => model.DateUpdated)
            </th>
            <th></th>
        </tr>
    </thead>
    <tbody>
@foreach (var item in Model) {
        <tr>
            <td>
                @Html.DisplayFor(modelItem => item.ID)
            </td>
            <td>
                @Html.DisplayFor(modelItem => item.Title)
            </td>
            <td>
                @Html.DisplayFor(modelItem => item.Author)
            </td>
	…
            <td>
                @Html.DisplayFor(modelItem => item.DateUpdated)
            </td>
            <td>
                @Html.ActionLink("Edit", "Edit", new { /* id=item.PrimaryKey */ }) |
                @Html.ActionLink("Details", "Details", new { /* id=item.PrimaryKey */ }) |
                @Html.ActionLink("Delete", "Delete", new { /* id=item.PrimaryKey */ })
            </td>
        </tr>
}
    </tbody>
</table>
For more information on how to use Selenium to write interactive end-to-end scripts, refer to the Selenium site.
Viewing E2E Test Run Results in the Test Explorer
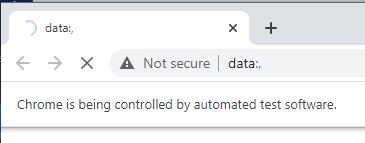
After we build and run the end-to-end test application, you will notice the Chrome browser will show that it is being controlled by the Selenium test driver:
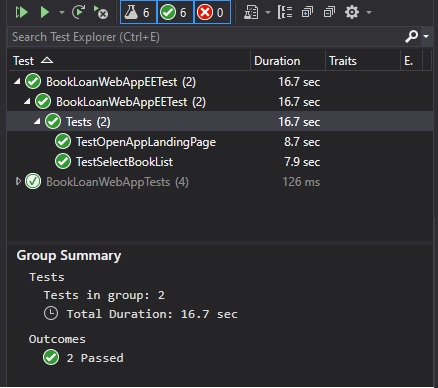
In the Visual Studio Test Explorer, you will see a running count of the number of tests passed and failed:

In the event of a failed test, the details will be shown in the Test Detail Summary:
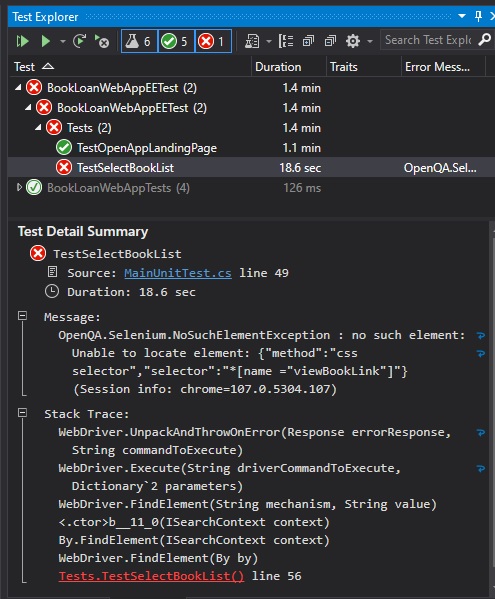
In the early phases when implementing the test script, you may get errors relating to failure to find elements in your web pages.
The error we got was something like this:
OpenQA.Selenium.NoSuchElementException : no such element: Unable to locate element: {"method":"css selector","selector":"*[name ="viewBookLink"]"}
  (Session info: chrome=107.0.5304.107)
The above is usually caused by either not including the ID to the element, like here:
<div>
    @Html.ActionLink("View Books", "List", "Book")
</div>
Or we have incorrectly applied an invalid Selenium API locator as shown:
var viewLink = driver.FindElement(By.Name("viewBookLink"));
viewLink.Click();
Once we have our page elements and API locators all working fine, the tests should be successful outcomes as shown:
The complete test script for the above automated user interface test is as shown:
using NUnit.Framework;
using OpenQA.Selenium;
using OpenQA.Selenium.Chrome;

namespace BookLoanWebAppEETest
{
    public class Tests
    {
        private TestContext testCtxtInst;
        private IWebDriver driver;
        private string applicationURL;

        [SetUp]
        public void Setup()
        {
            this.applicationURL = "http://localhost:8060";
            this.driver = new ChromeDriver();
        }

        [TearDown]
        public void TearDown()
        {
            this.driver.Quit();
        }

        public TestContext TestContext
        {
            get
            {
                return this.testCtxtInst;
            }
            set
            {
                this.testCtxtInst = value;
            }
        }

        [Test]
        public void TestOpenAppLandingPage()
        {
            driver.Navigate().GoToUrl(this.applicationURL + "/");

            // Test title is correct.
            var title = driver.Title;
            Assert.AreEqual("Landing Page!! - BookLoanWebApp", title);
        }

        [Test]
        public void TestSelectBookList()
        {
            driver.Navigate().GoToUrl(this.applicationURL + "/");

            driver.Manage().Timeouts().ImplicitWait =
System.TimeSpan.FromMilliseconds(500);

            // Click on view books link.
            var viewLink = driver.FindElement(By.Id("viewBookLink"));
            viewLink.Click();

            // Test book list heading is correct.
            var listHeading = driver.FindElement(By.TagName("h1"));
            Assert.AreEqual("Book List", listHeading.Text);

            // Test number of books is greater than zero.
            var booksList = driver.FindElements(By.TagName("tr"));
            Assert.IsTrue(booksList.Count > 0);
        }
    }
}
After completion of a set of end-to-end tests for our application and testing the end-to-end Selenium script in a local environment, we can then proceed to commit and push the end-to-end tests to a repository, then integrate the tests into a continuous deployment pipeline that will verify that our deployed application functions as expected, before the artifacts are approved to be deployed through a release pipeline into a higher environment, such as test, UAT or production. A variety of end-to-end tests and wide coverage throughout our application will provide significant man-hour savings during the acceptance and integration testing phases during a sprint.
That is all for today’s post.
I hope you have found today’s post useful and informative.
Andrew Halil is a blogger, author and software developer with expertise of many areas in the information technology industry including full-stack web and native cloud based development, test driven development and Devops.

