
Welcome to today’s post.
In today’s blog I will show how you can use Azure to investigate application settings for your web application that have been deployed into Azure under an App Service Plan.
To be able to complete this exercise you should already have a web application deployed into Azure as a Web Application under an App Service Plan.
I will show how you can use a useful part of the Azure Platform Service, which is the Kudu Service.
The Kudu Service is an important part of Azure App Services that deploys web applications from a source control repository into a folder in your App Service.
To be able to access the Kudu Console, you will need to have logged into an Azure subscription.
In the first section I will show how to access the Kudu console and locate application settings from within a browser.
Using the Kudu Console to Access App Settings
When you access your Azure web site, you would normally use a URL of the form:
https://[web application name].azurewebsites.net/To be able to access your application settings for your deployed Azure web site, you will need to use a URL of the form:
https://[web application name].scm.azurewebsites.net/Note that the above URL is accessible after you have logged into the Azure portal.
Once you browse to the above URL, you will see a utility screen like the one shown:
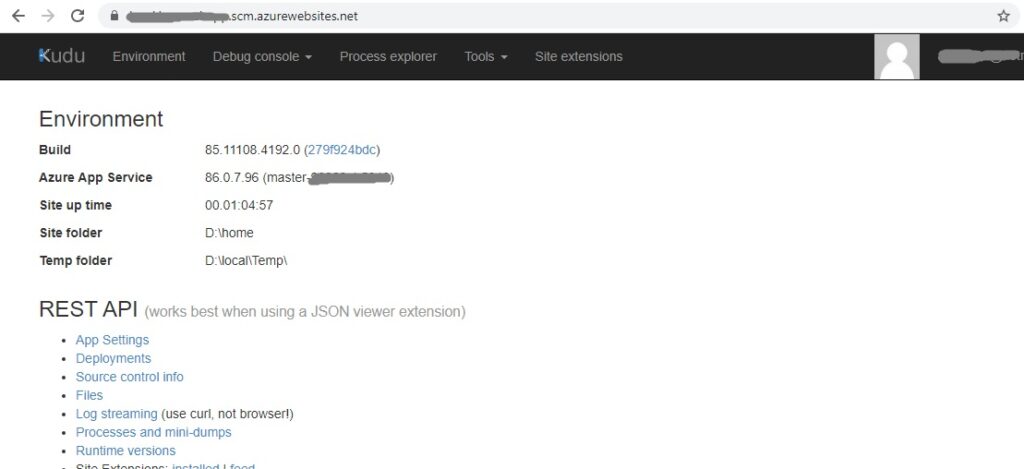
What we see is the Kudu utility console. It allows you to investigate deployment settings and deployed components of your Azure application.
From here you can access the debug console, which will allow you to view configuration settings:
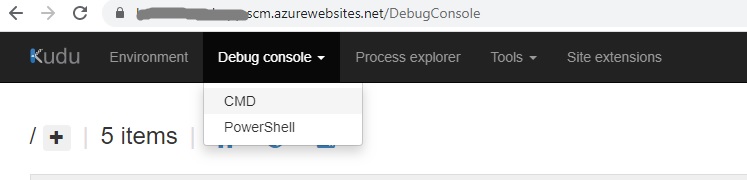
Once selected, you will be in the Kudo debug console as shown:
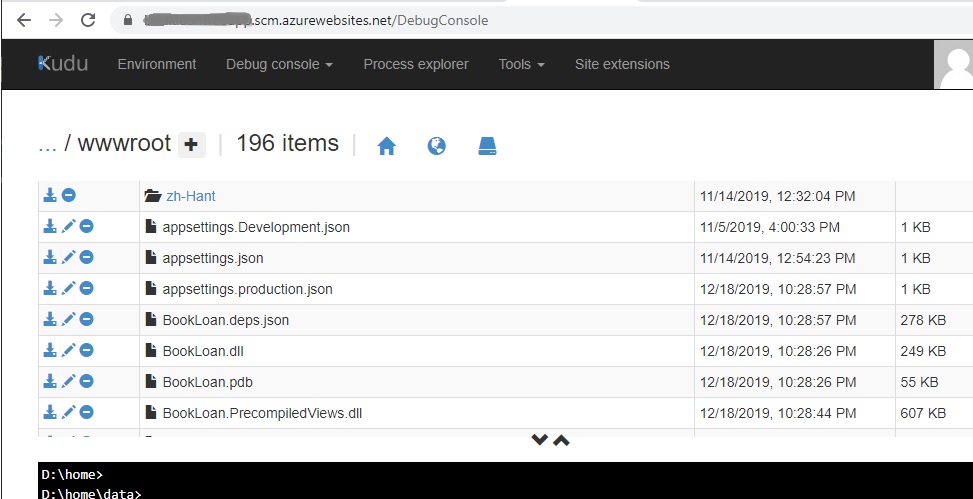
The application settings for your application are stored in the folder:
D:\home\site\wwwroot
Once you are in the above folder you can see a number of binaries and also the appsettings.* configuration files as shown:
In the next section I will show how you can review the application settings from the deployment folders.
Reviewing App Settings Configuration Files
Each file can be downloaded for viewing in the browser. For example, when you view the production settings configuration file, the URL will be:
https://[web application name].
scm.azurewebsites.net/api/vfs/
site/wwwroot/appsettings.production.json
The content of the above production configuration file in Azure will be almost identical to that deployed from your visual studio development environment:
{
  "ConnectionStrings": {
    "AppDbContext": "Server=tcp:????.database.windows.net,1433;Initial Catalog=BookLoanDb;Persist Security Info=False;User ID=????;Password=????;MultipleActiveResultSets=False;Encrypt=True;TrustServerCertificate=False;Connection Timeout=30;"
  },
  "Logging": {
    "IncludeScopes": false,
    "LogLevel": {
      "Default": "Warning"
    }
  },
  "AppSettings": {
    "AppName": "BookLoan",
    "AppVersion": "1.0.0",
    "AdminEmail": "???",
    "AdminPwd": "???"
  }
}
When you publish your .NET Core web application to Azure using the publish wizard (which I will show in a separate post), you specify the database connection string of your Azure SQL database (or other database) in the wizard and the setting is applied into the appsettings.production.json file in Azure.
If you are using a local SQL express database on your local development environment, then the development configuration settings will also be deployed into the appsettings.json file:
{
  "ConnectionStrings": {
    "AppDbContext": "Server=(localdb)\\mssqllocaldb;Database=aspnet-BookLoan-8939A8CF-89E2-42F3-9A64-E13624F164AB; Trusted_Connection=True;MultipleActiveResultSets=true"
  },
  "Logging": {
    "IncludeScopes": false,
    "LogLevel": {
      "Default": "Warning"
    }
  },
  "AppSettings": {
    "AppName": "BookLoan",
    "AppVersion": "1.0.0",
    "AdminEmail": "???",
    "AdminPwd": "???"
  }
}
Since local SQL Express database settings do not reference a deployed database server instance, they will need to reference an existing Azure SQL database for the web application to access data.
From here you can verify your application settings and which deployed settings you wish to override from within your Azure Application Service settings.
That is all for today’s post.
I hope this post has been informative.
In a future post I will discuss how to override your application settings in Azure.
Andrew Halil is a blogger, author and software developer with expertise of many areas in the information technology industry including full-stack web and native cloud based development, test driven development and Devops.

