
Welcome to today’s blog.
Today I will be showing how we can use the Microsoft Graph API to help us access Outlook Calendar Events.
In another post I showed how to configure an Angular application to authenticate with Office 365 resources using Azure MS Graph API.
As we did in that post, we will use the Microsoft Authentication Library and MS Graph API to access our user profile.
We can access some useful data from the outlook calendar, which includes important upcoming events that are once off or periodic. We could make use of the events data to alert us if there are important events occurring today or tomorrow. We could even obtain the event location and link that to geographical mapping services that help us with transport options.
The Outlook Calendar that is linked to our MS account that has access to a subscription within an MS Azure tenant (such as an Office 365 subscription), would require the web application itself to be a registered application within the MS Azure tenant. This would delegate access to MS Graph API from our web application.
The access to our Outlook Calendar is not automatic! We will still need to specify the application authorization scopes, then authorize the MS Graph API explorer to access our Outlook Calendar profile. I will show how the latter this is done much later in this post.
Defining Application Authorization Scopes
I will show how to authorize which scopes (or permissions) are required to access features of each Calendar profile. These permissions include reading the user profile and reading the calendar.
There are some common configurations that the access to different Office 365 resources share. The first is that we can use the same Azure application registration. Next, the ClientId, Authority and Redirect URL are unchanged.
The main difference is with scopes. The scopes define what level of authorization we will delegate the MS Graph API and the registered app to access user account resources. When accessing Outlook calendar events and the name of the account user, we will require the following scopes:
Calendars.Read
User.Read
Refer to the graph permissions reference for which delegated permissions to use for each Graph resource.
Below is the configuration required within app.module.ts:
…
import { AuthService } from './services/auth.service';
import { AppRoutingModule } from './app-routing.module';
import { MsalModule, MsalInterceptor } from '@azure/msal-angular';
	…
import { ProfileComponent } from './profile/profile.component';
import { CalendarComponent } from './calendar/calendar.component';

export const protectedResourceMap: [string, string[]][] = [
  ['https://graph.microsoft.com/v1.0/me/calendar',
    ['user.read, calendars.read']
  ];
…

@NgModule({
  declarations: [
    AppComponent,
	…
    ProfileComponent,
    CalendarComponent
  ],
  imports: [
	…
    MsalModule.forRoot({
      auth: {
        clientId: '556d1c99-1253-40ac-9acd-e20e55994c7a',
        authority: 'https://login.microsoftonline.com/consumers/',
        validateAuthority: true,
        redirectUri: 'http://localhost:4200/',
        postLogoutRedirectUri: 'http://localhost:4200/',
        navigateToLoginRequestUrl: true,
      },
      cache: {
        cacheLocation: 'localStorage',
        storeAuthStateInCookie: isIE, // set to true for IE 11
      },
    },
    {
      popUp: !isIE,
      consentScopes: [
        'user.read',
        ‘calendars.read’,
        'openid',
        'profile',
        'api://556d1c99-1253-40ac-9acd-e20e55994c7a/user.read',
        'api://556d1c99-1253-40ac-9acd-e20e55994c7a/calendars.read'
      ],
      unprotectedResources: ['https://www.microsoft.com/en-us/'],
      protectedResourceMap,
      extraQueryParameters: {}
    })
  ],
  providers: [
    AuthService,
    {
      provide: HTTP_INTERCEPTORS,
      useClass: MsalInterceptor,
      multi: true
    }
  ],
  bootstrap: [AppComponent]
})
export class AppModule { }
Determining the Graph API OData Query
Before I discuss the Calendar component and run the application, I will show how we determine the Graph API OData query we require in order to filter data from the calendar events.
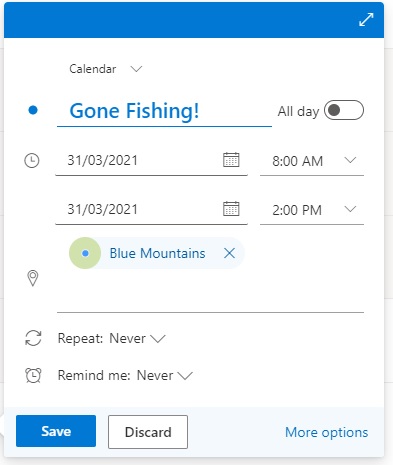
Firstly, we add at least one event into our Outlook Calendar.
Add a fishing event:
Then add a hiking event:
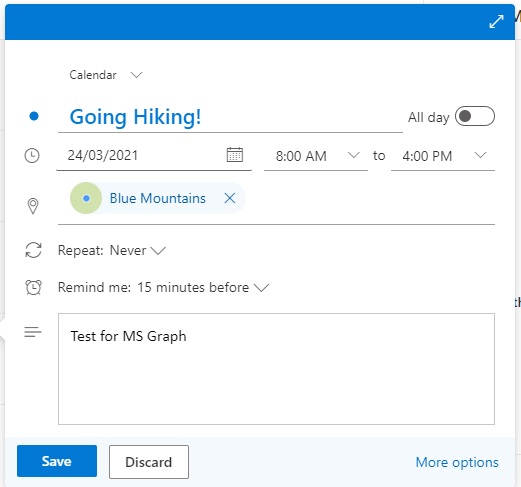
Save both events.
Next, open the MS Graph explorer at this location:
https://developer.microsoft.com/graph/graph-explorer
Login to your MS account.
Select the sample query from the left pane: Next 7 days Outlook Calendar.
The following OData query (dates will differ for your environment) will appear in the query URL field:
GET https://graph.microsoft.com/me/calendarView?startDateTime=2019-09-01T09:00:00.0000000&endDateTime=2019-09-01T17:00:00.0000000
When the run the query, the resulting JSON result is shown (truncated):
{
    "@odata.context": "https://graph.microsoft.com/v1.0/$metadata#users('xxxx%40xxxxx.xxx')/calendarView",
    "value": [
        {
…
            "originalStartTimeZone": "Greenwich Standard Time",
            "originalEndTimeZone": "Greenwich Standard Time",
…
            "reminderMinutesBeforeStart": 15,
	…
            "subject": "Going Hiking!",
            "bodyPreview": "Test for MS Graph",
	…
            "start": {
                "dateTime": "2021-03-24T08:00:00.0000000",
                "timeZone": "UTC"
            },
            "end": {
                "dateTime": "2021-03-24T16:00:00.0000000",
                "timeZone": "UTC"
            },
            "location": {
                "displayName": "Blue Mountains",
	 …
                "uniqueIdType": "bing",
                "address": {
                    "street": "",
                    "city": "Blue Mountains National Park",
                    "state": "New South Wales",
                    "countryOrRegion": "Australia",
                    "postalCode": ""
                },
                "coordinates": {
                    "latitude": -33.59,
                    "longitude": 150.37
                }
            }
            ],
            "attendees": [],
            "organizer": {
                "emailAddress": {
                    "name": "Andrew Halil",
                    "address": "XXXX@XXXX.com"
                }
            }
        }
    ]
}
In the next section, we will see how to extend a calendar component to display outlook calendar events using results from a graph endpoint.
Extending a Calendar Component to Display Outlook Calendar Events
It is now straightforward to extend the calendar component from the profile component we saw in the last post. The tricky part is constructing the startDateString and endDateString strings that build the OData query. These date strings are then appended to startdatetime and enddatetime query parameters. The OData query and Graph API request is within the getCalendar() method in the component below:
import { Component, OnInit } from '@angular/core';
import { MsalService } from '@azure/msal-angular';
import { HttpClient } from '@angular/common/http';

const GRAPH_ENDPOINT = 'https://graph.microsoft.com/v1.0/me/calendarview';

@Component({
  selector: 'app-calendar',
  templateUrl: './calendar.component.html',
  styleUrls: ['./calendar.component.scss']
})
export class CalendarComponent implements OnInit {

  calendar;

  constructor(private authService: MsalService, private http: HttpClient) {
    console.log(authService.getAllAccounts.length);
  }

  ngOnInit() {
    this.getCalendar();
  }

  getCalendar() {
    // set start and end dates to past 14 days in graph API calendar endpoint query.
    let startDate = new Date();

    const startMonthNum = startDate.getMonth() + 1;

    let startDateString = startDate.getFullYear().toString() + '-' +
          startMonthNum.toString().padStart(2,'0') + '-' +
          startDate.getDate().toString().padStart(2,'0');

    let endDate = new Date();
    endDate.setDate(endDate.getDate() + 14);
    const endMonthNum = endDate.getMonth() + 1;
    let endDateString = endDate.getFullYear().toString() + '-' +
          endMonthNum.toString().padStart(2,'0') + '-' +
          endDate.getDate().toString().padStart(2,'0');

    const calendarEndPointQuery = "?startdatetime=" + startDateString + "&enddatetime=" + endDateString;

    this.http.get(GRAPH_ENDPOINT + calendarEndPointQuery)
      .toPromise().then(calendar => {
        this.events = calendar['value'].map(x =>
          ({ subject: x.subject,
             location: x.location.displayName,
             start: x.start.dateTime,
             end: x.end.dateTime,
             eventOrganizer: x.organizer.emailAddress.name }));
        console.log(calendar);
      });
  }
}
After running the application and signing in, you be presented with the authorization scope confirmation for MS Graph Explorer to access the user account profile and calendars:
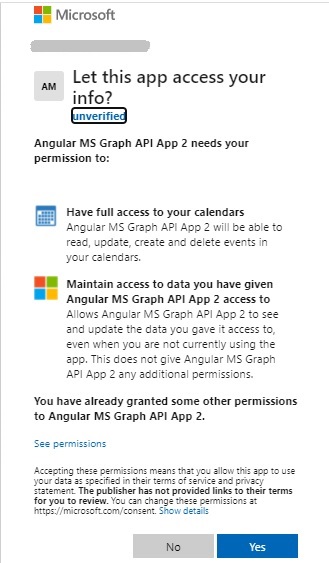
The MS Graph explorer then obtains the user profile from the MS Graph endpoint
https://graph.microsoft.com/v1.0/me/calendarview
using the constructed OData query. The user’s calendar events are then displayed as shown:

We’ve done it and managed to extract data from our Outlook Calendar events, and it looks really cool!
That’s all for today’s post.
I hope you found this post useful and informative.
Andrew Halil is a blogger, author and software developer with expertise of many areas in the information technology industry including full-stack web and native cloud based development, test driven development and Devops.

