

Welcome to today’s post.
In today’s post I will be showing you how to recognize text within images using Azure AI Vision Services.
In previous posts, I showed how to use Azure Vision Services to detect objects within images, then used the Custom Vision Studio to create and train custom vision models to detect objects within images, create and trained custom vision models to classify objects within images.
I then showed how to use the Custom Vision SDK in an application to implement Object Detection Vision Models, and then implement Object Classification Vision Models.
Before I progress to discussion of how we implement text recognition within an application, I will provide a brief overview of its usage in everyday applications.
Use of Text Detection in Real-Word Applications
Given that we are analyzing images to detect text, then recognize the words within the text, you would think that we should be using the Azure Language Service for this capability. However, the detection and recognition of text is itself part of the capabilities supported by Vision models, and not part of Language models. Language models are devised to tell us the semantics of the text.
Systems that analyze images, detect objects, then recognize the object as a block of text are also known as optical character recognition (OCR) systems.
OCR systems are used in many use cases where the extraction of text from images is used to provide inputs to another process. An example of this use case would be manually filled application forms that are submitted to an application processor that uses OCR capability to determine the form values, validates them with some business rules, then sends that parameter values across to another process that evaluates the application.
With manually filled applications that are scanned or photographed from the computer or a printer, the resulting text within the image can either contain human, hand-written text, or computer-generated text font that is typed in. In both cases, the Azure AI Vision Service model can detect both styles of text font.
As I mentioned earlier, the purpose of an optical character recognition system is not to understand the text what has been recognized, but to extract the text and pass it as a result to another process that can conduct further analysis. The subsequent processes can then use an AI language model to understand the text. This could be used when the text is a comment at the end of the submitted form image.
The next step in understanding how OCR is used in Azure AI Vision Services is to try a sample text detection using the Azure Vision Studio. I will show how this is done in the next section.
Using Azure AI Vision Studio to Evaluate Text Recognition within Images
In this section, I will be showing how we can evaluate text recognition within a sample image. To do this, we can use the Azure AI Vision Studio. The vision studio allows us to experiment by testing out the capabilities of different AI vision models on sample image inputs and observe the accuracy of the results.
To recognize text within images, we select the feature Extract text from images from within the Optical character recognition category:
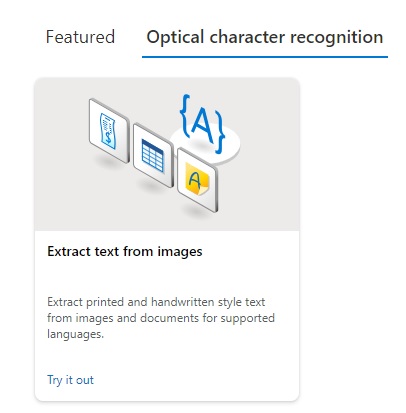
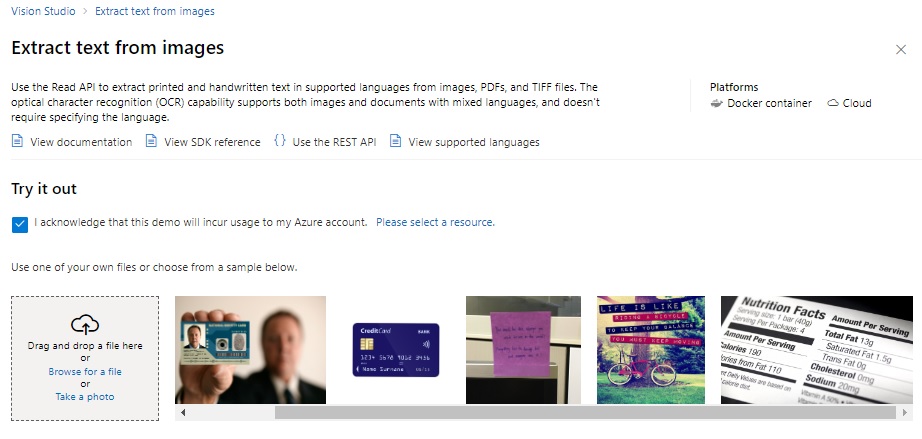
When selected, the try out screen is displayed with links to documentation and an input box allowing you to drop or upload a sample file to be evaluated:
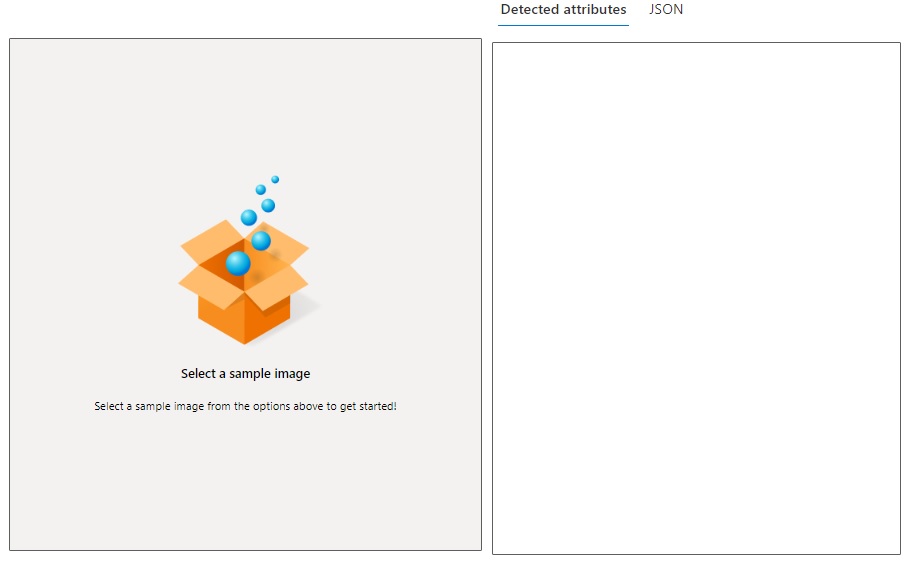
Further down the screen we can see the input and output display panes which show the input image and output, which will show the detected text in the detected attributes panel and results in JSON format:
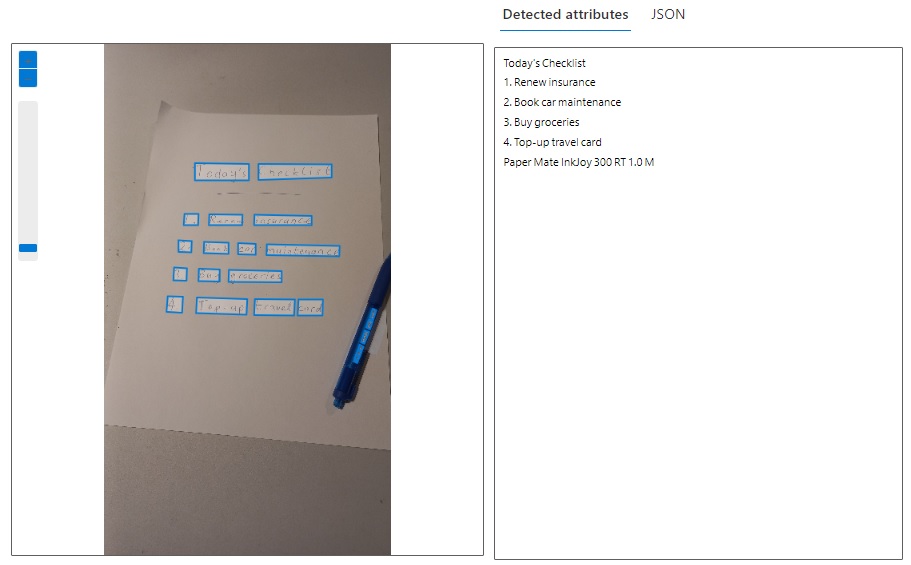
The sample image I am using for the initial evaluation of the OCR AI vision model is shown:
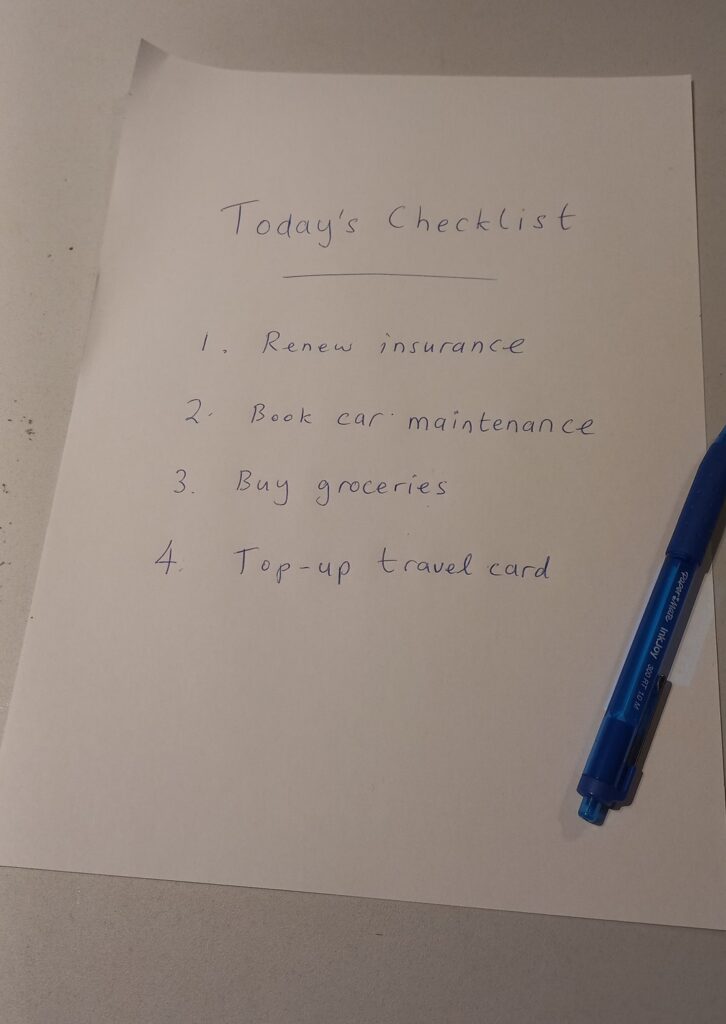
After uploading the image to the test form, after a few seconds we will see the results with each detected word of text outlined in blue in the image in the left pane, and the detected attributes (text) in the right pane:
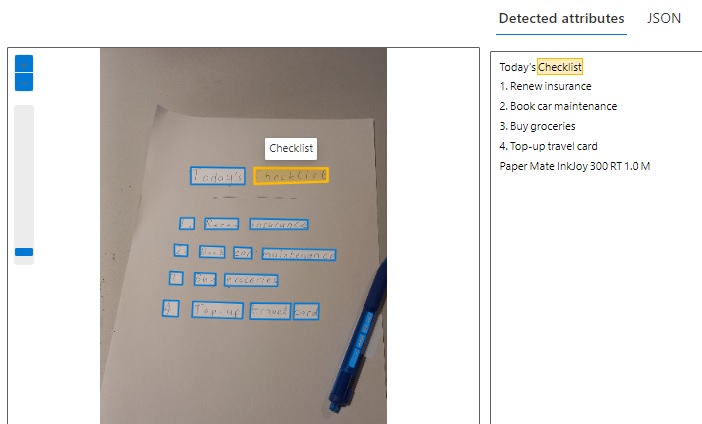
When we select any of the outlined words in the image, we will see the corresponding text highlighted in light orange in both image and detected attributes panes, and the tag of the text show above the highlighted text in the image:
Clicking on the JSON output tab, we can see what the JSON results for the detected text looks like:
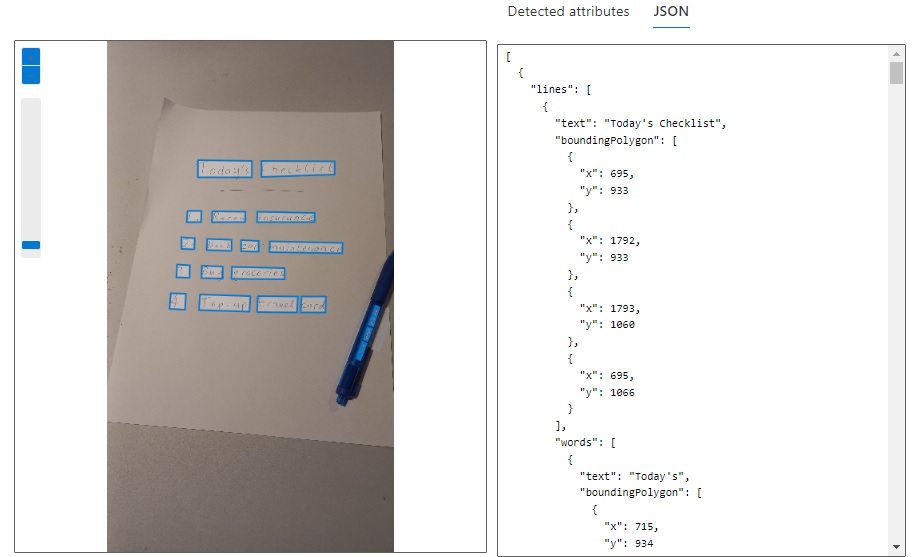
The structure of the detected text JSON structure is as follows:
[
  {
    "lines": [
      {
        "text": "[text line]",
        "boundingPolygon": [
          {
            "x": [left],
            "y": [top]
          },
          {
            "x": [right],
            "y": [top]
          },
          {
            "x": [right],
            "y": [bottom]
          },
          {
            "x": [left],
            "y": [bottom]
          }
        ],
        "words": [
          {
            "text": "[text word 1]",
            "boundingPolygon": [
                {
                  "x": [left],
                  "y": [top]
                },
                {
                  "x": [right],
                  "y": [top]
                },
                {
                  "x": [right],
                  "y": [bottom]
                },
                {
                  "x": [left],
                  "y": [bottom]
                }
            ],
            "confidence": [word 1 probability]
          },
          …
          {
            "text": "[text word N]",
            …
          }
        ],
        "confidence": [word N probability]
      }
    ]
  },
  {
    …
  }
]
In the next section, I will show how to execute text recognition on images within an application using the Azure Vision SDK.
Text Recognition using the Azure Vision SDK
In this section I will show how to execute text recognition (optical character recognition) within an application using the Azure Vision SDK.
Before we startup Visual Studio 2022, I create the environment variables for the vision key and endpoint using the command line from within a local development workstation.
Below are the commands that we can apply to setup the above configuration values:
setx VISION_KEY [vision-key]
setx VISION_ENDPOINT [vision-endpoint]
In the previous posts, where I used a vision resource in region eastus for the object detection and classification capabilities within the AI vision models, with text recognition capabilities, we require a vision resource created in region westus. When setting the key and endpoint, we can either overwrite the existing key and endpoint environment variables (if we don’t need to use the existing vision resource) or create a new set of environment variables to hold the extra vision resource that supports text (optical character) recognition.
After applying the above configuration changes, they are accessible within the Visual Studio environment.
I will now show how to setup the application to use the Custom Vision SDK libraries.
Next, we open Visual Studio, then create a new .NET Core console application, then add the following NuGet package library:
Microsoft.Azure.CognitiveServices.Vision.ComputerVision
In the Program.cs source file we add the following namespaces lines to the top:
using Microsoft.Azure.CognitiveServices.Vision.ComputerVision;
using Microsoft.Azure.CognitiveServices.Vision.ComputerVision.Models;
In the first section of the program, we initialise the key and endpoint variables, then using these resource variables, create an instance of the ComputerVisionClient class.
namespace ImageTextRecognitionDemos
{
    internal class Program
    {
        static void Main(string[] args)
        {
            string visionKey = Environment.GetEnvironmentVariable("VISION_KEY");
            string visionEndpoint = Environment.GetEnvironmentVariable("VISION_ENDPOINT");

            var visionConfig = new ComputerVisionClient(
                new ApiKeyServiceClientCredentials(visionKey))
                {
                    Endpoint = visionEndpoint
                };
  ..
What I create next is a loop to request the local input image file to upload into the image analysis routine ReadAndAnalyzeLocalFile(), which I will show the details of a little later.
…
bool finished = false;

while (!finished)
{
    Console.WriteLine("Image Text Recognition Demos");
    Console.WriteLine("----------------------------");
    Console.WriteLine("For Text Recognition within an Image File Press T.");
    Console.WriteLine("Press Escape to finish.");
    ConsoleKeyInfo consoleKeyInfo = Console.ReadKey(true);

    if (consoleKeyInfo.Key == ConsoleKey.Escape)
    {
        finished = true;
        Console.WriteLine("Ending application..");
        break;
    }
    else
    if (consoleKeyInfo.Key == ConsoleKey.T)
    {
        Console.WriteLine("Enter the file path to the image file:");
        string? filePath = String.Empty;
        filePath = Console.ReadLine();
        ReadAndAnalyzeLocalFile(visionConfig, filePath).Wait();
        Console.WriteLine();
    }
}
…
In the method below, which I will explain more about later, we pass in the ComputerVisionClient instance and the full folder and file path to the image file, then have the results of the analysis for each line and words returned in the console output:
public static async Task ReadAndAnalyzeLocalFile(ComputerVisionClient client,
  string localFile)
{
        Console.WriteLine("----------------------------------------------------------");
        Console.WriteLine("READ FILE FROM LOCAL");
        Console.WriteLine();

        // Read text from URL
        var textHeaders = await client.ReadInStreamAsync(File.OpenRead(localFile));

        // After the request, get the operation location (operation ID)
        string operationLocation = textHeaders.OperationLocation;
        Thread.Sleep(2000);

        // Retrieve the URI where the recognized text will be stored from the Operation-Location header.
        // We only need the ID and not the full URL
        const int numberOfCharsInOperationId = 36;
        string operationId = operationLocation.Substring(operationLocation.Length - numberOfCharsInOperationId);

        // Extract the text
        ReadOperationResult results;
        Console.WriteLine($"Reading text from local file {Path.GetFileName(localFile)}...");
        Console.WriteLine();
        do
        {
            results = await client.GetReadResultAsync(Guid.Parse(operationId));
        }
        while ((results.Status == OperationStatusCodes.Running ||
            results.Status == OperationStatusCodes.NotStarted));

        // Display the found text.
        Console.WriteLine();
        var textLocalFileResults = results.AnalyzeResult.ReadResults;
        foreach (ReadResult page in textLocalFileResults)
        {
            foreach (Line line in page.Lines)
            {
                Console.WriteLine(line.Text);

                // Display the words in each line.
                foreach (Word word in line.Words)
                {
                    // Display the confidence and bounding coordinates.
                    string boundingCoords = String.Empty;
                    foreach (double? rectItem in word.BoundingBox)
                    {
                        boundingCoords += $"{rectItem!.Value},";
                    }
                    boundingCoords = boundingCoords.TrimEnd(',');
                    Console.WriteLine($"\t Word: {word.Text}, Confidence: {word.Confidence:P1}, Bounding Box: [{boundingCoords}]");
                }
            }
        }
        Console.WriteLine();
    }
}
I will now explain how the input image is analysed for text.
When we submit an image for analysis, we can either send an image that is specified within a publicly accessible URL, or a local file.
To analyse a file from an accessible URL, we use the following Azure Vision SDK method:
Task<ReadHeader> ReadAsync(string url);
To analyse a file from a local file stream, we use the following Azure Vision SDK method:
Task<ReadInStreamHeaders> ReadInStreamAsync(stream file);
In the above method, we ran the file stream equivalent as shown:
var textHeaders = await client.ReadInStreamAsync(File.OpenRead(localFile));
From the above returned header, we retrieve the OperationLocation property:
string operationLocation = textHeaders.OperationLocation;
The operation location is returned as a URL of the form:
https://[vision-service-resource-name].cognitiveservices.azure.com/vision/v3.2/read/ analyzeResults/[operation-id]
Where:
[vision-service-resource-name] is the name of the Azure Vision resource.[operation-id]
is a 36-digit GUID.
After we extract the operation identifier from the operation location URL, we then pass in the operation identifier into the following SDK method to retrieve results in the ReadOperationResult object:
Task<ReadOperationResult> GetReadResultAsync(Guid operationId);
We then read the text results asynchronously as shown:
results = await client.GetReadResultAsync(Guid.Parse(operationId));
From the above results, we extract the text as a list of type IList<ReadResult> from the AnalyzeResult property and the ReadResults child-property:
var textLocalFileResults = results.AnalyzeResult.ReadResults;
We then iterated through the Line and Word collections to retrieve the important details of each line, word and confidence levels.
I will show how the outputs look like with two sample image files.
Testing and Outputs of Text Recognition with Sample Image Files
In this section, I will run two tests of the above code with two sample image files, then examine the console outputs.
As I mentioned earlier, we can apply text recognition on images that contain both human handwritten and type-written text.
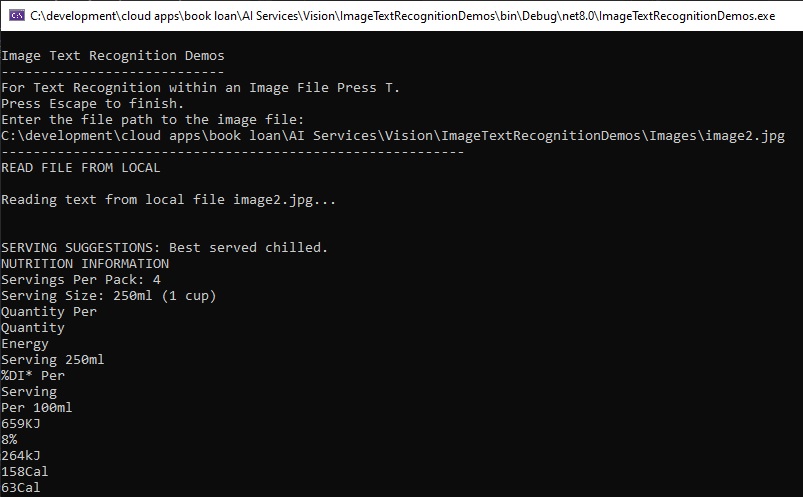
In the image below, we have a container of milk with the nutrition information displayed in dark text font.
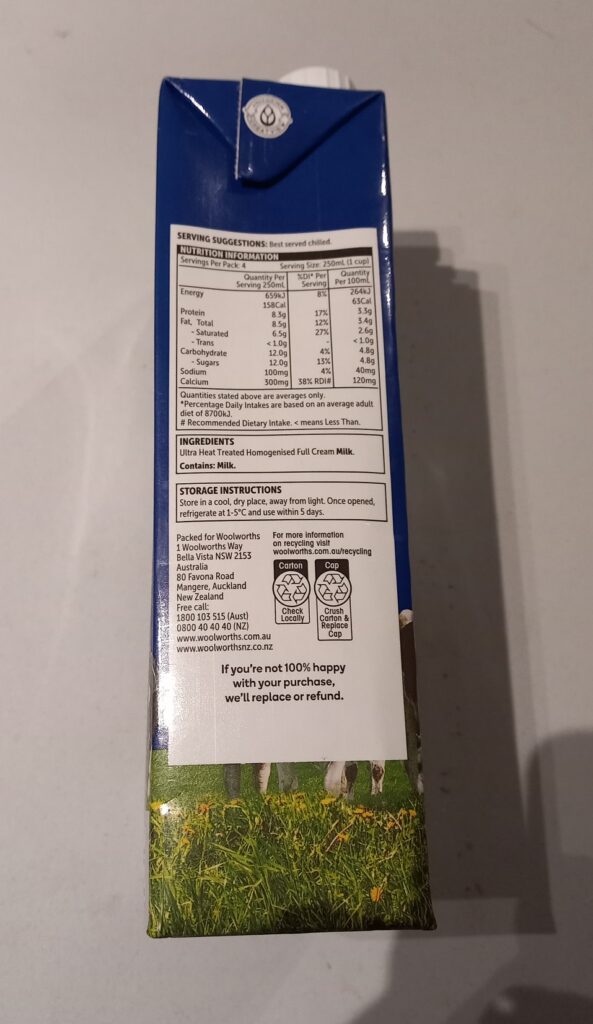
The text recognition outputs for the above image are shown displayed in an excerpt of the session below:
For the image of the handwritten reminder note that I tested earlier within the Azure Vision Studio, we have the following outputs of the recognized lines of text:
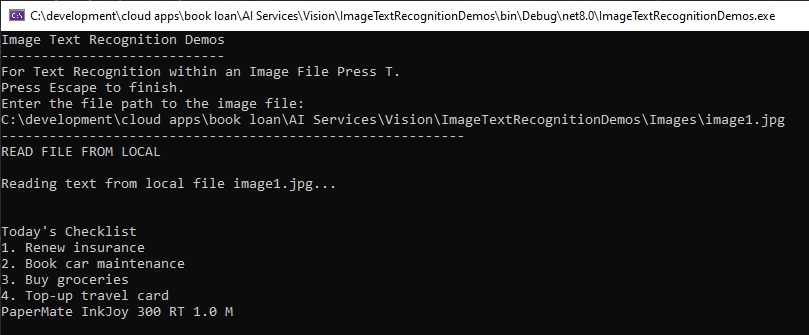
In the above outputs, I ran an earlier version of the code that didn’t include the loop through the collection of Word objects within each Line object that contains the confidence of each word and its bounding coordinates. Below is the loop through the Lines property collection within the ReadResult object that outputs only the Text property:
var textLocalFileResults = results.AnalyzeResult.ReadResults;

foreach (ReadResult page in textLocalFileResults)
{
    foreach (Line line in page.Lines)
    {
        Console.WriteLine(line.Text);
    }
}
When running our application with the looping through the Word collection within each Lines object, and display the text, confidence, and bounding box for each word, we see a more detailed display of the recognized text:
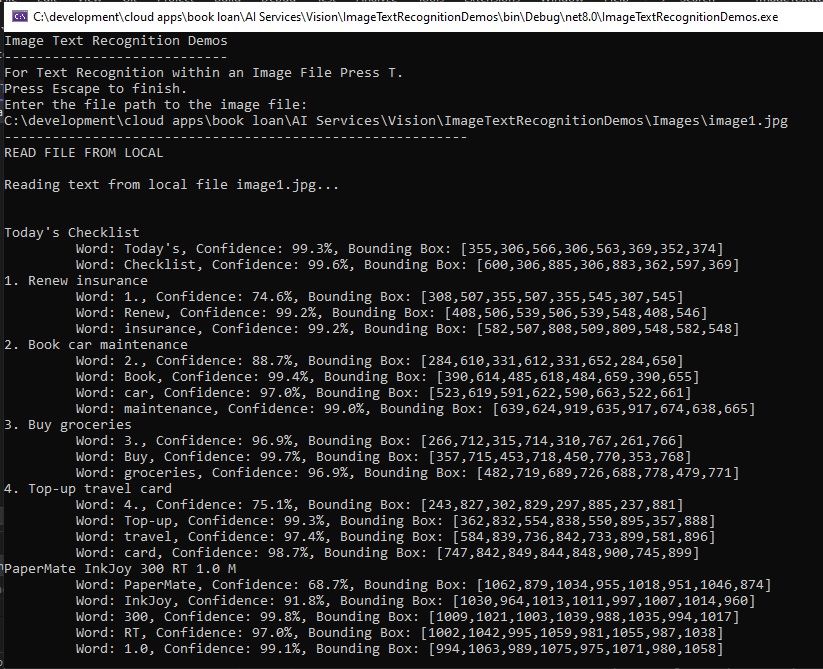
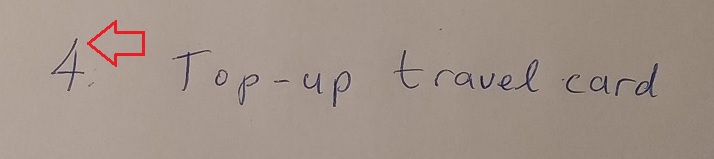
What you will notice is that the confidence levels of 74% and 75% for the two numbers 1 and 4 are lower than other words recognized in the image. The handwritten number 1 has no head when compared to the equivalent typed number:

And the handwritten number 4 does not have the vertical line and sloping lines meeting when compared to the equivalent typed number:
In addition, the handwritten number 2 was given confidence a level of 88% with the base line tapering off unevenly when compared to the equivalent typed number:

As we can see, the handwritten text is compared with vision models that have been trained with text fonts that clearly defined consistent lines that closely match typed text.
We have seen from the above how to recognize text within images using the Azure Vision SDK.
That is all for today’s post.
I hope that you have found this post useful and informative.

Andrew Halil is a blogger, author and software developer with expertise of many areas in the information technology industry including full-stack web and native cloud based development, test driven development and Devops.