

Welcome to today’s post.
In today’s post I will be showing you how to push data into an Azure AI Search index from an external source.
In a previous post I showed how to implement indexed search on documents with indexers and skillsets within an Azure AI Search Service. In that post, I showed how to import data into the search service.
In the first section, I will explain the differences between pushing the data into the Azure AI Search Service and importing data in the same service.
Pushing vs Importing Data into an Azure AI Search Index
I will first explain the key difference between pushing data into an Azure AI Search index and importing data into an Azure AI Search. Both might sound conceptually similar, but they differ in the way in which and the type of data that is imported into the search service.
Data Importation
The data importation process uses Azure AI cognitive skills to extract unstructured data from sentences, documents and images language into separate JSON files containing key phrases, image captions and tags, and entity categories, such as locations.
The purpose behind using indexers and skillsets in an Azure AI Search was to help to extract embedded content into a structured format that is contained within an unstructured document such as a PDF document. Part of the indexer process involved using the document cracking Cognitive skill, which breaks apart the document into constituent text, images and metadata.
This indexer process then added the extracted data to the search index, which was then used for searches on the index fields.
Data Pushes
Adding (or pushing data) into a search index does not require an indexer and skillset to be created. Since we are pushing data into the index, the data is ready to be queried through a search. The data we are pushing into the index is in the form of JSON files.
Pushing data into the search index must be done with an external application or tool. Before pushing the data into the search index, we create the index within the Azure AI Search service, then ensure the data is available to be accessed through a variety of data sources (file storage, HTTP, HTTPS, storage container and so on).
Input Data Source
Each JSON input file consists of one or more documents, which are JSON objects that consist of one or more fields.
An example of a typical JSON object within an import data file is shown below:
{
    "id": "1",
    "accommodationName": "Euroka campground",
    "accommodationType": "Campground",
    "location": "Blue Mountains National Park",
    "cost": "Free",
    "facilities": [
        { "name": "Picnic tables" },
        { "name": "Barbecue facilities" },
        { "name": "Toilets" }
    ]
},
Adding an Index to the Azure AI Search Service
As I mentioned in the first section, before we can push data in the search index, we are required to create an index. This is what I will show in the section.
In the Azure AI Search Service, in the resource overview, select the Indexes link from the menu or properties. You will then see any indexes created within the search service.
If you have created the search service using the Free tier, then there is a quota of three indexes. If this is the case, you may need to remove one index before creating another if you are already at the limit.
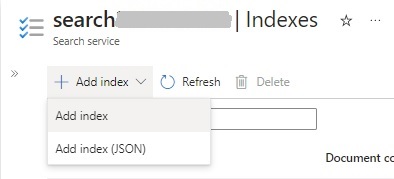
In the action menu, you will see the Add index menu, where you can add an index using the UI or with a JSON definition:
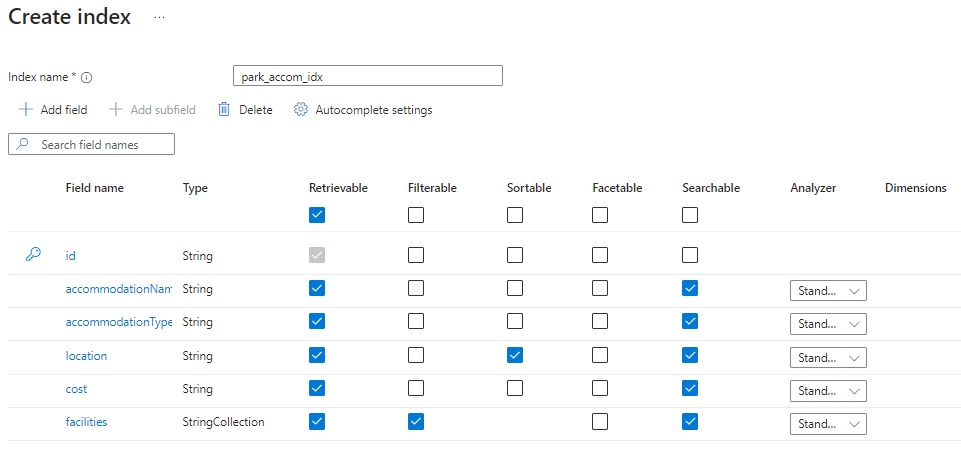
In the index creation interface, we add each index field with the search properties (Retrievable, Filterable, Sortable, Facetable and Searchable). A completed index definition is displayed below:
In the next section, I will show how we can use the Azure Data Factory, which is an external tool to import data directly into the index within the Azure AI Search services.
Creation of an Index Importation Pipeline with the Azure Data Factory
One useful tool that can be used to import data into a search service index is the Azure Data Factory.
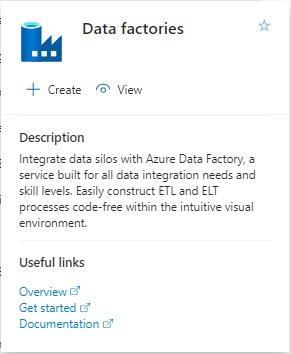
Creation of an instance of the Azure Data Factory can be achieved within the Azure Portal after searching for the service “data factory”.
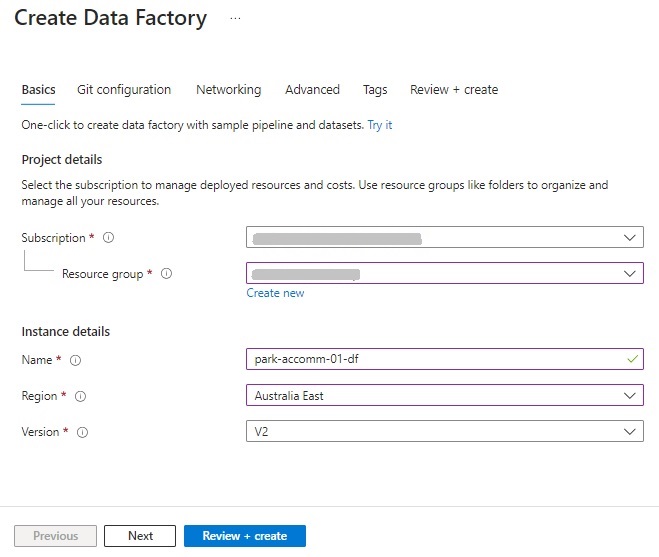
The parameters required to create an Azure Data Factory service instance are a subscription, resource group, instance name, region and version.
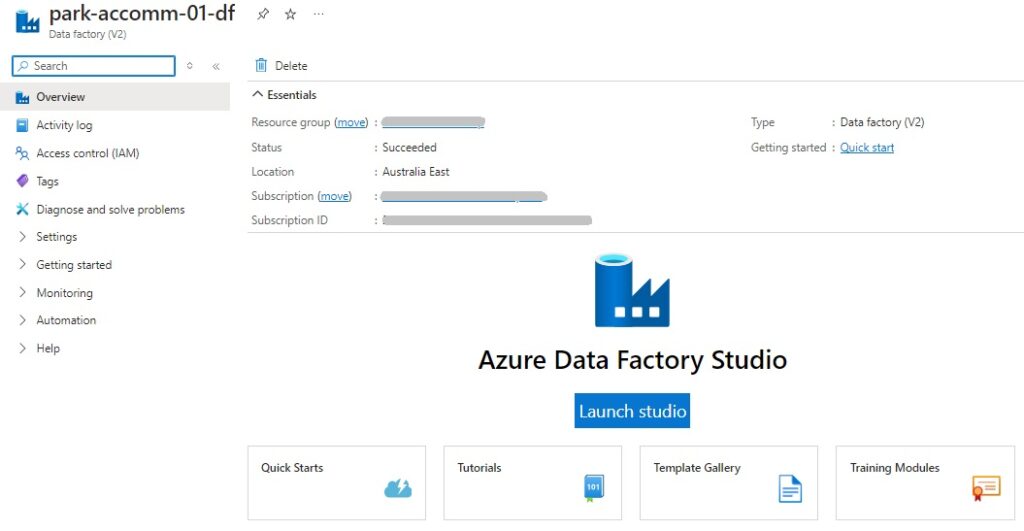
Following creation, you will be taken to the resource overview, from where you will have access to the Azure Data Factory Studio:
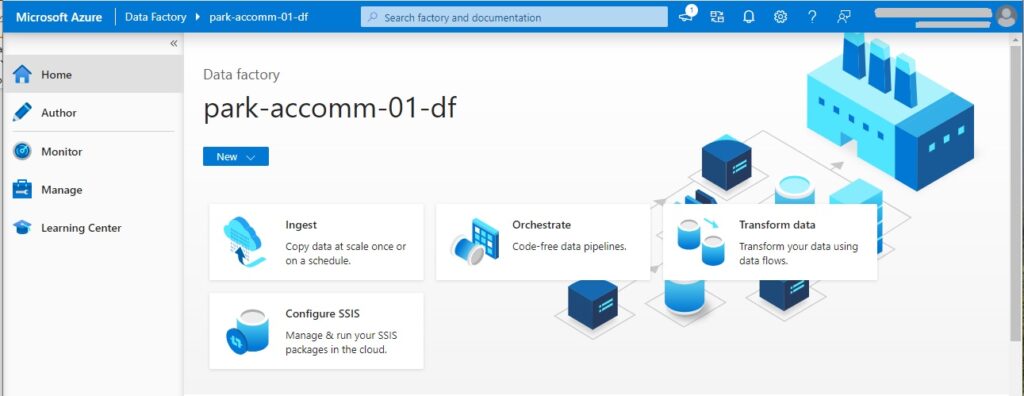
In the Data Factory Studio, you will see some options to get started. These options include:
Ingest
Orchestrate
Transform data
Configure SSIS
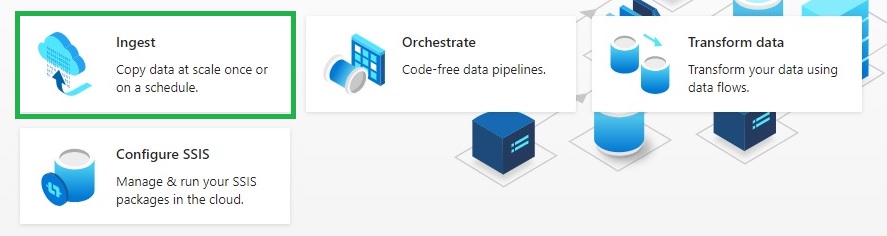
Most of the source fields from our source data can be mapped directly to the destination index without any additional transformations of coding, so we can select the Ingest option as shown:
We are then taken to the screen for the Copy Data tool. From here, we have two task types:
Built-in copy task
Metadata driven copy task
Select the first option as shown:
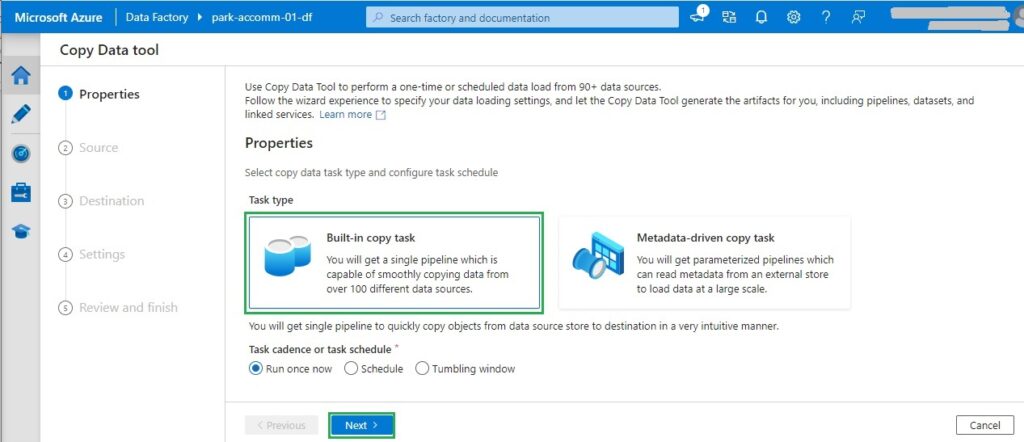
The first step of the Wizard within the Copy Data tool is the Properties screen.
In the next section, I will show how to define the data source for the data ingestion pipeline.
Defining the Data Source
To set a data source as an HTTP URL, select the Source type to HTTP as shown:
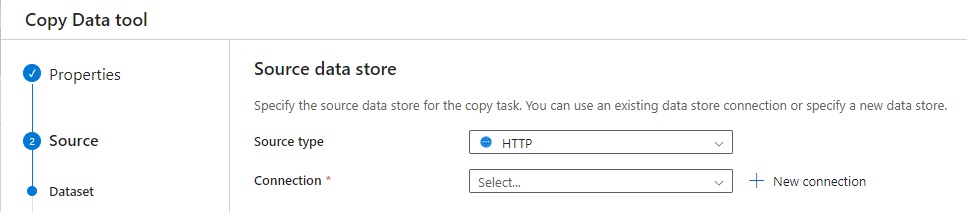
We then create a new connection to the data source, which has the following default parameter fields:
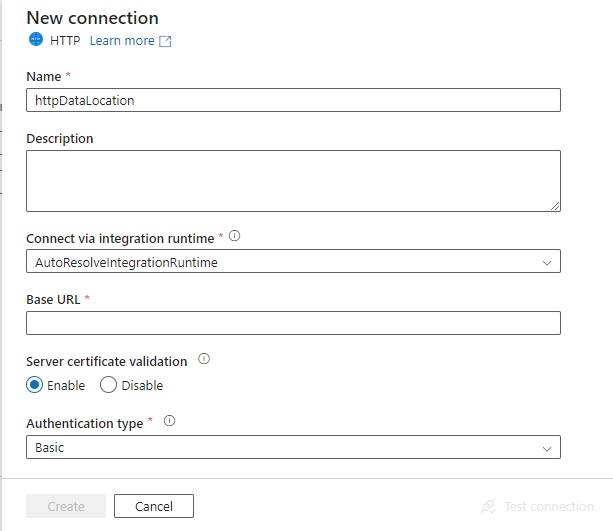
The rename the data source, specify a URL for the JSON file, runtime connection type, and the authentication for the access:
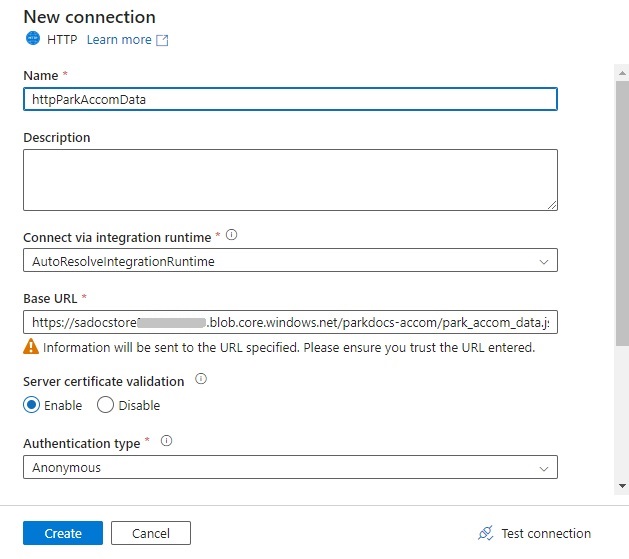
I have stored the JSON input file into a blob file within an Azure storage container. The file is of the form:
https://[storage-account0name].blob.core.windows.net/[container-name]/[file-name].json
After the new connection is created, select it in the Connection drop-down and the remaining parameter fields for the source Dataset are shown below:
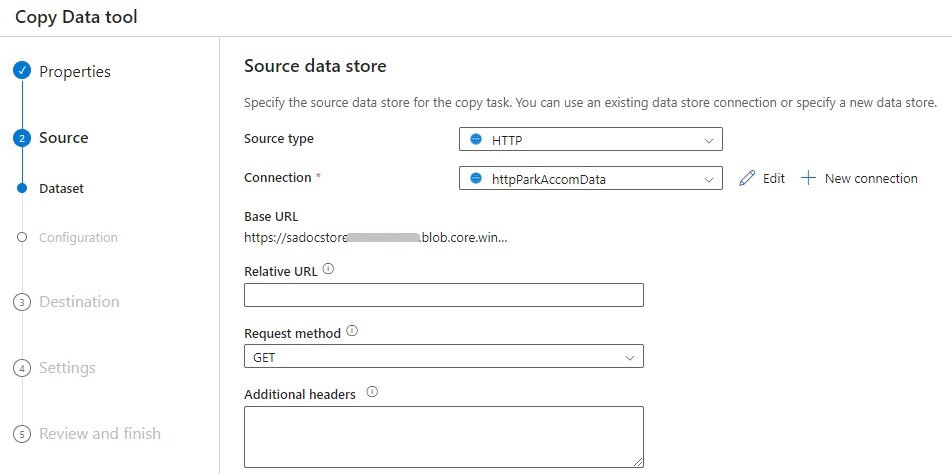
We can skip the relative URL if the base URL is the fully qualified path of our source file.
The request method for file retrieval is HTTP GET. In the next screen, the Configuration settings for the file format is shown below:
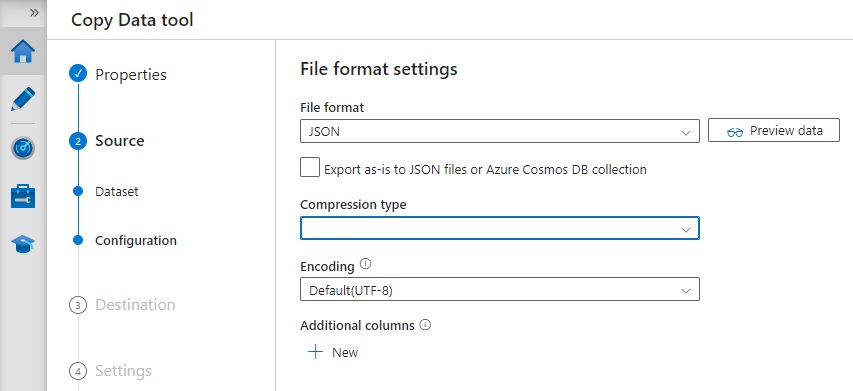
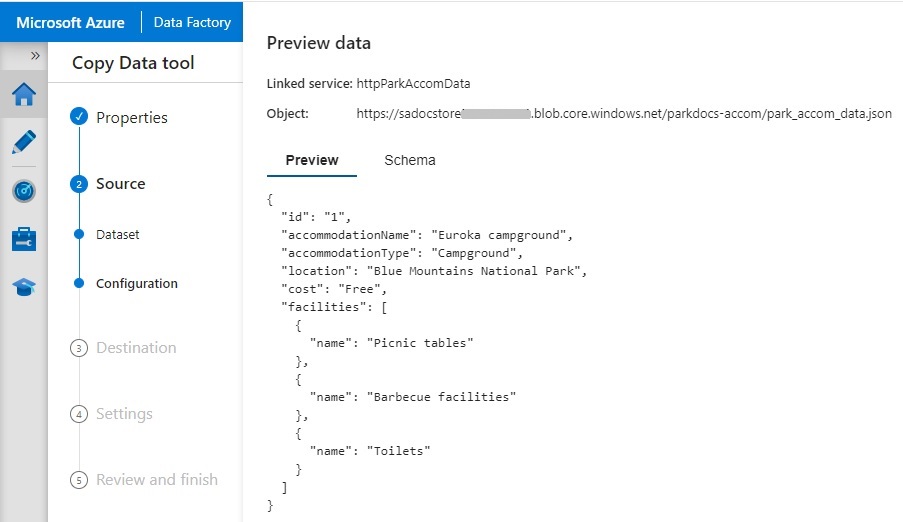
We can keep the settings as shown, then preview the data. If all is well, and the structure and formatting of the JSON source data is valid, we will see the first data in the preview as shown:
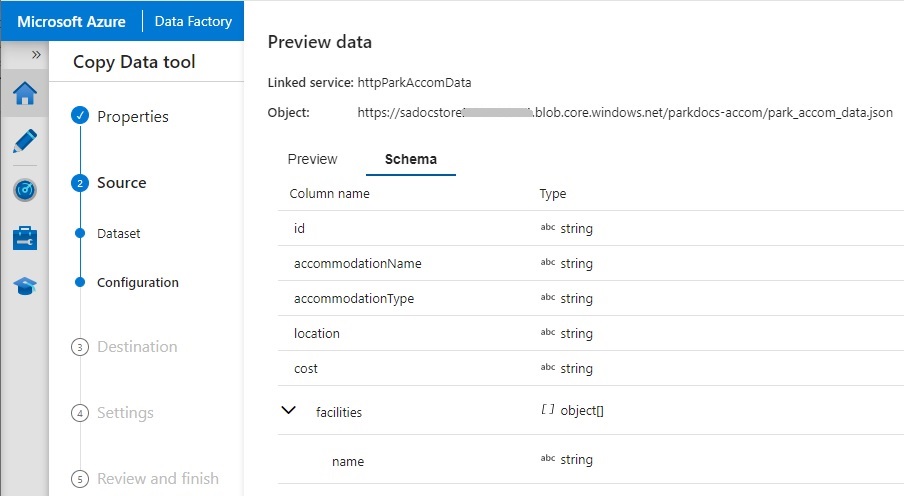
We can also preview the schema as shown:
If your JSON input file has any structural issues and any of the JSON objects is not correctly defined, then you will see the following error display when you attempt to preview the parsed data source file:
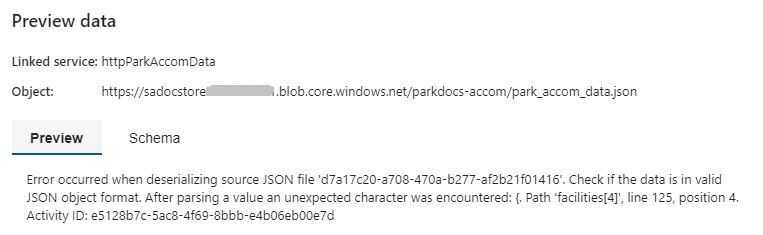
By reviewing the JSON data within the affected input file (in this case, on line 125), you will see that in this case, there is a missing comma in between JSON objects within one of the arrays:
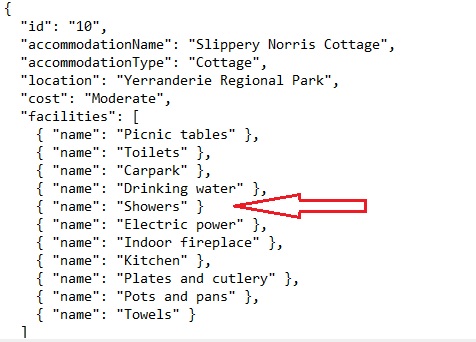
If you have an invalid input file, like the one above, then it will have to be re-imported into your location (in this case, re-uploaded the file into the storage container), then the ingestion pipeline above will have to be cancelled and re-created with the updated file re-specified in the data source input.
In the next section, I will show how to define the data destination for the data ingestion pipeline.
Defining the Data Destination
The data destination is where our source data will be exported. In this case, it will be the index within our Azure AI Search service. In the first screen of the Destination data store, we select Azure AI Search as the destination type:
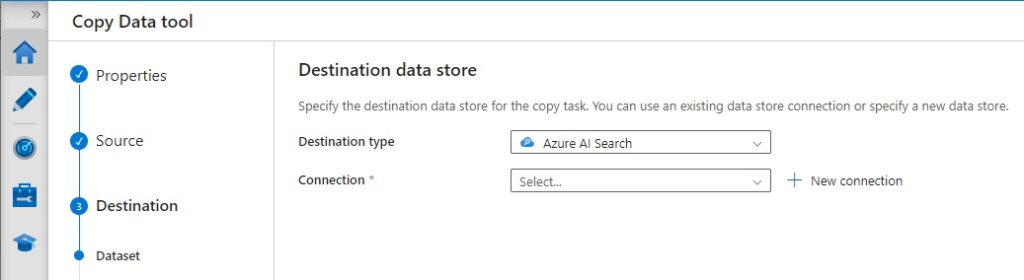
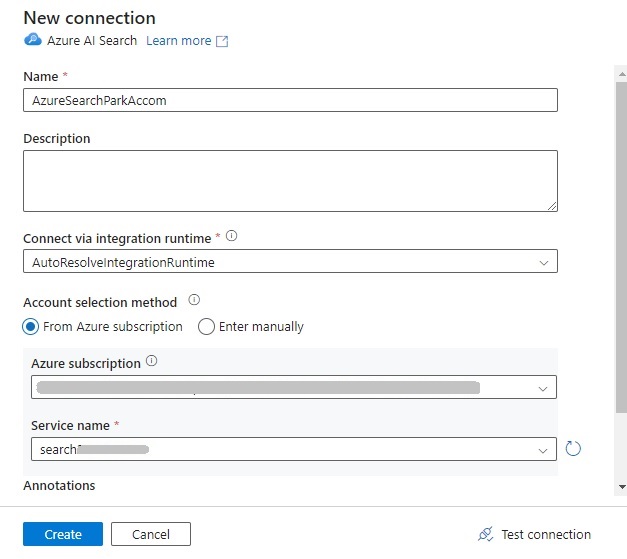
Then create a new connection to define the destination data. In the New connection screen, we specify the name, runtime connection type, subscription account type, and Azure AI search service instance name:
Then set the connection drop-down value to the new connection that we have created:
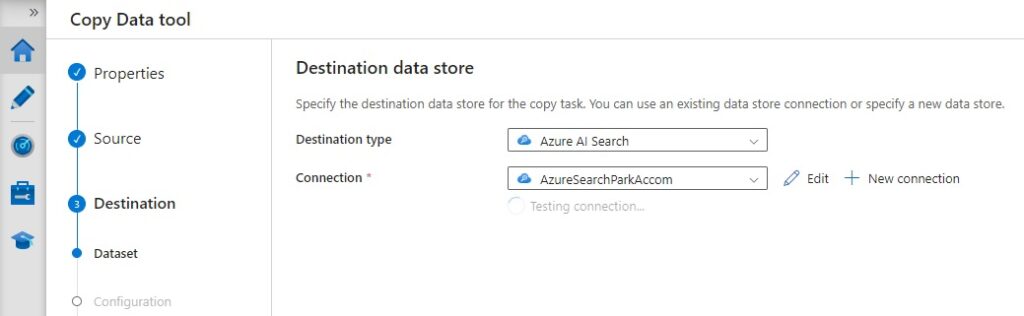
After the new connection has been established, you will see another drop-down parameter where you can select the search index that was created within the Azure AI Search service.
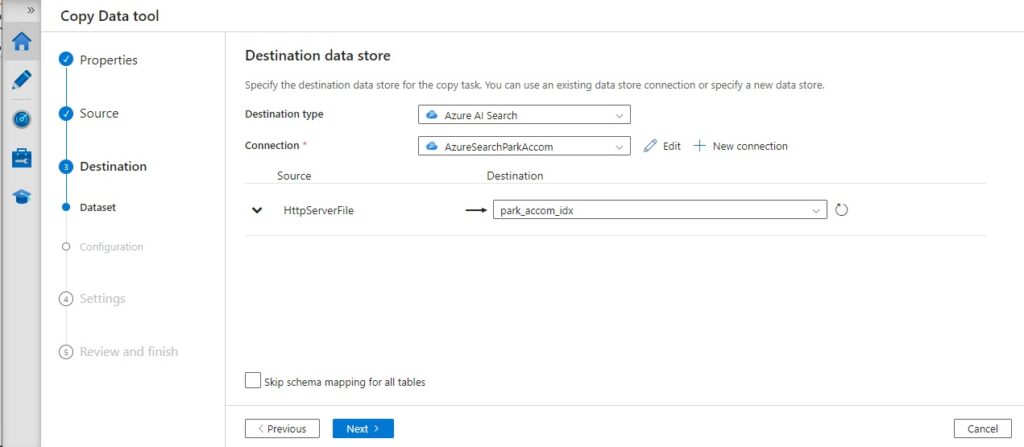
In the next section, I will show how to define the schema mapping for the data ingestion pipeline.
Defining the Schema Mapping
After defining the source and destination data, we are then required to define the schema mapping of the source and destination fields. In this case, the data fields within our JSON input file consist of the source fields, and the index field names are the destination fields.
In the schema mapping screen, you will see the mappings of the source and recommended destination field in a drop-down list.
You may see an unresolved error (in red), which means that you will have to define the correct mapping. In the case below, we can see the facilities field, which is a JSON array, cannot be directly mapped to a field without manual intervention. One alternative is to not select the field for mapping. If we decide to select the field, then we will have to nominate a field within the destination index.
Also, one limitation of the population of the destination index within the Azure AI Search index is that complex collections, such as arrays, are not currently supported.
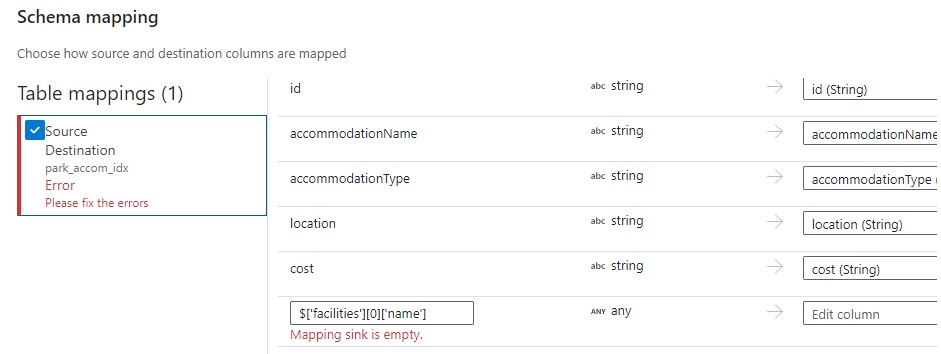
In the index I created, there are no other default fields defined for the JSON array, so I have added an additional field, allFacilities to the search index definition, then update it within the Azure Ai Search service index screen.
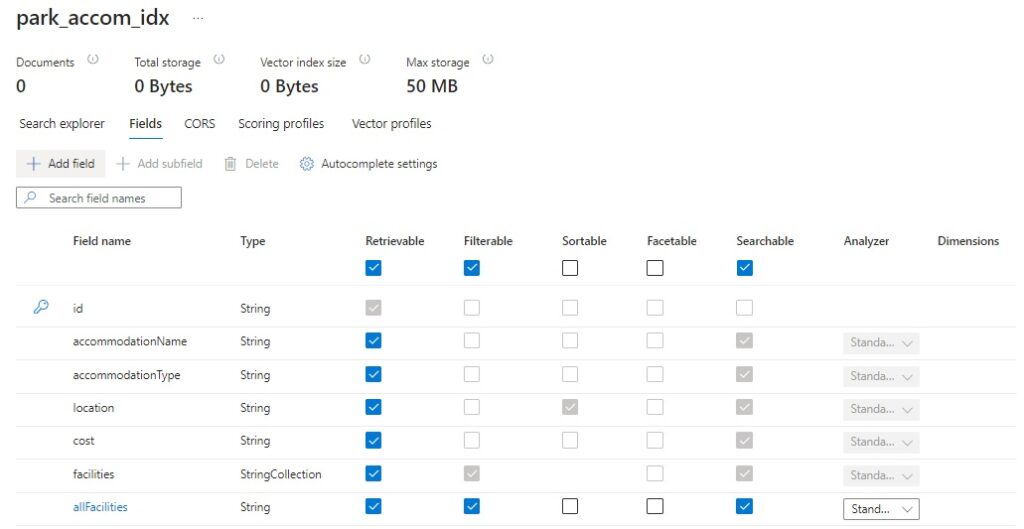
If the index definition is updated, then we will need to return to the data destination part of the ingestion pipeline wizard and re-create the connection to the index. Once that is done, the schema mapping will display the updated index with the additional field. You will then notice the error will disappear, and the facilities source field will map the first facility to the new allFacilities index field. In an improvement, you may wish to use a transform pipeline task to map the items within the array to a concatenated comma-separated string and make this searchable.
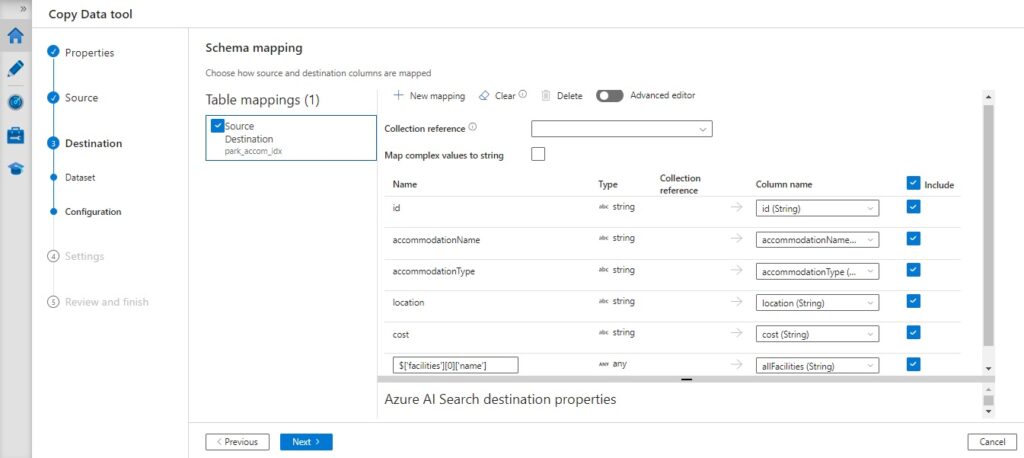
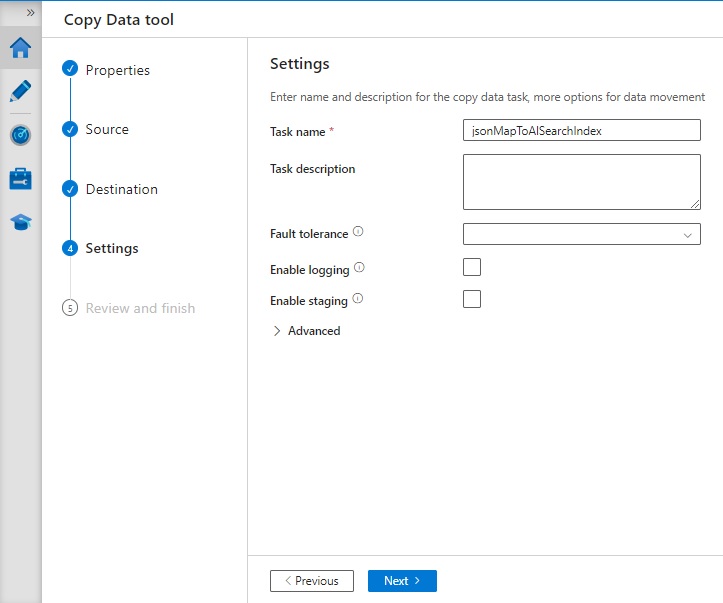
After defining and accepting the mapping, specify the task name within the settings screen. Optional logging, staging and fault-tolerance switches can also be selected.
In the next section, I will cover the deployment of the data ingestion pipeline and a sample query to return data from the populated search index.
Deployment Completion and Testing the Search
At this stage, the deployment can be completed.
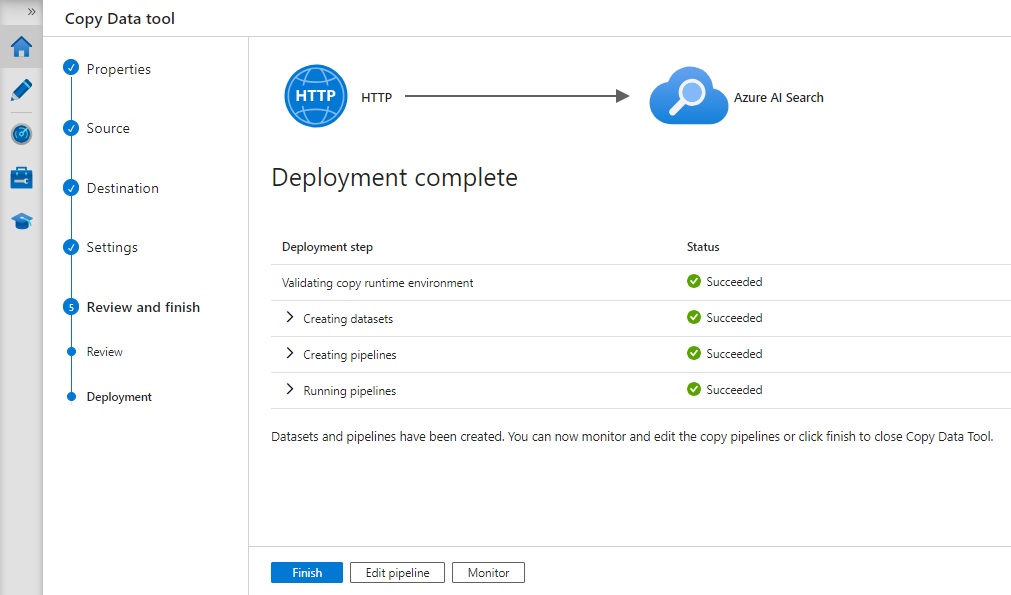
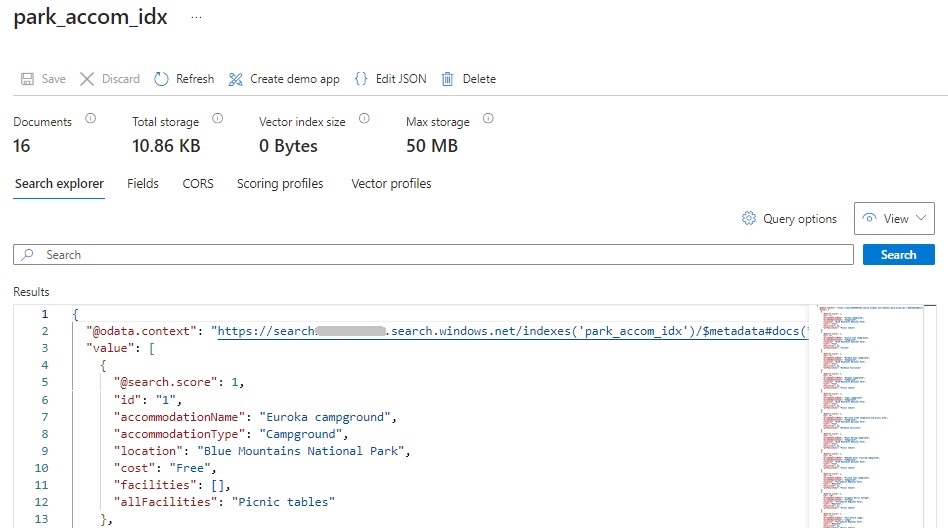
When finished, you can then return to the index within the instance of the Azure AI Search service and run sample queries.
You will notice that the index has been populated with the documents (in this case, 16) from the JSON input data file.
Running a search without any filters will display all the JSON documents from the populated index.
The above has been an overview of the external population of search indexes from an Azure AI Search service.
That is all for today’s post.
I hope that you have found this post useful and informative.

Andrew Halil is a blogger, author and software developer with expertise of many areas in the information technology industry including full-stack web and native cloud based development, test driven development and Devops.