
Welcome to today’s post.
In today’s post I will be showing you how to create an ASP.NET Core Blazor Server application with ready to use Identity UI Services.
The purpose behind adding identity UI services into an application is to allow built-in security to be self-contained into the application itself.
In a much earlier blog, I showed how to add Identity Services into an ASP.NET Core web application application. What I did in that post was to first create the application itself from the project templates. I then added the identity views and code through use of Visual Studio item templates by adding new identity forms within one of the project sub-folders. After the scaffolded forms and code were added to the project, the application was ready to be used with built-in security authentication and security management.
In another post, I showed how to generate identity applications using Entity Framework Core within an existing .NET Core application. The purpose behind this was to construct a standalone Identity Service application that could be used as a future Identity Service API.
Then in another post, I showed how to create a standalone Identity Service API application with the ASP.NET Core Identity API. The reason for that was in application architectures, where I would have to separate out the security identity services from the client application.
In this post, I am creating a .NET Core Blazor Server application with a consolidated security service.
I will start in the first section by showing you how to use the project templates to initially create an identity authentication enabled Blazor Server application.
Creating a Blazor Server Application with Identity Authentication
In this section I will show you how to use the project templates to initially create an identity authentication enabled Blazor Server application. The resulting application will contain the minimum packages, folder structure, and components to enable basic authentication.
We first start by creating a new project.
Select for the application type Blazor as shown below:
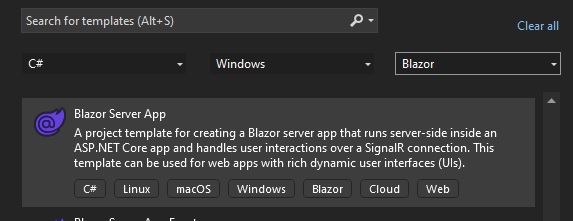
I have selected C# as the language of choice.
After the initial solution folder configuration screen, you will reach the Additional Information screen, where you will be presented with some properties:
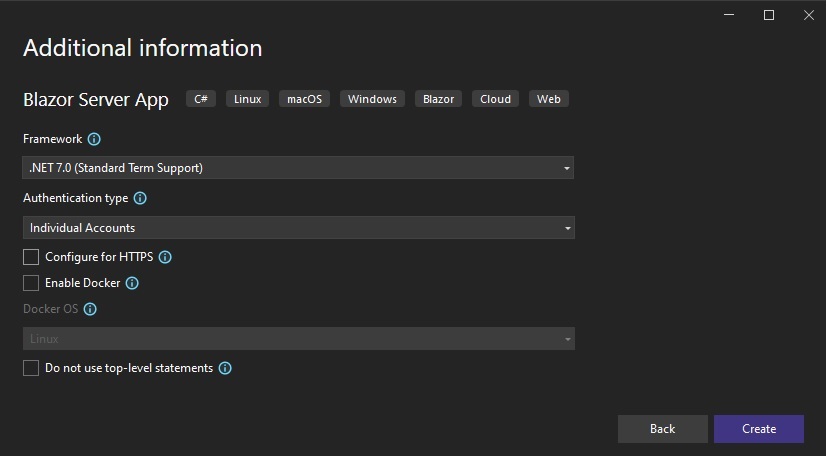
The most important application properties we will need to deal with regarding the identity configuration are:
Framework
Authentication type
Select the latest version of .NET that you are currently using. Currently it is .NET 8.0. I have chosen .NET 7.0. Next, select the drop-down list for the Authentication type property:
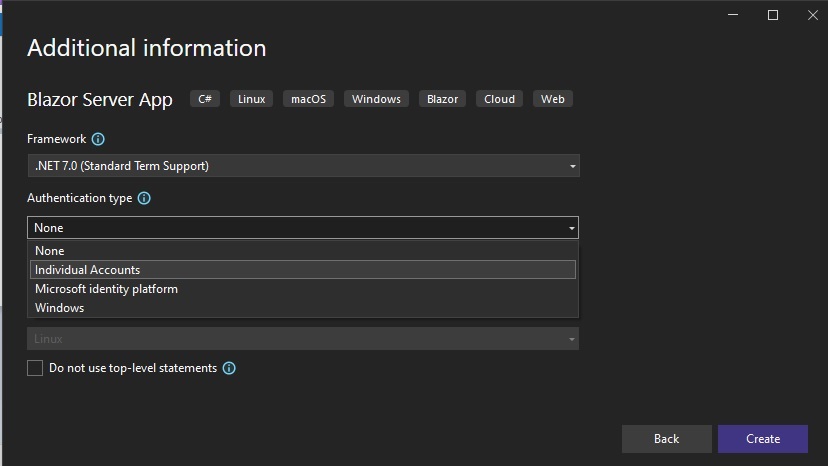
You will be presented with four choices:
None
Individual Accounts
Microsoft identity platform
Windows
The first option is for an application that has no authentication.
The option, Microsoft identity platform, is used to authenticate the credentials against Azure AD accounts. In a previous post, I showed how to authenticate an Angular client application with Azure AD accounts using Microsoft Identity platform. In a later post I can show how this is done with .NET Core Blazor applications.
The last option, Windows is used to authenticate users against Windows accounts that are part of a domain.
The option we will be selecting is Individual Accounts. What this allows us to do is to implement a set of Identity UI Services or to use an existing Identity Service API to provide authentication and security management within our application.
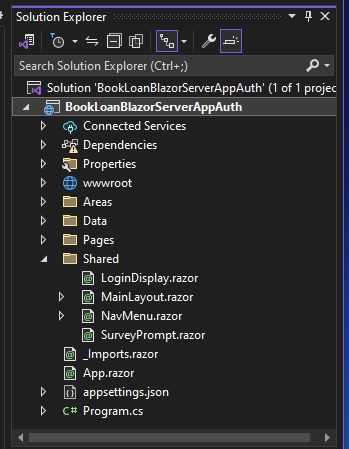
After creating the application, we will see the solution with the following folder structure generated as shown:
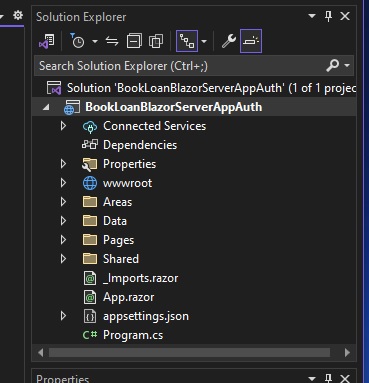
You will notice that a sub-folder, Areas is created. This is different from when we create the application without no authentication option selected. I will show what is in this folder soon.
In the Shared sub-folder, you will notice the creation of an additional Razor component, LoginDisplay.razor.
What this component does is to control the visibility of login and logout links within the landing page of the application.
When the identity authentication option is selected when creating Blazor applications, you will notice that the App.razor component that is the entry point for the application components is modified from the following original markup:
<Router AppAssembly="@typeof(App).Assembly">
    <Found Context="routeData">
        <RouteView RouteData="@routeData" DefaultLayout="@typeof(MainLayout)" />
        <FocusOnNavigate RouteData="@routeData" Selector="h1" />
    </Found>
    <NotFound>
        <PageTitle>Not found</PageTitle>
        <LayoutView Layout="@typeof(MainLayout)">
            <p role="alert">Sorry, there's nothing at this address.</p>
        </LayoutView>
    </NotFound>
</Router>
To the following amended app component that allows the application authentication context to be cascaded from the outer application component to form components:
<CascadingAuthenticationState>
    <Router AppAssembly="@typeof(App).Assembly">
        <Found Context="routeData">
            <AuthorizeRouteView RouteData="@routeData" DefaultLayout="@typeof(MainLayout)" />
            <FocusOnNavigate RouteData="@routeData" Selector="h1" />
        </Found>
        <NotFound>
            <PageTitle>Not found</PageTitle>
            <LayoutView Layout="@typeof(MainLayout)">
                <p role="alert">Sorry, there's nothing at this address.</p>
            </LayoutView>
        </NotFound>
    </Router>
</CascadingAuthenticationState>
As I mentioned earlier, the Areas sub-folder contains some additional components that will be useful in providing us with the authentication functionality for our application.
In the \Areas\Identity\Pages\Account sub-folder, an additional view, LogOut.cshtml provides us with the logout functionality from an active account.
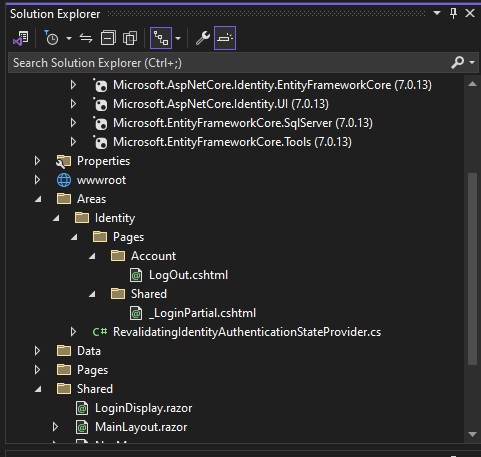
The provided view checks if the current user is signed in, and if they are signed in, they will be signed out and redirected back to the landing page.
\Areas\Identity\Pages\Account\Logout.cshtml
@page
@using Microsoft.AspNetCore.Identity
@attribute [IgnoreAntiforgeryToken]
@inject SignInManager<IdentityUser> SignInManager
@functions {
    public async Task<IActionResult> OnPost()
    {
        if (SignInManager.IsSignedIn(User))
        {
            await SignInManager.SignOutAsync();
        }

        return Redirect("~/");
    }
}
In the \Areas\Identity\Pages\Shared sub-folder, an additional view, _LoginPartial.cshtml provides users with a login functionality from the landing page.
\Areas\Identity\Pages\Shared\_LoginPartial.cshtml
@using Microsoft.AspNetCore.Identity
@inject SignInManager<IdentityUser> SignInManager
@inject UserManager<IdentityUser> UserManager
@addTagHelper *, Microsoft.AspNetCore.Mvc.TagHelpers

<ul class="navbar-nav">
@if (SignInManager.IsSignedIn(User))
{
    <li class="nav-item">
        <a  class="nav-link text-dark" asp-area="Identity" asp-page="/Account/Manage/Index" title="Manage">Hello @User.Identity?.Name!</a>
    </li>
    <li class="nav-item">
        <form class="form-inline" asp-area="Identity" asp-page="/Account/Logout" asp-route-returnUrl="/" method="post">
            <button  type="submit" class="nav-link btn btn-link text-dark">Logout</button>
        </form>
    </li>
}
else
{
    <li class="nav-item">
        <a class="nav-link text-dark" asp-area="Identity" asp-page="/Account/Register">Register</a>
    </li>
    <li class="nav-item">
        <a class="nav-link text-dark" asp-area="Identity" asp-page="/Account/Login">Login</a>
    </li>
}
</ul>
In the \Data subfolder, we have the generated data context for the identity store:
using Microsoft.AspNetCore.Identity.EntityFrameworkCore;
using Microsoft.EntityFrameworkCore;

namespace BookLoanBlazorServerAppAuth.Data
{
    public class ApplicationDbContext : IdentityDbContext
    {
        public ApplicationDbContext(DbContextOptions<ApplicationDbContext> options)
            : base(options)
        {
        }
    }
}
In the next section I will explain what packages are used to support identity services in the Blazor application.
Explaining the NuGet Packages used to Support Identity Services
Expand the packages folder. You will see the following packages, which I will explain about soon:
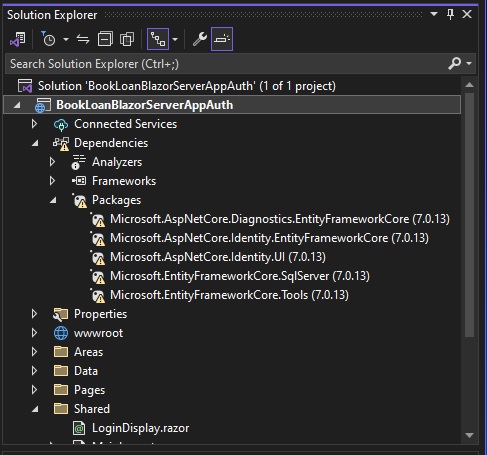
The package Microsoft.AspNetCore.Identity.EntityFrameworkCore contains the library capability to support the creation and management of identity schemas and data in a backend data store. These include user accounts and user roles.
The package Microsoft.AspNetCore.Diagnostics.EntityFrameworkCore is used to provide the diagnosis and detection of errors encountered during applications of Entity Framework Core data migrations scripts to a backend data store.
The package Microsoft.AspNetCore.Identity contains the library capability to provide identity services that include user interfaces to provide the following:
account authentication (login)
account registration
account management (password changes, password resets, 2-factor authentication)
account personal detail management (email, first name, last name)
account privacy (download personal details, account removal)
The remaining packages Microsoft.EntityFrameworkCore.SqlServer and Microsoft.EntityFrameworkCore.Tools are used to provide a SqlServer database provider for Entity Framework Core data contexts, and data migration PowerShell commands for generation of Entity Framework Core migration scripts from data context definitions, and application of the migrations to the backend database. In a previous post, I showed how to generate data migration scripts using Entity Framework Core and applying the migrations to update a backend SQL Server database.
The generated Blazor Server application is it stands supports logins to an authentication provider. If you were to build and run the application as it is, you will see the following landing page:
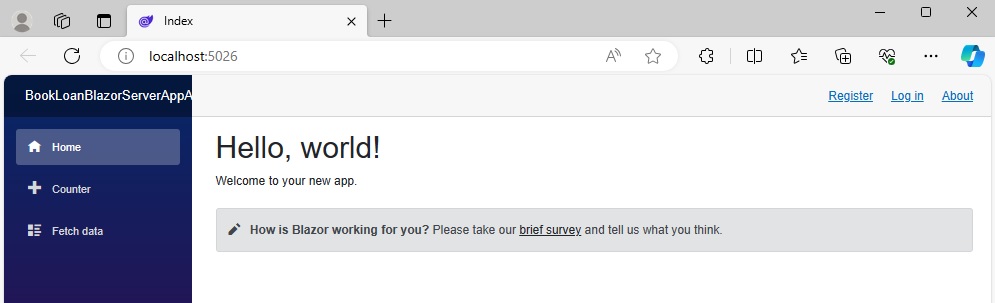
Presently, there are two hyperlinks on the landing page,
Register, with a URL:
http://localhost:5026/Identity/Account/Register
Log in, with a URL:
http://localhost:5026/Identity/Account/Login
In both cases, the links do not have existing web pages or code to provide the user login or registration. If we had selected one of the other two authentication options Microsoft identity platform or Windows in the project creation screen, then we would be able to use the associated login and registration services from those identity services instead of a custom identity store.
In the next section, I will show how to generate the scaffolding for the Identity UI part of our application.
Generating the Identity Data Storage Schema for our Application
In this section, I will show how to generate the data storage schema for the identity services.
As I mentioned, the application in its present state has unimplemented registration and login links. As we selected the Individual Accounts authentication option when creating the application, this required us to have the Identity Service UI generated. When the Identity Service UI is generated, it will generate the following registration and login endpoints:
/Identity/Account/Register
/Identity/Account/Login
for our hyperlinks in the landing page.
In addition to the components and views that have been added into the application to support connectivity to identity services, there is an additional change to the appSettings.json file that has a default connection string endpoint added to allow the identity service UI to connect to a backend data store.
{
    "ConnectionStrings": {
        "DefaultConnection": "Server=(localdb)\\mssqllocaldb;Database=aspnet-BookLoanBlazorServerAppAuth-xxxxxx;Trusted_Connection=True;MultipleActiveResultSets=true"
    },
    …
}
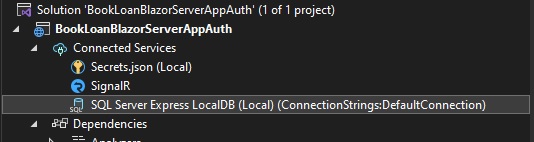
The connection string references a local SQL Express database, which is ideal for providing for data within an application being implemented within a local development environment. Below is the database connection shown under Connected Services:
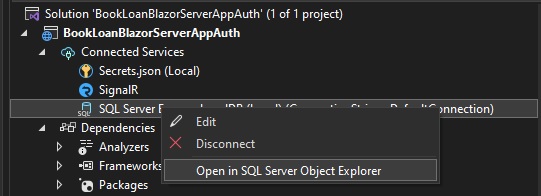
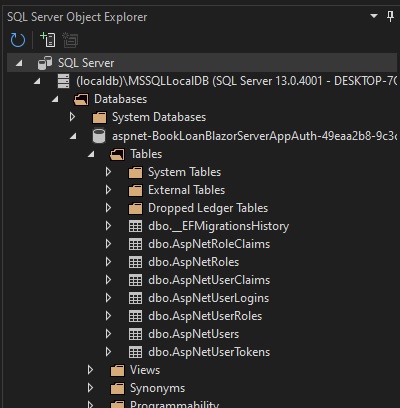
To view the database and its schema, open it in SQL Server Object Explorer:
The database for the application is shown in SQL Server Object Explorer as shown:
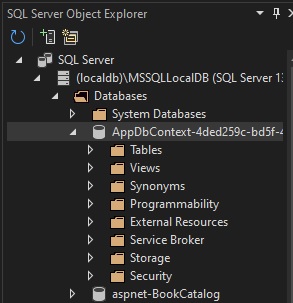
Expand the Tables schema folder. You will notice is that there are no table objects.
How do we generate the identity schema objects?
I will show how this is done.
Open the Package Manager Console:

Once opened, run the following PowerShell command:
Update-Database
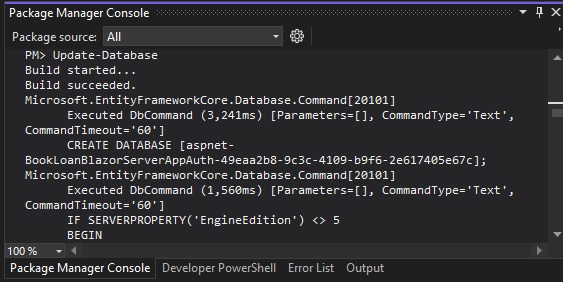
In the package manager console output, you will see the migration script applied to create a new SQL database and tables that will store our identity service data:
Refresh tables in the database in the SQL Server Object Explorer. You will notice that new tables have been generated:
In our Program.cs startup code, you will see the connection, DefaultConnection to our identity database configured as shown:
using BookLoanBlazorServerAppAuth.Areas.Identity;
using BookLoanBlazorServerAppAuth.Data;
using Microsoft.AspNetCore.Components;
using Microsoft.AspNetCore.Components.Authorization;
using Microsoft.AspNetCore.Components.Web;
using Microsoft.AspNetCore.Identity;
using Microsoft.AspNetCore.Identity.UI;
using Microsoft.EntityFrameworkCore;

var builder = WebApplication.CreateBuilder(args);

var connectionString =
builder.Configuration.GetConnectionString("DefaultConnection")
?? throw new InvalidOperationException(
"Connection string 'DefaultConnection' not found."
);

builder.Services.AddDbContext<ApplicationDbContext>(
    options => options.UseSqlServer(connectionString)
);

builder.Services.AddDatabaseDeveloperPageExceptionFilter();

builder.Services.AddDefaultIdentity<IdentityUser>(
    options => options.SignIn.RequireConfirmedAccount = true
)
.AddEntityFrameworkStores<ApplicationDbContext>();

builder.Services.AddRazorPages();
builder.Services.AddServerSideBlazor();

builder.Services.AddScoped<AuthenticationStateProvider,
RevalidatingIdentityAuthenticationStateProvider<IdentityUser>>();

var app = builder.Build();
…
app.UseAuthorization();
…
app.Run();
What you will notice is the option RequireConfirmedAccount that is added to SignIn options of the AddDefaultIdentity() middleware. What this does is to ensure that the email for a new account is confirmed before sign-in is permitted.
In the next section, I will show how to generate the scaffolding for the Identity UI part of our application.
Generating the Identity UI for our Application
In this section, I will show how to generate the scaffolding for the Identity UI.
One of the dependencies of the Identity UI is a backend database. In the previous section, we generated the database and its schema tables to provide for the identity storage.
The scaffolding will provide the implementations for the login, account registration, and other useful account management services.
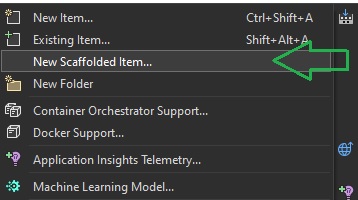
In the project context menu in the Solution Explorer, select the New Scaffolded Item… menu item as shown:
The Add New Scaffolded Item dialog shows:
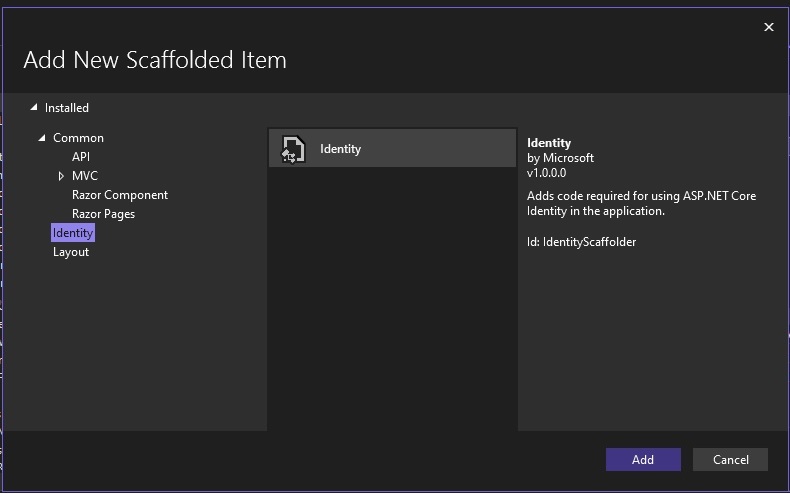
After selecting Identity and the Add action, you the list of identity UI forms will generate and will take some time.
The Add Identity dialog that shows will display all the available interface screens that are part of the Identity Services UI:
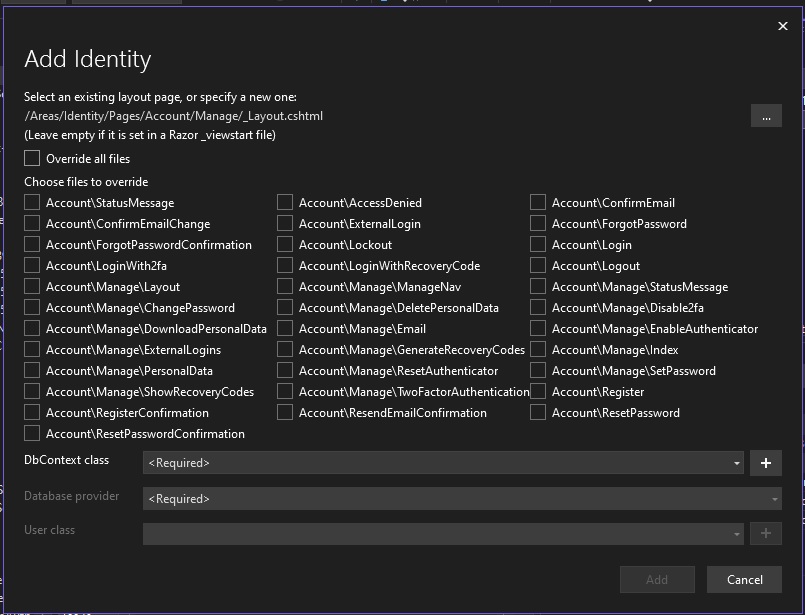
Select the DbContext (data context) class, then check all the interface forms that you wish to generate and include in the application:
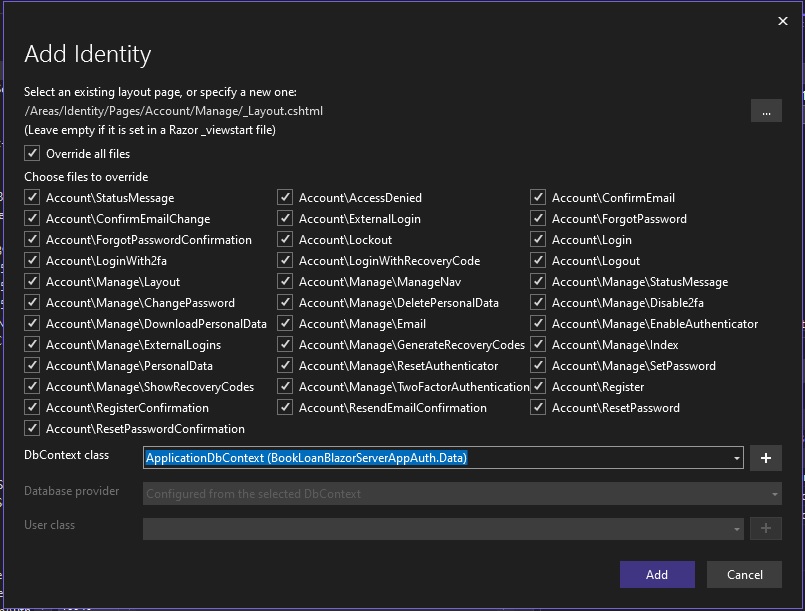
The existing application already has login and logout views, so you will need to decide whether to keep or replace the Logout.cshtml. If not sure, you can manually backup the login and logout views and accept to replace the views with the views that are part of the generated Identity UI.

Once the additions are accepted, the scaffolding will take some time to generate:
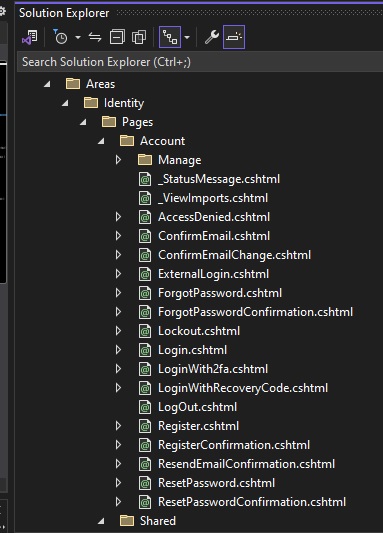
After the Identity UI management views are generated, you will see them in the solution explorer under the \Account\Manage sub-folder:
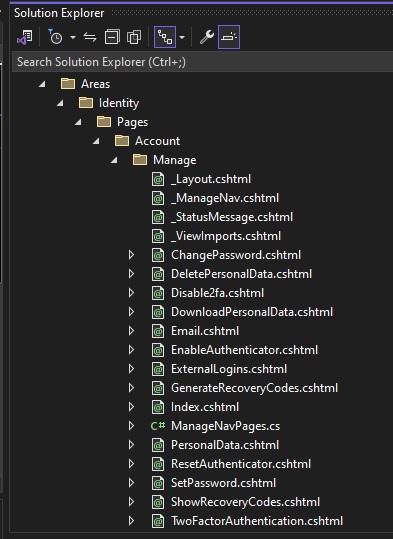
The non-management Identity UI views are also generated, you will see them in the solution explorer under the Account sub-folder.
Our application now that has a fully functional suite of identity user interfaces. After building the application and running it, the links within the landing page will serve their purpose and allow us to register accounts and login with those accounts.

The next step will be to register some accounts and login to our application. I will go through these steps in a future post where I will also show how to apply authorization to enable or disable visibility of sections of our application to the end user.
That is all for today’s post.
I hope that you have found this post useful and informative.
Andrew Halil is a blogger, author and software developer with expertise of many areas in the information technology industry including full-stack web and native cloud based development, test driven development and Devops.

