Welcome to today’s post.
In today’s post I will show how to add Azure AD single sign-on authentication to an ASP.NET Core web application.
In previous posts, I showed how to use ASP.NET Core Identity to provide user authentication through an identity store. I also showed how to implement the data store for identity applications using Entity Framework Core. I then showed how to implement a separate identity service Web API with ASP.NET Core.
In all the previous posts that I used ASP.NET Core Identity, the data store for the identity service that includes user accounts, roles, user roles, role claims, and user role claims are all stored in an on-premises data store such as SQL Server.
In this post, I will be showing how to implement the login (sign-in) and logout (sign-out) process from user security accounts that are stored within Azure Active Directory (Azure AD). More recently, Microsoft has rebranded Azure AD as Entra ID. In this post, I will still be referring to Azure AD.
Explaining the Azure AD Tenant
For users to be able to sign-in to the web application through Azure AD, they will need to have accounts within an Azure Tenant.
A Tenant is a representation of an Azure Organisation. Within the Tenant, there are users, groups, permissions, and applications that are published within Azure AD.
For details on how to create a separate Tenant within an existing Azure subscription or organization, refer to my previous post. If you are part of an existing organization, you will already have an existing Tenant. With an existing Azure subscription, if you have logged into Azure with a personal Microsoft account, then it makes sense to create a separate Tenant instance outside of the default directory.
Once you have the Tenant, you can register your application and have it authenticated with Microsoft Identity as the security provider. In a previous post, I showed how create an app registration within Azure for an Angular single page app. I will be doing likewise for an ASP.NET Core web application in this post.
In addition, the Tenant has an additional security feature which provides multi-factor authentication for users and enables MFA tokens to be generated and used to authenticate accounts through SSO (single sign-in) through the web application within the browser.
The architectural diagram summarizes this quite well:
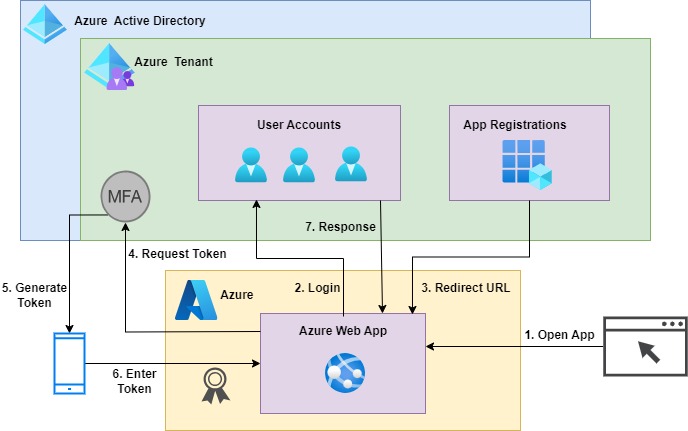
To test the SSO feature in a development environment, we do not need to host the web application in an Azure App Service. The registration of the application in the Azure tenant will initially redirect the sign-in flow to the localhost HTTP service on your machine under a port. When you are ready to test the SSO to a production like scenario, you can then change the sign-in redirection to the URI of the Azure hosted web application.
In the first section, I will show how to create an ASP.NET Core application scaffolded with built-in connectivity to Azure AD and single sign-on capability.
Creation of an ASP.NET Core Application with Microsoft Identity Framework
The application architecture I will use for the demonstration is to use an ASP.NET Core web application with MVC controllers. The reason for this is so that I don’t have to implement any additional integration outside of the controllers, which have built-in access to the user context within the HttpRequest object. The example will be a minimal as possible to demonstrate the technical aspects of the integration and configuration.
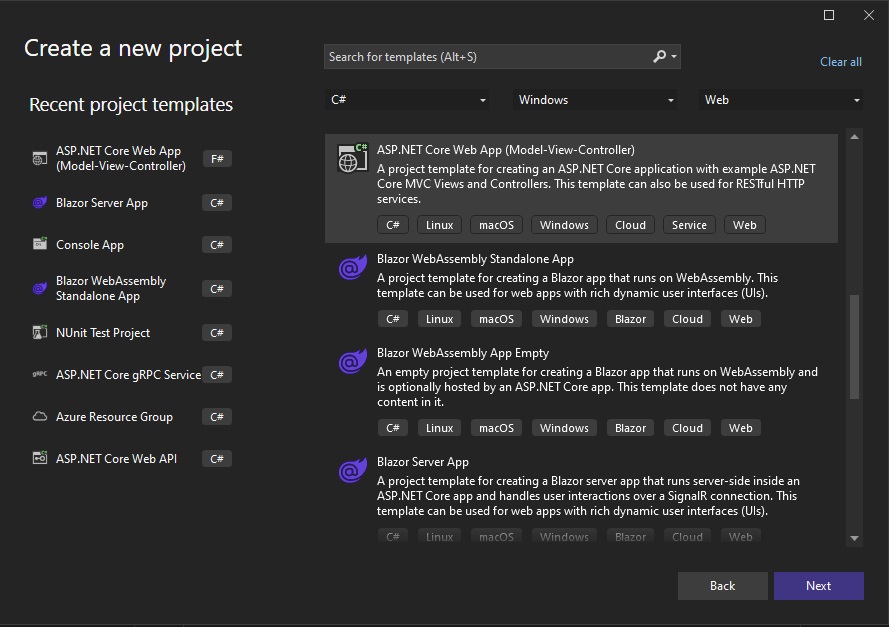
The first step we take to create our application I to select the ASP.NET Core project template in Visual Studio 2022 as shown:
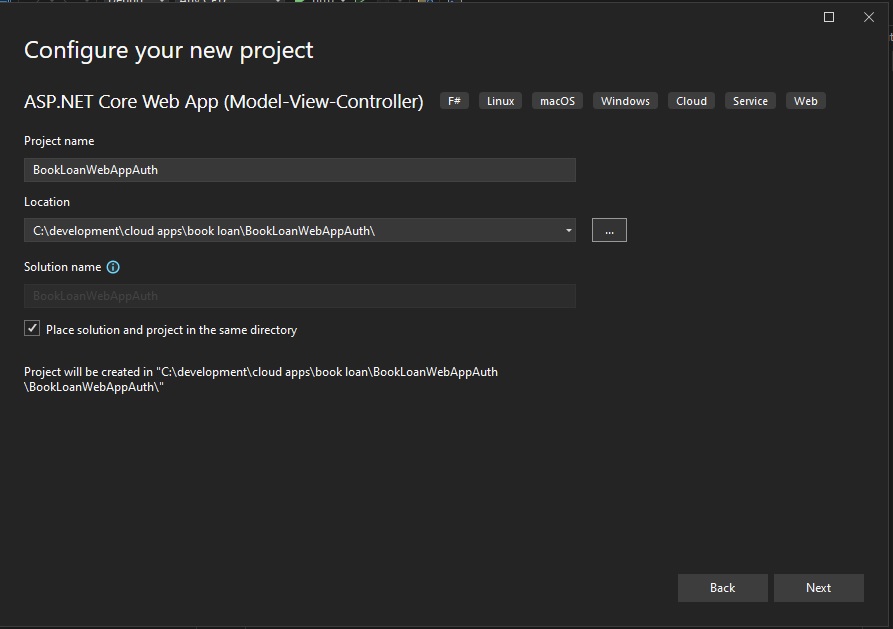
In the next screen, select a project name and folder:
In the next screen, select the HTTPS configuration and the version of the .NET (Core) framework you want to use for the application. My suggestion is to use .NET 8.0 (as of the time of writing) as shown:
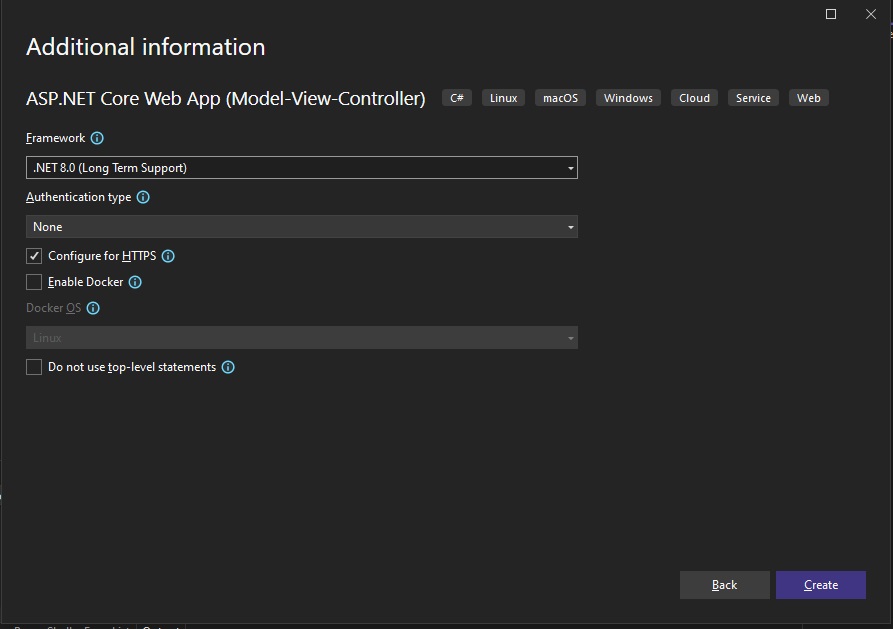
In the next screen, select the Authentication Type option. This includes:
None
Individual Accounts
Microsoft identity platform
Windows From the choices, we select Microsoft identity platform. Recall that the option Individual Accounts is for identity providers that are built with the ASP.NET Core Identity library, that stores individual user accounts. Refer to one of the links I mentioned earlier for more details on custom identity providers. The option Windows is of course used for Windows authentication, which checks the user that is signed into the same workstation machine as the browser is a member of the domain of the workstation.
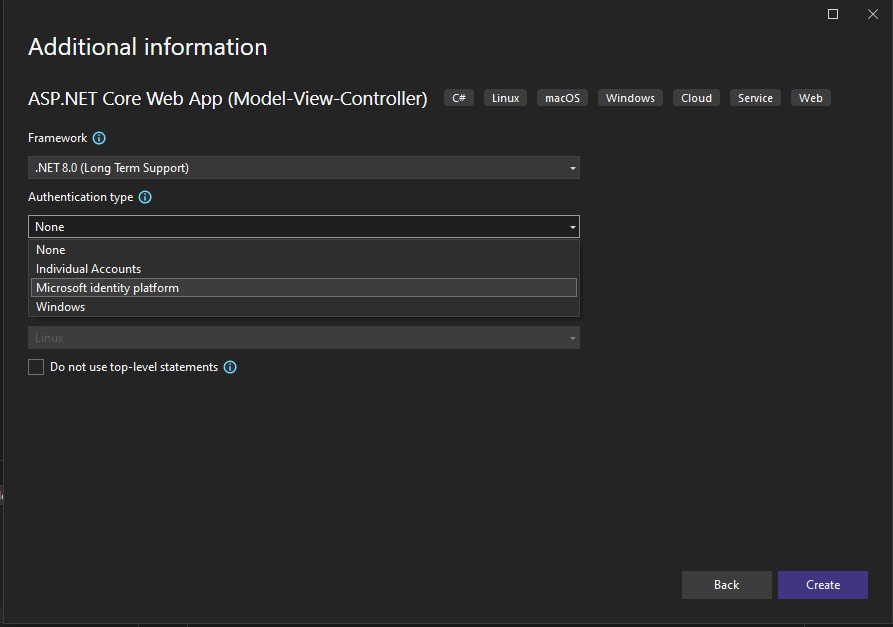
The inclusion of Microsoft Identity Platform based authentication provider has been available since version 16.9 of Visual Studio (Visual Studio 2019). .NET 5.0.
If interested, in a previous post, I showed how to register Angular SPA applications for Microsoft Identity Platform.
The Microsoft Identity Platform allows you to implement applications that allow you to sign-in to the Azure AD and Azure B2C security domains. Once you have selected the required options, hit the Create button to generate the project:
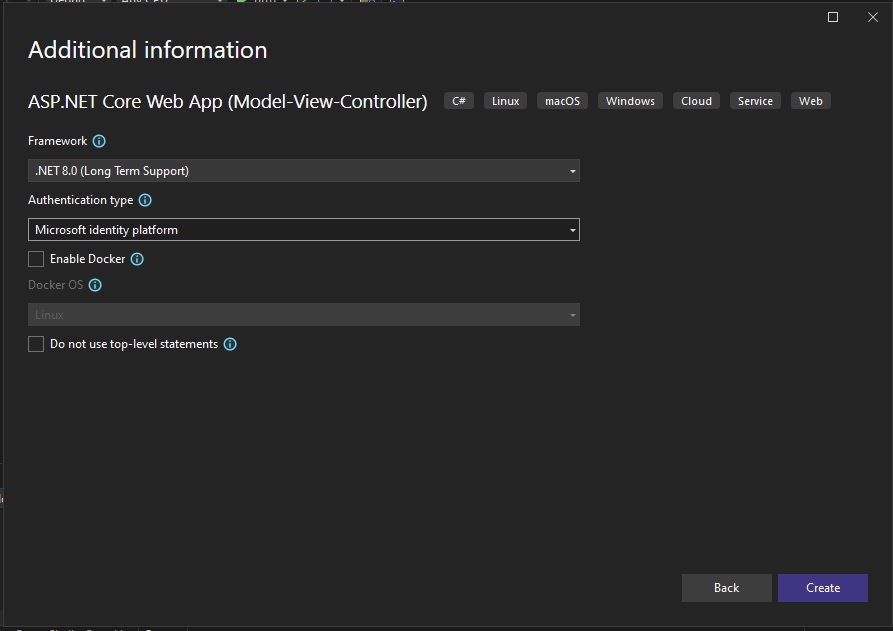
Before the project starts scaffolding the solution, you will get another screen that there is a required component:
dotnet msidentity tool

Select Next.
You will then see another screen trying to authenticate you into Azure:
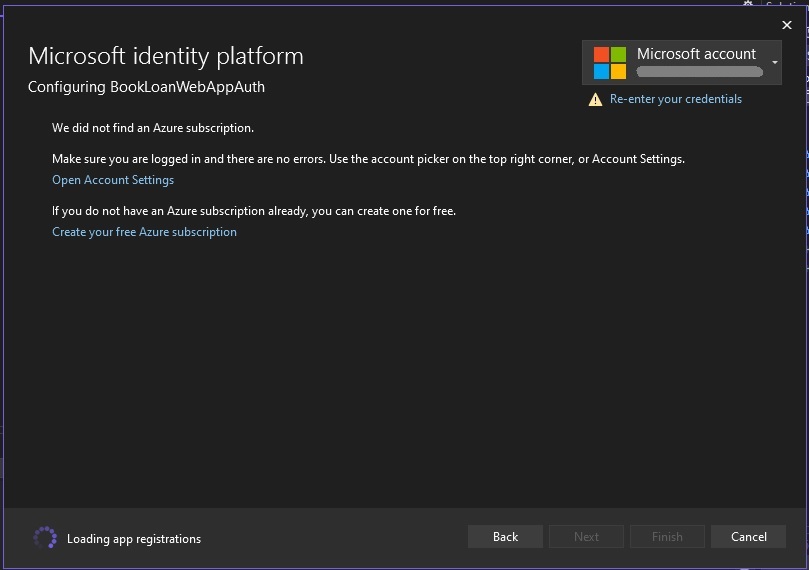
Once authenticated into Azure AD, you will see the Tenants drop down list populated with the tenants that are part of your subscription:
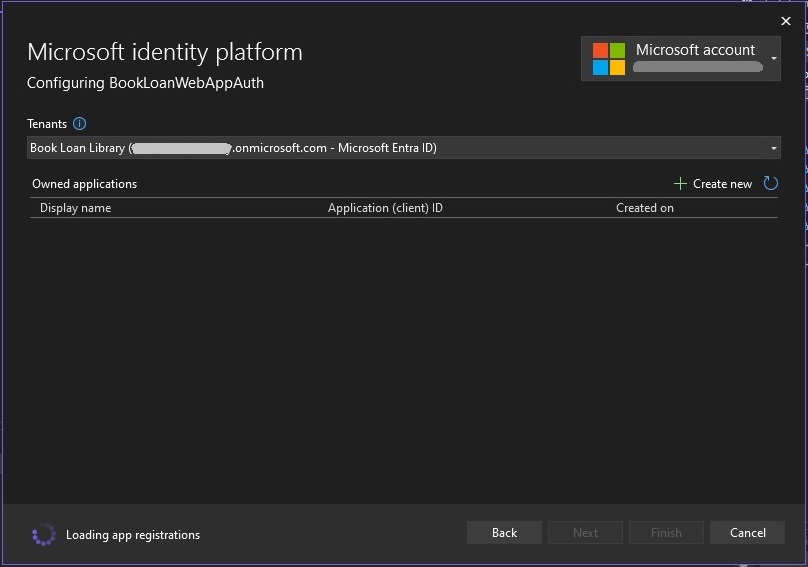
When a Tenant is selected, you will see the application registrations under the Owned applications section:
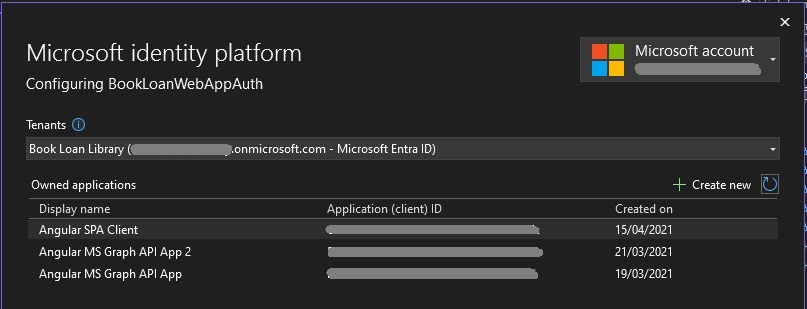
To create an application registration, select the Create new option, The following screen will open:

Click on the Register option. You will then see the new application in the list of owned applications:
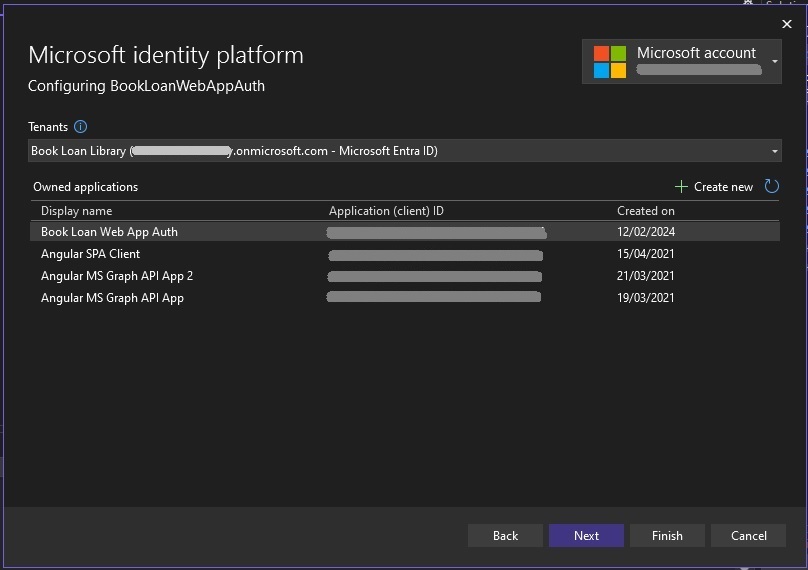
Each application that s registered in the Tenancy has a unique application client ID that can be used as part of the SSO configuration in the web application.
The next screen will show some additional settings that can be used in the web application:

The options:
Add Microsoft Graph permissions
and
Add permission to another API
are additional optional security configurations that allow you to either create an application that connects to and uses MS Graph API to query Azure resources.
In other previous posts, I showed how to add MS Graph permissions for an Angular SPA application to access my profile details. I also showed how to use MS Graph in a .NET Core Web API application to access MS Outlook Calendars and MS Outlook Calendar events. In a future post, I may show how to access MS Graph API using an ASP.NET Core web application.
For the second option, adding permissions to another API involves passing tokens from your ASP.NET Core web application to another protected web API.
You can then select the Finish option to proceed to the next page. On the summary of changes confirm that you want the code changes MS identity platform to be applied for code, configuration, NuGet packages and app registration. Then select the Finish option to complete.

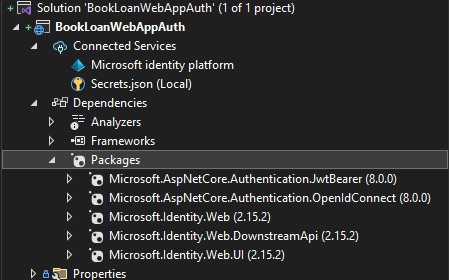
Once done, you should see the identity platform and secrets services are connected:

In the Solution explorer you will see that the NuGet packages installed are as shown:
Expanding the Views\Shared subfolder, you will see an extra page added for _LoginPartial.cshtml:

The Program.cs startup code will show the additional code added to setup the identity providers:
using Microsoft.AspNetCore.Authentication;
using Microsoft.AspNetCore.Authentication.OpenIdConnect;
using Microsoft.AspNetCore.Authorization;
using Microsoft.AspNetCore.Mvc.Authorization;
using Microsoft.Identity.Web;
using Microsoft.Identity.Web.UI;

var builder = WebApplication.CreateBuilder(args);

// Add services to the container.
builder.Services.AddAuthentication(OpenIdConnectDefaults.AuthenticationScheme)
    .AddMicrosoftIdentityWebApp(builder.Configuration.GetSection("AzureAd"));

builder.Services.AddControllersWithViews(options =>
{
    var policy = new AuthorizationPolicyBuilder()
        .RequireAuthenticatedUser()
        .Build();
    options.Filters.Add(new AuthorizeFilter(policy));
});
builder.Services.AddRazorPages()
    .AddMicrosoftIdentityUI();

var app = builder.Build();

// Configure the HTTP request pipeline.
if (!app.Environment.IsDevelopment())
{
    app.UseExceptionHandler("/Home/Error");
    // The default HSTS value is 30 days. You may want to change this for production scenarios, see https://aka.ms/aspnetcore-hsts.
    app.UseHsts();
}

app.UseHttpsRedirection();
app.UseStaticFiles();

app.UseRouting();

app.UseAuthorization();

app.MapControllerRoute(
    name: "default",
    pattern: "{controller=Home}/{action=Index}/{id?}");
app.MapRazorPages();

app.Run();
The interesting part of the startup is the configuration for the Azure AD endpoints which is in this line of code:
builder.Services.AddAuthentication(OpenIdConnectDefaults.AuthenticationScheme)
    .AddMicrosoftIdentityWebApp(builder.Configuration.GetSection("AzureAd"));
In the appsettings.json file, the Azure AD settings consist of the following keys and values:
{
  "AzureAd": {
    "Instance": "https://login.microsoftonline.com/",
    "Domain": "[your Azure AD Tenant name].onmicrosoft.com",
    "TenantId": "[your Azure AD Tenant ID] ",
    "ClientId": "[Your App Registration Client ID]",
    "CallbackPath": "/signin-oidc"
  },
  "Logging": {
    "LogLevel": {
      "Default": "Information",
      "Microsoft.AspNetCore": "Warning"
    }
  },
  "AllowedHosts": "*"
}
The login screen markup that has been added is shown below:
_LoginPartial.csthml:
@using System.Security.Principal

<ul class="navbar-nav">
@if (User.Identity?.IsAuthenticated == true)
{
    <span class="navbar-text text-dark">Hello @User.Identity?.Name!</span>
    <li class="nav-item">
        <a class="nav-link text-dark" asp-area="MicrosoftIdentity" asp-controller="Account" asp-action="SignOut">Sign out</a>
    </li>
}
else
{
    <li class="nav-item">
        <a class="nav-link text-dark" asp-area="MicrosoftIdentity" asp-controller="Account" asp-action="SignIn">Sign in</a>
    </li>
}
</ul>
The user principal object is User.Identity, with the IsAuthenticated property testing if the user is authenticated, and the Name property is the login name of the user.
Testing the Azure AD SSO in the ASP.NET Core Web Application
After all of that, you can then build and run the application.
When the application is running, you will be shown a credentials dialog from Microsoft requesting permissions. If you see the account as unverified, it means that under the app registration, there have been no previous logins to the application, so it will require the account to be verified before sign-in completes.

Check the option, Consent on behalf of your organisation, then click the Accept option.
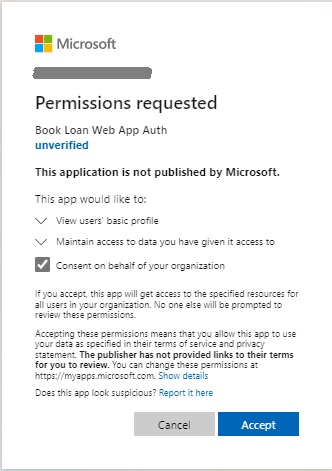
Once that is done, you will see that you are successfully signed into the web application using SSO for Azure AD and see your account name to the right of the screen near the Sign out link:

You can then test the sign out link. Click on the Sign out link. Then select the user account from the Pick an account dialog.

You will then be signed out.

In the next section, I will show how the Multi-Factor Authentication (MFA) service works within Azure AD and the SSO within the registered web application.
How the MFA service works with the Azure AD SSO
Recall that when we have users in our Azure Tenant, each user is setup with a username that is in the UPN format:
[user name]@[tenant name].onmicrosoft.com
All users that are setup under the tenancy and any users that are authorized administrators from the parent organisation will appear in the Users blade under the Tenant.

When you sign-in to Azure AD, the challenge dialog that shows in the browser displays the username in the UPN format:
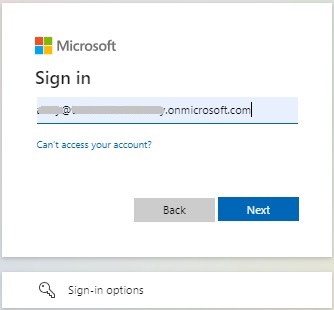
Click the Next action.
The next screen will display the Action Required dialog.
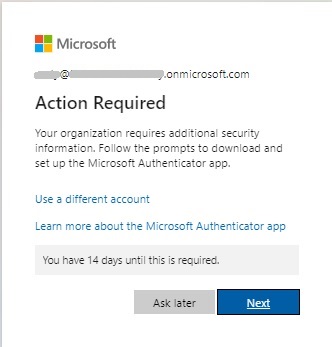
What this means is that the account you used to sign in has either never signed into any applications registered within the Azure Tenant or is a completely new account that have never signed into Azure at all. To verify the account, you will be asked to setup multi-factor authentication.
Click the Next action.
The next screen will suggest using Microsoft Authenticator.
Microsoft Authenticator is an application that is installed on your mobile device, which generates numeric tokens. These tokens are generated every 30 seconds. When you attempt to use a token after a new token has been generated in the 30 second window, the login attempt you make with the older token will be invalid.

At this point, if you do not have Microsoft Authenticator on your device, then you can install it. Then click the Next action.
You will then be prompted to setup the account in your Microsoft Authenticator app on your device.
Click the Next action.
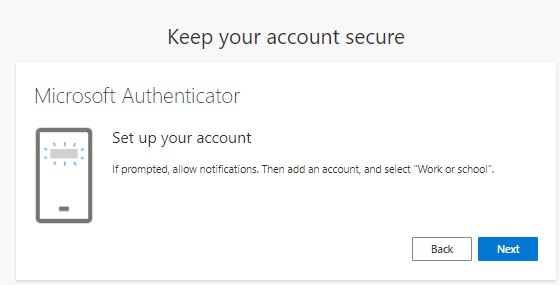
Follow the steps below until Microsoft Authenticator Scan QR code screen is reached:
Open Microsoft Authenticator.
Click +
Select work or school account option.
In Add work or school account popup, select Scan a QR code. Click the Next action in the browser. You will see the screen below with a generated QR Code (obfuscated):
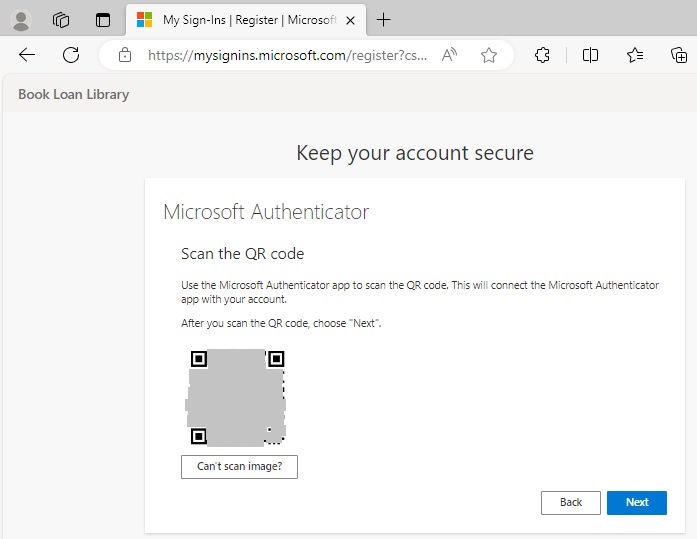
Scan the QR code from the browser using your device authenticator app.
You will be shown a given a code and a URL in the authenticator app.
In the Microsoft Authenticator app, press the Finish action.
If you have mis-scanned the QR code, then go back in the browser to the “Microsoft Authenticator – Set up your account” screen and click Next to show a regenerated QR code.
After the QR code is scanned, you will see a new authentication token created for the account you have used to sign in with.
In the browser Microsoft Authenticator credentials screen, click next. Once that is done, you should get the following Success message:
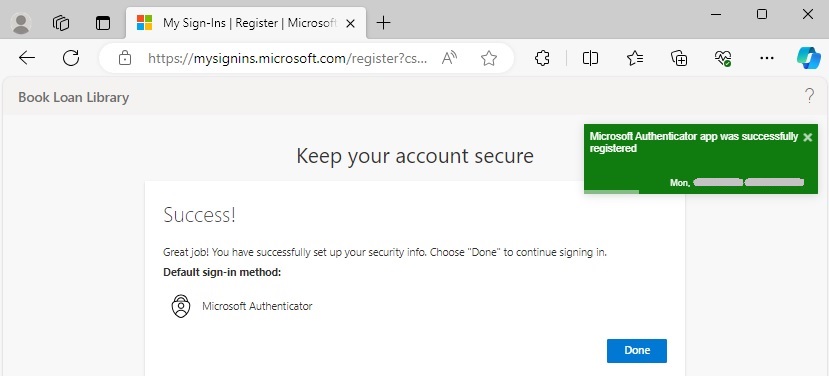
Also, the account you have setup will appear in your authenticator app.
For each user you have setup in Azure AD, you can create one user in the Authenticator app. It is possible to setup multiple user accounts to run in one device, which is useful if you are testing MFA and security in an environment, then switch between them during testing and development.
In future posts I will show how to setup groups for Azure AD users, then I will show how to use authorization techniques within an ASP.NET Core web application to control access to areas of the application and determine user role memberships.
That is all for today’s post.
I hope that you have found this post useful and informative.
Andrew Halil is a blogger, author and software developer with expertise of many areas in the information technology industry including full-stack web and native cloud based development, test driven development and Devops.


